Exercise - Analyze the limitations of a polling-based web app
Before you begin, make sure you have the following software installed on your machine:
- Node.js
- Visual Studio Code
- Azure Functions Core Tools (min. version 2.6.666)
- Azure Functions extension for Visual Studio Code
- Azure Storage extension for Visual Studio Code
Download sample app code
Run the following command in Azure Cloud Shell from the portal to clone the app from GitHub.
git clone https://github.com/MicrosoftDocs/mslearn-advocates.azure-functions-and-signalr.git serverless-demoImportant
Do not run
npm installuntil you have completed the steps that update the local.settings.json. A post-install script is included to set up your database and add some data to the database.Run the following command to go to the new folder into which you cloned the repo:
cd serverless-demoThe beginning state of the app is located in the start folder. Make sure you are in that folder for the rest of this module. Run the following command to open the start folder in Visual Studio Code:
code startFor your reference, the finished solution is available in the folder called end.
Create a Storage account
Azure Functions requires a storage account, and you need it when you deploy the web app to the cloud later in the module.
Run the following command in Cloud Shell to define a name for your Azure Storage account.
export STORAGE_ACCOUNT_NAME=mslsigrstorage$(openssl rand -hex 5)
echo "Storage Account Name: $STORAGE_ACCOUNT_NAME"
Keep note of this account name for the remainder of the module.
Run the following
az storage account createcommand to create a storage account for your function and static website.az storage account create \ --name $STORAGE_ACCOUNT_NAME \ --resource-group <rgn>[sandbox resource group name]</rgn> \ --kind StorageV2 \ --sku Standard_LRSIt can take a few minutes to create a storage account. Wait for this step to finish before proceeding.
Create an Azure Cosmos DB account
You store stock prices in an Azure Cosmos DB database. So, set that up in the sandbox account.
Run the following
az cosmosdb createcommand in Cloud Shell to create a new Azure Cosmos DB account in your sandbox resource group.az cosmosdb create \ --name msl-sigr-cosmos-$(openssl rand -hex 5) \ --resource-group <rgn>[sandbox resource group name]</rgn>It can take a few minutes to create an Azure Cosmos DB account. Wait for this step to finish before proceeding.
Update local settings
For the app to run, you need to add the connection settings for your cloud services to the local settings file.
Run the following commands in Cloud Shell to get the connection strings for the resources we created in this exercise.
STORAGE_CONNECTION_STRING=$(az storage account show-connection-string \
--name $(az storage account list \
  --resource-group <rgn>[sandbox resource group name]</rgn> \
  --query [0].name -o tsv) \
--resource-group <rgn>[sandbox resource group name]</rgn> \
--query "connectionString" -o tsv)

COSMOSDB_ACCOUNT_NAME=$(az cosmosdb list \
    --resource-group <rgn>[sandbox resource group name]</rgn> \
    --query [0].name -o tsv)

COSMOSDB_CONNECTION_STRING=$(az cosmosdb list-connection-strings  \
  --name $COSMOSDB_ACCOUNT_NAME \
  --resource-group <rgn>[sandbox resource group name]</rgn> \
  --query "connectionStrings[?description=='Primary SQL Connection String'].connectionString" -o tsv)

COSMOSDB_MASTER_KEY=$(az cosmosdb list-keys \
--name $COSMOSDB_ACCOUNT_NAME \
--resource-group <rgn>[sandbox resource group name]</rgn> \
--query primaryMasterKey -o tsv)

printf "\n\nReplace <STORAGE_CONNECTION_STRING> with:\n$STORAGE_CONNECTION_STRING\n\nReplace <COSMOSDB_CONNECTION_STRING> with:\n$COSMOSDB_CONNECTION_STRING\n\nReplace <COSMOSDB_MASTER_KEY> with:\n$COSMOSDB_MASTER_KEY\n\n"
Go to where you cloned the application, and open the start folder in Visual Studio Code. Open local.settings.json in the editor so you can update the file.
In local.settings.json, update the variables
AzureWebJobsStorage,AzureCosmosDBConnectionString, andAzureCosmosDBMasterKeywith the values listed in the Cloud Shell and save the file. The local.settings.json file should only exist on your local computer.
Run the application
In the Visual Studio Code terminal window, run the following command to install dependencies and set up the database:
npm installNote
If a problem arises during the install process and the database is not correctly setup, you can run
npm run setupto manually seed the database.Press F5 to start debugging the function app. The function app startup is shown in a terminal window.
To run the web application on your machine, open a second integrated terminal instance and run the following command to start the web app.
npm startThe script automatically opens the browser and goes to http://localhost:8080. If the browser fails to open automatically, you can go to http://localhost:8080 manually.
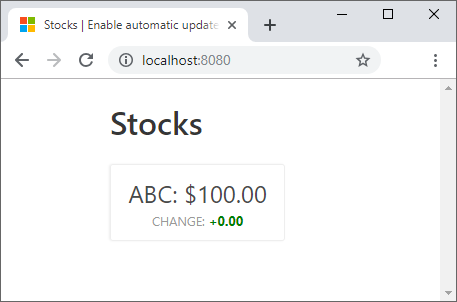
Return to Visual Studio Code, open a third terminal instance, and enter the following command to update the stock prices. Immediately return to the browser and observe that the values for stock ABC change within a few seconds.
npm run update-data
When you're done, stop the running processes.
To stop the web server, select the kill process (trash can icon) on the terminal window that is running the web server.
To stop the functions app, select Stop or press Shift+F5.