Exercise - Create a Windows virtual machine
Your company processes video content on Windows VMs. A new city has contracted with your company to process their traffic cameras, but it's a model with which you haven't worked before. You need to create a new Windows VM and install some proprietary codecs in order to process and analyze the new video content.
Create a new Windows virtual machine
You can create Windows VMs with the Azure portal, Azure CLI, or Azure PowerShell. The best approach is to use the portal, because the Create a virtual machine wizard collects all the required information and provides hints and validation messages throughout the process.
Sign in to the Azure portal using the same account you used to activate the sandbox.
On the Azure portal, under Azure services, select Create a resource. The Create a resource pane appears.
In Search services and marketplace search box, search for Windows Server and press Enter. Select Windows Server by Microsoft. The Windows Server pane appears.
There are several Windows Server options to choose from to create your VM. In the Plan dropdown list, scroll down, and select [smalldisk] Windows Server 2019 Datacenter.
Select Create. The Create a virtual machine pane appears.
Configure the VM settings
Azure presents a wizard as a series of tabs to walk you through all the configuration details for creating the VM. The first tab is Basics. You can select Next or Previous to move from one tab to another, or you can select any tab in the horizontal menu to move to a customizable configuration section.
Configure basic VM settings
Note
As you add or change settings in the wizard, Azure validates each value and places a green check mark next to a validated field, or red error indicator below the field. You can hover over an error indicator to get more information about a validation issue.
Note
It's a best practice to use a standard naming convention for resource names so you can easily identify their purpose. Windows VM names are a bit limited; they must be between 1 and 15 characters, cannot contain non-ASCII or special characters, and must be unique in the current resource group.
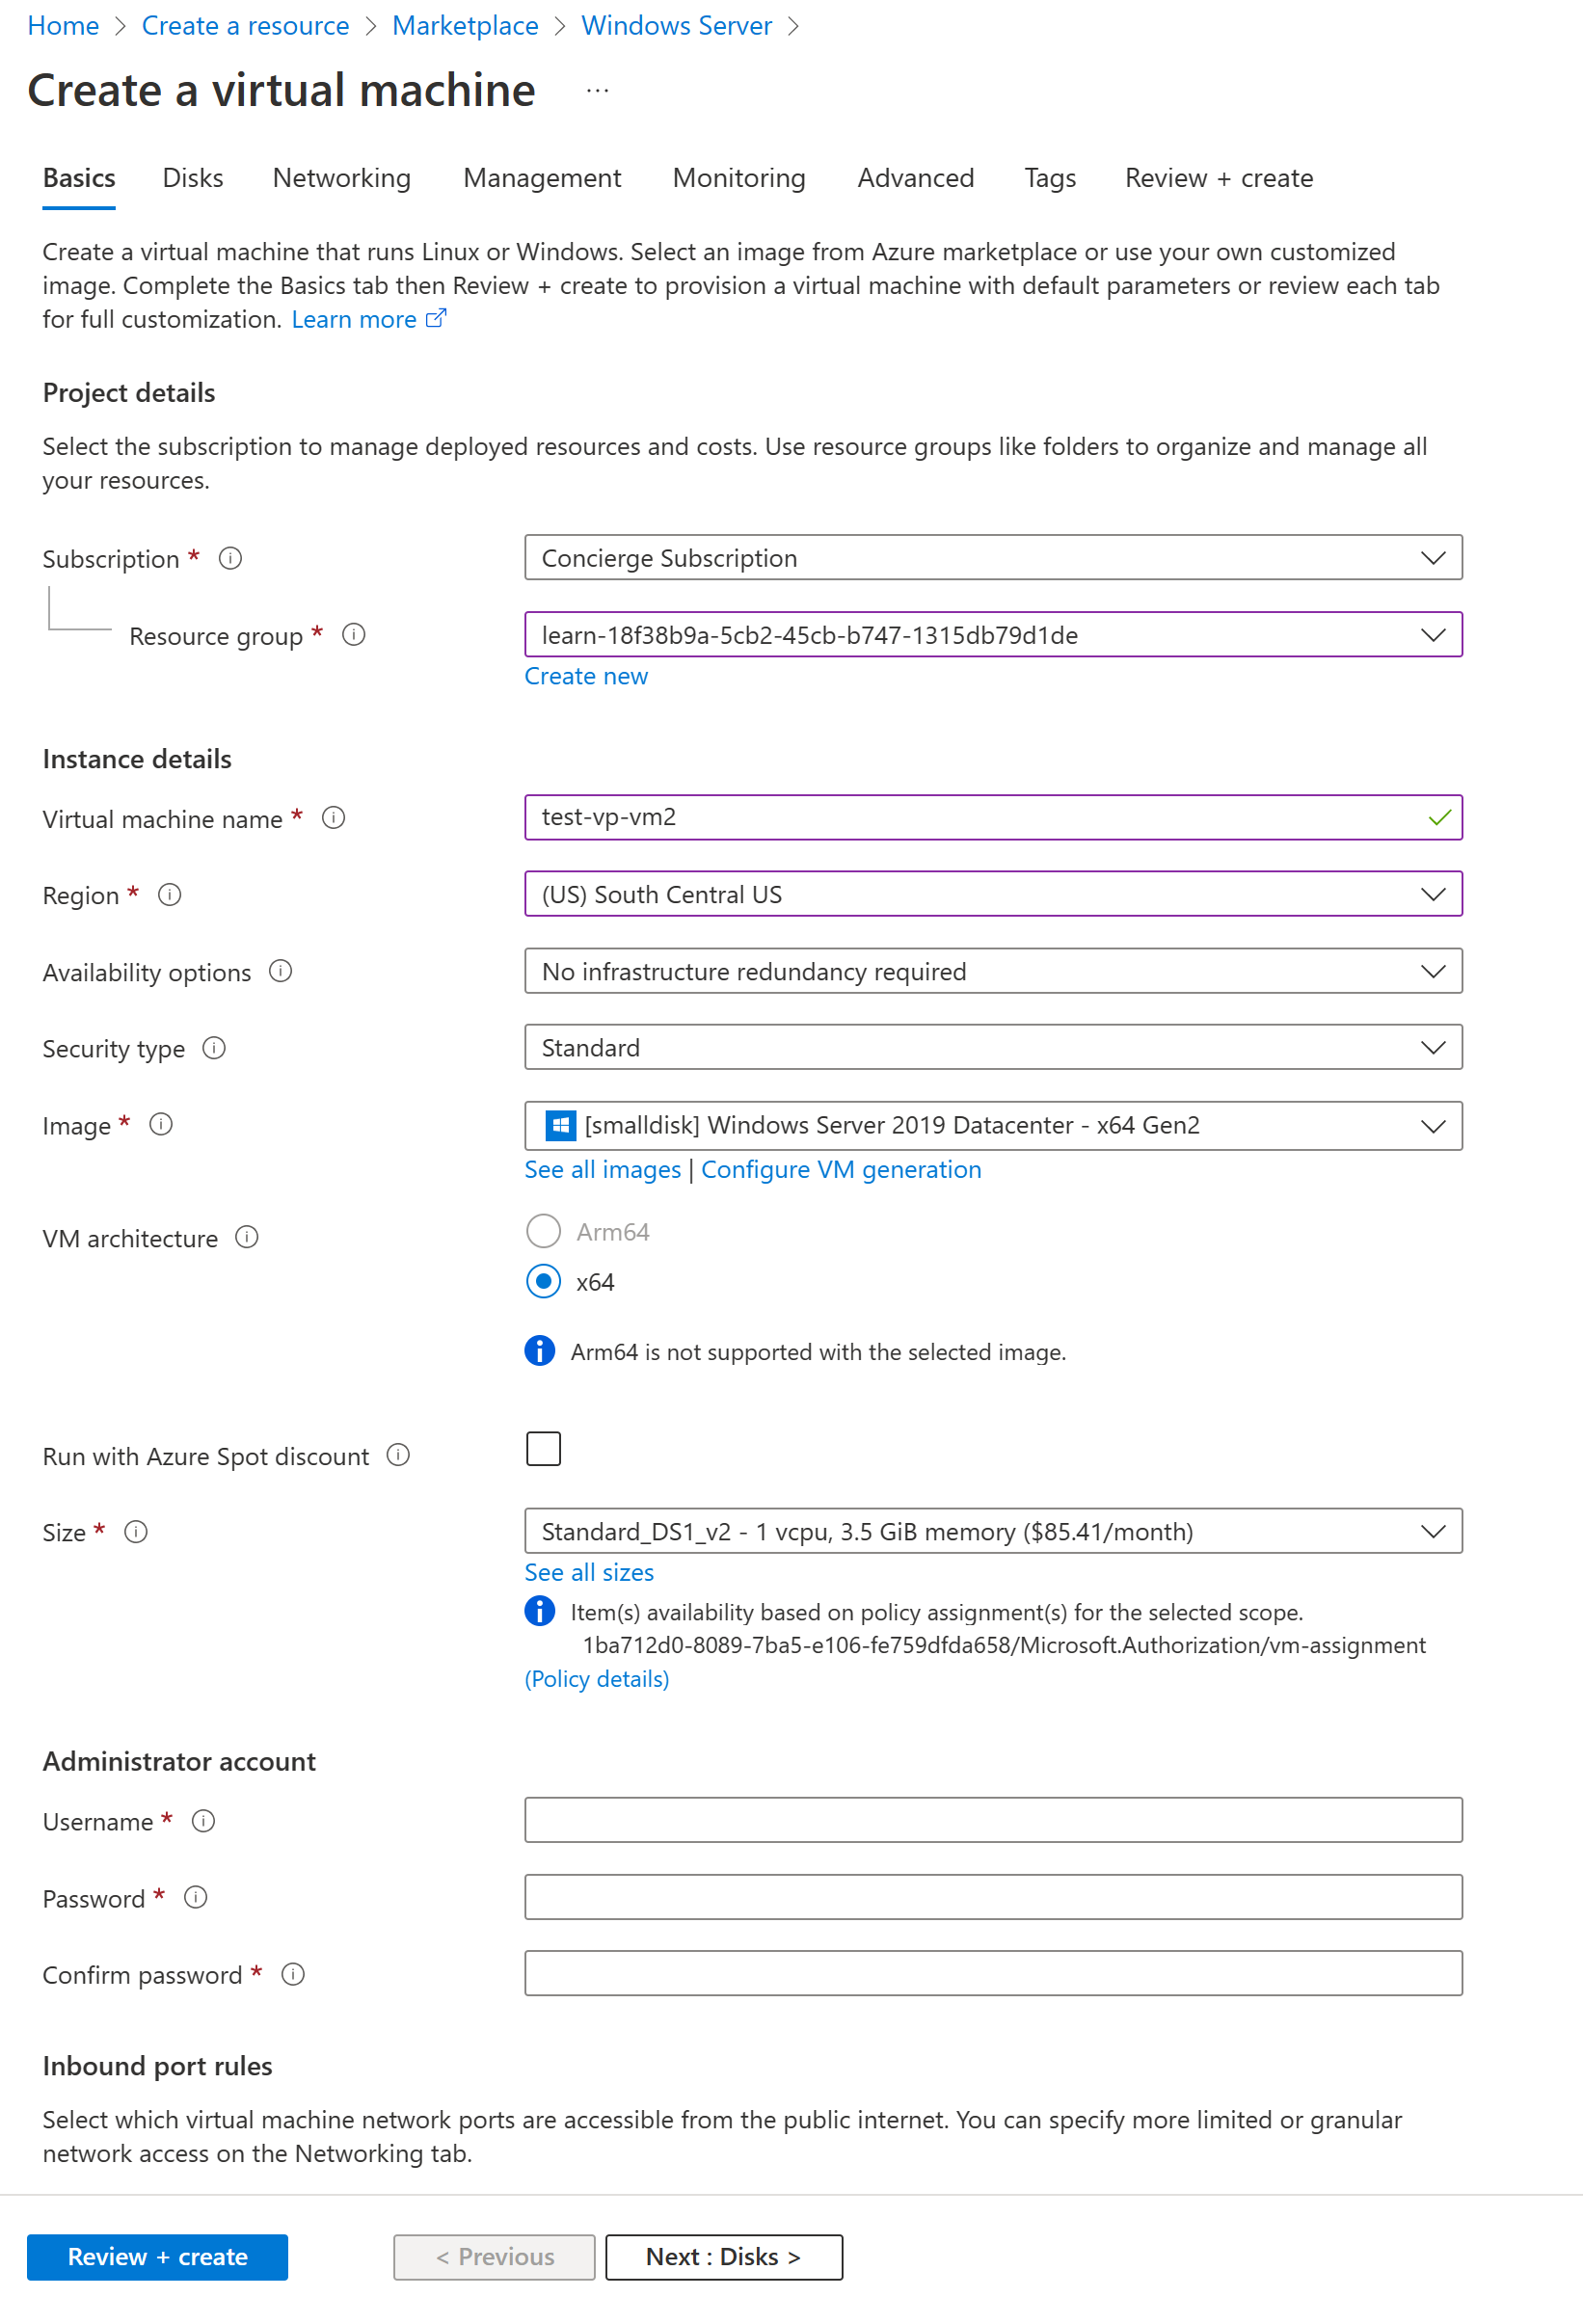
On the Basics tab, enter the following values for each setting.
Setting Value Project details Subscription Concierge Subscription (the subscription that should be billed for VM hours). Resource Group Select [sandbox resource group name] .Instance details Virtual machine name Enter a name for your VM, such as test-vp-vm2 (for Test Video Processor VM #2). Region Select a region close to you from the global regions listed in the following table. Availability options Accept default No infrastructure redundancy required. This option is used to ensure the VM is highly available by grouping multiple VMs together to deal with planned or unplanned maintenance events or outages. Security type Standard Image Select [smalldisk] Windows Server 2019 Datacenter - x64 Gen2 from the dropdown list. VM architecture Accept default (x64) Run with Azure Spot discount Accept default (unchecked). Size The Size field isn't directly editable. Select or accept the default Standard DS1 v2, which will give the VM 1 CPU and 3.5 GB of memory. Optionally, select the field to view recommended or recently chosen sizes; select See all sizes to explore filters for sizes based on vCPUs, RAM, Data disks, operations per second, and cost. Select the X in the top right of the pane to close the pane. Administrator account Username Enter a username you'll use to sign in to the VM. Password Enter a password that's at least 12 characters long and has at least three of the following four characteristics: one lower case character, one uppercase character, one number, and one special character that isn't '\' or '-'. Use something you'll remember or write it down, as you'll need it later. Confirm password Confirm your password. Inbound port rules Public inbound ports Select Allow selected ports. We want to be able to access the desktop for this Windows VM using RDP. Select inbound ports Select RDP (3389) from the dropdown list. As the note in the UI indicates, we can also adjust the network ports after we create the VM. Licensing Would you like to use an existing Windows Server License Leave unchecked The free sandbox allows you to create resources in a subset of the Azure global regions. Select a region from the following list when you create resources:
- West US 2
- South Central US
- Central US
- East US
- West Europe
- Southeast Asia
- Japan East
- Brazil South
- Australia Southeast
- Central India
Select Next : Disks.
Tip
You can use the horizonal scroll bar to slide the view to the left to get back to the VM settings, which had opened a new pane to the right.
Configure disks for the VM
On the Disks tab, enter or select the following values for each setting.
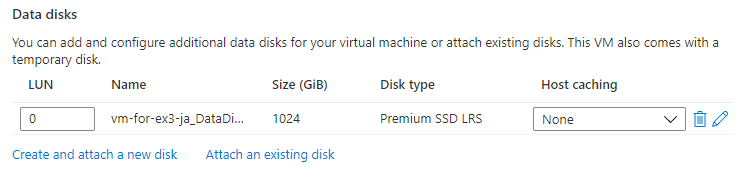
Setting Value Disk options Encryption at host Accept the default (unchecked) OS disk size Accept the default Image default (30 GiB). OS disk type Accept the default Premium SSD (locally redundant storage). Delete with VM Accept the default (checked) Key management Accept the default. Enable Ultra Disk compatibility Accept the default (unchecked) Data disks Select Create and attach a new disk link. The Create a new disk pane appears. Accept all the default values for the following settings: Name; Source type; Size; Key management; and Enable shared disk. This is where you could use a snapshot, or Storage Blob, to create a VHD. Select OK to save the settings and close the pane.
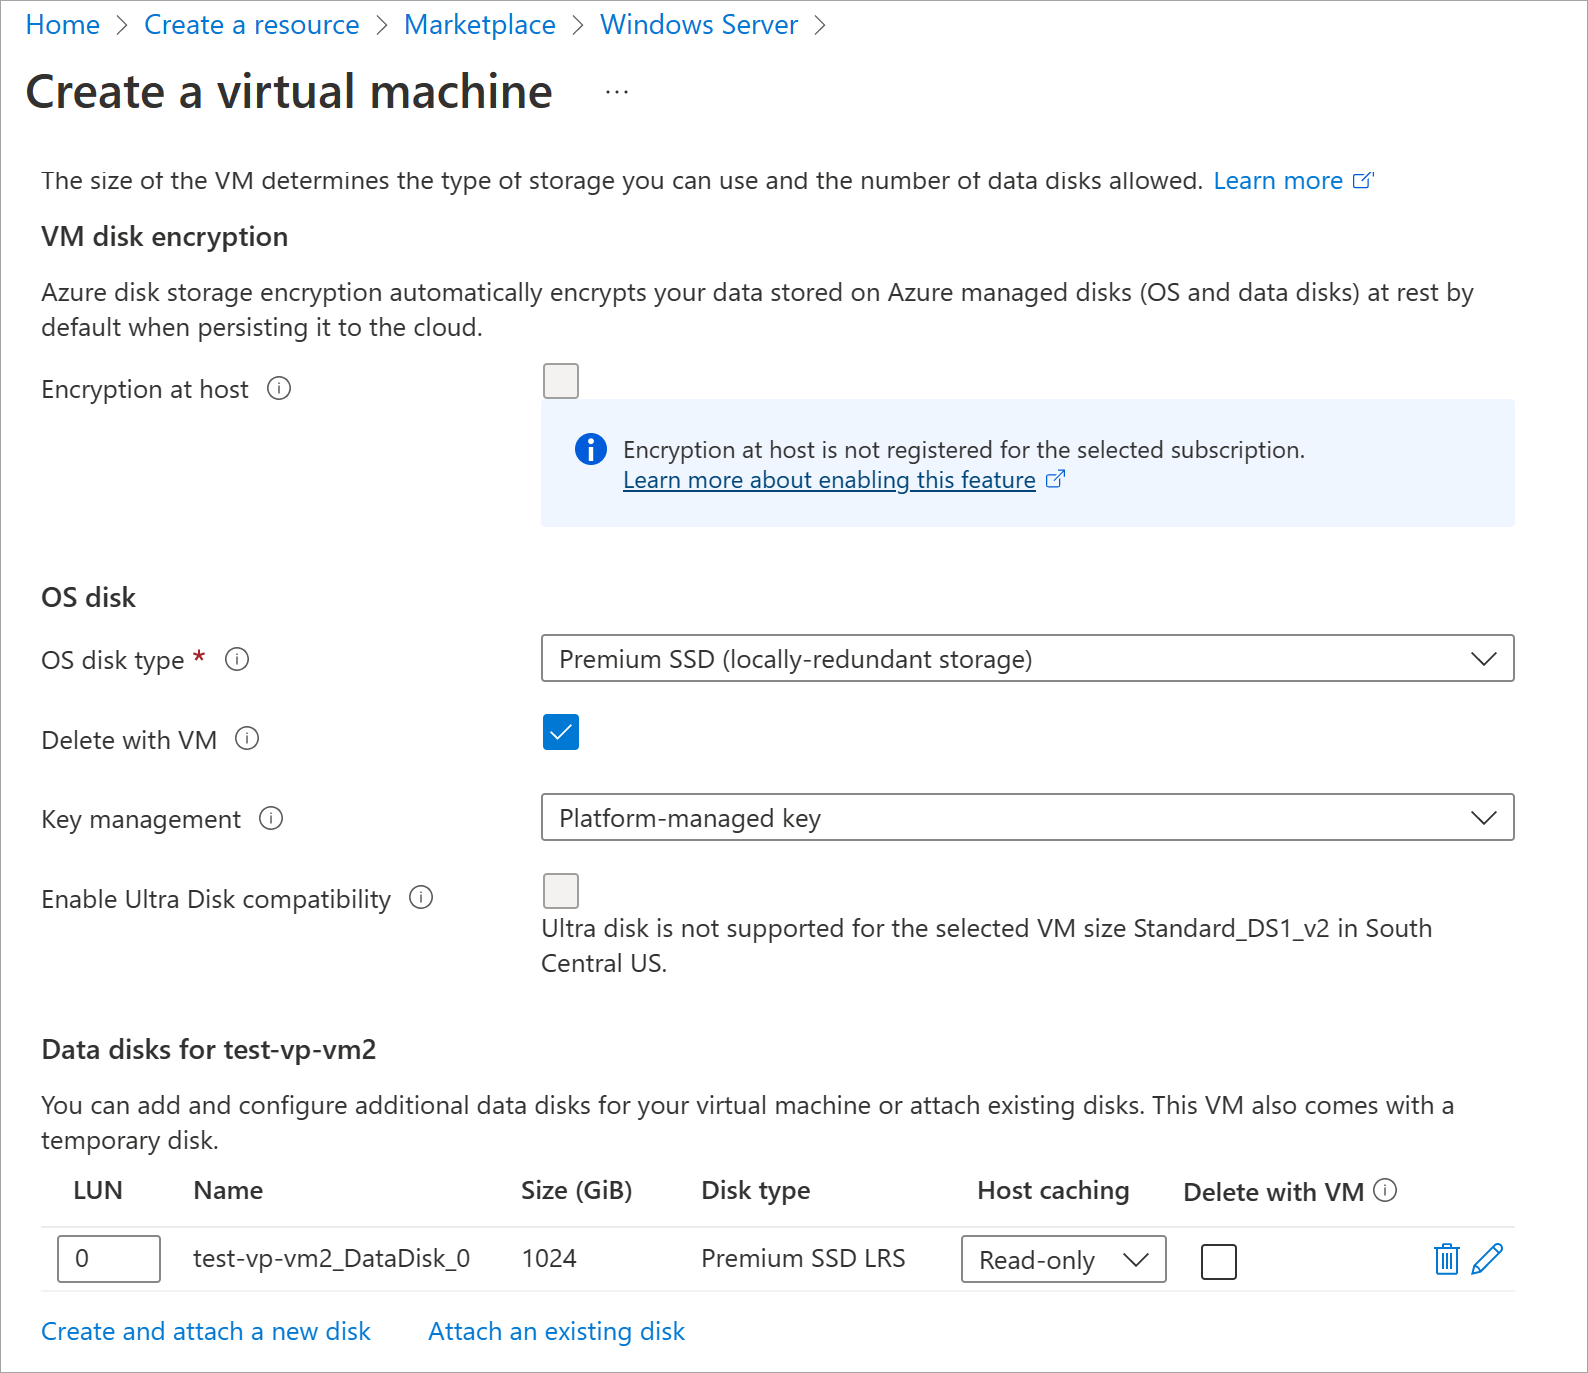
On the Create a virtual machine pane Disks tab, under Data disks, there should now be a new row showing the newly configured disk.
Configure the network
Select Next : Networking.
In a production system where other components are already in use, it would be important to use an existing virtual network so that the VM can communicate with the other cloud services in the production solution. If no virtual network has been defined in this location, create it here and configure the:
- Subnet: First subnet to subdivide the address space; it must fit within the defined address space. After the VNet is created, you can add more subnets.
- Public IP: Overall IPV4 space available to this network.
On the Networking tab, let's change some of the settings. Under the input field for Virtual network, select Create new. The Create virtual network pane appears.
On the Create virtual network pane, enter the following values for each setting.
Setting Value Name Accept the default name. Address space Address range In the row below the heading, enter 172.16.0.0/16to give the address space a full range of addresses, then check the box next to the address you just entered. If another address range row exists, select the Delete icon to delete it.Subnets Subnet name Enter default in the first input field, then select the checkbox next to the name you just entered. If another row exists, select it to delete it. Address range In the empty input field, enter 172.16.1.0/24to give the subnet 256 IP addresses of space.Select OK to save your settings and return to the Create a virtual machine pane.
Note
By default, Azure will create a virtual network, network interface, and public IP for your VM. It's not trivial to change networking options after the VM is created, so always double-check the network assignments for services you create in Azure.
Finish configuring the VM and create the image
On the Create a virtual machine pane, the rest of the tabs have reasonable defaults and there's no need to change any of them. You can explore the other tabs if you like. Each field has an (i) icon next to it which, if selected, will show a detailed definition of that configuration setting. Reviewing field descriptions is a great way to learn about the settings you can use to configure the VM.
Select Review + create. The system will validate your options and display details about the VM being created.
Select Create to deploy the VM. The Azure dashboard will show the name of the VM that's being deployed and details about your deployment. Deployment may take several minutes.
After deployment completes, select Go to resource. Your virtual machine pane appears.
Now, let's look at what we can do with this VM.