Use WDS to deploy Windows Server
The infrastructure team at Contoso has many Windows Server computers to deploy. You want to expedite and at least, partially automate the installation process. Windows Deployment Services enables you to deploy updates to or complete installations of the Windows operating system. The infrastructure team can use a network-based installation of WDS to deploy Windows Server on new server computers.
What is WDS?
WDS is a server role provided with Windows Server. It provides the following functions:
- Enables the performance of network-based installations.
- Simplifies the deployment process.
- Supports deployment to computers that have no installed operating system.
- Provides end-to-end deployment solutions for both client and server computers.
- Uses existing technologies, such as Windows Preinstallation Environment (Windows PE), Windows image file (.wim) and virtual hard disk (.vhd and .vhdx) image files, and image-based deployment.
If Contoso wants to reduce administration effort during operating system deployment, they can do so by using WDS. Organizations that use WDS require little interaction from users when deploying the operating systems.
To create a WDS session, the Contoso infrastructure team must start the target server computers by using PXE, and then join the session. Once the session starts, the deployment requires no further user interaction. This type of deployment is a light-touch installation.
Note
This example assumes Contoso use multicast to distribute images from WDS, which is typical.
The WDS role in the Windows Server operating system is composed of two components: the Transport Server and the Deployment Server.
Transport Server
The transport server component provides the core networking functionality of WDS for multicast transmission. The transport server provides a multicasting engine for distributing images. The multicasting engine enables you to push data over a network to multiple computers simultaneously. This saves time and network bandwidth.
The transport server component provides three types of multicasting, described in the following table.
| Type of multicast | Description |
|---|---|
| Scheduled-Cast with client count | Schedule-Cast is a multicast type that you can use to schedule a multicast session. When you specify a client count, the server waits until the defined count of connected clients is reached, and then it starts to send the information. |
| Scheduled-Cast with point in time | When you specify a point in time, the server waits until the specified time and begins deployment to connected client computers. |
| Auto-cast | Auto-cast is a type of multicast that creates a new session automatically for each client connection received. A target can join an Auto-cast at any time, and the server repeats the transmission for as long as targets are connected. |
Deployment Server
The Deployment Server component of WDS requires the installation of the Transport Server. The deployment server uses the multicasting engine that the transport server component provides, to push operating system images across the network.
The deployment server provides the following functionality:
- Pre-Boot Execution Environment (PXE) server. PXE servers listen for Dynamic Host Configuration Protocol (DHCP) requests and respond to DHCP clients with a PXE offer. PXE clients use the information on this offer to establish a connection with the PXE server and join a session that the transport server hosts.
Note
Sessions are created by using the Deployment Server interface to push an image that are to be applied to PXE clients.
- Image store. The image store manages images uploaded to a server running WDS. You can use two types of images in Windows Deployment Services: boot images and install images.
- WDS Client. The WDS client is an integral part of Windows PE. It is the component responsible for connecting to a server running WDS, joining a session, and applying an install image.
- TFT Server. WDS acts as a trivial FTP (TFTP) server.
Deployment images
As mentioned, WDS uses two types of image. These are described in the following table.
| Image type | Description |
|---|---|
| Boot images | Usually, you only need two boot images in Windows Deployment Services, one for computers running 32-bit processors, and one for computers running 64-bit processors. The boot image contains Windows PE, a scaled-down version of the Windows operating system. |
| Install images | Install images contain the operating system you want to deploy to a given computer along with any applications, updates, roles, and settings configured on the original computer that created the image. Install images are a mirror of a hard drive you can apply on a Windows Deployment Services client computer. |
You also can use Windows Deployment Services in conjunction with other technologies to provide an even less interactive deployment, called zero-touch installation (ZTI). In a zero-touch installation, a designated server can use the Wake On LAN protocol to start computers by using PXE, and then join a session managed by Windows Deployment Services. That way, no interaction with the target computers is necessary.
Note
To implement ZTI deployment, you'll also need Microsoft Endpoint Configuration Manager (former System Center Configuration Manager).
Demonstration
The following video demonstrates how to deploy Windows Server by using WDS. The main steps in the process are:
Install the Windows Deployment Services role.
Configure the Windows Deployment Services role:
- Specify the remote installation folder location.
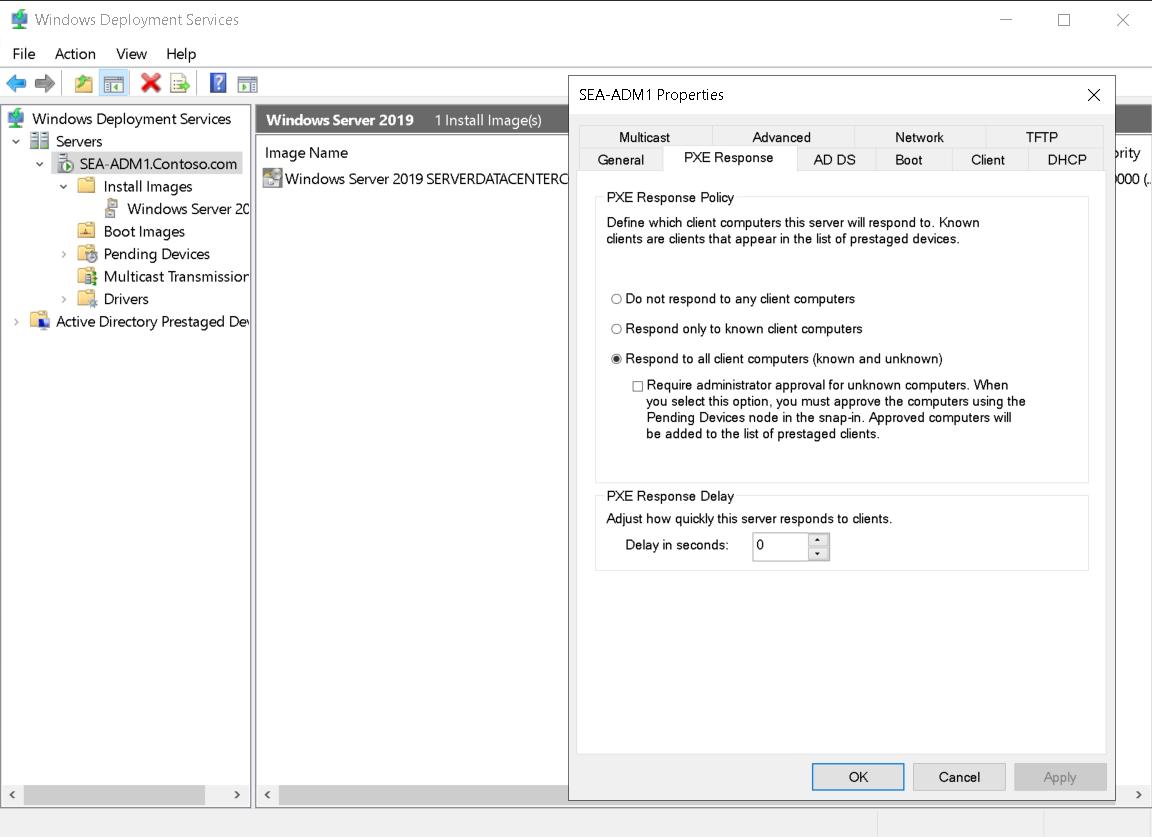
- Configure PXE Server Initial Settings to Respond to all client computers (known and unknown).
Add a boot image called boot.wim from D:\Sources.
Create an image group called Windows Server 2019.
Add an install image called install.wim from D:\Sources.
Select the Windows Server 2019 SERVERSTANDARDCORE image.
Verify the settings for WDS:
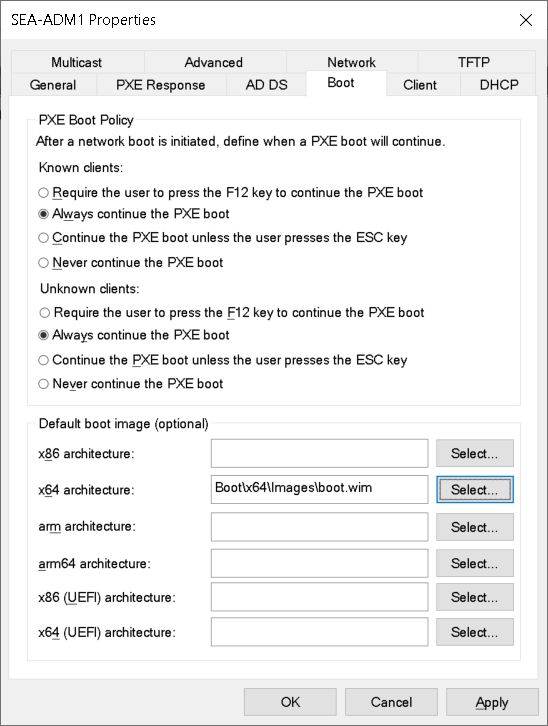
- Verify Always continue the PXE boot setting.
- In the boot image section, verify Microsoft Windows Setup (x64) is selected.
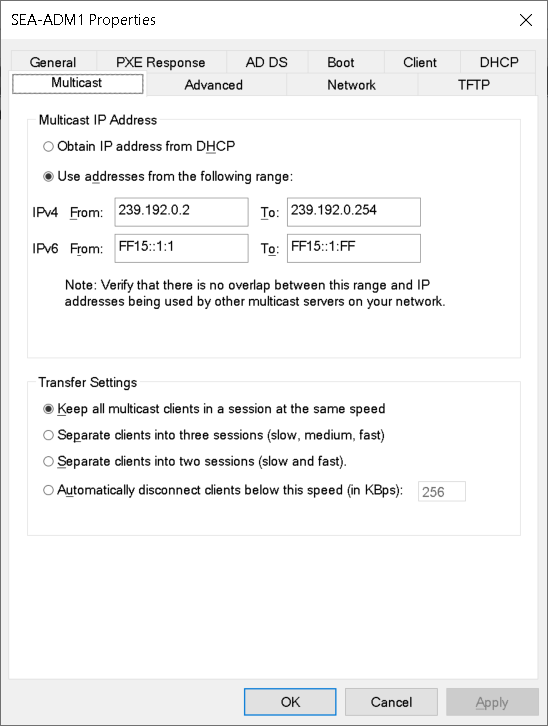
- Review the multicast settings.