Exercise - Use the Azure CLI to Create an event hub
You're now ready to create a new event hub. After creating it with Azure CLI commands, you use the Azure portal to view your new hub.
Create an Event Hubs namespace
Let's create an Event Hubs namespace using Azure CLI and Bash in Azure Cloud Shell on the right.
First, let's assign default values that can be reused so that you don't have to enter these values with every command. In particular, let's set the resource group and location. Enter the following command in Cloud Shell, and feel free to replace the location value with a region close to you.
az configure --defaults group=<rgn>[sandbox Resource Group]</rgn> location=westus2The free sandbox allows you to create resources in a subset of the Azure global regions. Select a region from this list when you create resources:
- westus2
- southcentralus
- centralus
- eastus
- westeurope
- southeastasia
- japaneast
- brazilsouth
- australiasoutheast
- centralindia
Tip
You can use the Copy button to copy commands to the clipboard. To paste, right-click on a new line in the Cloud Shell terminal and select Paste, or use the Shift+Insert keyboard shortcut (⌘+V on macOS).
Create the Event Hubs namespace by running the following Azure CLI command, which takes these parameters:
Parameter Description --name (required) A unique name for your Event Hubs namespace. The name must be 6-50 characters long, start with a letter, end with a letter or number, and contain only letters, numbers, and hyphens. --resource-group (required) This parameter can be omitted because it defaults to the sandbox resource group supplied from the previous command. --location (optional) This parameter can be omitted because it defaults to the location (region) supplied from the previous command. --sku (optional) The default value for this parameter, if omitted, is Standard, which is the value that we want. The sku determines the connections and consumer thresholds. Before running the command, though, let's set the namespace name as an environment variable so we can reuse it.
NS_NAME=ehubns-$RANDOMNow, when you run this command, the namespace name is already defined for you, and the CLI command creates it.
az eventhubs namespace create --name $NS_NAMENote
It may take some time for the namespace to be created. Azure will validate the namespace name, and if the name exists or is invalid, the CLI returns Bad Request. In this case, try a different name by rerunning the Bash command to set the environment variable and then reissue the Azure CLI command.
Fetch the connection string and primary key for your namespace by running the following command.
az eventhubs namespace authorization-rule keys list \
    --name RootManageSharedAccessKey \
    --namespace-name $NS_NAME
The output from this command is in JSON format and contains details that you need when configuring your publisher and consumer applications. Save the following values for later use.
- primaryConnectionString
- primaryKey
Create an event hub
Now let's create your event hub.
First, let's define the event hub name as an environment variable by running the following command in Cloud Shell.
HUB_NAME=hubname-$RANDOMNow, run the Azure CLI command to create an event hub. This command needs the following parameters.
Parameter Description --name (required) The name for your event hub is the environment variable $HUB_NAME. --resource-group (required) The resource group owner is already defined in an environment variable. --namespace-name (required) The Event Hubs namespace is the environment variable $NS_NAME. az eventhubs eventhub create --name $HUB_NAME --namespace-name $NS_NAMEView the details of your event hub by running the following Azure CLI command, which needs the following parameters.
Parameter Description --resource-group (required) The resource group owner is already defined in an environment variable. --namespace-name (required) The namespace you created. --name (required) Name of the event hub. az eventhubs eventhub show --namespace-name $NS_NAME --name $HUB_NAME
View the event hub in the Azure portal
Next, let's see what our event hub looks like in the Azure portal.
Sign in to the Azure portal using the same account you used to activate the sandbox.
In the search bar at the top of the portal, enter Event Hubs, and press Enter. The Event Hubs pane for your subscription appears.
In the list of Event Hubs namespaces, look for your namespace. Because we assigned the namespace as an environment variable ehubns-RANDOM, look for ehubns-NNNNN. Select it. The Overview page for your Event Hubs Namespace appears.
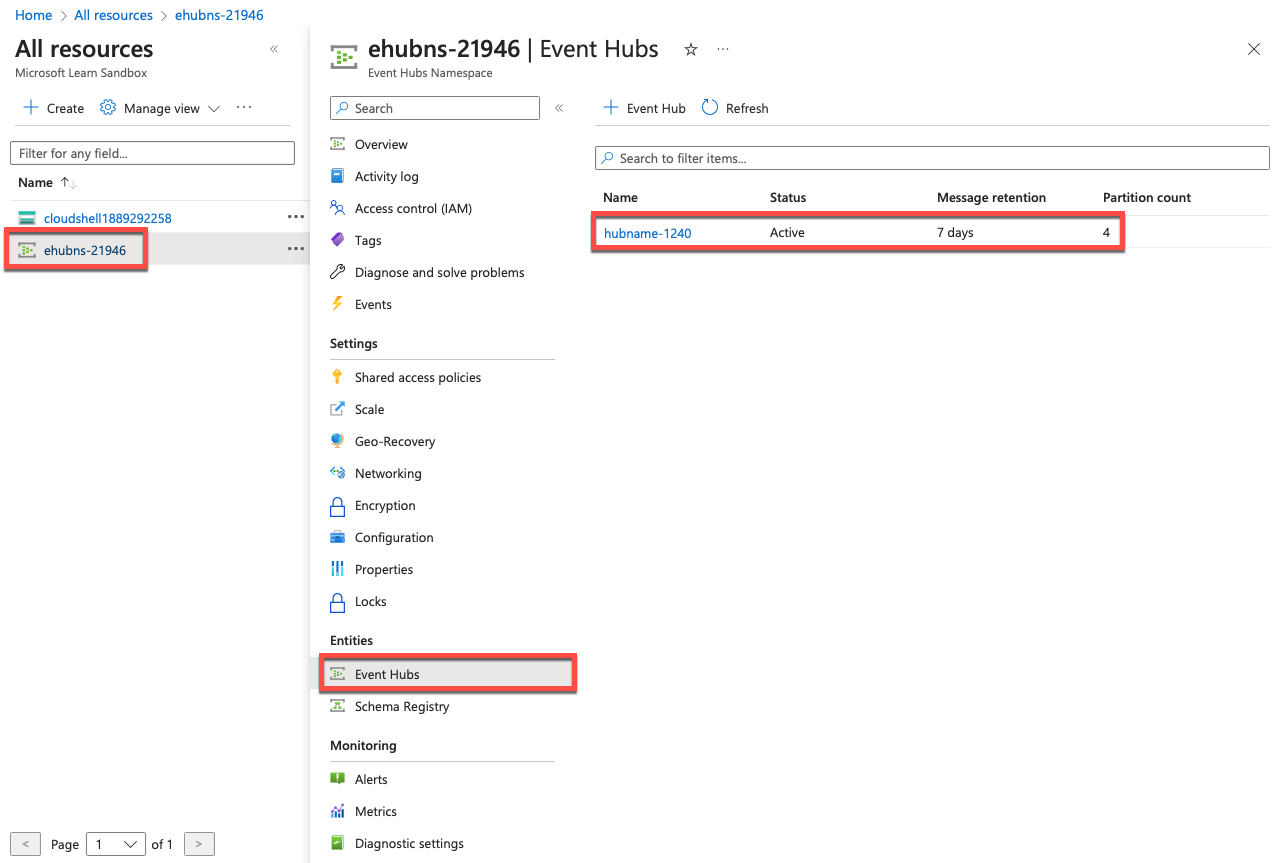
In the middle menu pane, under Entities, select Event Hubs. The Event Hubs pane appears with list of event hubs in your namespace.
Your event hub is listed, showing the status (Active), and the expected default values for Message retention (7 days (168 hours)) and Partition count (4).
Summary
You created a new event hub, and you have all the necessary information ready to configure your publisher and consumer applications.