Create and manage live events policies
With the help of Microsoft Teams live events policies, an administrator can control which users in the company can hold live events, and which features will be available in the events they create. Microsoft Teams provides a default live events policy that organizations can use. The Teams administrator can also create one or more custom live events policies that can be tailored specifically to their organization's needs. After a custom policy is created, it must be assigned to a user or groups of users within the organization.
Manage Live event policies
Use Teams admin center
Create a live events policy
To create a live events policy:
In the Microsoft Teams admin center, in the left-hand navigation pane, select Meetings and then select Live events policies.
In the Live events policies window, select +Add on the menu bar that appears above the list of policies.
In the Live event policies \ Add window, enter a name for your policy and optionally enter a description.
Customize the following settings according to your preferences for this new policy:
- Live events scheduling - Select the toggle to turn this option On or Off.
- Transcription for attendees - Select the toggle to turn this option On or Off.
- Who can join scheduled live events - Choose from Everyone, Everyone in the organization, and Specific users or groups.
- Record an event - Choose from Always record, Never record, and Organizer can record.
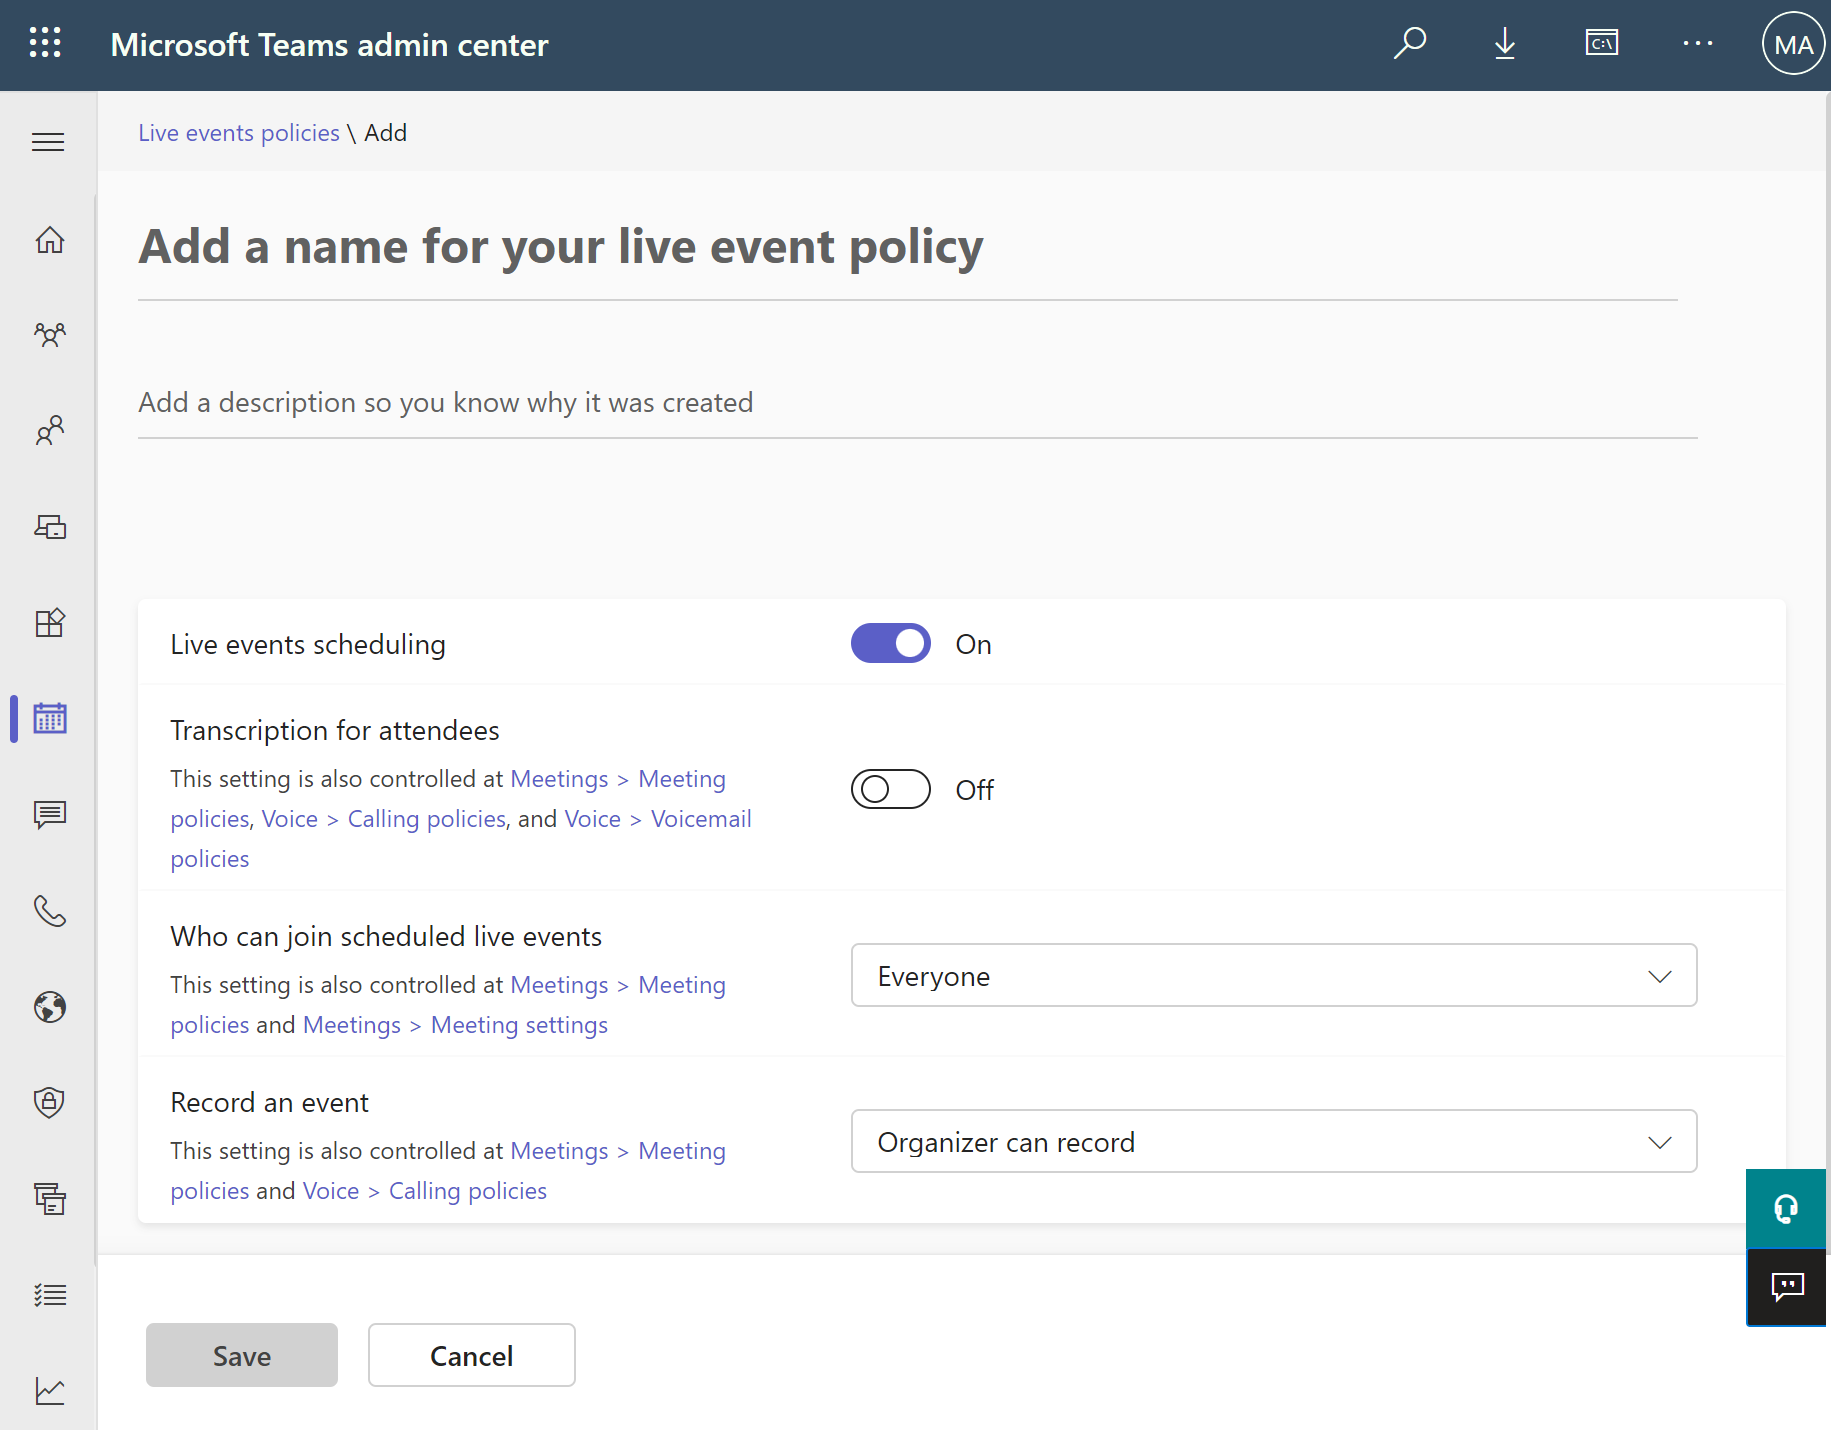
Select Save to save your new policy.
Assign a live events policy
After creating a new live events policy, it will be displayed in the live events policies window, where it will be ready for assignment with the following ways from Teams admin center:
| Scenarios | Details |
|---|---|
| Assign a policy directly to an individual user | Go to Users > Manage users > Select a user > Policies tab > Assigned policies. |
| Assign a policy to a batch of users | Option 1: Go to Users > Manage users > Select multiple users > Edit settings. Option 2: Go to Live events policy > Select the policy > Assign users. |
| Assign a policy to a group | Go to Live events policy > Group policy assignment > +Add and follow the configuration. |
| Assign a policy package directly to an individual user. | Go to Users > Manage users > Select a user > Policies tab > Policy package. |
| Assign a policy package to a batch of users | Go to Policy packages > Select the policy package > Manage users. |
| Assign a policy package to a group | Go to Policy packages > Group policy assignment > +Add and follow the configuration. |
Use PowerShell
Live event policies can also be managed by using the following Windows PowerShell cmdlets:
Get-CsTeamsMeetingBroadcastPolicySet-CsTeamsMeetingBroadcastPolicyNew-CsTeamsMeetingBroadcastPolicyGrant-CsTeamsMeetingBroadcastPolicy
When a user has been assigned the global policy, the AllowBroadcastScheduling parameter will indicate whether the user can schedule a Live event. To determine whether this parameter is set to True, run the following command:
Get-CsTeamsMeetingBroadcastPolicy -identity Global
To disable live events scheduling across your organization, run the following command:
Set-CsTeamsMeetingBroadcastPolicy -identity Global
-AllowBroadcastScheduling $false
To identify who can join live events, the global policy must be set to allow users to create events that everyone, including anonymous users, can attend. To update the global policy, run the following command:
Set-CsTeamsMeetingBroadcastPolicy -Identity Global -BroadcastAttendeeVisibility Everyone
The recording option for live events only applies to live events that are produced in Teams. For example, to set the global policy to disable recording for live events, run the following command:
Set-CsTeamsMeetingBroadcastPolicy -Identity Global -BroadcastRecordingMode AlwaysDisabled
Manage immersive experiences in meetings
Set up immersive spaces in Teams
The Mesh app, which enables immersive spaces in Teams, is enabled by default in the Teams Admin Center. This allows users to change the View in a Teams meeting to an immersive space. However, unlike other apps in Teams, users don't need to search for or pin it in. Instead, they only access an immersive space in the View menu in any Microsoft Teams meeting.
To set up immersive spaces in Teams, you should:
- Verify URLs, endpoints, and ports are properly set up.
- Create or edit app permission policy to block specific people from accessing the app.
What is an immersive space?
Connect in a 3D immersive space, helping hybrid meetings feel more like face-to-face connections. With just one click, you can easily connect with your team in a pre-built immersive space right from a Teams meeting.
In a Microsoft Teams meeting, select View > Immersive space (3D).
Use your avatar and join with a Meta Quest VR device to bring even more richness to the experience.
Immersive spaces work well for these types of meetings:
Weekly scrums or standups with your team
Brainstorming sessions with multiple break-out groups
Casual get-togethers or celebrations for morale
Virtual networking events across multiple groups
Onboarding meet-and-greets for new team members
For more information see Set up immersive spaces in Teams