Exercise - Move and verify resources between Azure resource groups
You identified the development resources that are in the production resource group, and you checked that they can move successfully. Now, you want to move your development resources from the production resource group into the dedicated development resource group. You can use the Azure portal to do so.
Create a resource group for development resources
First you create the development resource group where you want to move your resources.
Return to the Azure portal.
On the home page, select Create a resource. Search for and select Resource group. The Resource group pane appears.
Select Create. The Create a resource group pane appears.
On the Basics tab, enter the following values for each setting.
Setting Value Project details Subscription From the dropdown list, select your account's subscription Resource group Enter devgroup Resource details Region Accept the default value Select Next : Tags.
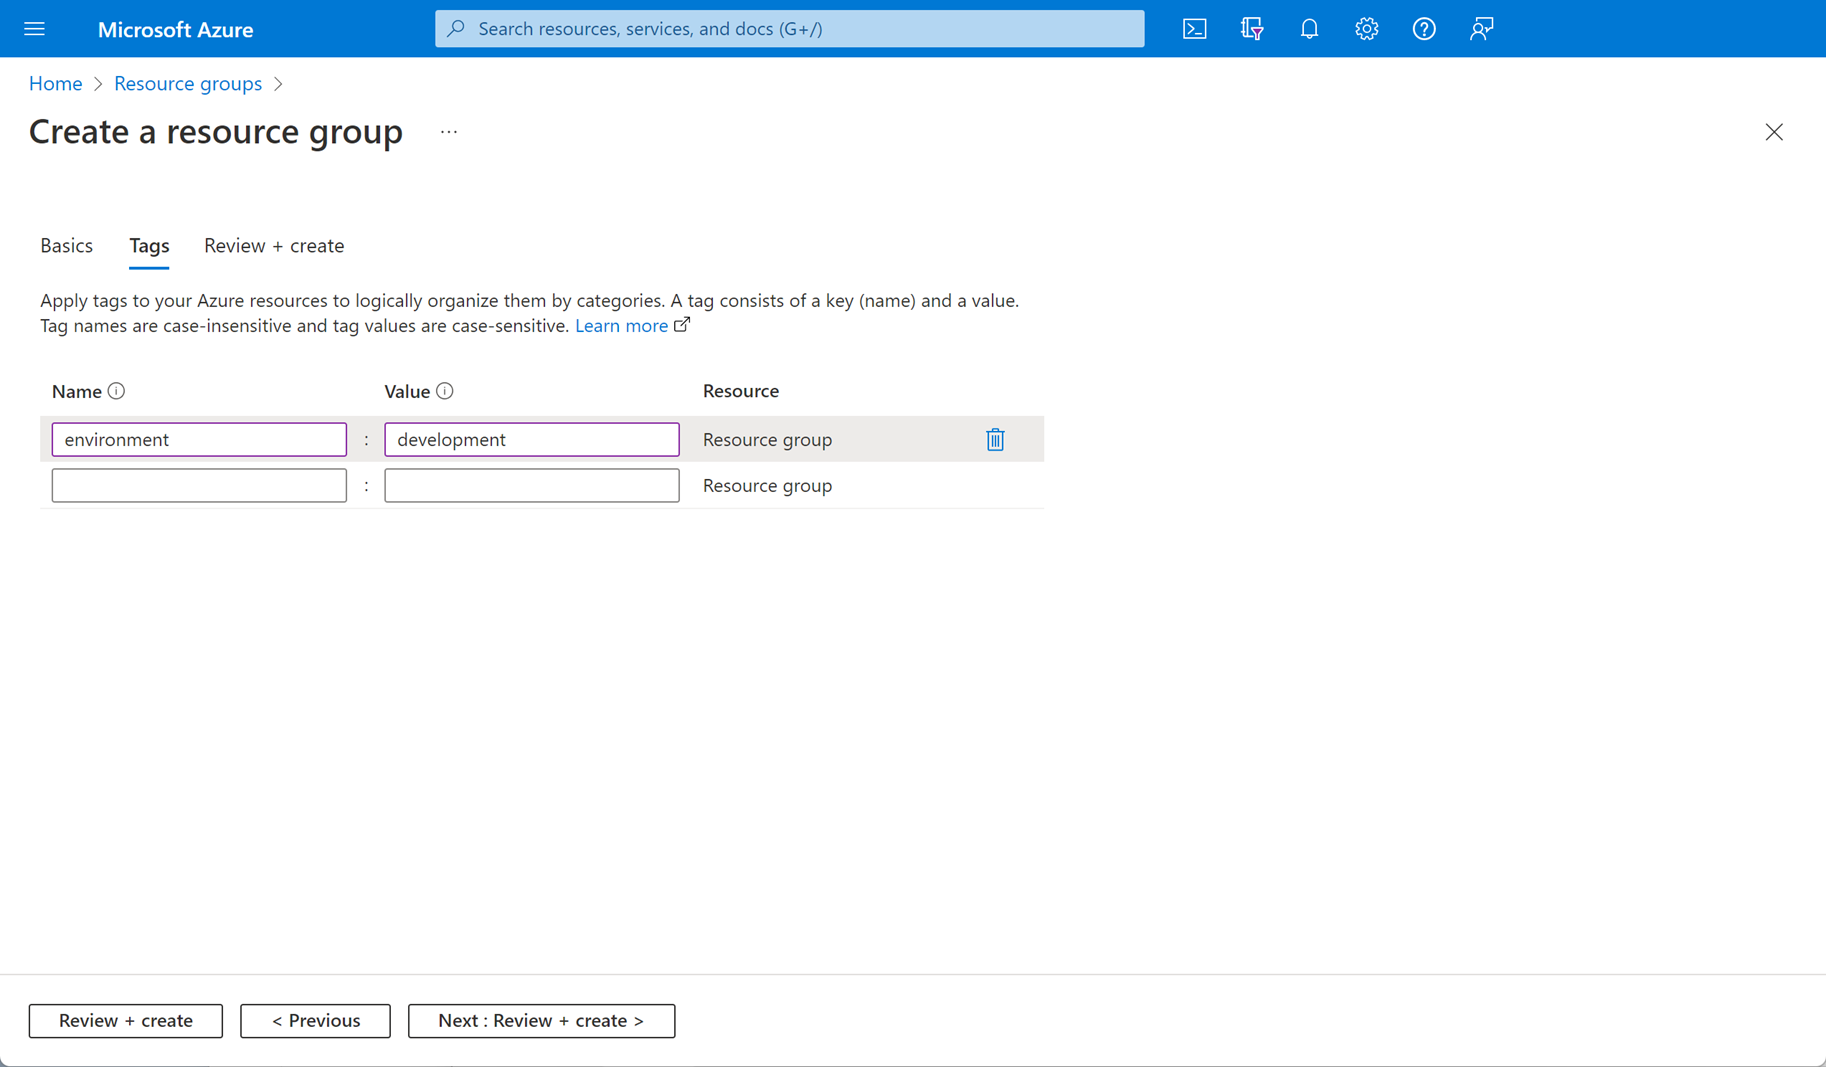
On the Tags tab, enter the following values for each setting.
Setting Value Name environment Value development Select Review + create. After validation passes, select Create.
Move development resources to the new group
Now that a devgroup resource group is created, you can move your development resources into it.
At the top of the Azure portal, search for and select Tags. The Tags pane appears.
Select the environment:development tag.
Select the storage account that you want to move. The storage account pane appears.
On the top menu bar, select Move > Move to another resource group.
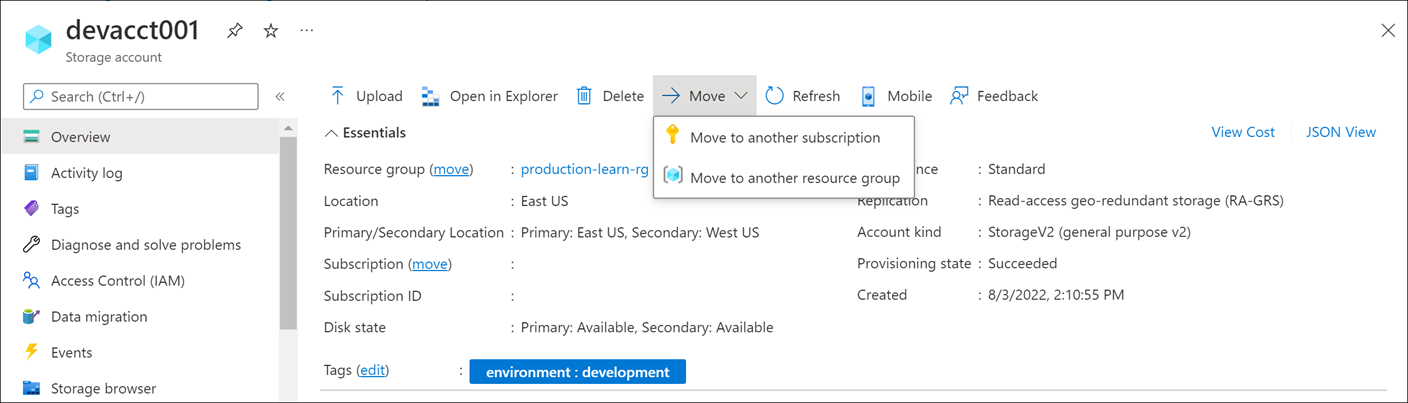
The Move resources pane appears.
On the Source + target tab, under Target, for the Resource group, from the dropdown list, select devgroup.
Select Next. On the Resources to move tab, the resources are validated as to whether they can be moved. The validation might take a few minutes.
After validation succeeds, select Next.
On the Review tab, check the disclaimer box, and then select Move.
The move might take a few minutes. Wait for the "Moving resources complete" notification that confirms your resource is scucessfuly moved. The notification appears in the top-right hand section of the portal.
Repeat this process again to move the other storage account.
To confirm that your move operations are successful:
On the Azure portal home page, under Azure services, select Resource groups. The Resource groups pane appears.
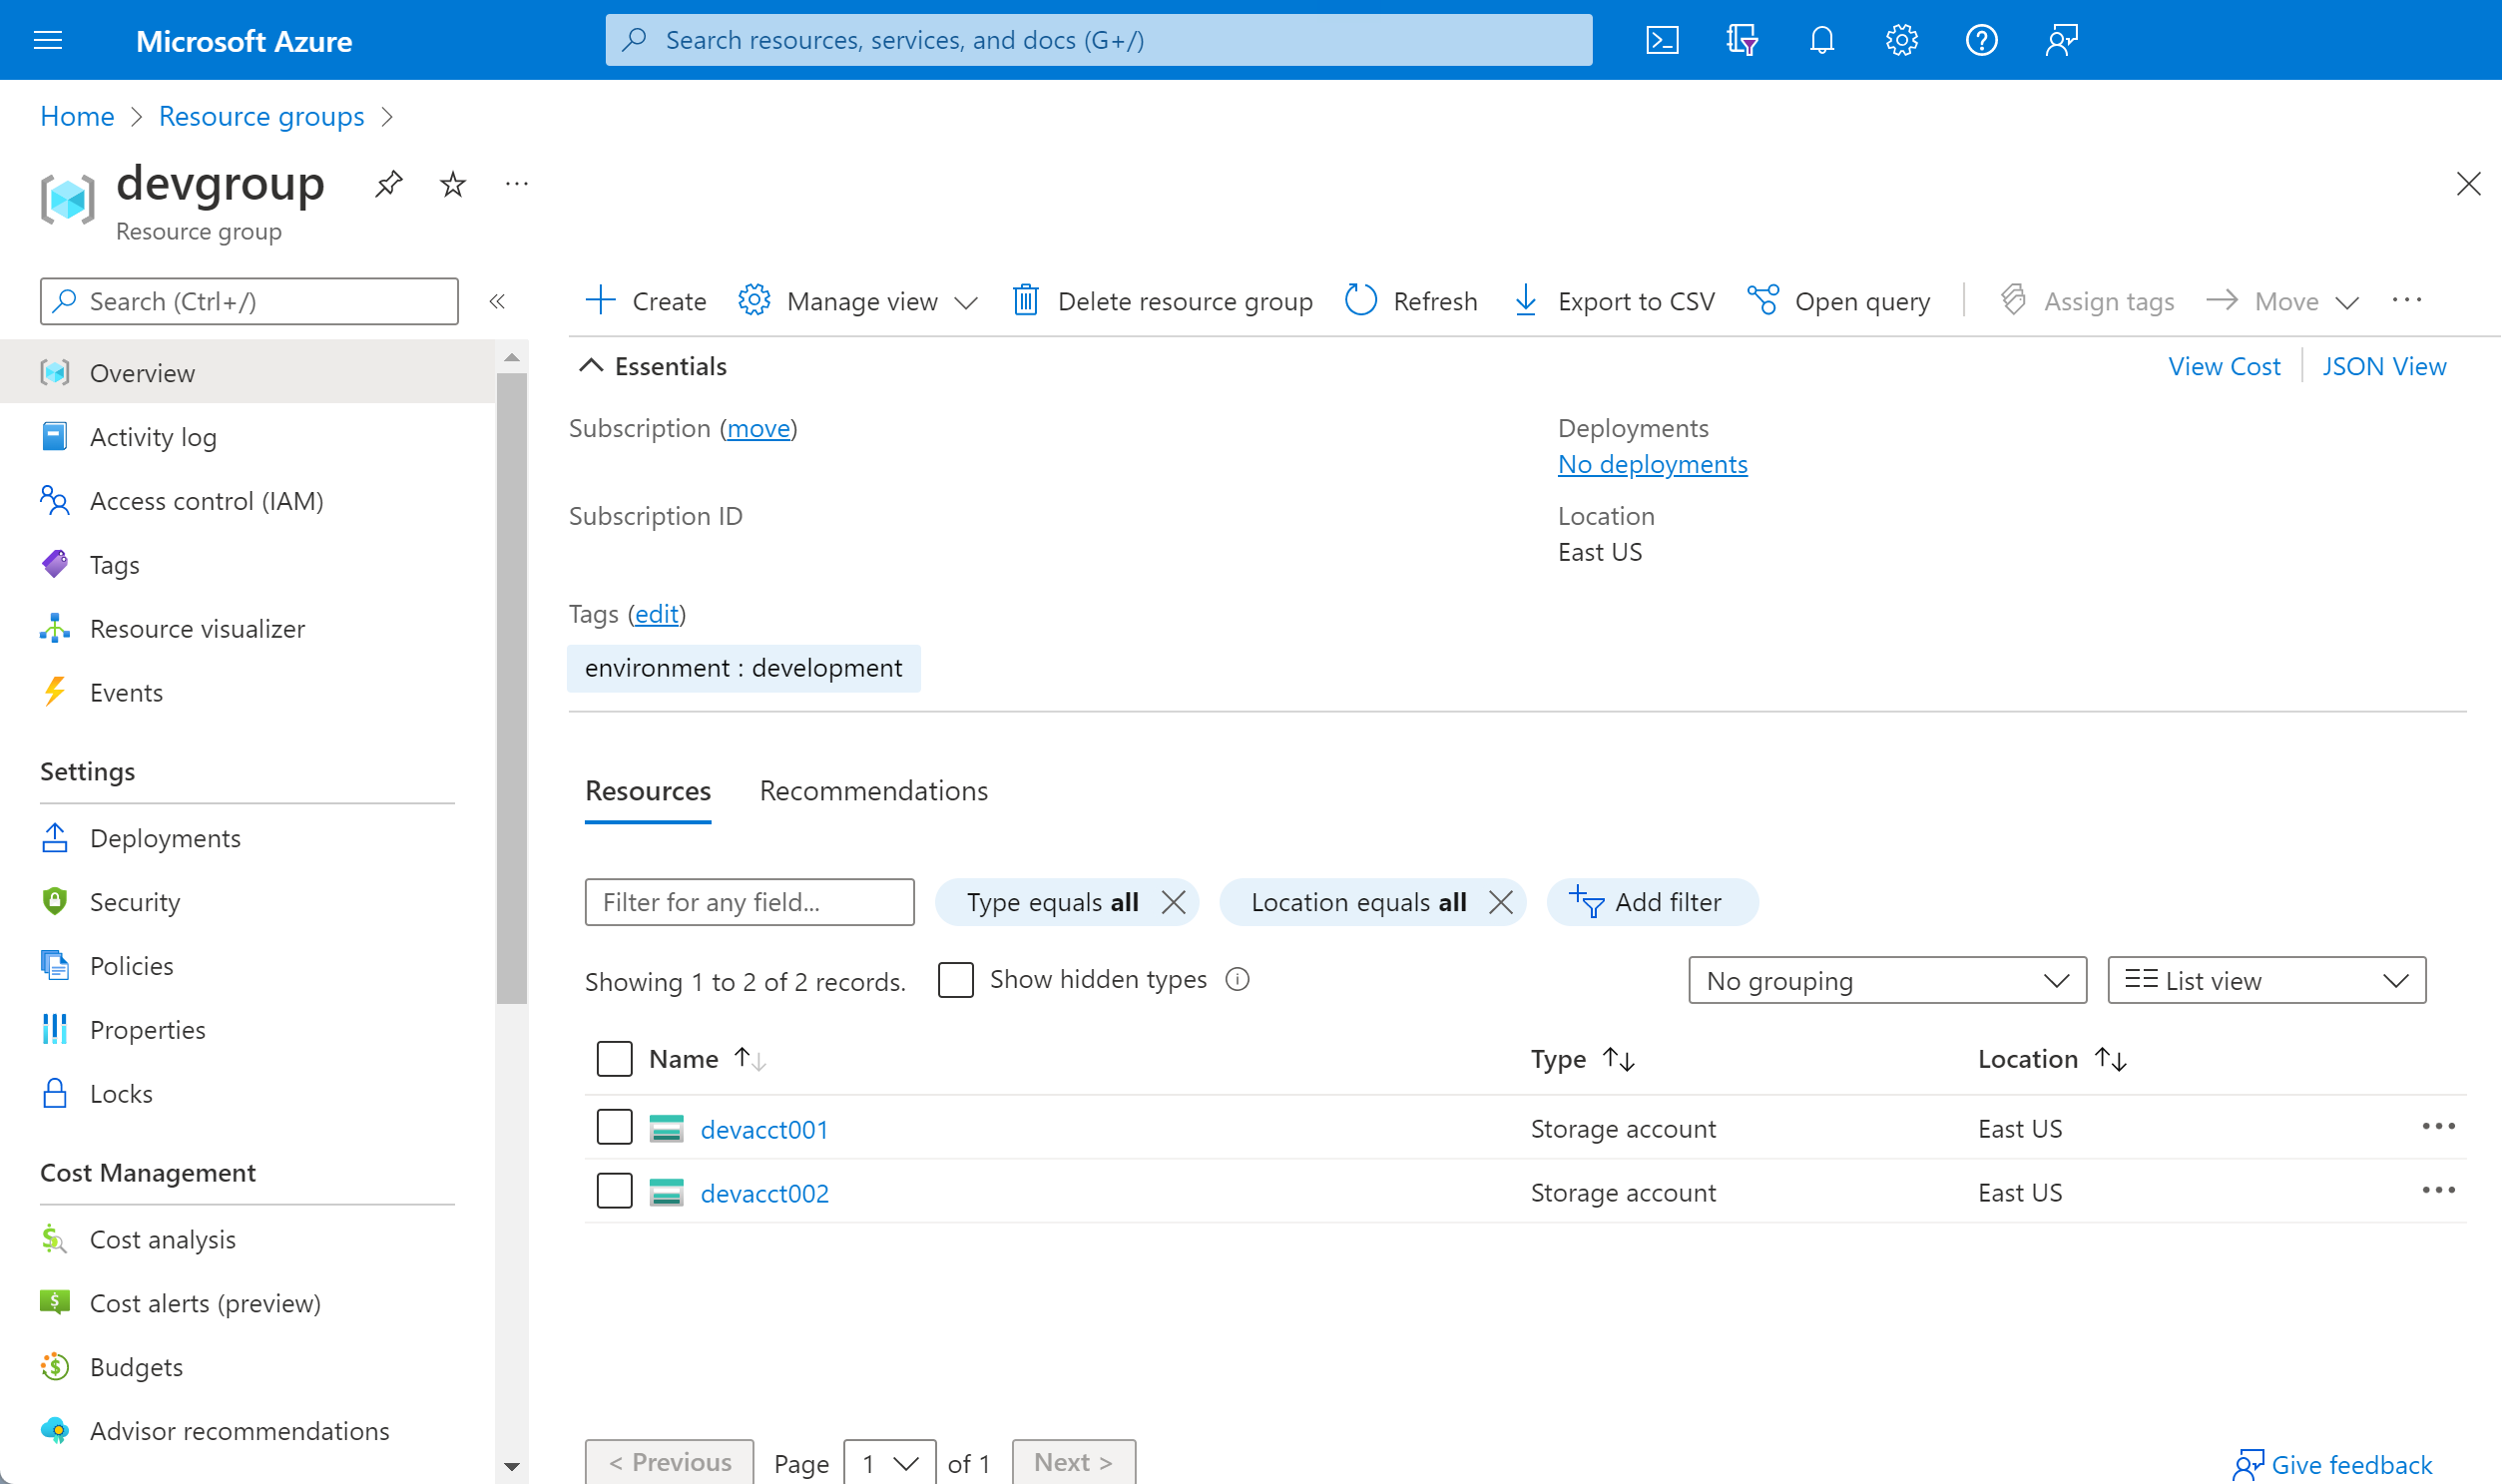
Select devgroup. The devgroup Resource group pane appears.
Notice that the development resources are now moved to the devgroup resource group.
In a real environment, you'd now update the resource IDs in any tools and scripts that reference your resources.