Events
17 Mar, 21 - 21 Mar, 10
Join the meetup series to build scalable AI solutions based on real-world use cases with fellow developers and experts.
Register nowThis browser is no longer supported.
Upgrade to Microsoft Edge to take advantage of the latest features, security updates, and technical support.
This article shows you how to create function apps hosted in the Flex Consumption plan in Azure Functions. It also shows you how to manage certain features of a Flex Consumption plan hosted app.
Function app resources are langauge-specific. Make sure to choose your preferred code development language at the beginning of the article.
An Azure account with an active subscription. If you don't already have one, you can create an account for free.
Azure CLI: used to create and manage resources in Azure. When using the Azure CLI on your local computer, make sure to use version 2.60.0, or a later version. You can also use Azure Cloud Shell, which has the correct Azure CLI version.
Visual Studio Code: used to create and develop apps, create Azure resources, and deploy code projects to Azure. When using Visual Studio Code, make sure to also install the latest Azure Functions extension. You can also install the Azure Tools extension pack.
While not required to create a Flex Consumption plan app, you need a code project to be able to deploy to and validate a new function app. Complete the first part of one of these quickstart articles, where you create a code project with an HTTP triggered function:
To create an app in a new Flex Consumption plan during a Maven deployment, you must create your local app project and then update the project's pom.xml file. For more information, see Create a Java Flex Consumption app using Maven
Return to this article after you create and run the local project, but before you're asked to create Azure resources. You create the function app and other Azure resources in the next section.
This section shows you how to create a function app in the Flex Consumption plan by using either the Azure CLI, Azure portal, or Visual Studio Code. For an example of creating an app in a Flex Consumption plan using Bicep/ARM templates, see the Flex Consumption repository.
You can skip this section if you choose to instead create and deploy your app using Maven.
To support your function code, you need to create three resources:
In the Azure portal, from the menu or the Home page, select Create a resource.
Select Get started and then Create under Function App.
Under Select a hosting option, choose Flex Consumption > Select.
On the Basics page, use the function app settings as specified in the following table:
| Setting | Suggested value | Description |
|---|---|---|
| Subscription | Your subscription | The subscription in which you create your new function app. |
| Resource Group | myResourceGroup | Name for the new resource group in which you create your function app. |
| Function App name | Globally unique name | Name that identifies your new function app. Valid characters are a-z (case insensitive), 0-9, and -. |
| Region | Preferred region | Select a region that's near you or near other services that your functions can access. Unsupported regions aren't displayed. For more information, see View currently supported regions. |
| Runtime stack | Preferred language | Choose one of the supported language runtime stacks. In-portal editing using Visual Studio Code for the Web is currently only available for Node.js, PowerShell, and Python apps. C# class library and Java functions must be developed locally. |
| Version | Language version | Choose a supported version of your language runtime stack. |
| Instance size | Default | Determines the amount of instance memory allocated for each instance of your app. For more information, see Instance memory. |
Accept the default options in the remaining tabs, including the default behavior of creating a new storage account on the Storage tab and a new Application Insight instance on the Monitoring tab. You can also choose to use an existing storage account or Application Insights instance.
Select Review + create to review the app configuration you chose, and then select Create to provision and deploy the function app.
Select the Notifications icon in the upper-right corner of the portal and watch for the Deployment succeeded message.
Select Go to resource to view your new function app. You can also select Pin to dashboard. Pinning makes it easier to return to this function app resource from your dashboard.
You can skip this section if you choose to instead create and deploy your app using Maven.
You can choose to deploy your project code to an existing function app using various tools:
Important
Deploying to an existing function app always overwrites the contents of that app in Azure.
In the command palette, enter and then select Azure Functions: Deploy to Function App.
Select the function app you just created. When prompted about overwriting previous deployments, select Deploy to deploy your function code to the new function app resource.
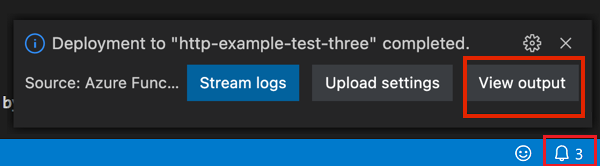
When deployment is completed, select View Output to view the creation and deployment results, including the Azure resources that you created. If you miss the notification, select the bell icon in the lower-right corner to see it again.
You can use Maven to create a Flex Consumption hosted function app and required resources during deployment by modifying the pom.xml file.
Create a Java code project by completing the first part of one of these quickstart articles:
In your Java code project, open the pom.xml file and make these changes to create your function app in the Flex Consumption plan:
Change the value of <properties>.<azure.functions.maven.plugin.version> to 1.34.0.
In the <plugin>.<configuration> section for the azure-functions-maven-plugin, add or uncomment the <pricingTier> element as follows:
<pricingTier>Flex Consumption</pricingTier>
(Optional) Customize the Flex Consumption plan in your Maven deployment by also including these elements in the <plugin>.<configuration> section: .
<instanceSize> - sets the instance memory size for the function app. The default value is 2048.<maximumInstances> - sets the highest value for the maximum instances count of the function app.<alwaysReadyInstances> - sets the always ready instance counts with child elements for HTTP trigger groups (<http>), Durable Functions groups (<durable>), and other specific triggers (<my_function>). When you set any instance count greater than zero, you're charged for these instances whether your functions execute or not. For more information, see Billing.Before you can deploy, sign in to your Azure subscription using the Azure CLI.
az login
The az login command signs you into your Azure account.
Use the following command to deploy your code project to a new function app in Flex Consumption.
mvn azure-functions:deploy
Maven uses settings in the pom.xml template to create your function app in a Flex Consumption plan in Azure, along with the other required resources. Should these resources already exist, the code is deployed to your function app, overwriting any existing code.
You can enable virtual network integration for your app in a Flex Consumption plan. The examples in this section assume that you already have created a virtual network with subnet in your account. You can enable virtual network integration when you create your app or at a later time.
Important
The Flex Consumption plan currently doesn't support subnets with names that contain underscore (_) characters.
To enable virtual networking when you create your app:
Use these steps to create your function app with virtual network integration and related Azure resources.
In the Azure portal, from the menu or the Home page, select Create a resource.
Select Get started and then Create under Function App.
Under Select a hosting option, choose Flex Consumption > Select.
On the Basics page, use the function app settings as specified in the following table:
| Setting | Suggested value | Description |
|---|---|---|
| Subscription | Your subscription | The subscription in which you create your new function app. |
| Resource Group | myResourceGroup | Name for the new resource group in which you create your function app. |
| Function App name | Globally unique name | Name that identifies your new function app. Valid characters are a-z (case insensitive), 0-9, and -. |
| Region | Preferred region | Select a region that's near you or near other services that your functions can access. Unsupported regions aren't displayed. For more information, see View currently supported regions. |
| Runtime stack | Preferred language | Choose one of the supported language runtime stacks. In-portal editing using Visual Studio Code for the Web is currently only available for Node.js, PowerShell, and Python apps. C# class library and Java functions must be developed locally. |
| Version | Language version | Choose a supported version of your language runtime stack. |
| Instance size | Default | Determines the amount of instance memory allocated for each instance of your app. For more information, see Instance memory. |
Accept the default options in the remaining tabs, including the default behavior of creating a new storage account on the Storage tab and a new Application Insight instance on the Monitoring tab. You can also choose to use an existing storage account or Application Insights instance.
In the Networking tab, set Enable public access to Off and Enable network injection to On.
For Virtual network, select or create a virtual network that is in the same region as your app.
Set Enable VNet integration to On and select or create a subnet.
Select Review + create to review the app configuration you chose, and then select Create to provision and deploy the function app with virtual networking.
Select the Notifications icon in the upper-right corner of the portal and watch for the Deployment succeeded message.
Select Go to resource to view your new function app. You can also select Pin to dashboard. Pinning makes it easier to return to this function app resource from your dashboard.
For end-to-end examples of how to create apps in Flex Consumption with virtual network integration see these resources:
To modify or delete virtual network integration in an existing app:
You can integrate your existing app with an existing virtual network and subnet in the portal.
In your function app page in the Azure portal, expand Settings in the left menu and select Networking.
Under Outbound traffic configuration, select Not configured.
In the Virtual Network Integration page, select Add virtual network integration.
Select an existing Virtual network and Subnet and select Connect.
When choosing a subnet, these considerations apply:
In the Flex Consumption plan, the deployment package that contains your app's code is maintained in an Azure Blob Storage container. By default, deployments use the same storage account (AzureWebJobsStorage) and connection string value used by the Functions runtime to maintain your app. The connection string is stored in the DEPLOYMENT_STORAGE_CONNECTION_STRING application setting. However, you can instead designate a blob container in a separate storage account as the deployment source for your code. You can also change the authentication method used to access the container.
A customized deployment source should meet this criteria:
When configuring deployment storage authentication, keep these considerations in mind:
Storage Blob Data Contributor role scoped to the deployment storage account also gets assigned to the identity.Storage Blob Data Contributor role scoped to the deployment storage account also gets assigned to the identity.To configure deployment settings when you create your function app in the Flex Consumption plan:
You can't currently configure deployment storage when creating your app in the Azure portal. To configure deployment storage during app creation, instead use the Azure CLI to create your app.
You can use the portal to modify the deployment settings of an existing app, as detailed in the next section.
You can also modify the deployment storage configuration for an existing app.
In your function app page in the Azure portal, expand Settings in the left menu and select Deployment settings.
Under Application package location, select an existing Storage account and then select an existing empty container in the account.
Under Storage authentication, select your preferred authentication type
If you selected Connection string, select the name of the app setting that contains the connection string for the deployment storage account.
If you selected User assigned identity, select the identity you would like to use.
Select Save to update the app.
The instance memory size used by your Flex Consumption plan can be explicitly set when you create your app. For more information about supported sizes, see Instance memory.
To set an instance memory size that's different from the default when creating your app:
When you create your app in a Flex Consumption plan in the Azure portal, you can choose your instance memory size in the Instance size field in the Basics tab. For more information, see Create a Flex Consumption app.
At any point, you can change the instance memory size setting used by your app.
In your function app page in the Azure portal, expand Settings in the left menu and select Scale and concurrency.
Select an Instance memory option and select Save to update the app.
You can set a number of always ready instances for the Per-function scaling groups or individual functions, to keep your functions loaded and ready to execute. There are three special groups, as in per-function scaling:
http - all the HTTP triggered functions in the app scale together into their own instances.durable - all the Durable triggered functions (Orchestration, Activity, Entity) in the app scale together into their own instances.blob - all the blob (Event Grid) triggered functions in the app scale together into their own instances.Use http, durable or blob as the name for the name value pair setting to configure always ready counts for these groups. For all other functions in the app you need to configure always ready for each individual function using the format function:<FUNCTION_NAME>=n.
You can't currently define always ready instances when creating your app in the Azure portal. To define always ready instances during app creation, instead use the Azure CLI to create your app.
You can use the portal to modify always ready instances on an existing app, as detailed in the next section.
You can also modify always ready instances on an existing app by adding or removing instance designations or by changing existing instance designation counts.
In your function app page in the Azure portal, expand Settings in the left menu and select Scale and concurrency.
Under Always-ready instance minimum type http, blob, durable, or a specific function name using the format function:<FUNCTION_NAME>=n in Trigger and type the Number of always-ready instances.
Select Save to update the app.
Unless you set specific limits, HTTP concurrency defaults for Flex Consumption plan apps are determined based on your instance size setting. For more information, see HTTP trigger concurrency.
Here's how you can set HTTP concurrency limits for an existing app:
In your function app page in the Azure portal, expand Settings in the left menu and select Scale and concurrency.
Under Concurrency per instance select Assign manually and type a specific limit.
Select Save to update the app.
To view the list of regions that currently support Flex Consumption plans:
If you haven't done so already, sign in to Azure:
az login
The az login command signs you into your Azure account.
Use the az functionapp list-flexconsumption-locations command to review the list of regions that currently support Flex Consumption.
az functionapp list-flexconsumption-locations --output table
When you create an app in the Azure portal or by using Visual Studio Code, currently unsupported regions are filtered out of the region list.
Events
17 Mar, 21 - 21 Mar, 10
Join the meetup series to build scalable AI solutions based on real-world use cases with fellow developers and experts.
Register nowTraining
Learning path
Create serverless applications learning path - Training
In this learning path, discover Azure Functions that create event-driven, compute-on-demand systems using server-side logic to build serverless architectures.
Certification
Microsoft Certified: Azure Developer Associate - Certifications
Build end-to-end solutions in Microsoft Azure to create Azure Functions, implement and manage web apps, develop solutions utilizing Azure storage, and more.
Documentation
Azure Functions Flex Consumption plan hosting
Running your function code in the Azure Functions Flex Consumption plan provides virtual network integration, dynamic scale (to zero), and reduced cold starts.
Azure Functions scale and hosting
Compare the various options you need to consider when choosing a hosting plan in which to run your function app in Azure Functions.
Azure Functions Consumption plan hosting
Learn about how Azure Functions Consumption plan hosting lets you run your code in an environment that scales dynamically, but you only pay for resources used during execution.