Configure and test Microsoft Entra SSO for AlertOps
Configure and test Microsoft Entra SSO with AlertOps using a test user called B.Simon. For SSO to work, you need to establish a link relationship between a Microsoft Entra user and the related user in AlertOps.
To configure and test Microsoft Entra SSO with AlertOps, perform the following steps:
Browse to Identity > Applications > Enterprise applications > AlertOps application integration page, find the Manage section and select Single sign-on.
On the Select a Single sign-on method page, select SAML.
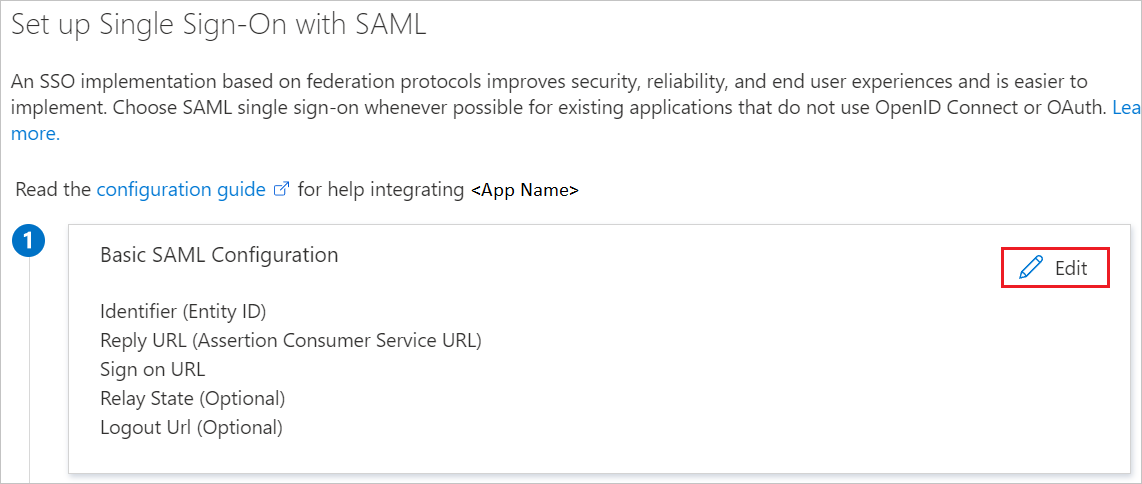
On the Set up Single Sign-On with SAML page, click the pencil icon for Basic SAML Configuration to edit the settings.
On the Basic SAML Configuration section, if you wish to configure the application in IDP initiated mode, perform the following steps:
In the Identifier text box, type a URL using the following pattern:
https://app.alertops.com/<SUBDOMAIN>
In the Reply URL text box, type a URL using the following pattern:
https://api.alertops.com/api/v2/saml/<SUBDOMAIN>
In the Logout Url (Optional) text box, type a URL using the following pattern:
https://app.alertops.com/<SUBDOMAIN>
Note
These values are not real. Update these values with the actual Identifier, Reply URL and Logout Url. Contact AlertOps Client support team to get these values. You can also refer to the patterns shown in the Basic SAML Configuration section.
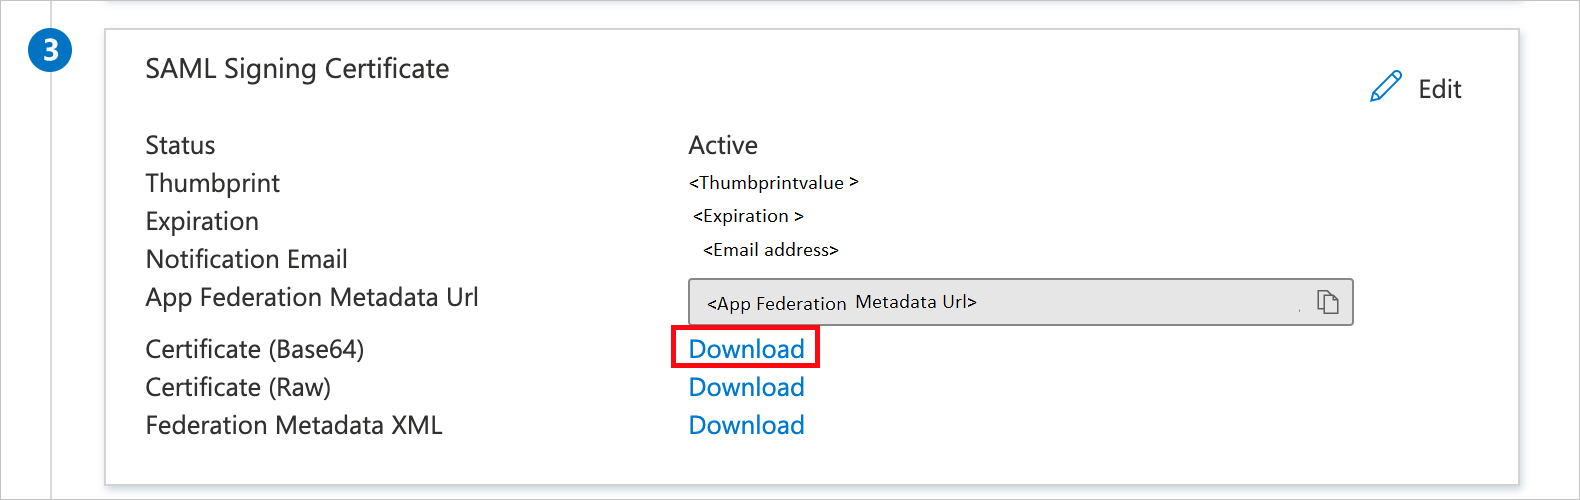
On the Set up Single Sign-On with SAML page, in the SAML Signing Certificate section, find Certificate (Base64) and select Download to download the certificate and save it on your computer.
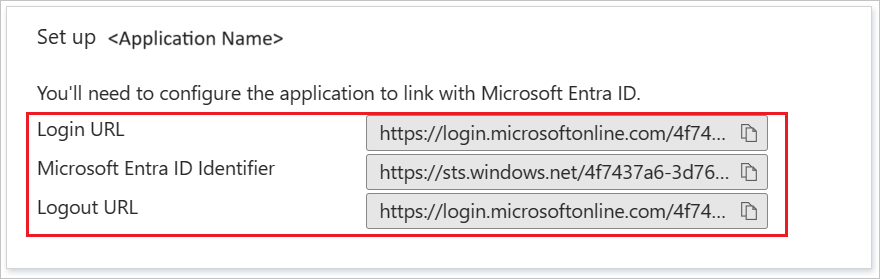
On the Set up AlertOps section, copy the appropriate URL(s) based on your requirement.
Create a Microsoft Entra test user
In this section, you'll create a test user called Britta Simon.
Browse to Identity > Applications > Enterprise applications > AlertOps.
In the app's overview page, find the Manage section and select Users and groups.
Select Add user, then select Users and groups in the Add Assignment dialog.
In the Users and groups dialog, select Britta Simon from the Users list, then click the Select button at the bottom of the screen.
If you're expecting any role value in the SAML assertion, in the Select Role dialog, select the appropriate role for the user from the list and then click the Select button at the bottom of the screen.
In the Add Assignment dialog, click the Assign button.
Configure AlertOps SSO
In a different web browser window, sign in to your AlertOps company site as an administrator
Click on the Account settings from the user profile.
On the Account Settings page, click Update SSO and select Use single sign-on (SSO)
In SSO section, perform the following steps:
a. In the Issuer URL textbox, use the identifier value, which you have used in the Basic SAML Configuration section.
b. In the SAML endpoint URL textbox, paste the Login URL value, which you copied previously.
c. In the SLO endpoint URL textbox, paste the Login URL value, which you copied previously.
d. Select SHA256 as a SAML Signature Algorithm from the dropdown.
e. Open your downloaded Certificate(Base64) file in Notepad. Copy the content of it into your clipboard, and then paste it to the X.509 Certificate text box.
f. Enable Allow username/password login.
Create AlertOps test user
In a different browser window, sign in to your AlertOps company site as administrator.
Click on the Configuration and then Users from navigation panel.
Select Add User.
On the Add User dialog, perform the following steps:
a. In the User Name textbox, enter the user name of the user like Brittasimon.
b. In the First Name textbox, enter the first name of user like Britta.
c. In the Last Name textbox, enter the first name of user like Simon.
d. In the Email textbox, enter the email address of the user like Brittasimon@contoso.com.
f. Select the User Role of the user from the dropdown as per your organization.
g. Select Submit.
Test SSO
In this section, you test your Microsoft Entra single sign-on configuration with following options.
SP initiated:
Click on Test this application, this will redirect to AlertOps Sign on URL where you can initiate the login flow.
Go to AlertOps Sign-on URL directly and initiate the login flow from there.
IDP initiated:
Click on Test this application, and you should be automatically signed in to the AlertOps for which you set up the SSO.
You can also use Microsoft My Apps to test the application in any mode. When you click the AlertOps tile in the My Apps, if configured in SP mode you would be redirected to the application sign on page for initiating the login flow and if configured in IDP mode, you should be automatically signed in to the AlertOps for which you set up the SSO. For more information about the My Apps, see Introduction to the My Apps.
Deploying and monitoring enterprise applications to Azure solutions can ensure security. Explore how to deploy on-premises and cloud based apps to users.