Quickstart: Create a new Azure API Management service instance using an ARM template
APPLIES TO: All API Management tiers
This quickstart describes how to use an Azure Resource Manager template (ARM template) to create an Azure API Management instance. You can also use ARM templates for common management tasks such as importing APIs in your API Management instance.
Azure API Management helps organizations publish APIs to external, partner, and internal developers to unlock the potential of their data and services. API Management provides the core competencies to ensure a successful API program through developer engagement, business insights, analytics, security, and protection. With API Management, create and manage modern API gateways for existing backend services hosted anywhere.
An Azure Resource Manager template is a JavaScript Object Notation (JSON) file that defines the infrastructure and configuration for your project. The template uses declarative syntax. You describe your intended deployment without writing the sequence of programming commands to create the deployment.
If your environment meets the prerequisites and you're familiar with using ARM templates, select the Deploy to Azure button. The template will open in the Azure portal.

Prerequisites
If you don't have an Azure subscription, create a free account before you begin.
Review the template
The template used in this quickstart is from Azure Quickstart Templates.
{
  "$schema": "https://schema.management.azure.com/schemas/2019-04-01/deploymentTemplate.json#",
  "contentVersion": "1.0.0.0",
  "metadata": {
    "_generator": {
      "name": "bicep",
      "version": "0.26.54.24096",
      "templateHash": "15176578550391235821"
    }
  },
  "parameters": {
    "apiManagementServiceName": {
      "type": "string",
      "defaultValue": "[format('apiservice{0}', uniqueString(resourceGroup().id))]",
      "metadata": {
        "description": "The name of the API Management service instance"
      }
    },
    "publisherEmail": {
      "type": "string",
      "minLength": 1,
      "metadata": {
        "description": "The email address of the owner of the service"
      }
    },
    "publisherName": {
      "type": "string",
      "minLength": 1,
      "metadata": {
        "description": "The name of the owner of the service"
      }
    },
    "sku": {
      "type": "string",
      "defaultValue": "Developer",
      "allowedValues": [
        "Consumption",
        "Developer",
        "Basic",
        "Basicv2",
        "Standard",
        "Standardv2",
        "Premium"
      ],
      "metadata": {
        "description": "The pricing tier of this API Management service"
      }
    },
    "skuCount": {
      "type": "int",
      "defaultValue": 1,
      "allowedValues": [
        0,
        1,
        2
      ],
      "metadata": {
        "description": "The instance size of this API Management service."
      }
    },
    "location": {
      "type": "string",
      "defaultValue": "[resourceGroup().location]",
      "metadata": {
        "description": "Location for all resources."
      }
    }
  },
  "resources": [
    {
      "type": "Microsoft.ApiManagement/service",
      "apiVersion": "2023-05-01-preview",
      "name": "[parameters('apiManagementServiceName')]",
      "location": "[parameters('location')]",
      "sku": {
        "name": "[parameters('sku')]",
        "capacity": "[parameters('skuCount')]"
      },
      "properties": {
        "publisherEmail": "[parameters('publisherEmail')]",
        "publisherName": "[parameters('publisherName')]"
      }
    }
  ]
}
The following resource is defined in the template:
More Azure API Management template samples can be found in Azure Quickstart Templates.
Deploy the template
Select the following image to sign in to Azure and open a template. The template creates an API Management service instance with an automatically generated name.
In this example, the instance is configured in the Developer tier, an economical option to evaluate Azure API Management. This tier isn't for production use. For more information about scaling the API Management tiers, see upgrade and scale.
Select or enter the following values.
- Subscription: select an Azure subscription.
- Resource group: select Create new, enter a unique name for the resource group, and then select OK.
- Region: select a location for the resource group. Example: Central US.
- Publisher Email: enter an email address to receive notifications.
- Publisher Name: enter a name you choose for the API publisher.
- Sku: accept the default value of Developer. Alternatively, choose another value.
- Sku Count: accept the default value.
- Location: accept the generated location for the API Management service.
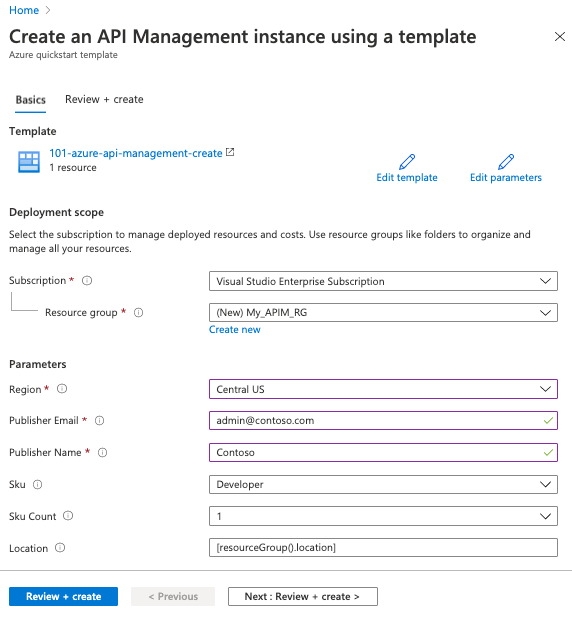
Select Review + Create, then review the terms and conditions. If you agree, select Create.
Tip
It can take between 30 and 40 minutes to create and activate an API Management service in the Developer tier. Times vary by tier.
After the instance has been created successfully, you get a notification:
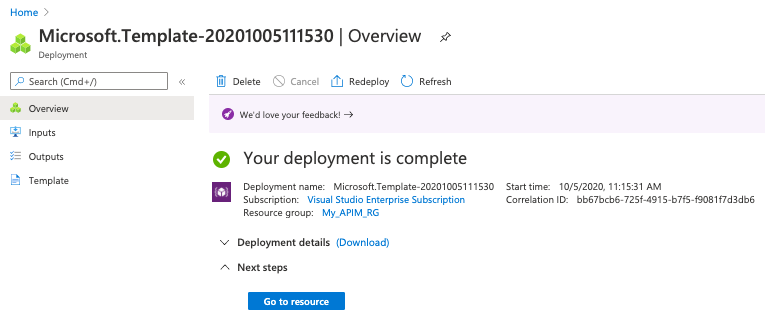
The Azure portal is used to deploy the template. In addition to the Azure portal, you can use the Azure PowerShell, Azure CLI, and REST API. To learn other deployment methods, see Deploy templates.
Review deployed resources
Use the Azure portal to check the deployed resources, or use tools such as the Azure CLI or Azure PowerShell to list the deployed resources.
- In the Azure portal, search for and select API Management services, and select the service instance you created.
- Review the properties of your service on the Overview page.
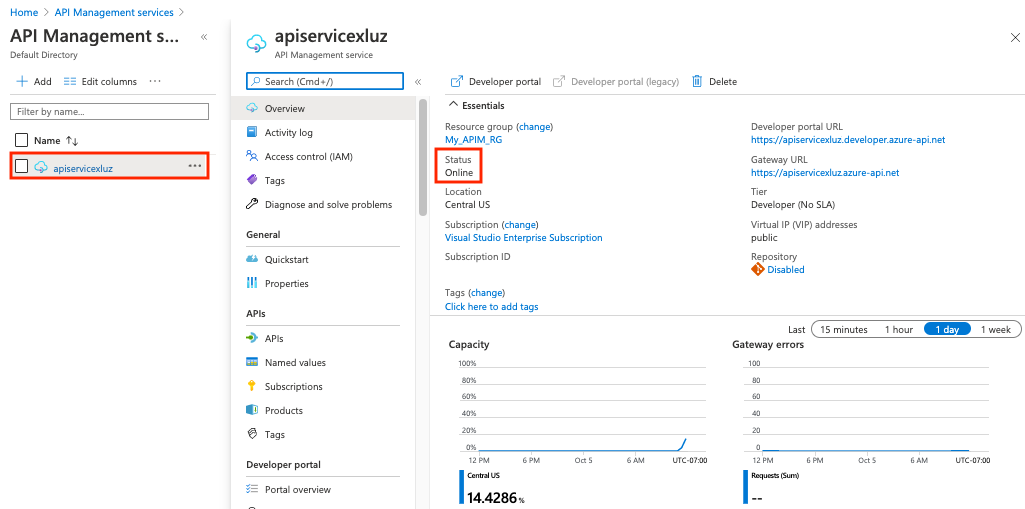
When your API Management service instance is online, you're ready to use it. Start with the tutorial to import and publish your first API.
Clean up resources
If you plan to continue working with subsequent tutorials, you might want to leave the API Management instance in place. When no longer needed, delete the resource group, which deletes the resources in the resource group.
In the Azure portal, search for and select Resource groups. You can also select Resource groups on the Home page.
On the Resource groups page, select your resource group.
On the resource group page, select Delete resource group.
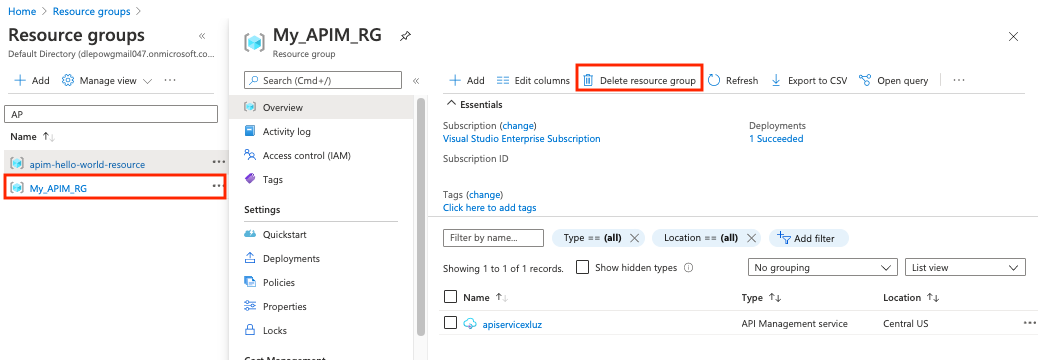
Type the name of your resource group, and then select Delete.
Next steps
Feedback
Coming soon: Throughout 2024 we will be phasing out GitHub Issues as the feedback mechanism for content and replacing it with a new feedback system. For more information see: https://aka.ms/ContentUserFeedback.
Submit and view feedback for