Tutorial: Prerequisites for availability groups in multiple subnets (SQL Server on Azure VMs)
Applies to: ![]() SQL Server on Azure VM
SQL Server on Azure VM
Tip
There are many methods to deploy an availability group. Simplify your deployment and eliminate the need for an Azure Load Balancer or distributed network name (DNN) for your Always On availability group by creating your SQL Server virtual machines (VMs) in multiple subnets within the same Azure virtual network. If you've already created your availability group in a single subnet, you can migrate it to a multi-subnet environment.
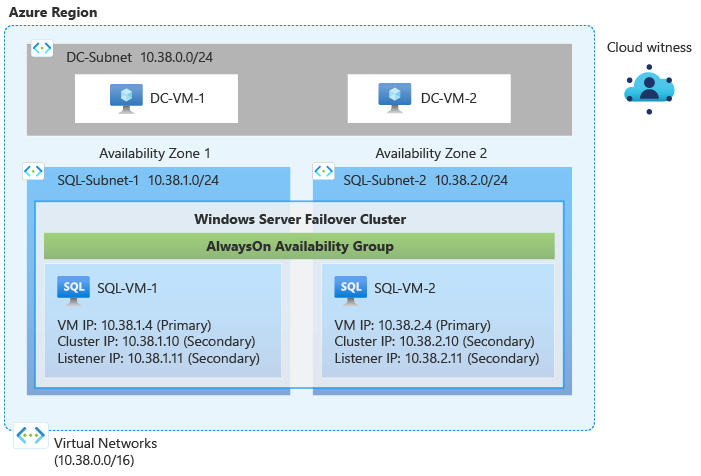
In this tutorial, complete the prerequisites for creating an Always On availability group for SQL Server on Azure Virtual Machines (VMs) in multiple subnets. At the end of this tutorial, you will have a domain controller on two Azure virtual machines, two SQL Server VMs in multiple subnets, and a storage account in a single resource group.
Time estimate: This tutorial creates several resources in Azure and may take up to 30 minutes to complete.
The following diagram illustrates the resources you deploy in this tutorial:
Prerequisites
To complete this tutorial, you need the following:
- An Azure subscription. You can open a free Azure account or activate Visual Studio subscriber benefits.
- A basic understanding of, and familiarity with, Always On availability groups in SQL Server.
Create resource group
To create the resource group in the Azure portal, follow these steps:
Sign in to the Azure portal.
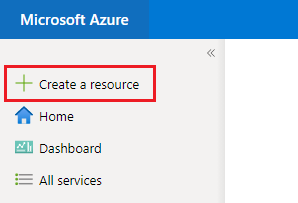
Select + Create a resource to create a new resource in the portal.
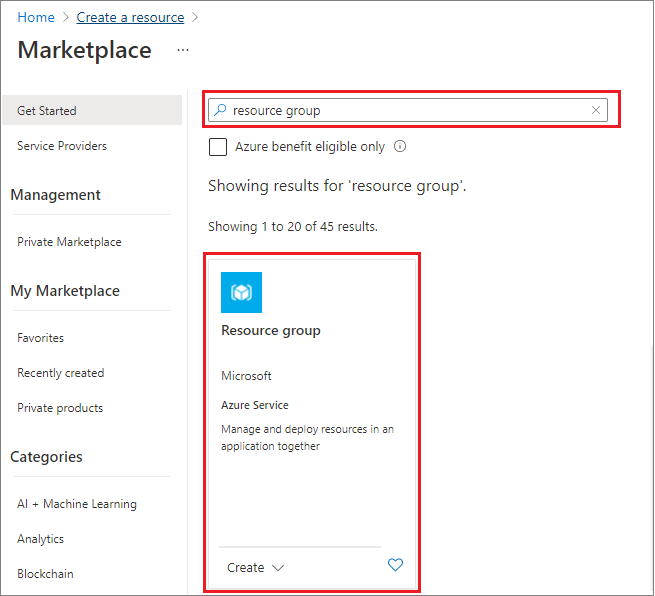
Search for resource group in the Marketplace search box and choose the Resource group tile from Microsoft. Select Create on the Resource group page.
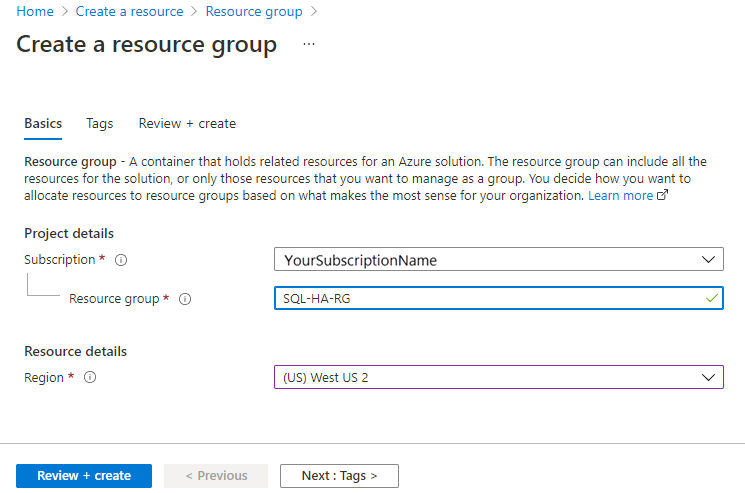
On the Create a resource group page, fill out the values to create the resource group:
- Choose the appropriate Azure subscription from the drop-down.
- Provide a name for your resource group, such as SQL-HA-RG.
- Choose a region from the drop-down, such as West US 2. Be sure to deploy all subsequent resources to this location as well.
- Select Review + create to review your resource parameters, and then select Create to create your resource group.
Create network and subnets
Next, create the virtual network and three subnets. To learn more, see Virtual network overview.
To create the virtual network in the Azure portal, follow these steps:
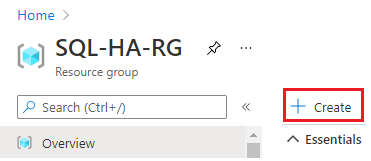
Go to your resource group in the Azure portal and select + Create
Search for virtual network in the Marketplace search box and choose the virtual network tile from Microsoft. Select Create on the Virtual network page.
On the Create virtual network page, enter the following information on the Basics tab:
- Under Project details, choose the appropriate Azure Subscription, and the Resource group you created previously, such as SQL-HA-RG.
- Under Instance details, provide a name for your virtual network, such as SQLHAVNET, and choose the same region as your resource group from the drop-down.

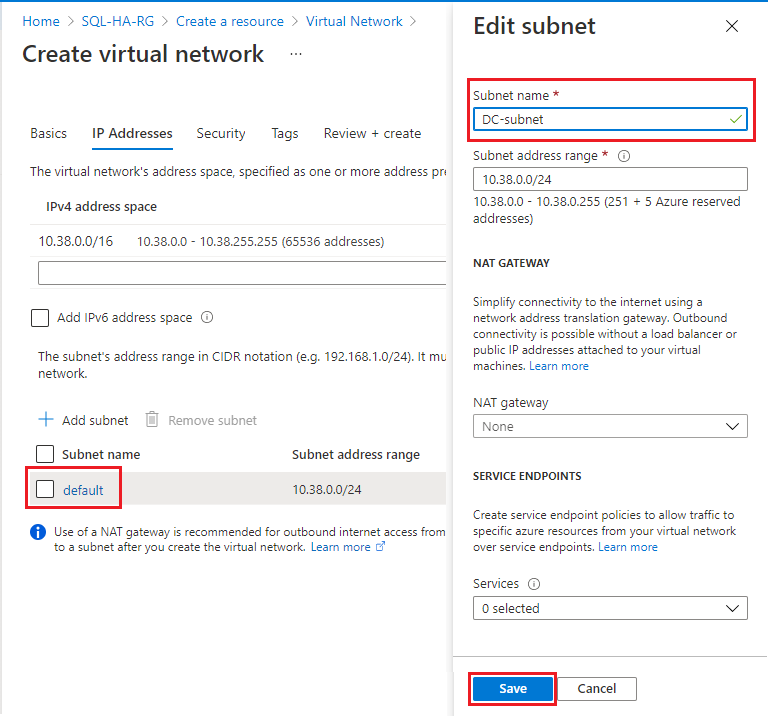
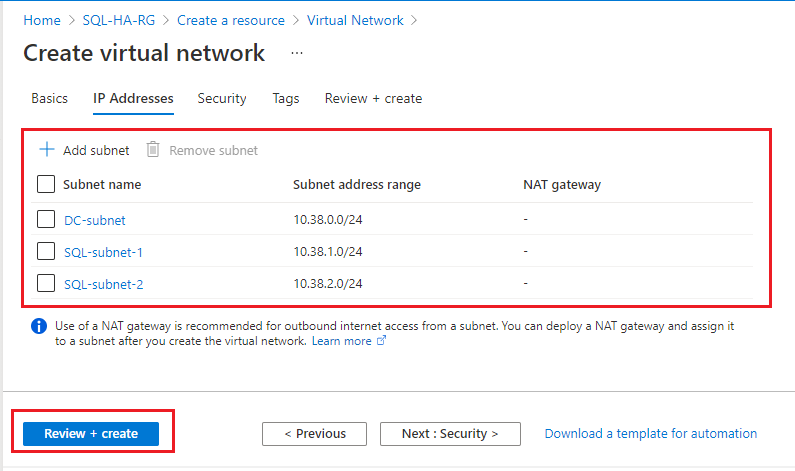
On the IP addresses tab, select the default subnet to open the Edit subnet page. Change the name to DC-subnet to use for the domain controller subnet. Select Save.
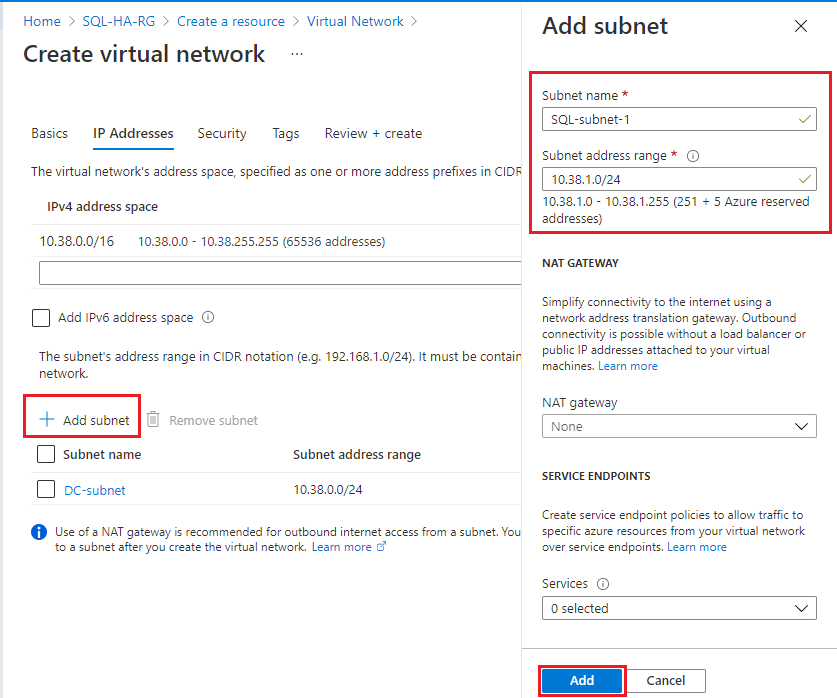
Select + Add subnet to add an additional subnet for your first SQL Server VM, and fill in the following values:
- Provide a value for the Subnet name, such as SQL-subnet-1.
- Provide a unique subnet address range within the virtual network address space. For example, you can iterate the third octet of DC-subnet address range by 1.
- For example, if your DC-subnet range is 10.38.0.0/24, enter the IP address range
10.38.1.0/24for SQL-subnet-1. - Likewise, if your DC-subnet IP range is 10.5.0.0/24, then enter
10.5.1.0/24for the new subnet.
- For example, if your DC-subnet range is 10.38.0.0/24, enter the IP address range
- Select Add to add your new subnet.
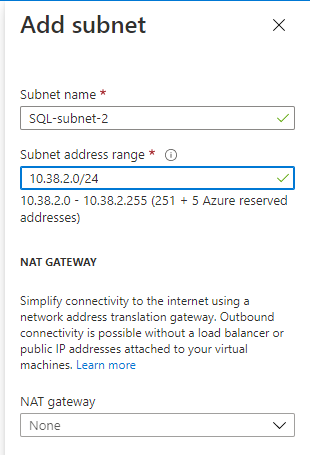
Repeat the previous step to add an additional unique subnet range for your second SQL Server VM with a name such as SQL-subnet-2. You can iterate the third octet by one again.
- For example, if your DC-subnet IP range is 10.38.0.0/24, and your SQL-subnet-1 is 10.38.1.0/24, then enter
10.38.2.0/24for the new subnet. - Likewise, if your DC-subnet IP range is 10.5.0.0/24, and your SQL-subnet-1 is 10.5.1.0/24, then enter the IP address range
10.5.2.0/24for SQL-subnet-2.
- For example, if your DC-subnet IP range is 10.38.0.0/24, and your SQL-subnet-1 is 10.38.1.0/24, then enter
After you've added the second subnet, review your subnet names and ranges (your IP address ranges may differ from the image). If everything looks correct, select Review + create, then Create to create your new virtual network.
Azure returns you to the portal dashboard and notifies you when the new network is created.
Create domain controllers
After your network and subnets are ready, create a virtual machine (or two optionally, for high availability) and configure it as your domain controller.
Create DC virtual machines
To create your domain controller (DC) virtual machines in the Azure portal, follow these steps:
Go to your resource group in the Azure portal and select + Create
Search for Windows Server in the Marketplace search box.
On the Windows Server tile from Microsoft, select the Create drop-down and choose the Windows Server 2016 Datacenter image.
Fill out the values on the Create a virtual machine page to create your domain controller VM, such as DC-VM-1. Optionally, create an additional VM, such as DC-VM-2 to provide high availability for the Active Directory Domain Services. Use the values in the following tablet to create your VM(s):
Field Value Subscription Your subscription Resource group SQL-HA-RG Virtual machine name First domain controller: DC-VM-1.
Second domain controller DC-VM-2.Region The location where you deployed your resource group and virtual network. Availability options Availability zone
For Azure regions that do not support Availability zones, use Availability sets instead. Create a new availability set and place all VMs created in this tutorial inside the availability set.Availability zone Specify 1 for DC-VM-1.
Specify 2 for DC-VM-2.Size D2s_v3 (2 vCPUs, 8 GB RAM) User name DomainAdmin Password Contoso!0000 Public inbound ports Allow selected ports Select inbound ports RDP (3389) OS disk type Premium SSD (locally redundant storage) Virtual network SQLHAVNET Subnet DC-subnet Public IP Same name as the VM, such as DC-VM-1 or DC-VM-2 NIC network security group Basic Public inbound ports Allow selected ports Select inbound ports RDP (3389) Boot diagnostics Enable with managed storage account (recommended). Azure notifies you when your virtual machines are created and ready to use.
Configure the domain controller
After your DC virtual machines are ready, configure the domain controller for corp.contoso.com.
To configure DC-VM-1 as the domain controller, follow these steps:
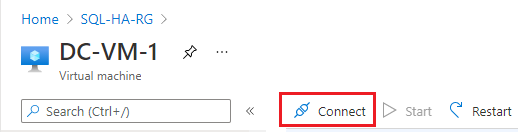
Go to your resource group in the Azure portal and select the DC-VM-1 machine.
On the DC-VM-1 page, select Connect to download an RDP file for remote desktop access and then open the file.
Connect to the RDP session using your configured administrator account (DomainAdmin) and password (Contoso!0000).
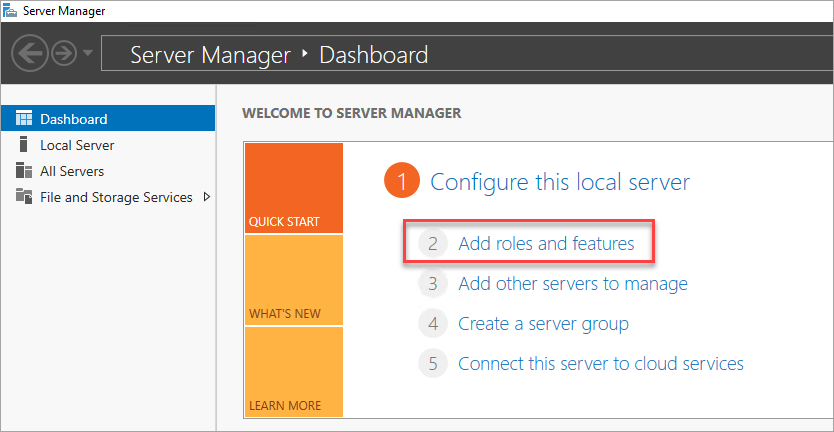
Open the Server Manager dashboard (which may open by default) and choose to Add roles and features.
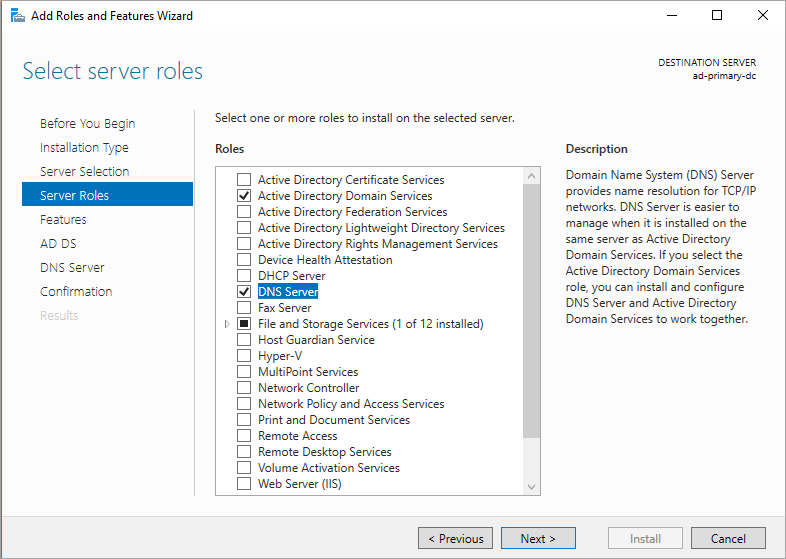
Select Next until you get to the Server Roles section.
Select the Active Directory Domain Services and DNS Server roles. When you're prompted, add any additional features that are required by these roles.
Note
Windows warns you that there is no static IP address. If you're testing the configuration, select Continue. For production scenarios, set the IP address to static in the Azure portal, or use PowerShell to set the static IP address of the domain controller machine.
Select Next until you reach the Confirmation section. Select the Restart the destination server automatically if required check box.
Select Install.
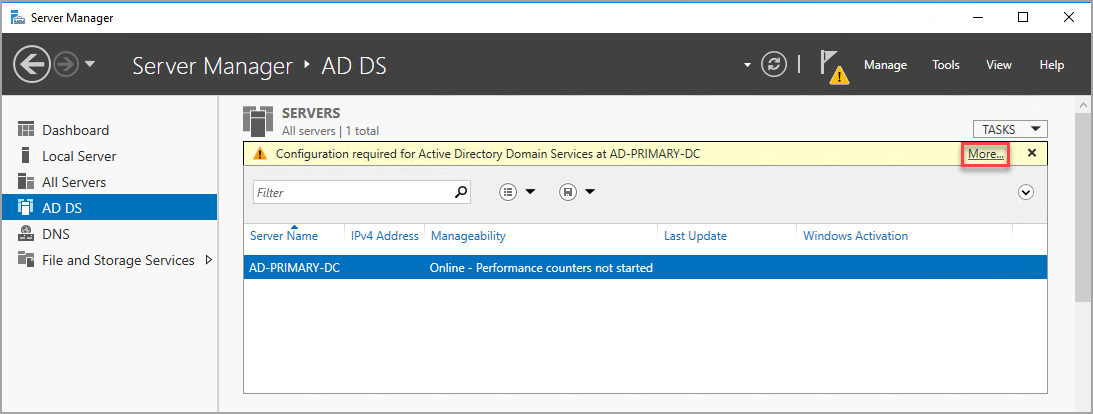
After the features finish installing, return to the Server Manager dashboard.
Select the new AD DS option on the left-hand pane.
Select the More link on the yellow warning bar.
In the Action column of the All Server Task Details dialog, select Promote this server to a domain controller.
In the Active Directory Domain Services Configuration Wizard, use the following values:
Page Setting Deployment Configuration Add a new forest
Root domain name = corp.contoso.comDomain Controller Options DSRM Password = Contoso!0000
Confirm Password = Contoso!0000Select Next to go through the other pages in the wizard. On the Prerequisites Check page, verify that you see the following message: All prerequisite checks passed successfully. You can review any applicable warning messages, but it's possible to continue with the installation.
Select Install. The DC-VM-1 virtual machine automatically restarts.
Identify DNS IP address
Use the primary domain controller for DNS. To do so, identify the private IP address of the VM used for the primary domain controller.
To identify the private IP address of the VM in the Azure portal, follow these steps:
- Go to your resource group in the Azure portal and select the primary domain controller, DC-VM-1.
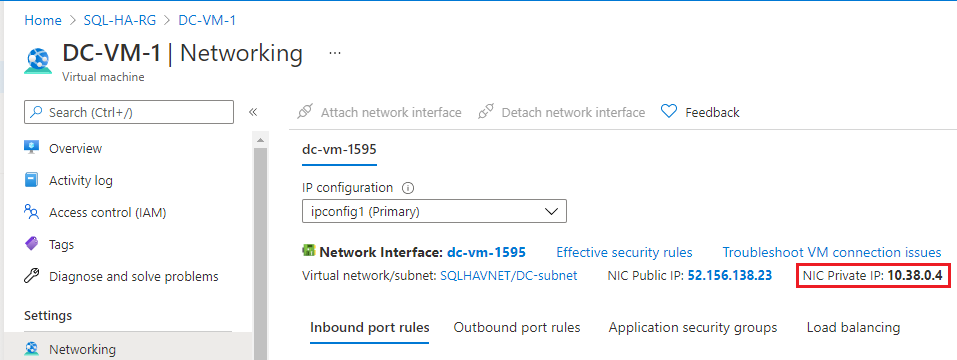
- On the DC-VM-1 page, choose Networking in the Settings pane.
- Note the NIC Private IP address. Use this IP address as the DNS server for the other virtual machines. In the example image, the private IP address is 10.38.0.4.
Configure virtual network DNS
After you create the first domain controller and enable DNS, configure the virtual network to use this VM for DNS.
To configure your virtual network for DNS, follow these steps:
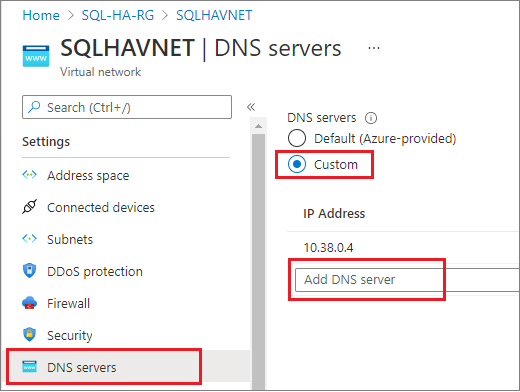
- Go to your resource group in the Azure portal, and select your virtual network, such as SQLHAVNET.
- Select DNS servers under the Settings pane and then select Custom.
- Enter the private IP address you identified previously in the IP Address field, such as
10.38.0.4. - Select Save.
Configure second domain controller
After the primary domain controller restarts, you can optionally configure the second domain controller for the purpose of high availability. If you do not want to configure a second domain controller, skip this step. However, a second domain controller is recommended in production environments.
Set the preferred DNS server address, join the domain, and then configure the secondary domain controller.
Set preferred DNS server address
The preferred DNS server address should not be updated directly within a VM, it should be edited from the Azure portal, or PowerShell, or Azure CLI. The steps below are to make the change inside of the Azure portal:
Sign-in to the Azure portal.
In the search box at the top of the portal, enter Network interface. Select Network interfaces in the search results.
Select the network interface for the second domain controller that you want to view or change settings for from the list.
In Settings, select DNS servers.
Select either:
Inherit from virtual network: Choose this option to inherit the DNS server setting defined for the virtual network the network interface is assigned to. This would automatically inherit the primary domain controller as the DNS server.
Custom: You can configure your own DNS server to resolve names across multiple virtual networks. Enter the IP address of the server you want to use as a DNS server. The DNS server address you specify is assigned only to this network interface and overrides any DNS setting for the virtual network the network interface is assigned to. If you select custom, then input the IP address of the primary domain controller, such as
10.38.0.4.
Select Save.
If using a Custom DNS Server, return to the virtual machine in the Azure portal and restart the VM.
Join the domain
Next, join the corp.contoso.com domain. To do so, follow these steps:
- Remotely connect to the virtual machine using the BUILTIN\DomainAdmin account. This account is the same one used when creating the domain controller virtual machines.
- Open Server Manager, and select Local Server.
- Select WORKGROUP.
- In the Computer Name section, select Change.
- Select the Domain checkbox and type corp.contoso.com in the text box. Select OK.
- In the Windows Security popup dialog, specify the credentials for the default domain administrator account (CORP\DomainAdmin) and the password (Contoso!0000).
- When you see the "Welcome to the corp.contoso.com domain" message, select OK.
- Select Close, and then select Restart Now in the popup dialog.
Configure domain controller
Once your server has joined the domain, you can configure it as the second domain controller. To do so, follow these steps:
If you're not already connected, open an RDP session to your secondary domain controller, and open Server Manager Dashboard (which may be open by default).
Select the Add roles and features link on the dashboard.
Select Next until you get to the Server Roles section.
Select the Active Directory Domain Services and DNS Server roles. When you're prompted, add any additional features that are required by these roles.
After the features finish installing, return to the Server Manager dashboard.
Select the new AD DS option on the left-hand pane.
Select the More link on the yellow warning bar.
In the Action column of the All Server Task Details dialog, select Promote this server to a domain controller.
Under Deployment Configuration, select Add a domain controller to an existing domain.
Click Select.
Connect by using the administrator account (CORP.CONTOSO.COM\domainadmin) and password (Contoso!0000).
In Select a domain from the forest, choose your domain and then select OK.
In Domain Controller Options, use the default values and set a DSRM password.
Note
The DNS Options page might warn you that a delegation for this DNS server can't be created. You can ignore this warning in non-production environments.
Select Next until the dialog reaches the Prerequisites check. Then select Install.
After the server finishes the configuration changes, restart the server.
Add second DC IP address to DNS
After your second domain controller is configured, follow the same steps as before to identify the private IP address of the VM, and add the private IP address as a secondary custom DNS server in the virtual network of your resource group. Adding the secondary DNS server in the Azure portal enables redundancy of the DNS service.
Configure domain accounts
After your domain controller(s) have been configured, and you've set your DNS server(s) in the Azure portal, create domain accounts for the user who is installing SQL Server, and for the SQL Server service account.
Configure two accounts in total, one installation account and then a service account for both SQL Server VMs. For example, use the values in the following table for the accounts:
| Account | VM | Full domain name | Description |
|---|---|---|---|
| Install | Both | Corp\Install | Log in to either VM with this account to configure the cluster and availability group. |
| SQLSvc | Both | Corp\SQLSvc | Use this account for the SQL Server service on both SQL Server VMs. |
Follow these steps to create each account:
Connect to your primary domain controller machine, such as DC-VM-1.
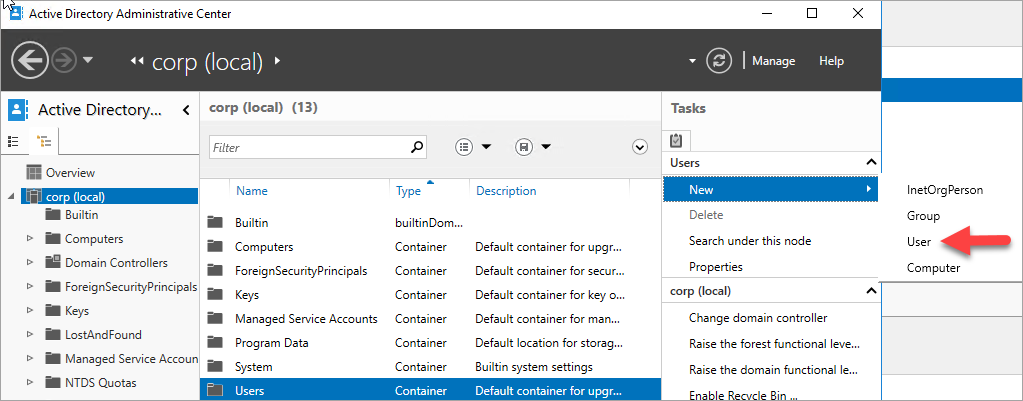
In Server Manager, select Tools, and then select Active Directory Administrative Center.
Select corp (local) from the left pane.
On the right Tasks pane, select New, and then select User.
Enter in the new user account and set a complex password. For non-production environments, set the user account to never expire.
Select OK to create the user.
Repeat these steps to create all accounts.
Grant installation account permissions
Once the accounts are created, grant required domain permissions to the installation account so the account is able to create objects in AD.
To grant the permissions to the installation account, follow these steps:
Open the Active Directory Administrative Center from Server Manager, if it's not open already.
Select corp (local) in the left pane.
In the right-hand Tasks pane, verify you see corp (local) in the drop-down, and then select Properties underneath.
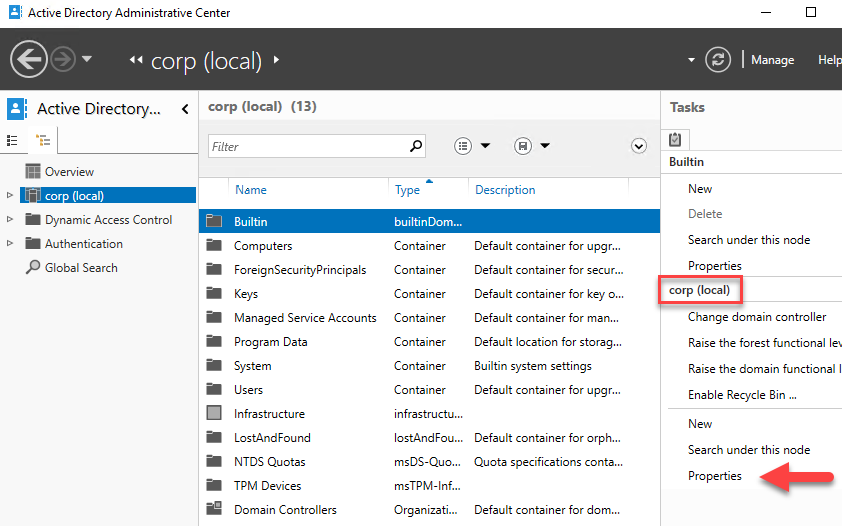
Select Extensions, and then select the Advanced button on the Security tab.
On the Advanced Security Settings for corp dialog box, select Add.
Select Select a principal, search for CORP\Install, and then select OK.
Check the boxes next to Read all properties and Create Computer Objects.
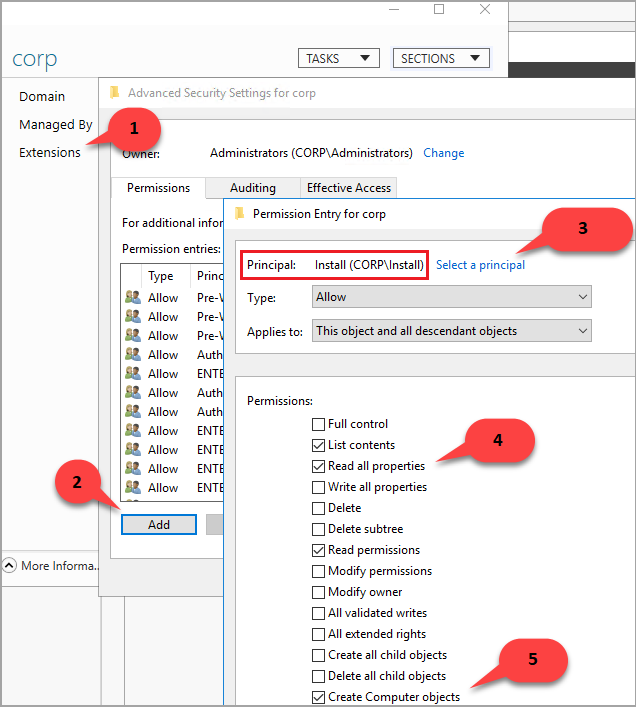
Select OK, and then select OK again. Close the corp properties window.
Now that you've finished configuring Active Directory and the user objects, you are ready to create your SQL Server VMs.
Create SQL Server VMs
Once your AD, DNS, and user accounts are configured, you are ready to create your SQL Server VMs. For simplicity, use the SQL Server VM images in the marketplace.
However, before creating your SQL Server VMs, consider the following design decisions:
Availability - Availability Zones
For the highest level of redundancy, resiliency and availability deploy the VMs within separate Availability Zones. Availability Zones are unique physical locations within an Azure region. Each zone is made up of one or more datacenters with independent power, cooling, and networking. For Azure regions that do not support Availability Zones yet, use Availability Sets instead. Place all the VMs within the same Availability Set.
Storage - Azure Managed Disks
For the virtual machine storage, use Azure Managed Disks. Microsoft recommends Managed Disks for SQL Server virtual machines as they handle storage behind the scenes. For more information, see Azure Managed Disks Overview.
Network - Private IP addresses in production
For the virtual machines, this tutorial uses public IP addresses. A public IP address enables remote connection directly to the virtual machine over the internet and makes configuration steps easier. In production environments, Microsoft recommends only private IP addresses in order to reduce the vulnerability footprint of the SQL Server instance VM resource.
Network - Single NIC per server
Use a single NIC per server (cluster node). Azure networking has physical redundancy, which makes additional NICs unnecessary on a failover cluster deployed to an Azure virtual machine. The cluster validation report warns you that the nodes are reachable only on a single network. You can ignore this warning when your failover cluster is on Azure virtual machines.
To create your VMs, follow these steps:
Go to your resource group in the Azure portal and select + Create.
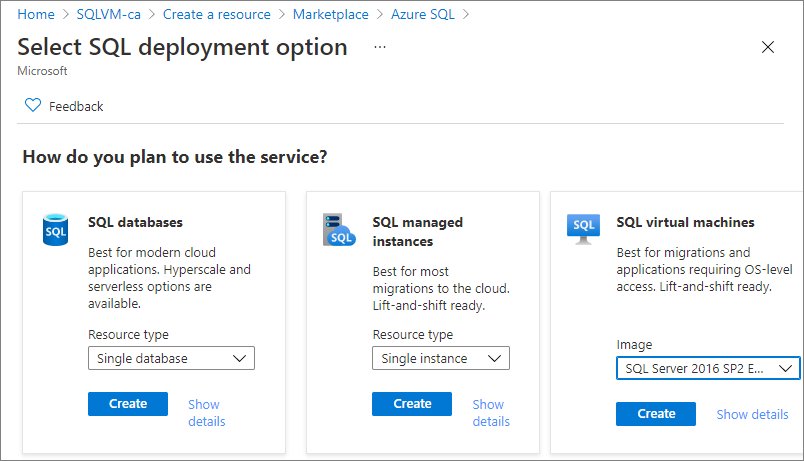
Search for Azure SQL and select the Azure SQL tile from Microsoft.
On the Azure SQL page, select Create and then choose the SQL Server 2016 SP2 Enterprise on Windows Server 2016 image from the drop-down.
Use the following table to fill out the values on the Create a virtual machine page to create both SQL Server VMs, such as SQL-VM-1 and SQL-VM-2 (your IP addresses may differ from the examples in the table):
| Configuration | SQL-VM-1 | SQL-VM-2 |
|---|---|---|
| Gallery image | SQL Server 2016 SP2 Enterprise on Windows Server 2016 | SQL Server 2016 SP2 Enterprise on Windows Server 2016 |
| VM basics | Name = SQL-VM-1 User Name = DomainAdmin Password = Contoso!0000 Subscription = Your subscription Resource group = SQL-HA-RG Location = Your Azure location |
Name = SQL-VM-2 User Name = DomainAdmin Password = Contoso!0000 Subscription = Your subscription Resource group = SQL-HA-RG Location = Your Azure location |
| VM Size | SIZE = E2ds_v4 (2 vCPUs, 16 GB RAM) |
SIZE = E2ds_v4 (2 vCPUs, 16 GB RAM) |
| VM Settings | Availability options = Availability zone Availability zone = 1 Public inbound ports = Allow selected ports Select inbound ports = RDP (3389) OS disk type = Premium SSD (locally redundant storage) Virtual network = SQLHAVNET Subnet = SQL-subnet-1(10.38.1.0/24) Public IP address = Automatically generated. NIC network security group = Basic Public inbound ports = Allow selected ports Select inbound ports = RDP (3389) Boot Diagnostics = Enable with managed storage account (recommended) |
Availability options = Availability zone Availability zone = 2 Public inbound ports = Allow selected ports Select inbound ports = RDP (3389) OS disk type = Premium SSD (locally redundant storage) Virtual network = SQLHAVNET Subnet = SQL-subnet-2(10.38.2.0/24) Public IP address = Automatically generated. NIC network security group = Basic Public inbound ports = Allow selected ports Select inbound ports = RDP (3389) Boot Diagnostics = Enable with managed storage account (recommended) |
| SQL Server settings | SQL connectivity = Private (within Virtual Network) Port = 1433 SQL Authentication = Disable Azure Key Vault integration = Disable Storage optimization = Transactional processing SQL Data = 1024 GiB, 5000 IOPS, 200 MB/s SQL Log = 1024 GiB, 5000 IOPS, 200 MB/s SQL TempDb = Use local SSD drive Automated patching = Sunday at 2:00 Automated backup = Disable |
SQL connectivity = Private (within Virtual Network) Port = 1433 SQL Authentication = Disable Azure Key Vault integration = Disable Storage optimization = Transactional processing SQL Data = 1024 GiB, 5000 IOPS, 200 MB/s SQL Log = 1024 GiB, 5000 IOPS, 200 MB/s SQL TempDb = Use local SSD drive Automated patching = Sunday at 2:00 Automated backup = Disable |
Note
These suggested machine sizes are only intended for testing availability groups in Azure Virtual Machines. For optimized production workloads, see the size recommendations in Performance best practices for SQL Server on Azure VMs.
Configure SQL Server VMs
After VM creation completes, configure your SQL Server VMs by adding a secondary IP address to each VM, and joining them to the domain.
Add secondary IPs to SQL Server VMs
In the multi-subnet environment, assign secondary IP addresses to each SQL Server VM to use for the availability group listener, and for Windows Server 2016 and earlier, assign secondary IP addresses to each SQL Server VM for the cluster IP address as well. Doing this negates the need for an Azure Load Balancer, as is the requirement in a single subnet environment.
On Windows Server 2016 and earlier, you need to assign an additional secondary IP address to each SQL Server VM to use for the windows cluster IP since the cluster uses the Cluster Network Name rather than the default Distributed Network Name (DNN) introduced in Windows Server 2019. With a DNN, the cluster name object (CNO) is automatically registered with the IP addresses for all the nodes of the cluster, eliminating the need for a dedicated windows cluster IP address.
If you're on Windows Server 2016 and prior, follow the steps in this section to assign a secondary IP address to each SQL Server VM for both the availability group listener, and the cluster.
If you're on Windows Server 2019 or later, only assign a secondary IP address for the availability group listener, and skip the steps to assign a windows cluster IP, unless you plan to configure your cluster with a virtual network name (VNN), in which case assign both IP addresses to each SQL Server VM as you would for Windows Server 2016.
To assign additional secondary IPs to the VMs, follow these steps:
Go to your resource group in the Azure portal and select the first SQL Server VM, such as SQL-VM-1.
Select Networking in the Settings pane, and then select the Network Interface:
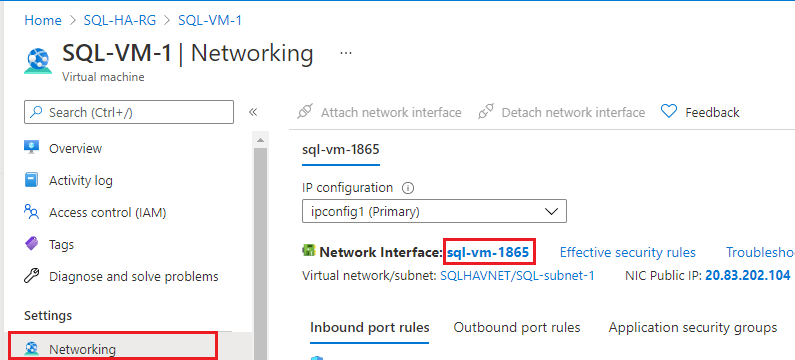
On the Network Interface page, select IP configurations in the Settings pane and then choose + Add to add an additional IP address:
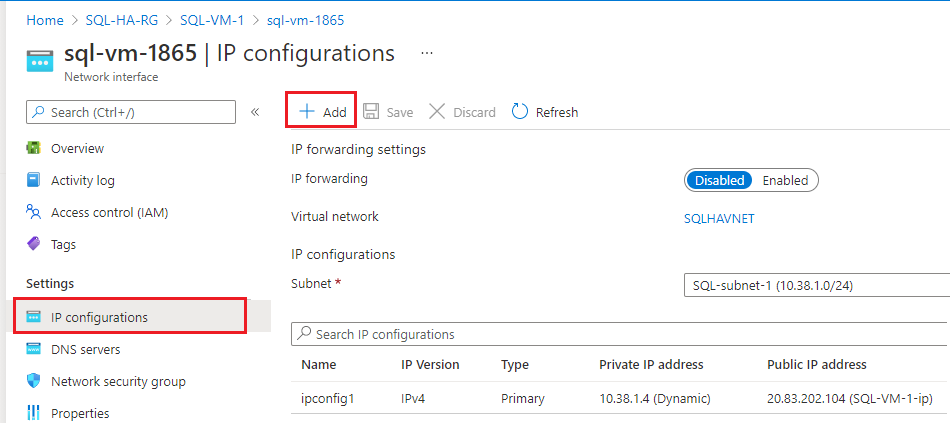
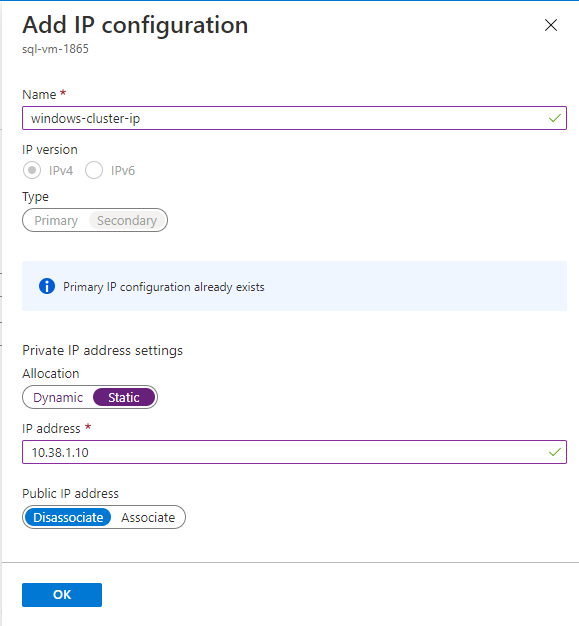
On the Add IP configuration page, do the following:
- Specify the Name as the Windows Cluster IP, such as windows-cluster-ip for Windows 2016 and earlier. Skip this step if you're on Windows Server 2019 or later.
- Set the Allocation to Static.
- Enter an unused IP address in the same subnet (SQL-subnet-1) as the SQL Server VM (SQL-VM-1), such as
10.38.1.10. - Leave the Public IP address at the default of Disassociate.
- Select OK to finish adding the IP configuration.
Select + Add again to configure an additional IP address for the availability group listener (with a name such as availability-group-listener), again specifying an unused IP address in SQL-subnet-1 such as
10.38.1.11: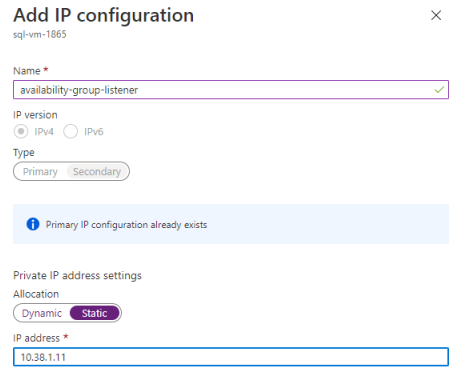
Repeat these steps again for the second SQL Server VM, such as SQL-VM-2. Assign two unused secondary IP addresses within SQL-subnet-2. Use the values from the following table to add the IP configuration:
Field Input Input Name windows-cluster-ip availability-group-listener Allocation Static Static IP address 10.38.2.10 10.38.2.11
Now you are ready to join the corp.contoso.com.
Join the servers to the domain
Once your two secondary IP addresses have been assigned to both SQL Server VMs, join each SQL Server VM to the corp.contoso.com domain.
To join the corp.contoso.com domain, follow the same steps for the SQL Server VM as you did when you joined the domain with the secondary domain controller.
Wait for each SQL Server VM to restart, and then you can add your accounts.
Add accounts
Add the installation account as an administrator on each VM, grant permission to the installation account and local accounts within SQL Server, and update the SQL Server service account.
Add install account
Once both SQL Server VMs have joined the domain, add CORP\Install as a member of the local administrators group.
Tip
Be sure you sign in with the domain administrator account. In previous steps, you were using the BUILTIN administrator account. Now that the server is part of the domain, use the domain account. In your RDP session, specify DOMAIN\username, such as CORP\DomainAdmin.
To add the account as an admin, follow these steps:
- Wait until the VM is restarted, then launch the RDP file again from the first SQL Server VM to sign in to SQL-VM-1 by using the CORP\DomainAdmin account.
- In Server Manager, select Tools, and then select Computer Management.
- In the Computer Management window, expand Local Users and Groups, and then select Groups.
- Double-click the Administrators group.
- In the Administrators Properties dialog, select the Add button.
- Enter the user CORP\Install, and then select OK.
- Select OK to close the Administrator Properties dialog.
- Repeat these steps on SQL-VM-2.
Add account to sysadmin
The installation account (CORP\install) used to configure the availability group must be part of the sysadmin fixed server role on each SQL Server VM.
To grant sysadmin rights to the installation account, follow these steps:
- Connect to the server through the Remote Desktop Protocol (RDP) by using the <MachineName>\DomainAdmin account, such as
SQL-VM-1\DomainAdmin. - Open SQL Server Management Studio and connect to the local instance of SQL Server.
- In Object Explorer, select Security.
- Right-click Logins. Select New Login.
- In Login - New, select Search.
- Select Locations.
- Enter the domain administrator network credentials.
- Use the installation account (CORP\install).
- Set the sign-in to be a member of the sysadmin fixed server role.
- Select OK.
- Repeat these steps on the second SQL Server VM, such as SQL-VM-2, connecting with the relevant machine name account, such as
SQL-VM-2\DomainAdmin.
Add system account
In later versions of SQL Server, the [NT AUTHORITY\SYSTEM] account does not have permissions to SQL Server by default, and must be granted manually.
To add the [NT AUTHORITY\SYSTEM] and grant appropriate permissions, follow these steps:
Connect to the first SQL Server VM through the Remote Desktop Protocol (RDP) by using the <MachineName>\DomainAdmin account, such as
SQL-VM-1\DomainAdmin.Open SQL Server Management Studio and connect to the local instance of SQL Server.
Create an account for
[NT AUTHORITY\SYSTEM]on each SQL Server instance by using the following Transact-SQL (T-SQL) command:USE [master] GO CREATE LOGIN [NT AUTHORITY\SYSTEM] FROM WINDOWS WITH DEFAULT_DATABASE=[master] GOGrant the following permissions to
[NT AUTHORITY\SYSTEM]on each SQL Server instance:ALTER ANY AVAILABILITY GROUPCONNECT SQLVIEW SERVER STATE
To grant these permissions, use the following Transact-SQL (T-SQL) command:
GRANT ALTER ANY AVAILABILITY GROUP TO [NT AUTHORITY\SYSTEM]
GO
GRANT CONNECT SQL TO [NT AUTHORITY\SYSTEM]
GO
GRANT VIEW SERVER STATE TO [NT AUTHORITY\SYSTEM]
GO
Repeat these steps on the second SQL Server VM, such as SQL-VM-2, connecting with the relevant machine name account, such as
SQL-VM-2\DomainAdmin.
Set the SQL Server service accounts
The SQL Server service on each VM needs to use a dedicated domain account. Use the domain accounts you created earlier: Corp\SQLSvc for both SQL-VM-1 and SQL-VM-2.
To set the service account, follow these steps:
- Connect to the first SQL Server VM through the Remote Desktop Protocol (RDP) by using the <MachineName>\DomainAdmin account, such as
SQL-VM-1\DomainAdmin. - Open SQL Server Configuration Manager.
- Right-click the SQL Server service, and then select Properties.
- Provide the account (Corp\SQLSvc) and password.
- Select Apply to commit your change and restart the SQL Server service.
- Repeat these steps on the other SQL Server VM (SQL-VM-1), signing in with the machine domain account, such as
SQL-VM-2\DomainAdmin, and providing the service account (Corp\SQLSvc).
Create Azure Storage Account
To deploy a two-node Windows Server Failover Cluster, a third member is necessary to establish quorum. On Azure VMs, the cloud witness is the recommended quorum option. To configure a cloud witness, you need an Azure Storage account. To learn more, see Deploy a Cloud Witness for a Failover Cluster.
To create the Azure Storage Account in the portal:
In the portal, open the SQL-HA-RG resource group and select + Create
Search for storage account.
Select Storage account and select Create, configuring it with the following values:
- Select your subscription and select the resource group SQL-HA-RG.
- Enter a Storage Account Name for your storage account. Storage account names must be between 3 and 24 characters in length and may contain numbers and lowercase letters only. The storage account name must also be unique within Azure.
- Select your Region.
- For Performance, select Standard: Recommended for most scenarios (general-purpose v2 account). Azure Premium Storage is not supported for a cloud witness.
- For Redundancy, select Locally redundant storage (LRS). Failover Clustering uses the blob file as the arbitration point, which requires some consistency guarantees when reading the data. Therefore you must select Locally redundant storage for the Replication type.
- Select Review + create
Configure the firewall
The availability group feature relies on traffic through the following TCP ports:
- SQL Server VM: Port 1433 for a default instance of SQL Server.
- Database mirroring endpoint: Any available port. Examples frequently use 5022.
Open these firewall ports on both SQL Server VMs. The method of opening the ports depends on the firewall solution that you use, and may vary from the Windows Firewall example provided in this section.
To open these ports on a Windows Firewall, follow these steps:
On the first SQL Server Start screen, launch Windows Firewall with Advanced Security.
On the left pane, select Inbound Rules. On the right pane, select New Rule.
For Rule Type, choose Port.
For the port, specify TCP and type the appropriate port numbers. See the following example:
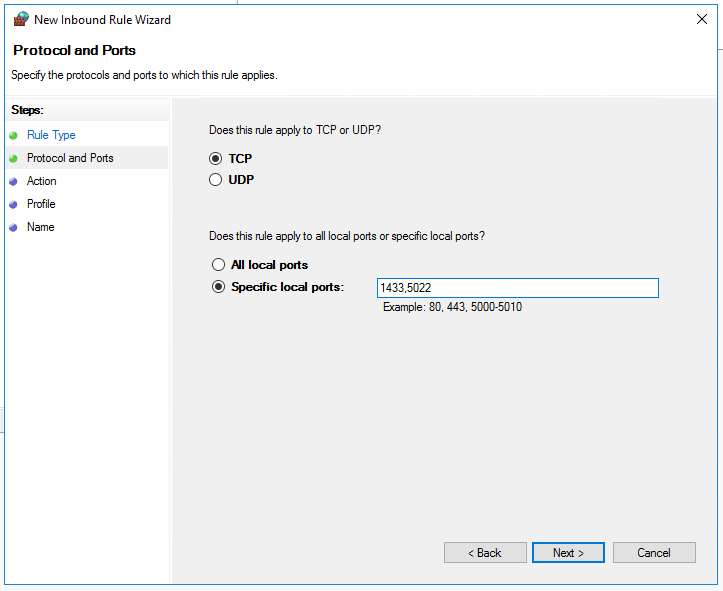
Select Next.
On the Action page, select Allow the connection , and then select Next.
On the Profile page, accept the default settings, and then select Next.
On the Name page, specify a rule name (such as SQL Inbound) in the Name text box, and then select Finish.
Repeat these steps on the second SQL Server VM.
Next steps
Now that you've configured the prerequisites, get started with configuring your availability group in multiple subnets.
To learn more, see:
Feedback
Coming soon: Throughout 2024 we will be phasing out GitHub Issues as the feedback mechanism for content and replacing it with a new feedback system. For more information see: https://aka.ms/ContentUserFeedback.
Submit and view feedback for