HCX Network extension high availability (HA)
VMware HCX is an application mobility platform designed to simplify application migration, workload rebalancing, and business continuity across data centers and clouds.
The HCX Network Extension service provides layer 2 connectivity between sites. Network Extension HA protects extended networks from a Network Extension appliance failure at either the source or remote site.
HCX 4.3.0 or later allows network extension high availability. Network Extension HA operates in Active/Standby mode. In this article, learn how to configure HCX network extension High Availability on Azure private cloud.
Prerequisites
The Network Extension High Availability (HA) setup requires four Network Extension appliances, with two appliances at the source site and two appliances at the remote site. Together, these two pairs form the HA Group, which is the mechanism for managing Network Extension High Availability. Appliances on the same site require a similar configuration and must have access to the same set of resources.
- Network Extension HA requires an HCX Enterprise license.
- In the HCX Compute Profile, the Network Extension Appliance Limit is set to allow for the number of Network Extension appliances. The Azure VMware Solutions Limit is automatically set to unlimited.
- In the HCX Service Mesh, the Network Extension Appliance Scale Out Appliance Count is set to provide enough appliances to support network extension objectives, including any Network Extension HA groups.
When you create a service mesh, set the appliance count to a minimum of two. For an existing service mesh, you can edit and adjust the appliance count to provide the required appliance count.
- The Network Extension appliances selected for HA activation must have no networks extended over them.
- Only Network Extension appliances upgraded to HCX 4.3.0 or later can be added to HA Groups.
- Learn more about the Network Extension High Availability feature, prerequisites, considerations and limitations.
Activate high availability (HA)
Use the following steps to activate HA, create HA groups, and view the HA roles and options available.
Sign in to HCX Manager UI in one of two ways:
- cloudadmin@vsphere.local.
- HCX UI through vCenter HCX Plugin.
Navigate to Infrastructure, then Interconnect.
Select Service Mesh, then select View Appliances.
Select Appliances from the Interconnect tab options.
- Check the network appliance that you want to make highly available and select Activate High Availability.

Confirm by selecting Activate HA.
- Activating HA initiates the process to create an HA group. The process automatically selects an HA partner from the available NE Appliances.
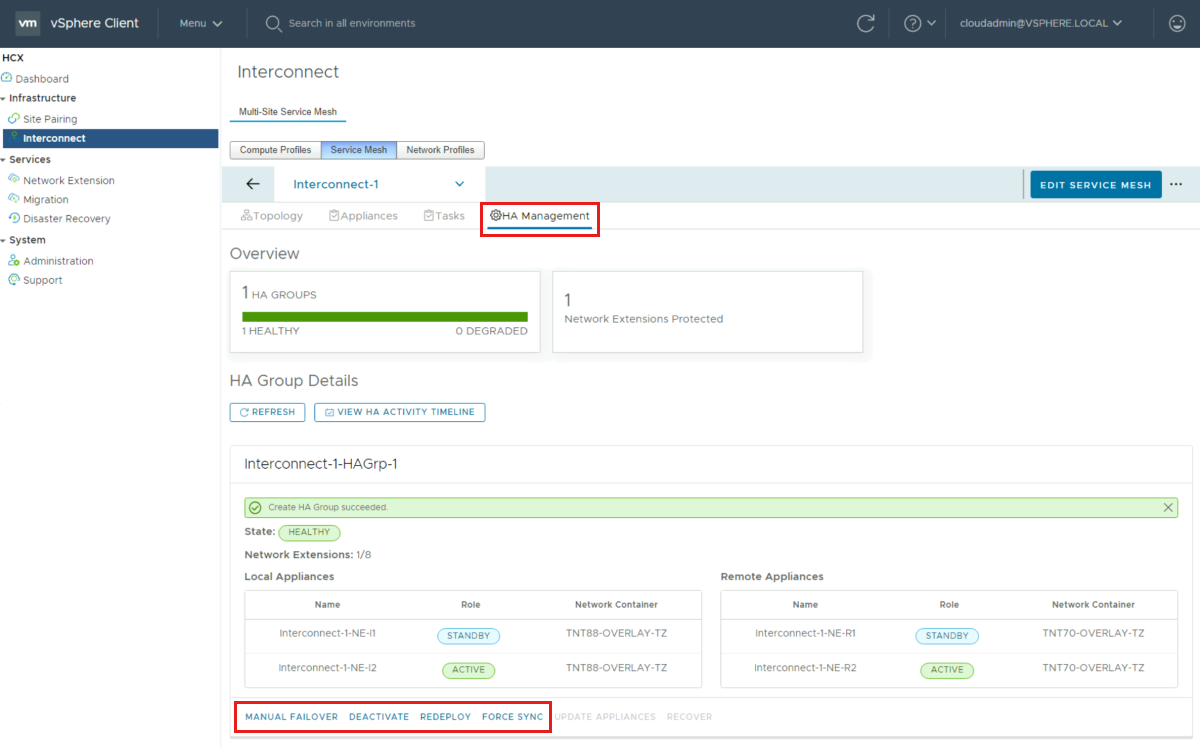
After the HA group is created, the HA Roles for the local and remote appliances display Active and Standby.

Select HA Management from the Interconnect tab options to view the HA group details and the available options: Manual failover, Deactivate, Redeploy, and Force Sync.


Extend network using network HA group
Locate Services in the left navigation and select Network Extension.
Select Create a Network Extension.
Choose the Network you want and select Next.
In mandatory fields, provide the gateway IP address in CIDR format, select the HA group under Extension Appliances (created in the previous step), and select Submit to extend the Network.
After the network is extended, under Extension Appliance, you can see the extension details and HA group.

To migrate virtual machines (VMs), navigate to Services and select Migration.
- Select Migrate from the Migration window to start the workload mobility wizard.
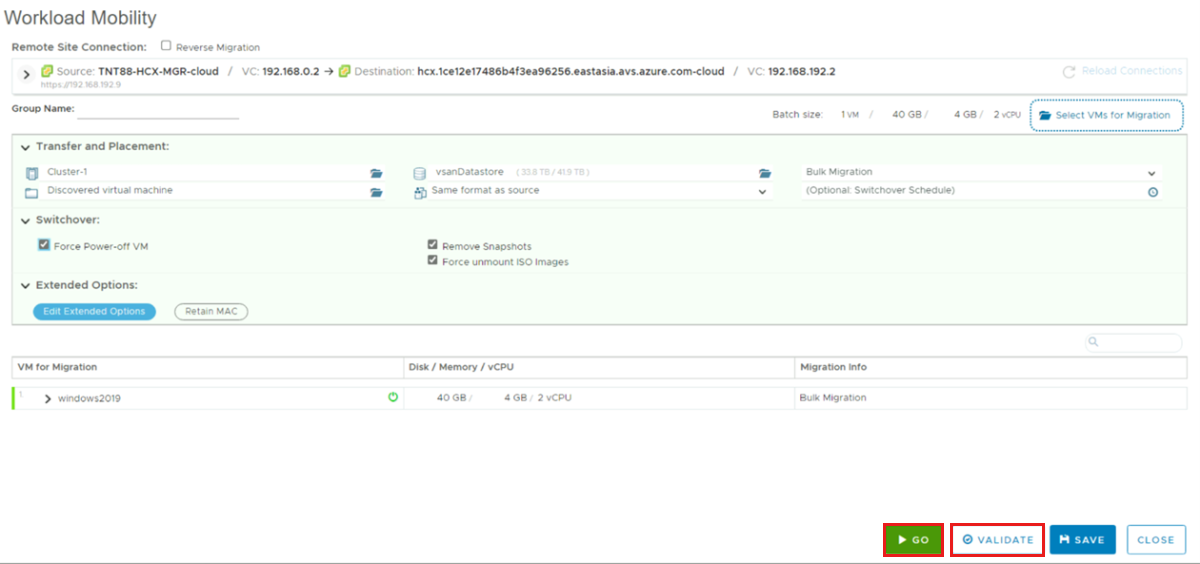
In Workload Mobility, add and replace details as needed, then select Validate.
After validation completes, select Go to start the migration using Extended Network.


Next steps
Now that you learned how to configure and extend HCX network extension high availability (HA), use the following resource to learn more about how to manage HCX network extension HA.
Feedback
Coming soon: Throughout 2024 we will be phasing out GitHub Issues as the feedback mechanism for content and replacing it with a new feedback system. For more information see: https://aka.ms/ContentUserFeedback.
Submit and view feedback for