Tutorial: Create a FAQ bot with Azure AI Bot Service
Create an FAQ Bot with QnA Maker and Azure Bot Service with no code.
In this tutorial, you learn how to:
- Link a QnA Maker knowledge base to an Azure AI Bot Service
- Deploy the Bot
- Chat with the Bot in web chat
- Light up the Bot in the supported channels
Note
The QnA Maker service is being retired on the 31st of March, 2025. A newer version of the question and answering capability is now available as part of Azure AI Language. For question answering capabilities within the Language Service, see question answering. Starting 1st October, 2022 you won’t be able to create new QnA Maker resources. For information on migrating existing QnA Maker knowledge bases to question answering, consult the migration guide.
Create and publish a knowledge base
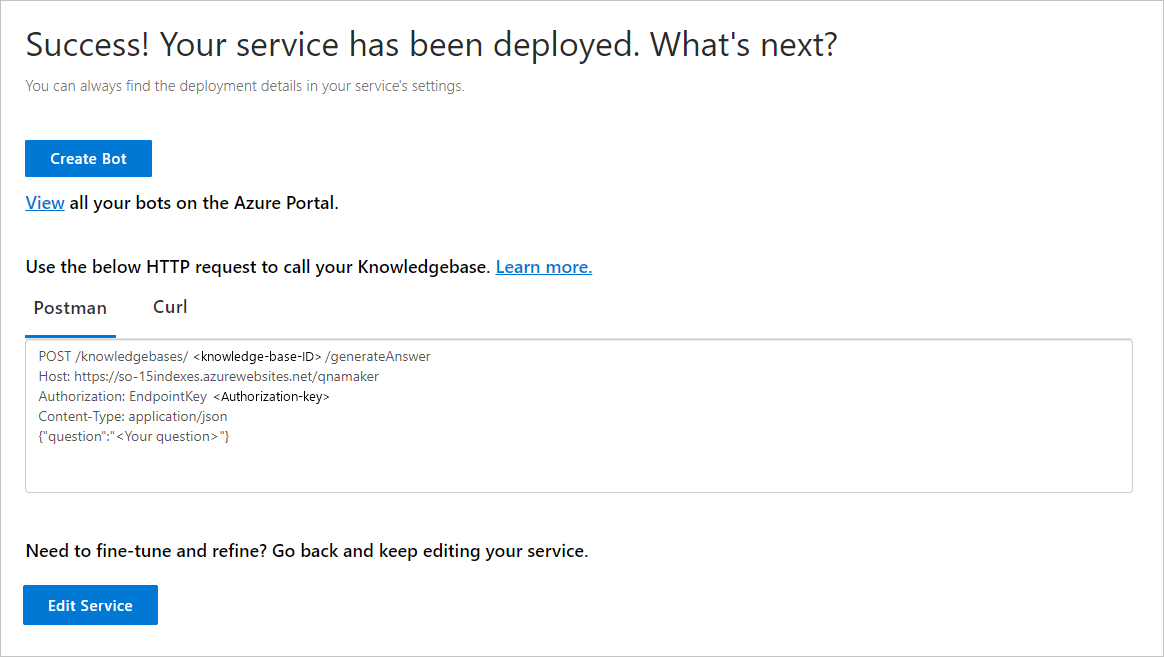
Follow the quickstart to create a knowledge base. Once the knowledge base has been successfully published, you will reach the below page.
Create a bot
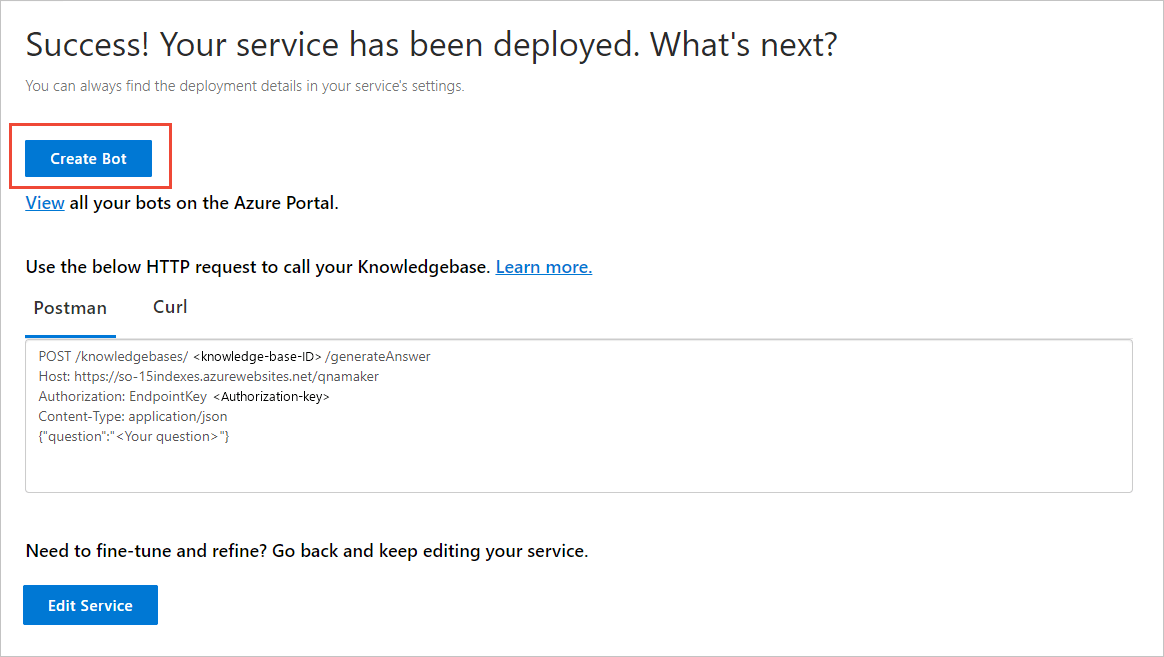
After publishing, you can create a bot from the Publish page:
- You can create several bots quickly, all pointing to the same knowledge base for different regions or pricing plans for the individual bots.
- If you want only one bot for the knowledge base, use the View all your bots on the Azure portal link to view a list of your current bots.
When you make changes to the knowledge base and republish, you don't need to take further action with the bot. It's already configured to work with the knowledge base, and works with all future changes to the knowledge base. Every time you publish a knowledge base, all the bots connected to it are automatically updated.
In the QnA Maker portal, on the Publish page, select Create bot. This button appears only after you've published the knowledge base.
A new browser tab opens for the Azure portal, with the Azure AI Bot Service's creation page. Configure the Azure AI Bot Service. The bot and QnA Maker can share the web app service plan, but can't share the web app. This means the app name for the bot must be different from the app name for the QnA Maker service.
- Do
- Change bot handle - if it is not unique.
- Select SDK Language. Once the bot is created, you can download the code to your local development environment and continue the development process.
- Don't
- Change the following settings in the Azure portal when creating the bot. They are pre-populated for your existing knowledge base:
- QnA Auth Key
- App service plan and location
- Change the following settings in the Azure portal when creating the bot. They are pre-populated for your existing knowledge base:
- Do
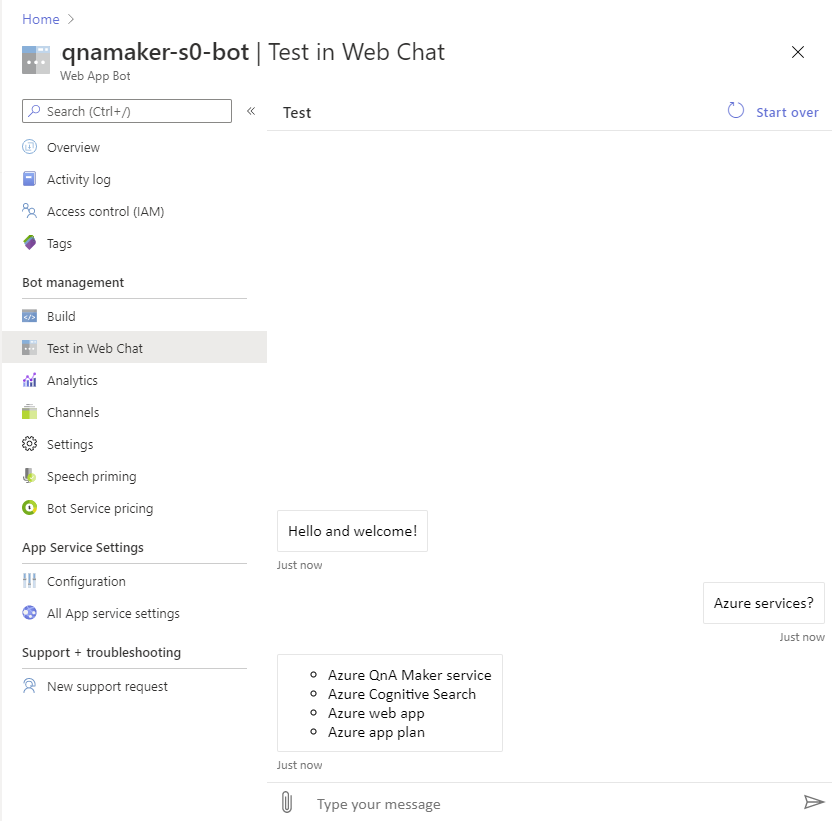
After the bot is created, open the Bot service resource.
Under Bot Management, select Test in Web Chat.
At the chat prompt of Type your message, enter:
Azure services?The chat bot responds with an answer from your knowledge base.
Light up the Bot in additional supported channels.
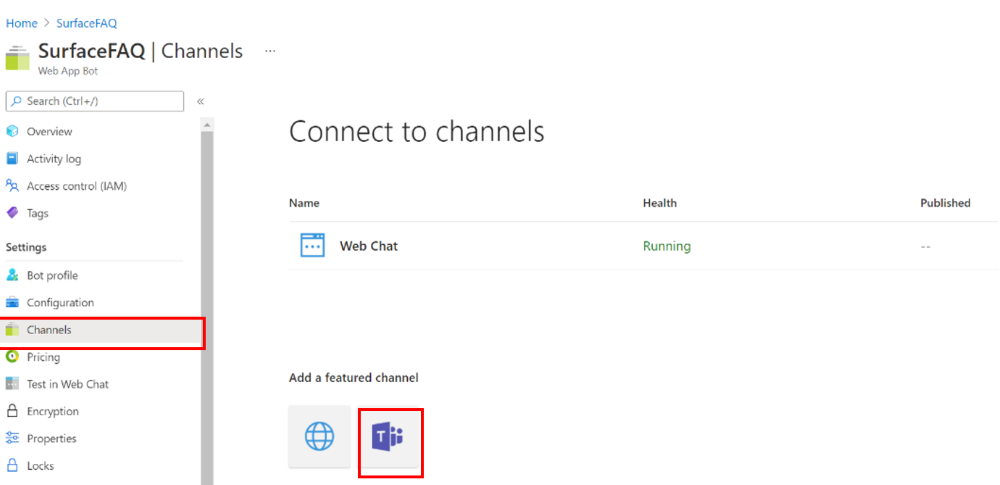
Integrate the bot with channels
Select Channels in the Bot service resource that you have created. You can light up the Bot in additional supported channels.