Manage and monitor IoT Central applications
You can use the Azure portal, Azure CLI, or Azure PowerShell to manage and monitor IoT Central applications.
If you prefer to use a language such as JavaScript, Python, C#, Ruby, or Go to create, update, list, and delete Azure IoT Central applications, see the Azure IoT Central ARM SDK samples repository.
To learn how to create an IoT Central application, see Create an IoT Central application.
View applications
To list all the IoT Central apps in your subscription, navigate to IoT Central applications.
Delete an application
To delete an IoT Central application in the Azure portal, navigate to the Overview page of the application in the portal and select Delete.
Manage networking
You can use private IP addresses from a virtual network address space when you manage your devices in IoT Central application to eliminate exposure on the public internet. To learn more, see Create and configure a private endpoint for IoT Central.
Configure a managed identity
When you configure a data export in your IoT Central application, you can choose to configure the connection to the destination with a connection string or a managed identity. Managed identities are more secure because:
- You don't store the credentials for your resource in a connection string in your IoT Central application.
- The credentials are automatically tied to the lifetime of your IoT Central application.
- Managed identities automatically rotate their security keys regularly.
IoT Central currently uses system-assigned managed identities. To create the managed identity for your application, you use either the Azure portal or the REST API.
When you configure a managed identity, the configuration includes a scope and a role:
- The scope defines where you can use the managed identity. For example, you can use an Azure resource group as the scope. In this case, both the IoT Central application and the destination must be in the same resource group.
- The role defines what permissions the IoT Central application is granted in the destination service. For example, for an IoT Central application to send data to an event hub, the managed identity needs the Azure Event Hubs Data Sender role assignment.
To configure the managed identity that enables your IoT Central application to securely export data to your Azure resource:
In the Azure portal, navigate to your IoT Central application.
Tip
By default, IoT Central applications are created in the IOTC resource group in your subscription.
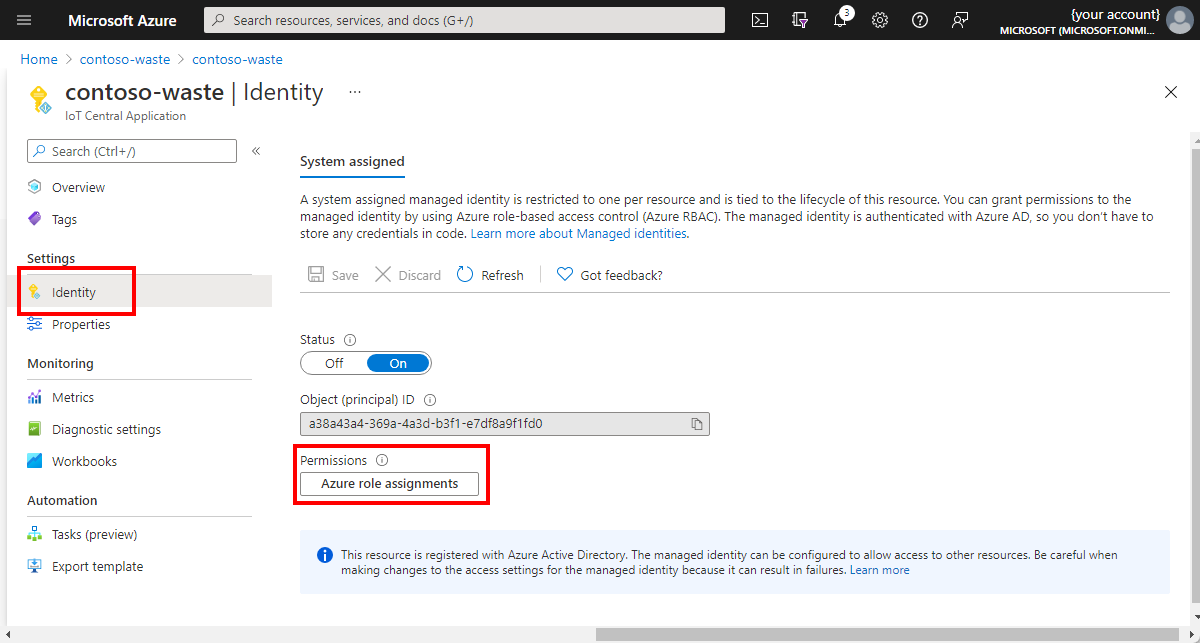
Select Identity. Then on the System assigned page, change the status to On, and then select Save.
After a few seconds, the system assigned managed identity for your IoT Central application is enabled and you can select Azure role assignments:
On the Azure role assignments page, select + Add role assignment.
To learn more about the role assignments, see:
- Built-in roles for Azure Event Hubs
- Built-in roles for Azure Service Bus
- Built-in roles for Azure Storage Services
Monitor application health
You can use the set of metrics provided by IoT Central to assess the health of devices connected to your IoT Central application and the health of your running data exports.
Note
IoT Central applications also have an internal audit log to track activity within the application.
Metrics are enabled by default for your IoT Central application and you access them from the Azure portal. The Azure Monitor data platform exposes these metrics and provides several ways for you to interact with them. For example, you can use charts in the Azure portal, a REST API, or queries in PowerShell or the Azure CLI.
Azure role based access control manages access to metrics in the Azure portal. Use the Azure portal to add users to the IoT Central application/resource group/subscription to grant them access. You must add a user in the portal even they're already added to the IoT Central application. Use Azure built-in roles for finer grained access control.
View metrics in the Azure portal
The following example Metrics page shows a plot of the number of devices connected to your IoT Central application. For a list of the metrics that are currently available for IoT Central, see Supported metrics with Azure Monitor.
To view IoT Central metrics in the portal:
- Navigate to your IoT Central application resource in the portal. By default, IoT Central resources are located in a resource group called IOTC.
- To create a chart from your application's metrics, select Metrics in the Monitoring section.

Export logs and metrics
Use the Diagnostics settings page to configure exporting metrics and logs to different destinations. To learn more, see Diagnostic settings in Azure Monitor.
Analyze logs and metrics
Use the Workbooks page to analyze logs and create visual reports. To learn more, see Azure Workbooks.
Metrics and invoices
Metrics might differ from the numbers shown on your Azure IoT Central invoice. This situation occurs for reasons such as:
IoT Central standard pricing plans include two devices and varying message quotas for free. While the free items are excluded from billing, they're still counted in the metrics.
IoT Central autogenerates one test device ID for each device template in the application. This device ID is visible on the Manage test device page for a device template. You can validate your device templates before publishing them by generating code that uses these test device IDs. While these devices are excluded from billing, they're still counted in the metrics.
While metrics might show a subset of device-to-cloud communication, all communication between the device and the cloud counts as a message for billing.
Monitor connected IoT Edge devices
If your application uses IoT Edge devices, you can monitor the health of your IoT Edge devices and modules using Azure Monitor. To learn more, see Collect and transport Azure IoT Edge metrics.
Feedback
Coming soon: Throughout 2024 we will be phasing out GitHub Issues as the feedback mechanism for content and replacing it with a new feedback system. For more information see: https://aka.ms/ContentUserFeedback.
Submit and view feedback for