Connect to workspace resources from a restricted network
Suppose you are an IT administrator who is managing your organization's restricted network. You want to enable the network connection between Azure Synapse Analytics Studio and a workstation within this restricted network. This article shows you how.
Prerequisites
- Azure subscription: If you don't have an Azure subscription, create a free Azure account before you begin.
- Azure Synapse Analytics workspace: You can create one from Azure Synapse Analytics. You need the workspace name in step 4.
- A restricted network: The IT admin maintains the restricted network for the organization, and has permission to configure the network policy. You need the virtual network name and its subnet in step 3.
Step 1: Add network outbound security rules to the restricted network
You'll need to add four network outbound security rules with four service tags.
- AzureResourceManager
- AzureFrontDoor.Frontend
- AzureActiveDirectory
- AzureMonitor (This type of rule is optional. Add it only when you want to share the data with Microsoft.)
The following screenshot shows details for the Azure Resource Manager outbound rule.
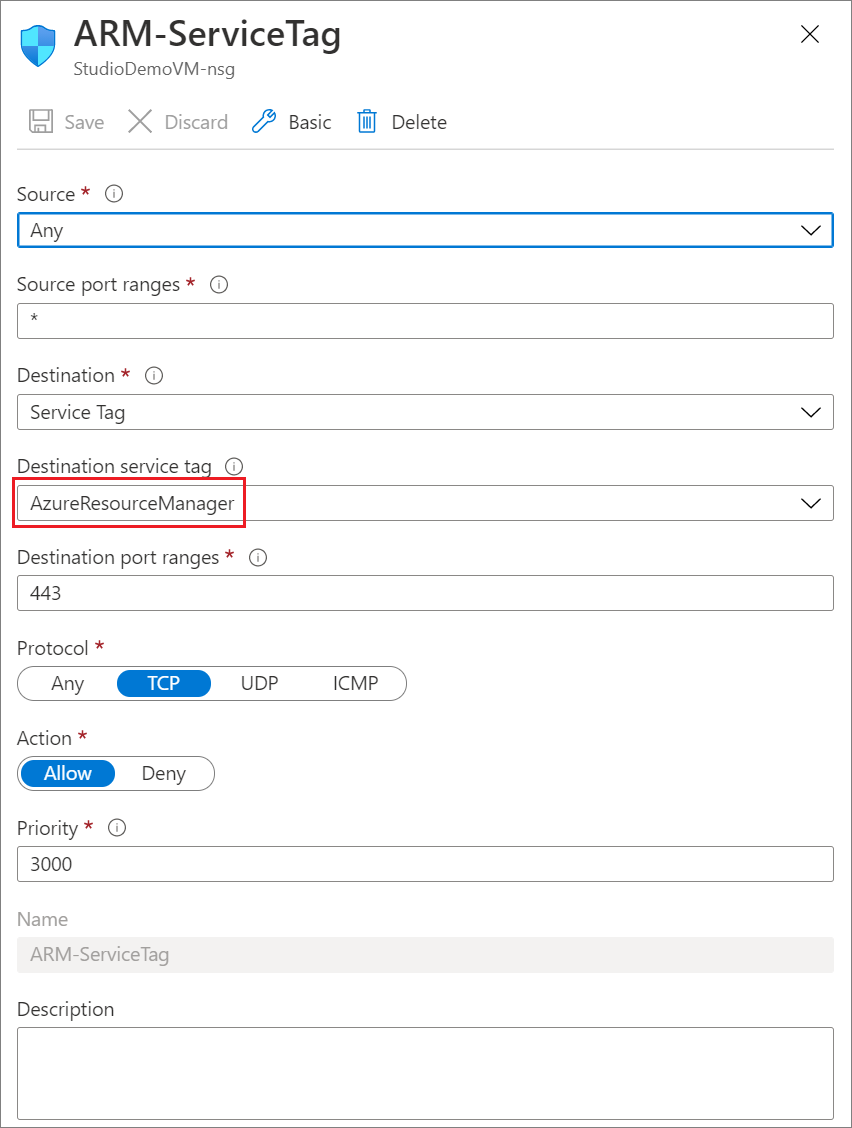
When you're creating the other three rules, replace the value of Destination service tag with AzureFrontDoor.Frontend, AzureActiveDirectory, or AzureMonitor from the list.
For more information, see Service tags overview.
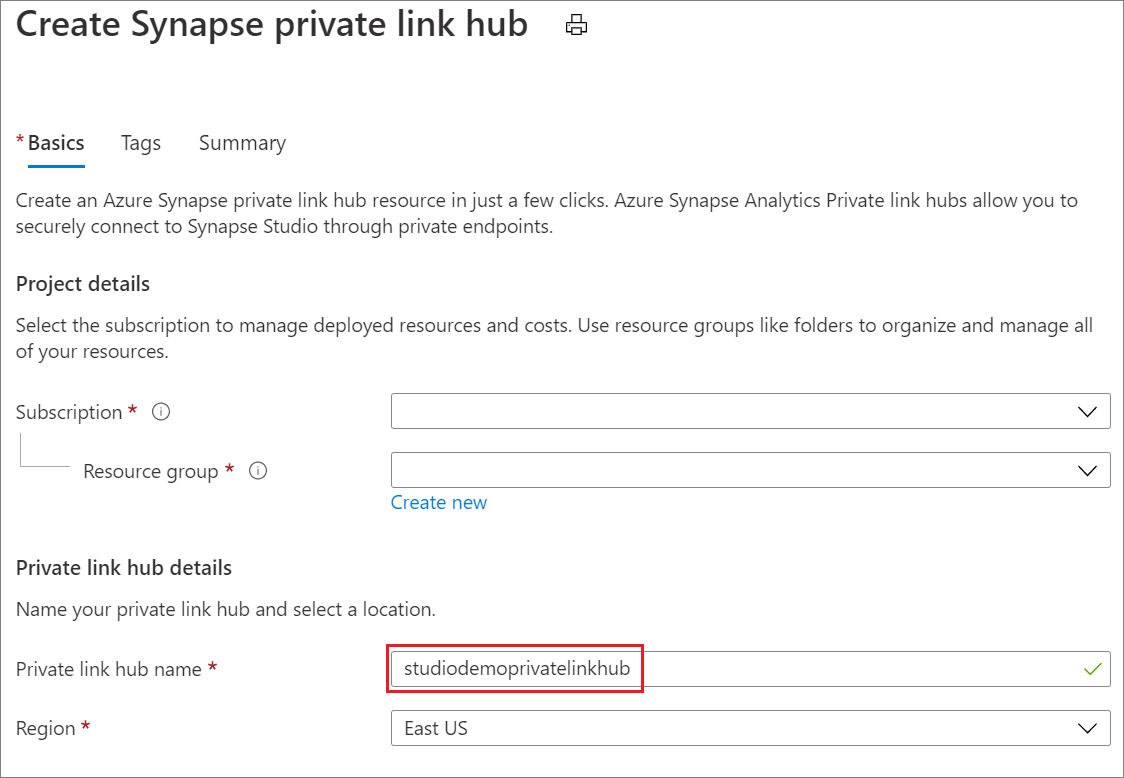
Step 2: Create private link hubs
Next, create private link hubs from the Azure portal. To find this in the portal, search for Azure Synapse Analytics (private link hubs), and then fill in the required information to create it.
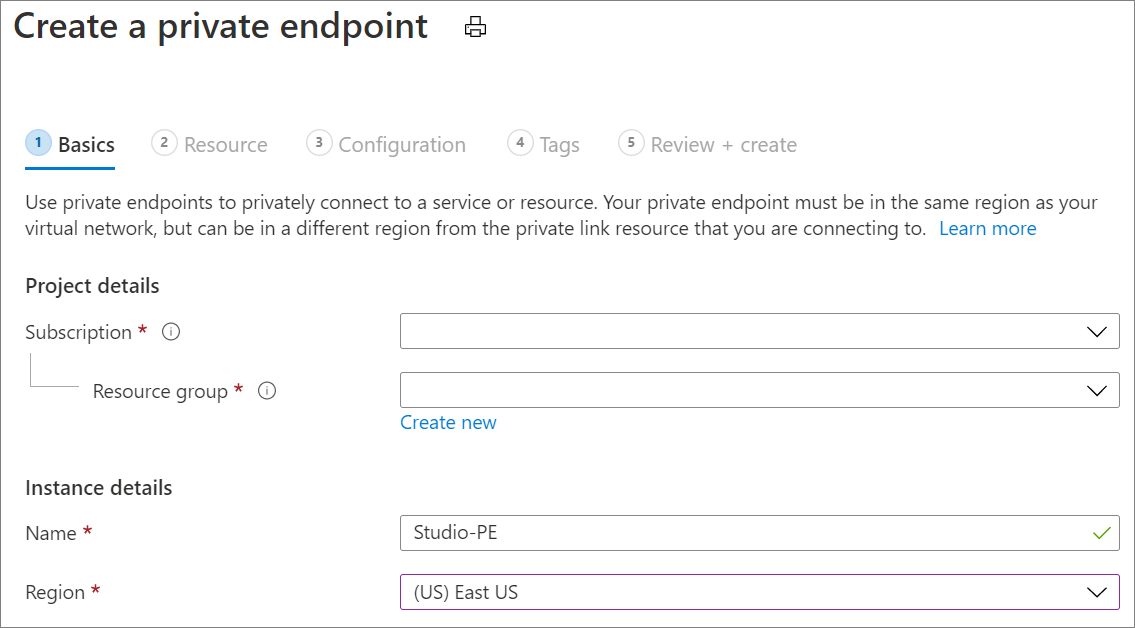
Step 3: Create a private endpoint for your Synapse Studio
To access the Azure Synapse Analytics Studio, you must create a private endpoint from the Azure portal. To find this in the portal, search for Private Link. In the Private Link Center, select Create private endpoint, and then fill in the required information to create it.
Note
Ensure that the Region value is the same as the one where your Azure Synapse Analytics workspace is.
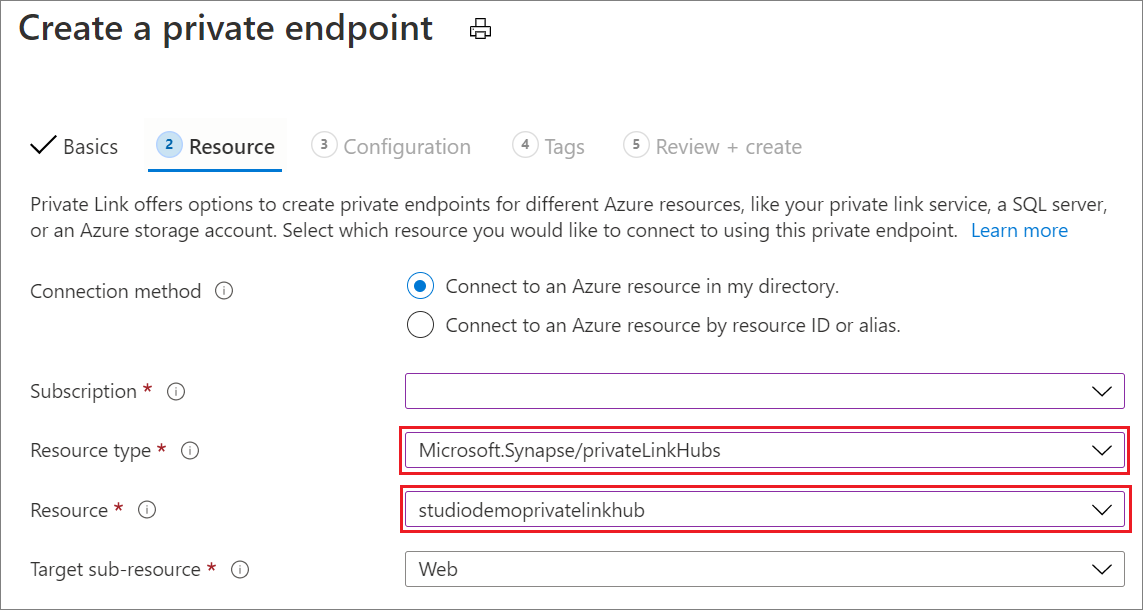
On the Resource tab, choose the private link hub, which you created in step 2.
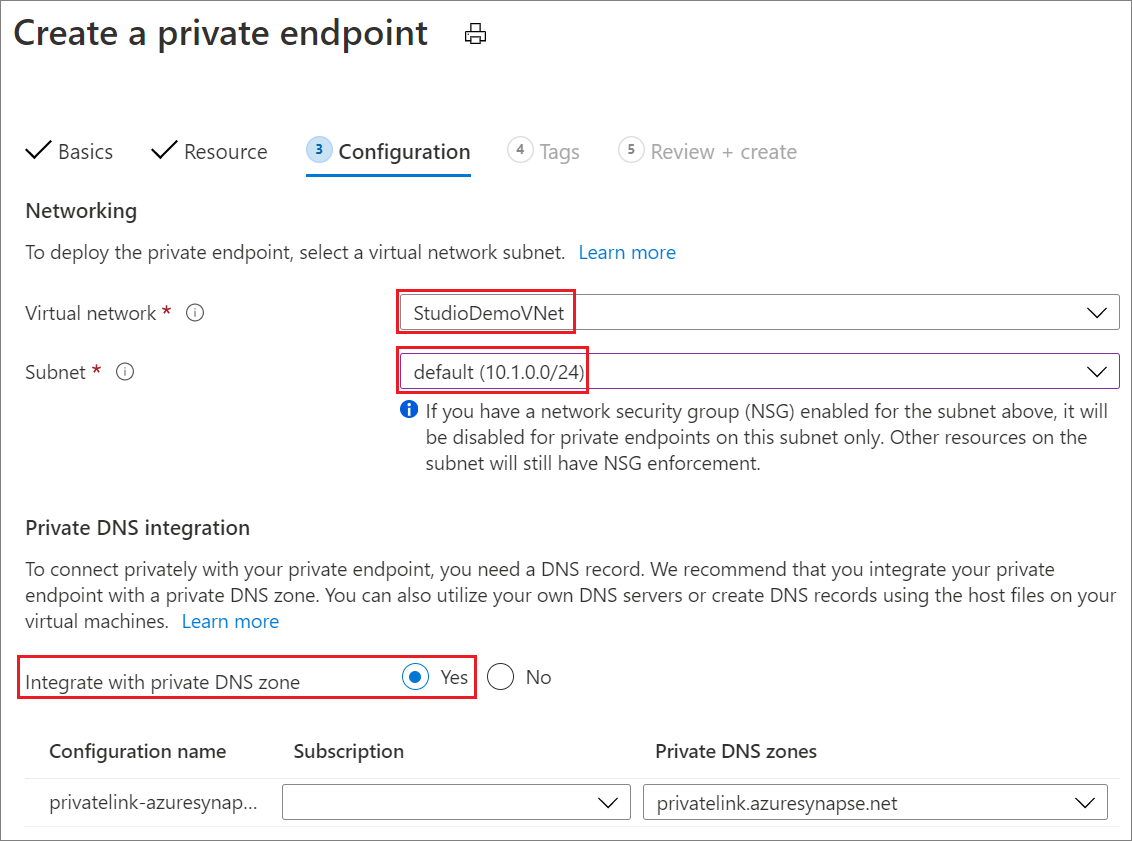
On the Configuration tab:
- For Virtual network, select the restricted virtual network name.
- For Subnet, select the subnet of the restricted virtual network.
- For Integrate with private DNS zone, select Yes.
After the private link endpoint is created, you can access the sign-in page of the web tool for Azure Synapse Analytics Studio. However, you aren't able to access the resources inside your workspace yet. For that, you need to complete the next step.
Step 4: Create private endpoints for your workspace resource
To access the resources inside your Azure Synapse Analytics Studio workspace resource, you need to create the following:
- At least one private link endpoint with a Target sub-resource type of Dev.
- Two other optional private link endpoints with types of Sql or SqlOnDemand, depending on what resources in the workspace you want to access.
Creating these is similar to how you create the endpoint in the previous step.
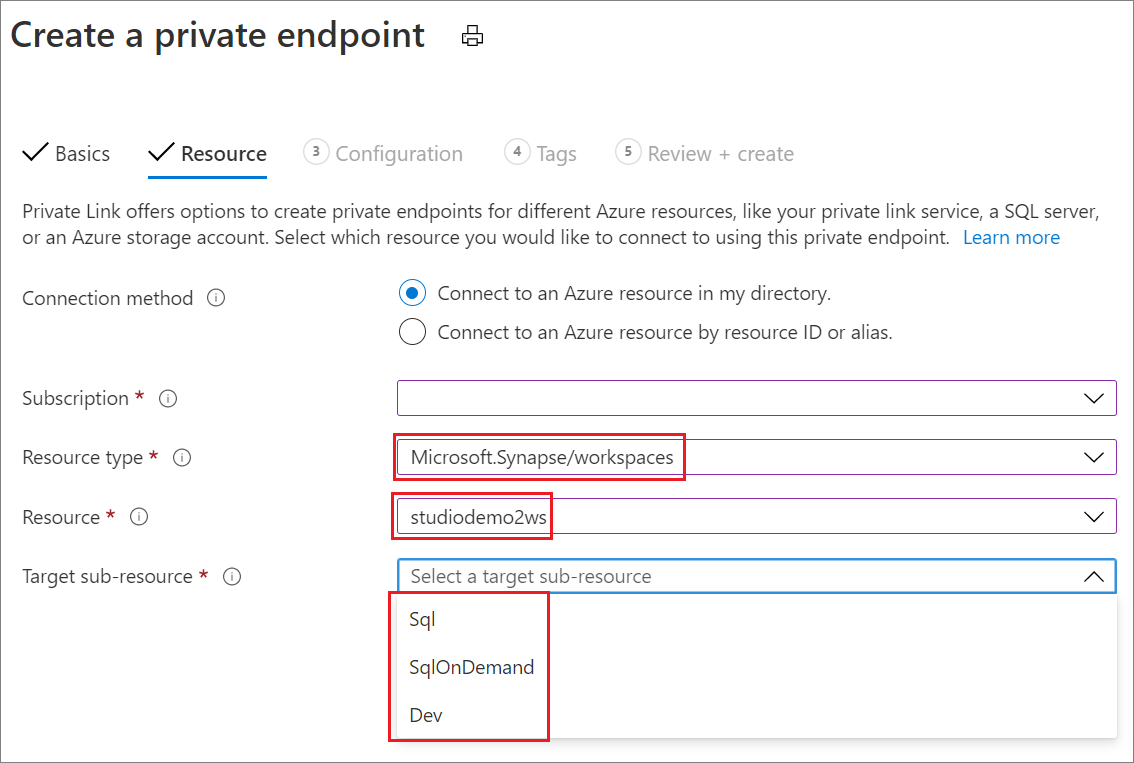
On the Resource tab:
- For Resource type, select Microsoft.Synapse/workspaces.
- For Resource, select the workspace name that you created previously.
- For Target sub-resource, select the endpoint type:
- Sql is for SQL query execution in SQL pool.
- SqlOnDemand is for SQL built-in query execution.
- Dev is for accessing everything else inside Azure Synapse Analytics Studio workspaces. You need to create at least one private link endpoint of this type.
Step 5: Create private endpoints for workspace linked storage
To access the linked storage with the storage explorer in Azure Synapse Analytics Studio workspace, you must create one private endpoint. The steps for this are similar to those of step 3.
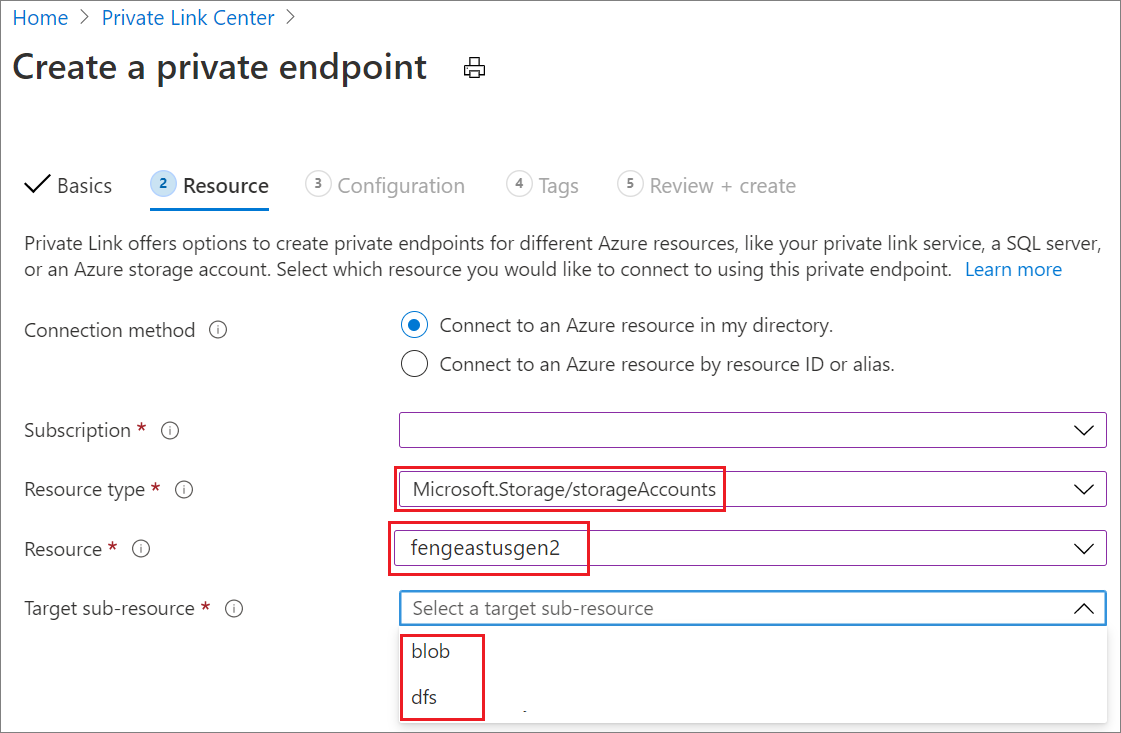
On the Resource tab:
- For Resource type, select Microsoft.Storage/storageAccounts.
- For Resource, select the storage account name that you created previously.
- For Target sub-resource, select the endpoint type:
- blob is for Azure Blob Storage.
- dfs is for Azure Data Lake Storage Gen2.
Now, you can access the linked storage resource. Within your virtual network, in your Azure Synapse Analytics Studio workspace, you can use the storage explorer to access the linked storage resource.
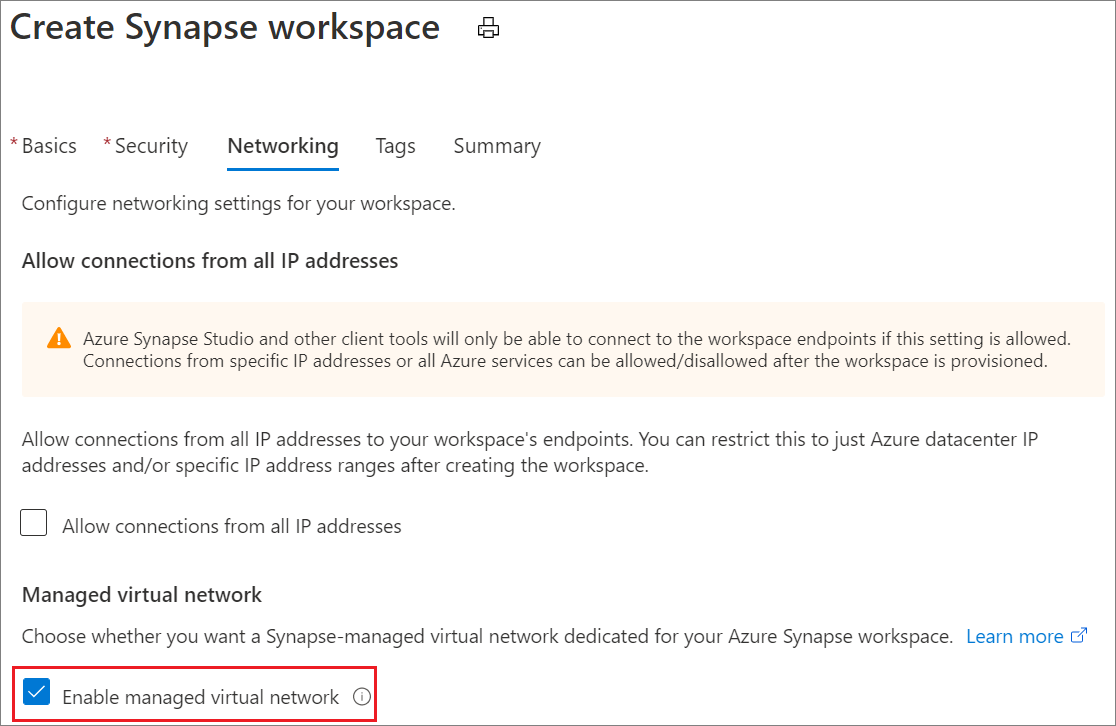
You can enable a managed virtual network for your workspace, as shown in this screenshot:
If you want your notebook to access the linked storage resources under a certain storage account, add managed private endpoints under your Azure Synapse Analytics Studio. The storage account name should be the one your notebook needs to access. For more information, see Create a managed private endpoint to your data source.
After you create this endpoint, the approval state shows a status of Pending. Request approval from the owner of this storage account, in the Private endpoint connections tab of this storage account in the Azure portal. After it's approved, your notebook can access the linked storage resources under this storage account.
Now, all set. You can access your Azure Synapse Analytics Studio workspace resource.
Step 6: Allow URL through firewall
Following URLs must be accessible from client browser after enabling Azure Synapse private link hub.
Required for auth:
login.microsoftonline.comaadcdn.msauth.netmsauth.netmsftauth.netgraph.microsoft.comlogin.live.com, though this may be different based on account type.
Required for workspace/pool management:
management.azure.com{workspaceName}.[dev|sql].azuresynapse.net{workspaceName}-ondemand.sql.azuresynapse.net
Required for Synapse notebook authoring:
aznb.azuresandbox.ms
Required for access control and identity searching:
graph.windows.net
Appendix: DNS registration for private endpoint
If the "Integrate with private DNS zone" is not enabled during the private endpoint creation as screenshot below, you must create the "Private DNS zone" for each of your private endpoints.

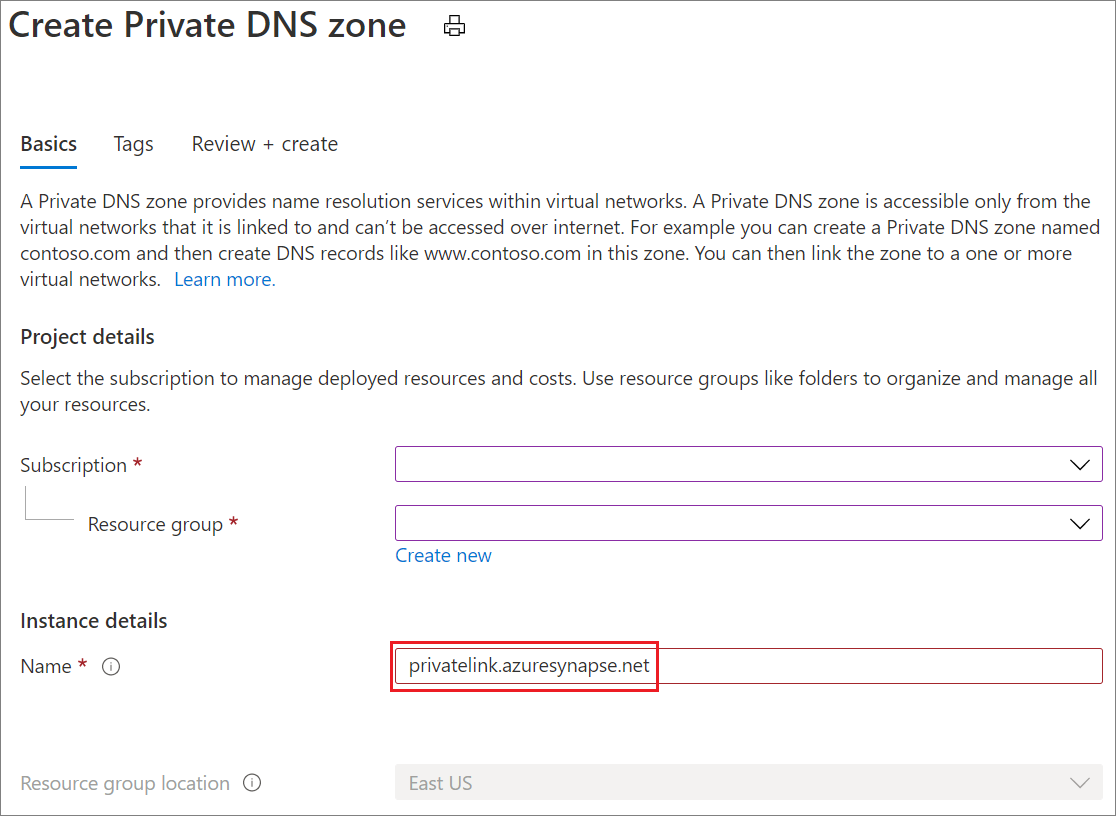
To find the Private DNS zone in the portal, search for Private DNS zone. In the Private DNS zone, fill in the required information below to create it.
- For Name, input the private DNS zone dedicated name for specific private endpoint as below:
privatelink.azuresynapse.netis for the private endpoint of accessing Azure Synapse Analytics Studio gateway. See this type of private endpoint creation in step 3.privatelink.sql.azuresynapse.netis for this type of private endpoint of sql query execution in SQL pool and built-in pool. See the endpoint creation in step 4.privatelink.dev.azuresynapse.netis for this type of private endpoint of accessing everything else inside Azure Synapse Analytics Studio workspaces. See this type of private endpoint creation in step 4.privatelink.dfs.core.windows.netis for the private endpoint of accessing workspace linked Azure Data Lake Storage Gen2. See this type of private endpoint creation in step 5.privatelink.blob.core.windows.netis for the private endpoint of accessing workspace linked Azure Blob Storage. See this type of private endpoint creation in step 5.
After the Private DNS zone created, enter the created private DNS zone and select the Virtual network links to add the link to your virtual network.
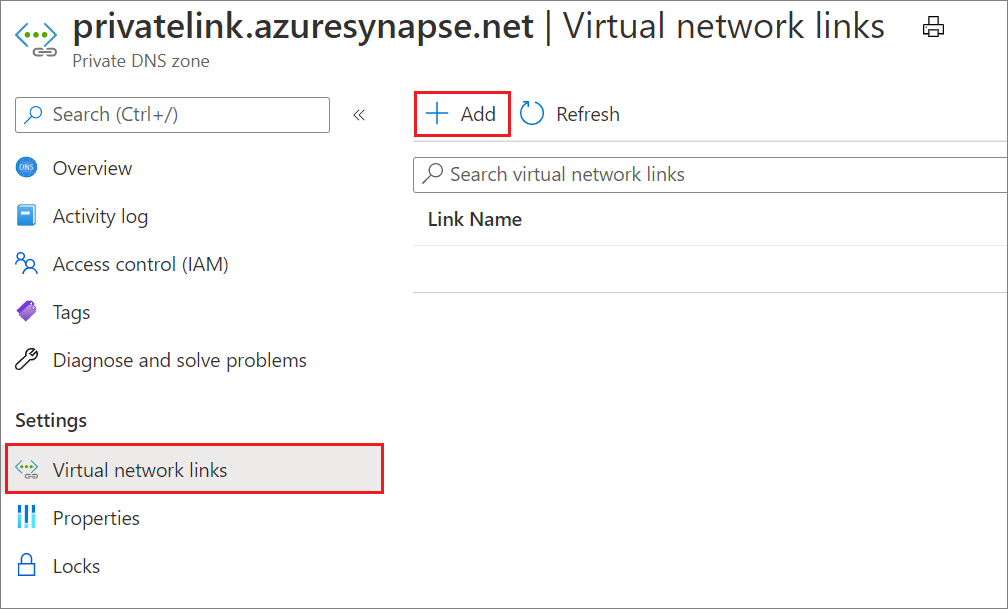
Fill in the mandatory fields as below:
- For Link name, input the link name.
- For Virtual network, select your virtual network.

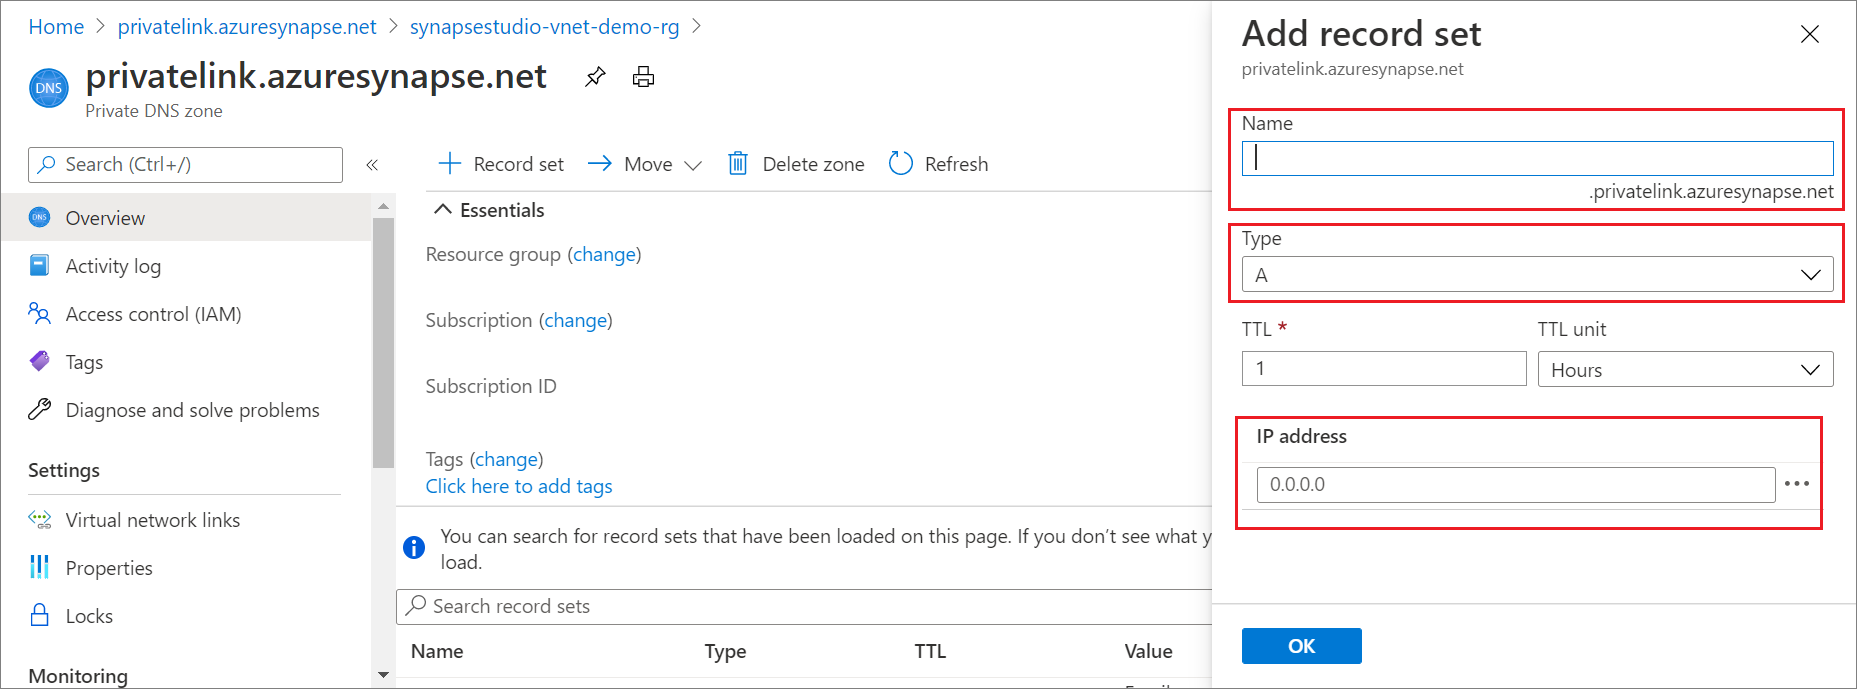
After the virtual network link is added, you need to add the DNS record set in the Private DNS zone you created before.
- For Name, input the dedicated name strings for different private endpoint:
- web is for the private endpoint of accessing Azure Synapse Analytics Studio.
- "YourWorkSpaceName" is for the private endpoint of sql query execution in SQL pool and also for the private endpoint of accessing everything else inside Azure Synapse Analytics Studio workspaces.
- "YourWorkSpaceName-ondemand" is for the private endpoint of sql query execution in built-in pool.
- For Type, select DNS record type A only.
- For IP address, input the corresponding IP address of each private endpoint. You can get the IP address in Network interface from your private endpoint overview.
Next steps
Learn more about Managed workspace virtual network.
Learn more about Managed private endpoints.
Feedback
Coming soon: Throughout 2024 we will be phasing out GitHub Issues as the feedback mechanism for content and replacing it with a new feedback system. For more information see: https://aka.ms/ContentUserFeedback.
Submit and view feedback for