Automate Premium workspace and semantic model tasks with service principals
Service principals are a Microsoft Entra ID app registration you create within your tenant to perform unattended resource and service level operations. They're a unique type of user identity with an app name, application ID, tenant ID, and client secret or certificate for a password.
Power BI Premium uses the same service principal functionality as Power BI Embedded. To learn more, see Embedding Power BI content with service principals.
In Power BI Premium, you can use service principals with the XMLA (XML Analysis) endpoint to automate semantic model management tasks such as provisioning workspaces, deploying models, and semantic model refresh with:
- PowerShell.
- Azure Automation.
- Azure Logic Apps.
- Custom client applications.
Only new workspaces support XMLA endpoint connections by using service principals. Classic workspaces aren't supported. A service principal has only those permissions necessary to perform tasks on workspaces where it's assigned. Permissions are assigned through workspace access, much like regular UPN (user principal name) accounts.
To perform write operations, the capacity's Semantic models workload must have the XMLA endpoint enabled for read-write operations. Semantic models published from Power BI Desktop should have the enhanced metadata format feature enabled.
Create a service principal
Service principals are created as an app registration in the Azure portal or by using PowerShell. When creating your service principal, be sure to copy and save separately the app name, application (client) ID, directory (tenant) ID, and client secret. For steps on how to create a service principal, see:
Create a Microsoft Entra security group
By default, service principals have access to any tenant settings they're enabled for. Depending on your admin settings, access can include specific security groups or the entire organization.
To restrict service principal access to specific tenant settings, you can allow access to specific security groups. Alternatively, you can create a dedicated security group for service principals, and exclude it from the desired tenant settings. To create a security group and add a service principal, see Create a basic group and add members using Microsoft Entra ID.
Enable service principals
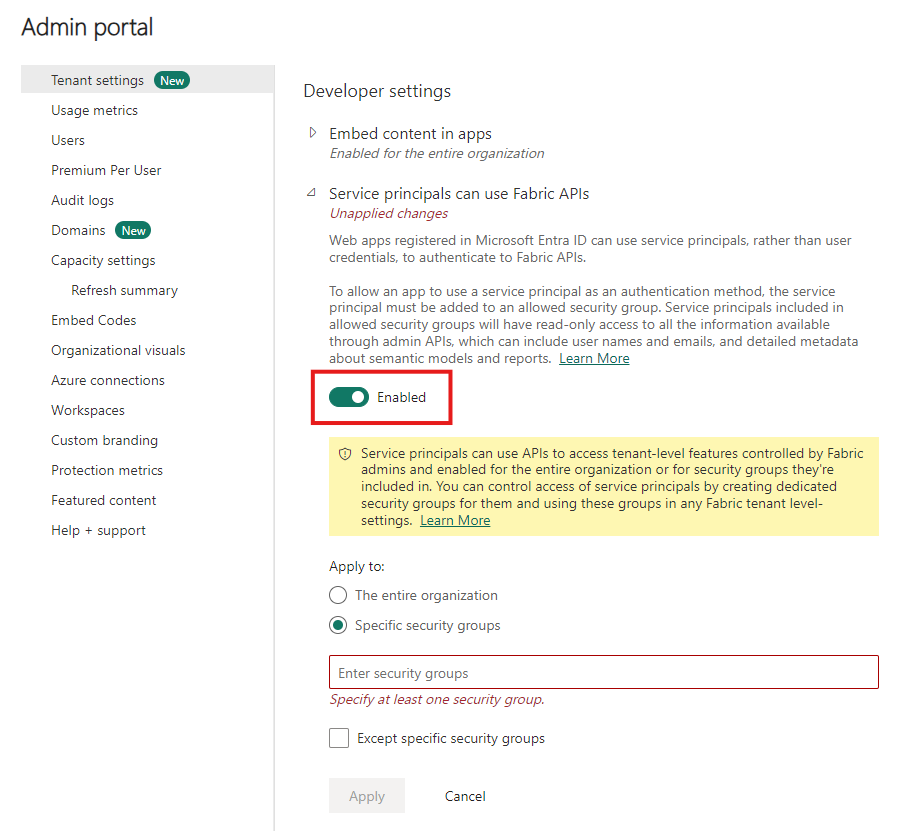
Before you can start using service principals in Power BI, an admin must enable service principal access in the Power BI Admin portal.
- Go to the Power BI Admin portal and then select Tenant settings.
- Scroll to Developer settings and then expand Allow service principals to use Power BI APIs.
- Select Enabled.
- To apply permissions to a security group, select Specific security groups (Recommended).
- Enter the group name.
- Select Apply.
Workspace access
In order for your service principal to have the necessary permissions to perform Premium workspace and semantic model operations, you must add the service principal as a workspace Member or Admin. Using workspace access in the Power BI service is described here, but you can also use the Add Group User REST API.
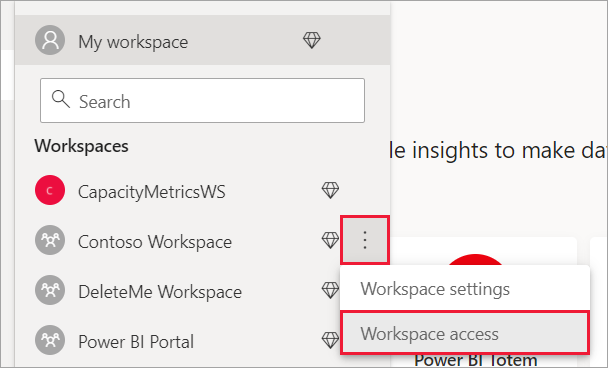
In the Power BI service for a workspace, select More > Workspace access.
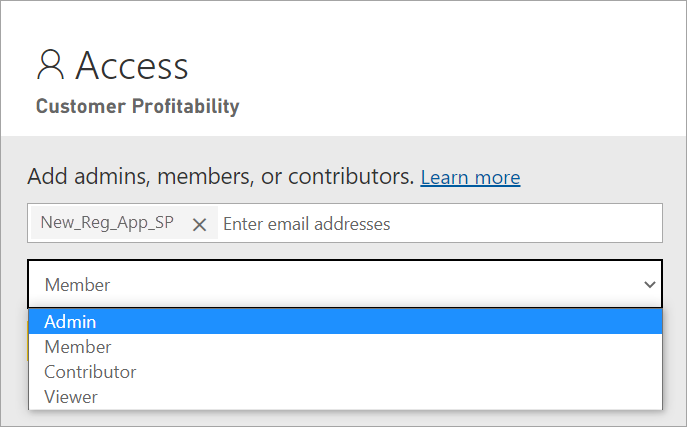
Search by application name and then add the service principal as an Admin or Member to the workspace.
Connection strings for the XMLA endpoint
After you create a service principal, enable service principals for your tenant, and add the service principal to workspace access, use it as a user identity in connection strings with the XMLA endpoint. The difference is, instead of the user id and password parameters, you specify the application ID, tenant ID, and application secret.
Data Source=powerbi://api.powerbi.com/v1.0/myorg/<workspace name>; Initial Catalog=<dataset name>;User ID=app:<appId>@<tenantId>;Password=<app_secret>;
PowerShell
Open a PowerShell session to run the following example code.
Using SQLServer module
In the following example, AppId, TenantId, and AppSecret are used to authenticate a semantic model refresh operation:
Param (
        [Parameter(Mandatory=$true)] [String] $AppId,
        [Parameter(Mandatory=$true)] [String] $TenantId,
        [Parameter(Mandatory=$true)] [String] $AppSecret
       )
$PWord = ConvertTo-SecureString -String $AppSecret -AsPlainText -Force

$Credential = New-Object -TypeName "System.Management.Automation.PSCredential" -ArgumentList $AppId, $PWord

Invoke-ProcessTable -Server "powerbi://api.powerbi.com/v1.0/myorg/myworkspace" -TableName "mytable" -DatabaseName "mydataset" -RefreshType "Full" -ServicePrincipal -ApplicationId $AppId -TenantId $TenantId -Credential $Credential
Analysis Management Objects (AMO) and ADOMD.NET
When you connect with client applications and web apps, you can use AMO and ADOMD client libraries version 15.1.42.26 (June 2020) and later installable packages from NuGet to support service principals in connection strings by using the following syntax: app:AppID and password or cert:thumbprint.
In the following example, appID and password values are used to perform a model database refresh operation:
string appId = "xxx";
string authKey = "yyy";
string connString = $"Provider=MSOLAP;Data source=powerbi://api.powerbi.com/v1.0/<tenant>/<workspacename>;Initial catalog=<datasetname>;User ID=app:{appId};Password={authKey};";
Server server = new Server();
server.Connect(connString);
Database db = server.Databases.FindByName("adventureworks");
Table tbl = db.Model.Tables.Find("DimDate");
tbl.RequestRefresh(RefreshType.Full);
db.Model.SaveChanges();
Related content
Feedback
Coming soon: Throughout 2024 we will be phasing out GitHub Issues as the feedback mechanism for content and replacing it with a new feedback system. For more information see: https://aka.ms/ContentUserFeedback.
Submit and view feedback for