Customize your Clip Art with Word 2007
Background and ideas:
A previous blog entry discusses Word 2007’s ability to turn downloaded clip art into editable content. Building on this idea exponentially extends Office Online Clip Art library content. Grouped and stylized to your own devices, clip art customizes to fit business document color-schemes, or arranges and overlaps within animation storyboards, and on and on.
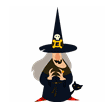
Again, some good styles (with uncomplicated line and shape) are #1450, #1434, or #1255. Much of Style #1450 appears in the following templates: Aquatic animals, Farm animals, Forest animals, Christmas, and Halloween. And has founds its way into Word themes for the Summer Santa correspondence set.
For this example, here is one page from the Farm animals coloring book:

The scene:
 |
 |
 |
| Flowers | A tree | And various shapes drawn in Word |
The cast:
 |
 |
 |
 |
| One frog… | Two frog…! | A boisterous fowl | And 1 awed snail |
Note: The video instructions previously located --> here <-- are offline at this time.
- Import clip art into a new Word 2007 document.
- Right click on your selected clip. Choose to Edit Picture, and this will show the image highlighted inside a dotted-line bounding box.
- Click and drag the mouse inside this box from one corner to the other to capture the most pieces of the art initially possible.
- On the Ribbon Format tab, change the Shape fill to White, and the Line color to Black.
- This will reveal shapes in the art you might have missed. Keeping all your original shapes selected, Control-click to gather any of the remaining shapes.
- Repeat step 4-5 until you’ve gathered all the visible shapes.
- With all shapes still selected, right click Grouping - Group.
- Copy or Cut your grouped image outside of the bounding box. Delete the bounding box and unwanted images inside of it. (Note: a stray bounding box can cause headaches by pushing around other objects).
- Optional: Right click to Ungroup your art, and re-group it into smaller sets. (Note: Overlapping objects may take practice. Lost objects may have gone behind a larger one. Be prepared to backtrack).
- You can now arrange your art within the overall document Use the Format tab in the Ribbon to Arrange shapes/groups with Bring to Front, Send Backward, etc.
Final suggestions:
Have fun! Play with Word 2007 styles to create text, color variation, stage placement, or texture and photographic elements.


-- Aaron