Updating the FIMMA to include Custom Attributes in the FIM Portal.
You may find yourself creating new Custom Attributes or even a custom Resource in the FIM Portal. If you only plan on managing these Custom Resources and or Attributes in the FIM Portal than you would not need to add them to the Synchronization Service and FIMMA, but if you intend to manage these new custom resources and attributes with the Synchronization Service than you will need to update the Synchronization Service to include these Resources and / or Attribute. This posting is to assist with the Updating of the FIMMA .
Before you continue verify that the new Resources and / or attributes have been added to the Metaverse. The following Post can assist with adding resources and attributes to the Synchronization Service. Resource Management - Configure Synchronization Service to manage New Resource.
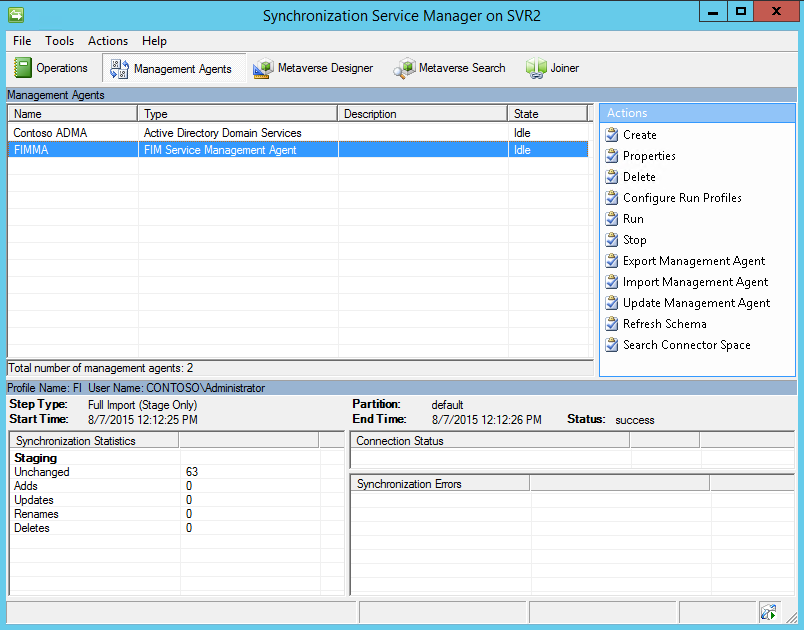
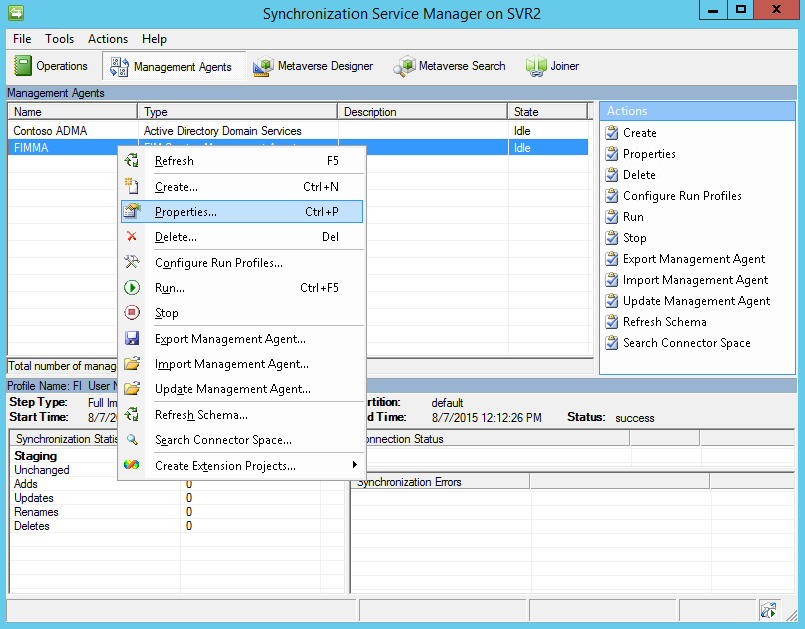
- Open the Synchronization Service and open the Management Agents Tab
- Right Click on the FIMMA
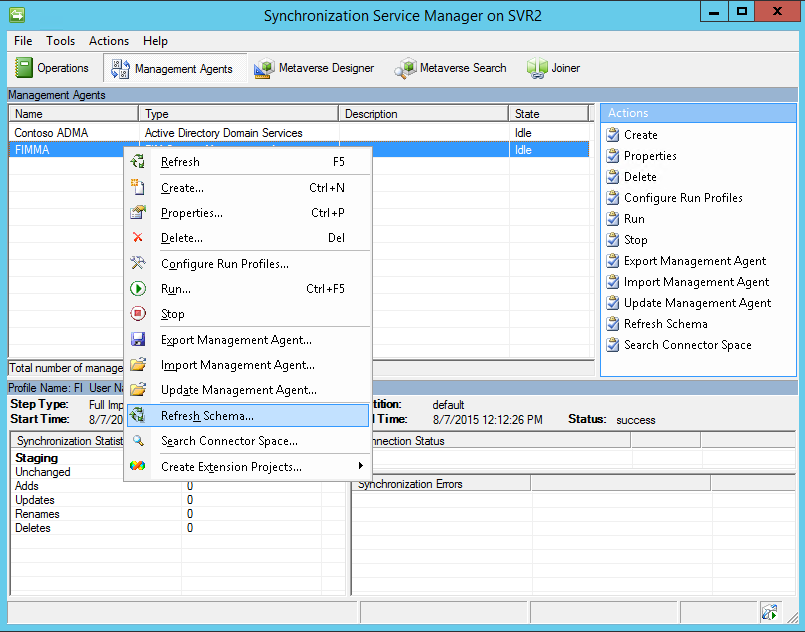
- Click on Refresh Schema
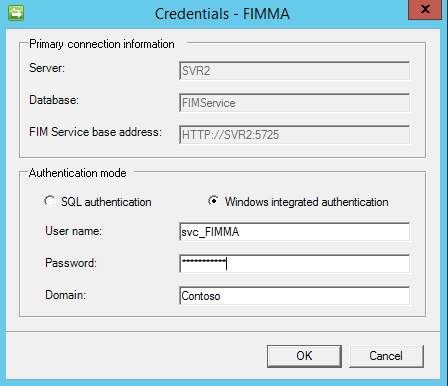
- When prompted enter the FIMMA Service account Password
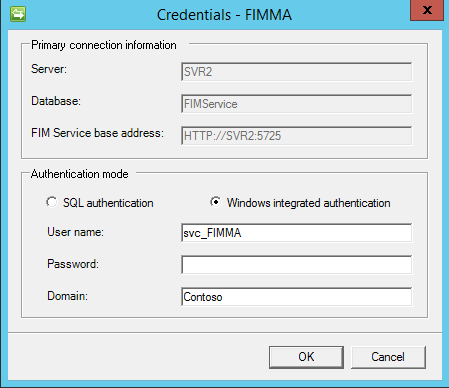
- Verify information is correct
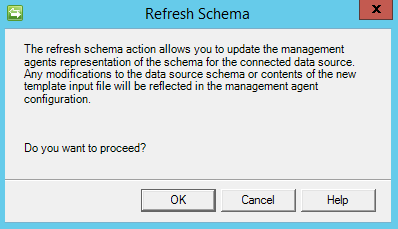
- Click on Ok to continue, this will refresh the Schema

- Click on Close
- Back in the Management Agent Window of the Synchronization Service right click on the FIMMA and click on Properties
- The Properties window will open
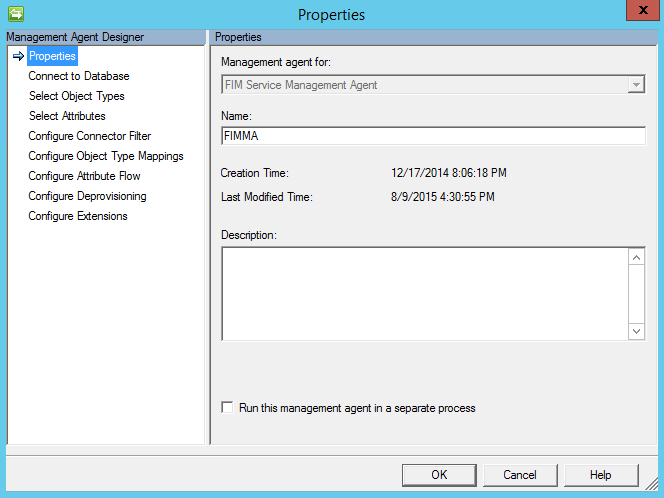
- Select the Select Attributes section
- If you dont see the new custom attribute that you want to add to the FIMMA select Show All.
- After you locate the new attribute (in the post we will be adding the "Employee Status" attribute) Select the attribute.
- After you have selected all the attributes you want to add the the FIMMA click on the Configure Attribute Flow Section
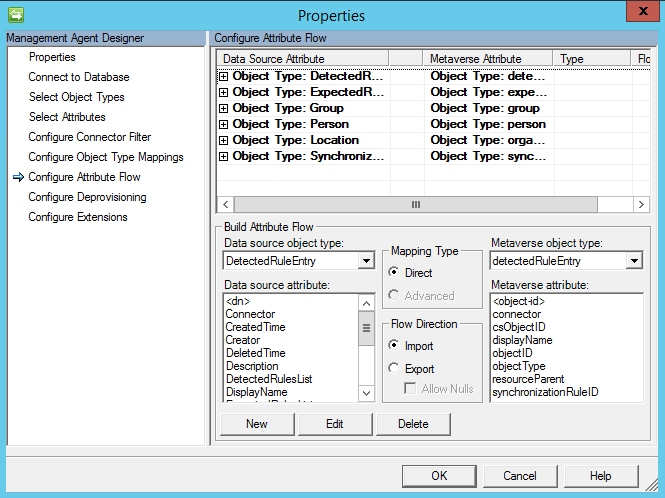
- Expand the section Object Type: Person
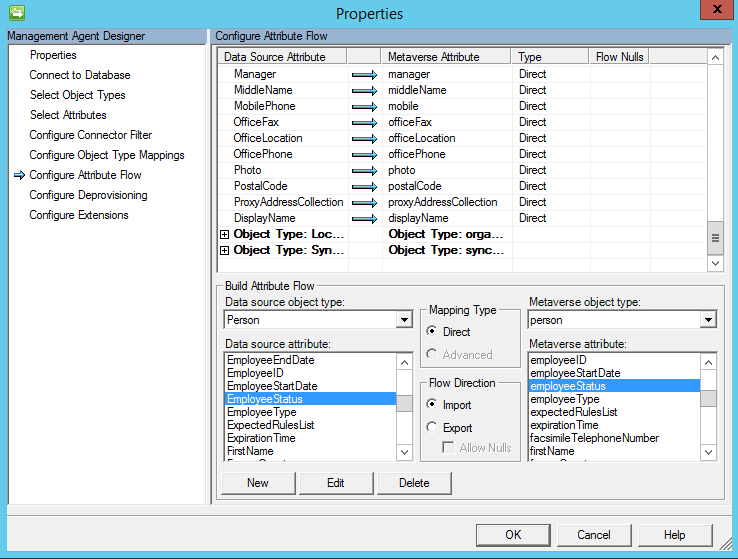
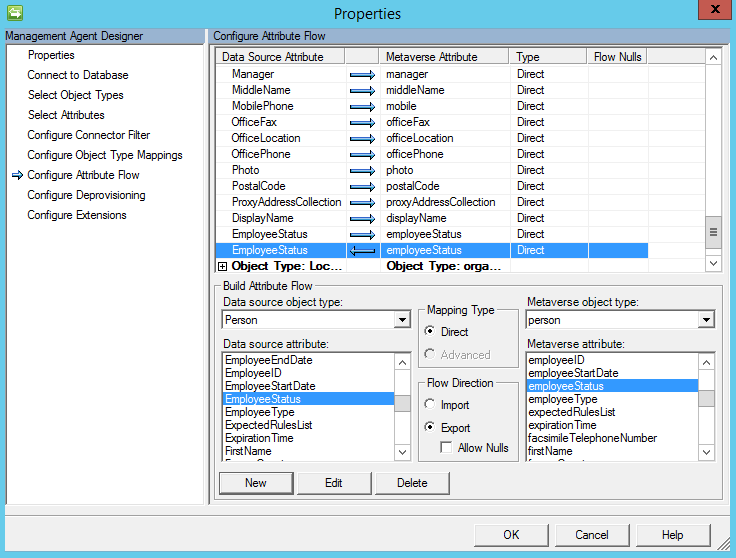
- Under Build Attribute Flow select Employee Status
- Under Metaverse object type select employeeStatus
- Add this as an Import and an Export attribute flow.
Additionally you may wish to read Configuring the FIM Management Agent