Step by Step - Configuring Guarded Hosts with Virtual Machine Manager 2016
[This post is authored by John Patterson, Program Manager for the System Center Product Team]
In this blog I want to talk about setting up guarded hosts using Virtual Machine Manager (VMM). A guarded host is just a host that can run shielded VMs. Once your Host Guardian Service has been set up and configured, configuring hosts to run shielded VMs is pretty easy.
All you need to do in VMM to set up a guarded host is to configure the host you want to be guarded with three (sometimes four) properties:
- Attestation Service URL – The URL of the attestation service (part of the HGS). The attestation service basically confirms that the host is authorized to run shielded VMs.
- Key Protection Service URL – The URL of the key protection service (also part of the HGS). Once a host passes attestation, it retrieves the key required to decrypt VMs from this service.
- Code Integrity Policy File Share Path (Only Required for TPM Attestation Mode) – When using TPM attestation mode (bare minimum requirement is that your host must have a TPM 2.0 chip in it), a code integrity policy is used to restrict the software that can run in kernel mode to ONLY what is specified in the code integrity file (a .p7b file). In order to get this file on the host, you must set the path to it.
- Shielding Helper VHD – Includes tools to convert existing non-Shielded VMs to Shielded VMs
So… while there is a LOT behind shielded VMs, guarded hosts, and encrypted workloads, actually configuring a guarded host is easy (remember at most you only need to set these three properties). Let’s do this in VMM.
Step 1 – Configuring the Global HGS Settings
In the VMM console navigate to Settings > Host Guardian Service Settings 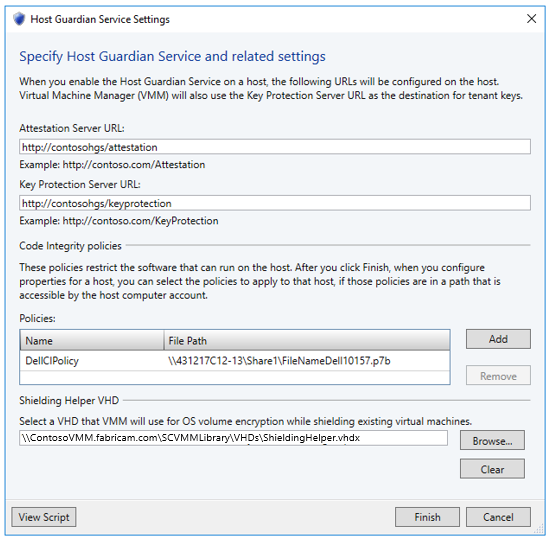
Here you need to do three things:
- Tell VMM what attestation and key protection URLs hosts in VMM will use (Note: all hosts in VMM must use the same ATT and KPS URLs)
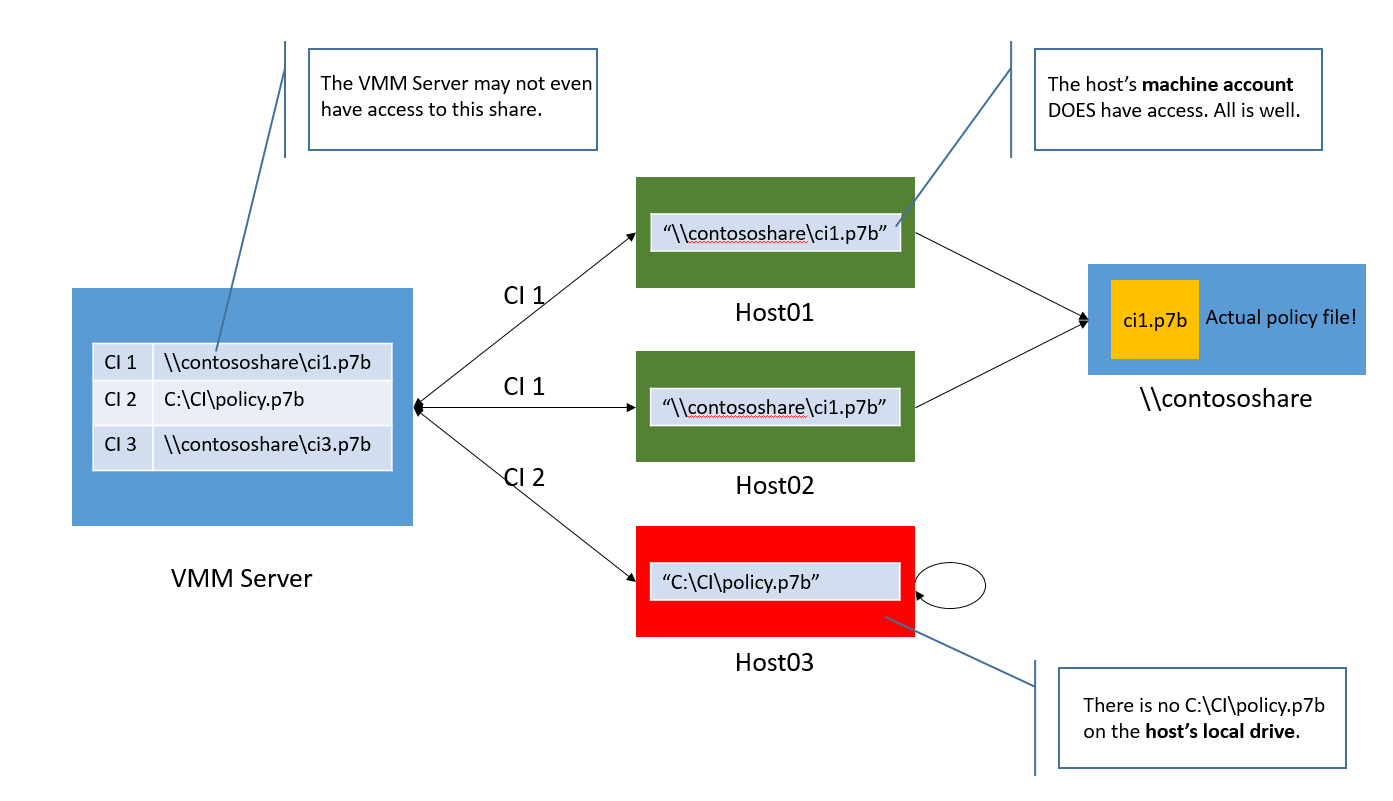
- Add any CI policies to VMM (really you don’t add the CI policy itself, you add a friendly name and the location where the host themselves can fetch the CI policy from). Note above I’m pointing to a file share the hosts can access (via their host account) to get the CI policy from.
- Specify the location of the Shielding Helper VHD in the VMM Library
Here is a potential gotcha: The Code Integrity Policy File Share Path entered in VMM is the EXACT same path set on the hosts. So ALL the hosts using a particular CI policy need to have access to the file share path that is set in VMM.
Step 2 – Configure Your Guarded Host
Note: For applying Code Integrity Policy on a TPM based host, the host needs to move into Maintenance Mode
Right Click Host > Start Maintenance Mode
Right Click Host > Host Guardian Service > Check the Checkboxes 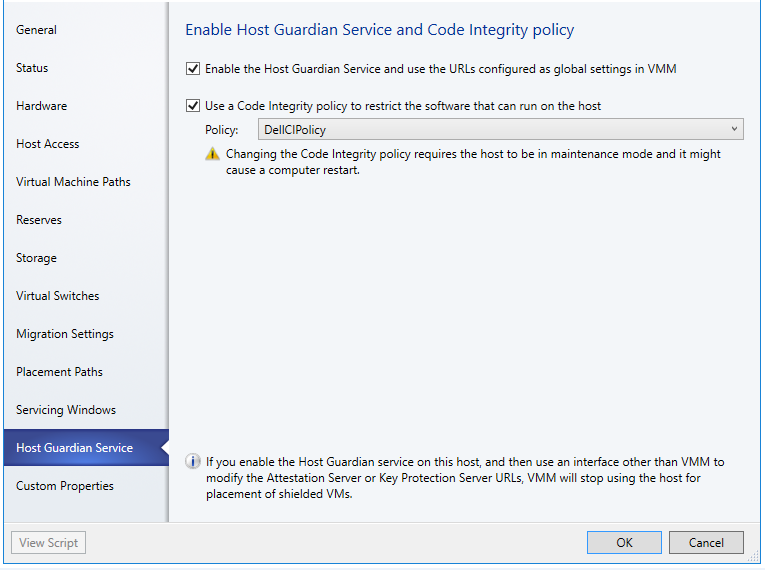
- The first checkbox essentially sets the attestation and key protection URLs on the host. If you are not using TPM based attestation, this is the only box you need to check.
- The second check box sets the file path of the CI policy on the host it doesn’t ACTUALLY put the CI policy on the host. The host fetches its CI policy on its own from the given location. In my case I’m using TPM based attestation, so I specify the CI policy designated for my Dell hosts (if you didn’t guess it, this happens to be a Dell server)
After successfully Applying ‘Host Guardian Service’ settings, need to move the host out of the Maintenance Mode.
Right Click Host > Stop Maintenance Mode
That’s It
That’s all it takes to configure hosts to run shielded VMs in VMM. At this point, shielded VMs will be automatically placed on any guarded hosts under VMM’s management.