TFS 2008 & How to Uninstall & Reinstall WSS 3.0
How to uninstall & reinstall Windows SharePoint Services 3.0 with Team Foundation Server 2008
This post is specific to:
1. Team Foundation Server 2008
2. Local installation of Windows SharePoint Services 3.0 (with SP1).
The overall steps required to perform the stated task are:
1. Take a full back up of the content data base.
2. Remove SharePoint from the content site which is normally the default web site.
3. Uninstall Windows SharePoint Services 3.0 from the machine.
4. Drop the WSS_AdminContent & WSS_Config databases.
5. Install Windows SharePoint Services 3.0 on the machines
6. Run the SharePoint Point Products & Technologies Wizard
7. Create a new Web Application to host the Project portals
8. Attach the content database to the new web application
9. Install TFS 2008 Extensions for WSS
Take a back of the content database
Please refer to https://msdn.microsoft.com/en-us/library/ms253070(VS.80).aspx for procedures to back up databases.
To know the name of the content database to backup:
1. Launch SharePoint Central Administration site from Start->Administrative Tools-> SharePoint 3.0 Central Administration.
2. Click on the Application Management tab.
3. Under SharePoint Web Application Management, click Content Databases.
4. In the Manage Content Databases page, note the name of the database. This is the database which you need to take a backup of.
Remove SharePoint from the Default Web Site/Content Site
1. Launch Start->Administrative Tools-> SharePoint 3.0 Central Administration.
2. Click on the Application Management tab.
3. Under SharePoint Web Application Management, click Remove SharePoint from IIS Web site.
4. In the Remove SharePoint From IIS Web Site page, ensure that
a. Web Application is set to https://machinename
b. Select IIS Web site and zone to remove is set to Default Web Site(default)
c. Delete IIS Web sites is set to No.
5. Click Ok to remove SharePoint from the default web site.
6. On the Application Management tab, under SharePoint Web Application Management, click Delete Web application.
7. On the Delete Web Application page, ensure that
a. Web Application is set to https://machinename
b. Delete content databases is set to No.
c. Delete IIS Web sites is set to No.
8. Click Ok.
Close the Central Administration Site.
Uninstall Windows SharePoint Services 3.0 from the machine
To uninstall WSS 3.0:
1. Go to Start->Control Panel->Add/Remove Programs.
2. Select Microsoft Windows SharePoint Services 3.0 & click Remove.
3. You should be prompted with a dialog box stating “Are you sure you want to remove Microsoft Windows SharePoint Services 3.0 from your machine?”. Click Yes.
4. You should be prompted with another Warning dialog box stating “Before uninstalling this product, note the following:
4.- Removing this product might result in partial loss of functionality for sites that depend on features installed by this product.
4.- If you installed this product over an existing SharePoint Products and Technologies installation or choose to cancel the uninstall after this dialog box, you must run the SharePoint Products and Technologies Configuration Wizard to reconfigure the server farm after Setup has exited.
4.Do you want to uninstall now?”.
Click Ok to start the un-installation for WSS 3.0.
5. Once the un-installation is complete, click Close on the confirmation dialog box.
6. Click Yes to reboot the box.
Drop the WSS_AdminContent & WSS_Config databases
1. Launch SQL Server Management Studio from Start->All Programs-> Microsoft SQL Server 2005-> SQL Server Management Studio.
2. Connect to the appropriate Database Engine instance.
3. Expand Databases.
4. Right click on WSS_AdminContent & select Delete.
5. In the Delete Objects dialog box, check “Close existing connections” & click Ok to drop the WSS_AdminContent database.
6. Right click on WSS_Config & select Delete.
7. In the Delete Objects dialog box, check “Close existing connections” & click Ok to drop the WSS_Config database.
Install Windows SharePoint Services 3.0 on the machines
1. Run SharePoint.exe.
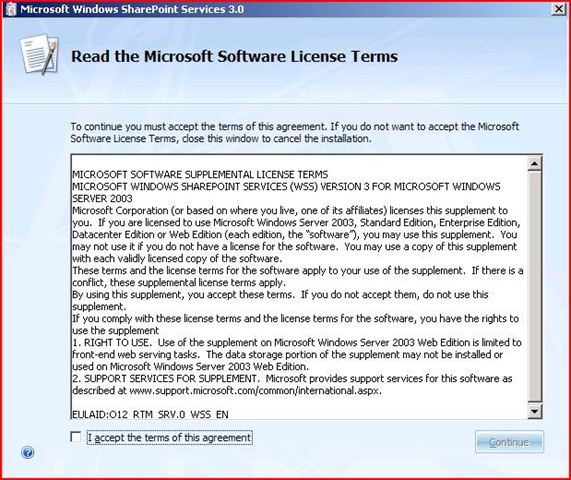
2. Accept the terms of Agreement & click Continue.
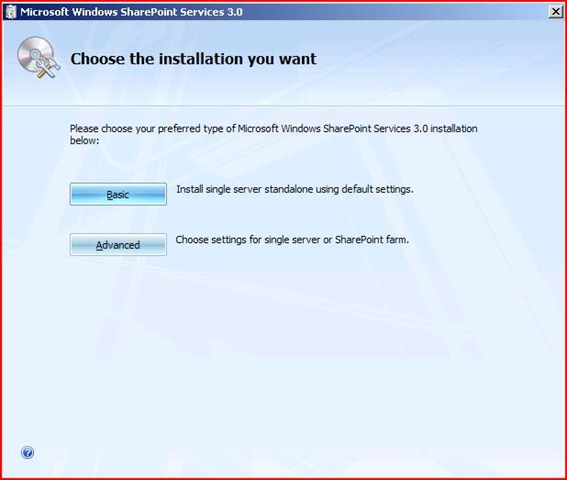
3. Click Advanced in the Choose the installation you want dialog .
4. Select Web Front End as the Server Type, confirm the installation location & click Install Now.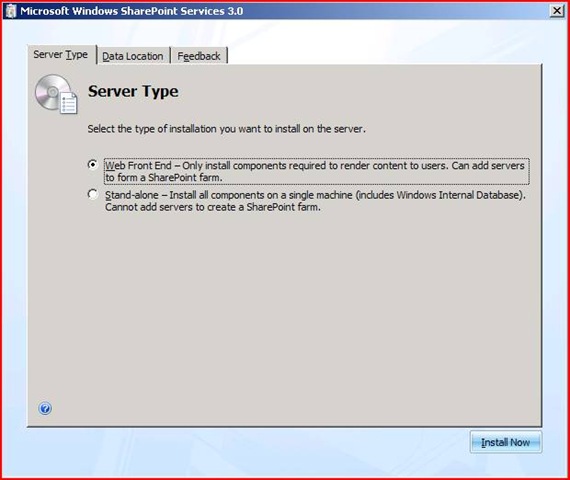
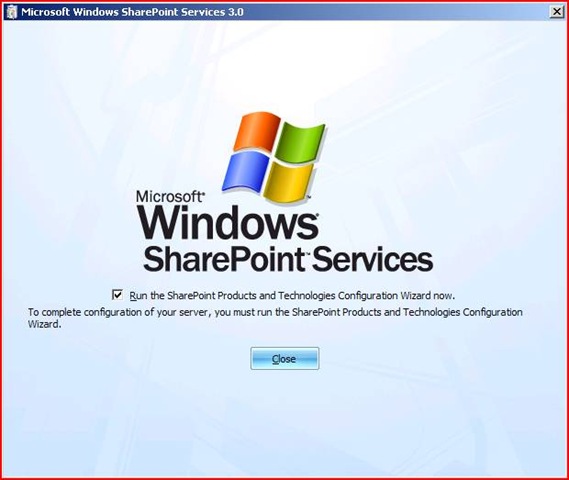
5. Once the installation is complete, make sure the check box for Run the SharePoint Products & Technologies Configuration Wizard now is selected & click Close.
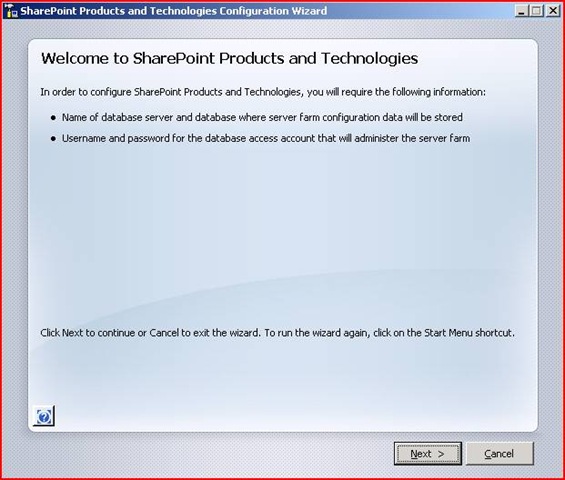
Run the SharePoint Point Products & Technologies Wizard
Complete the SharePoint Products & Technologies Wizard to set up the WSS 3.0 central admin site & WSS 3.0 services on the box.
1. Click Next on the Welcome page.
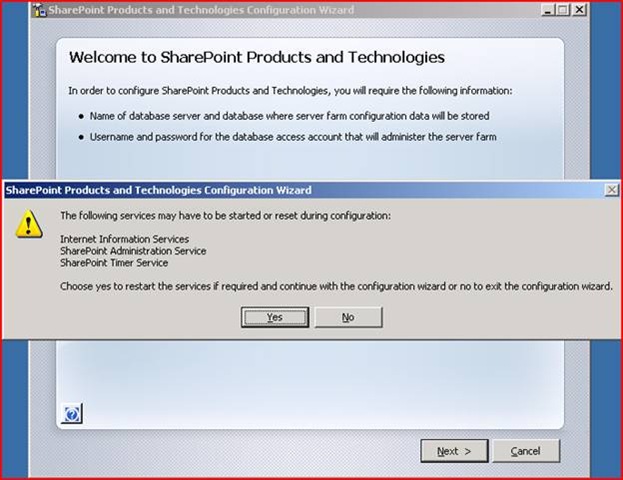
2. Click Yes to allow the Wizard to Restart IIS & WSS services.
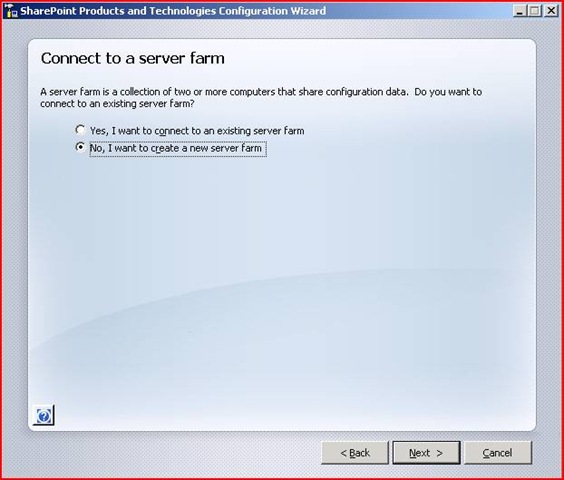
3. In the Connect to a server farm dialog, select No, I want to create a new server farm & click Next.
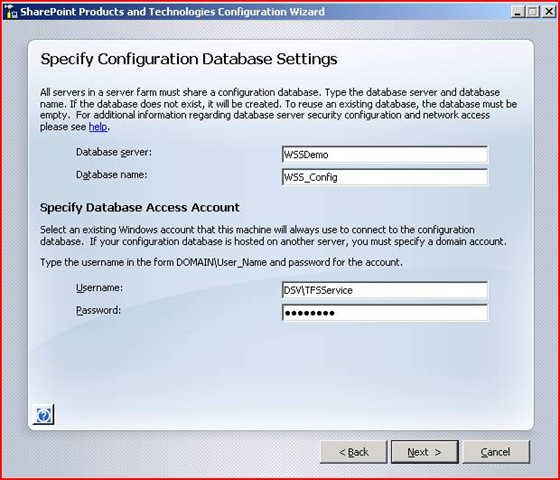
4. In the Specify Configuration Database Settings dialog box, give the SQL Instance name for your TFS, WSS_Config as the database name & the Domain\TFSService account name & password & click Next.
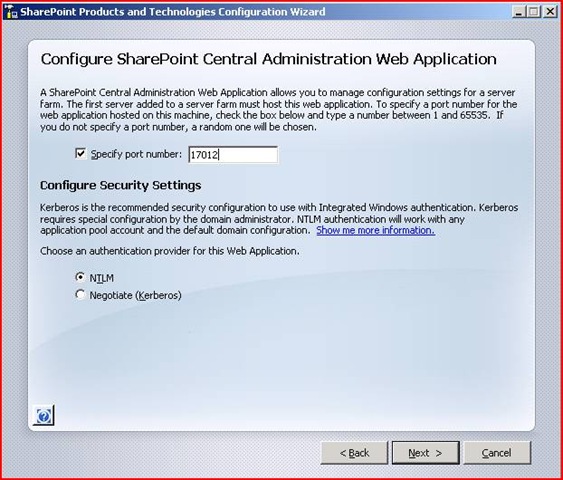
5. In the Configure SharePoint Central Administration Web Application dialog, check Specify port number & provide 17012 as the port number for WSS Central Administration site. Make sure that authentication provider is set to NTLM(which is the default selection) & click Next.
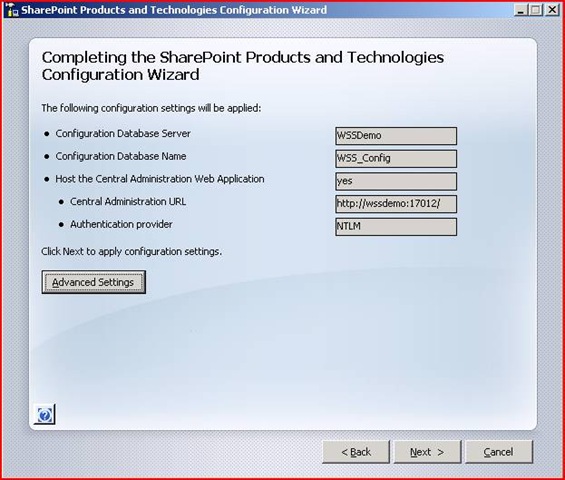
6. In the Completing the SharePoint Products and Technologies Configuration Wizard dialog, confirm the settings & click Next.
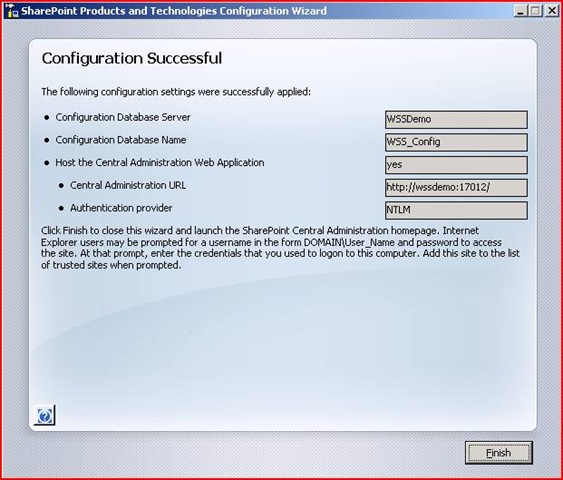
7. Once the wizard has successfully completed, click Finish. This would open up the WSS 3.0 Central Administration site.
Create a new Web Application to host the Project portals
Create a Web Application & extend the Default Web Site with WSS 3.0.
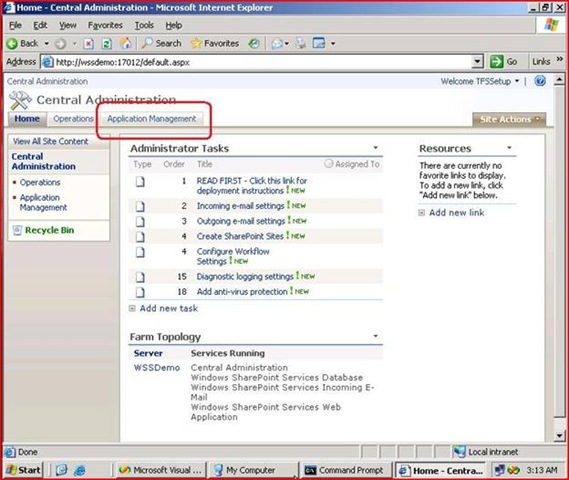
1. Click Application Management tab in WSS 3.0 Central Administration site.
2. In Application Management tab, under SharePoint Web Application Management, click Create or extend Web application.
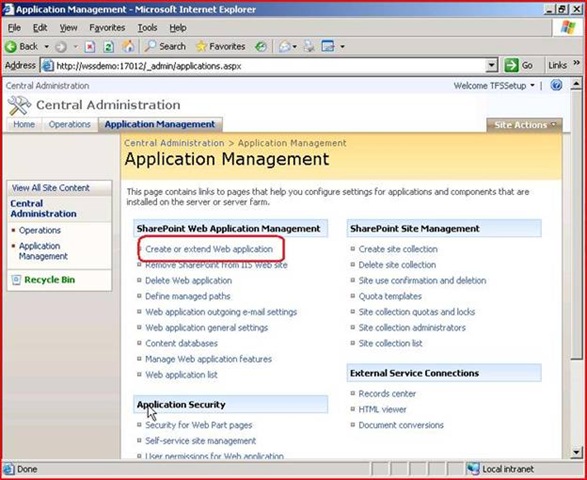
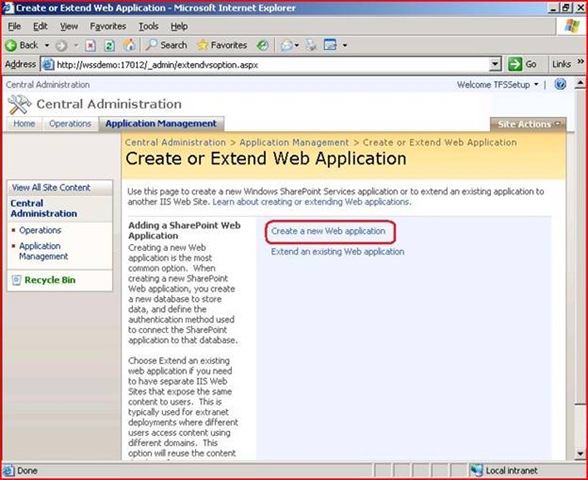
3. In the Create or Extend Web application page, click Create a new Web application.
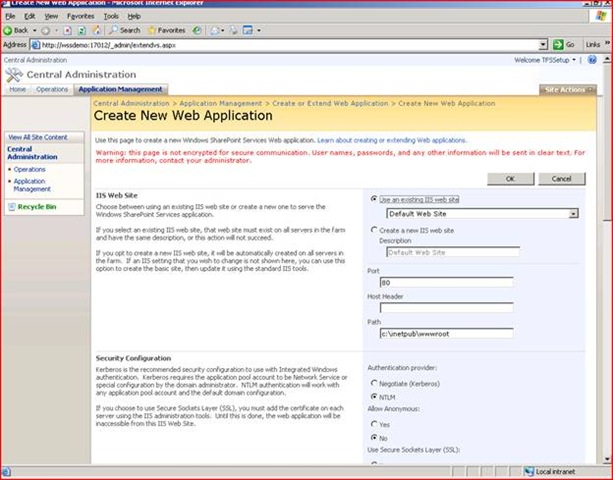
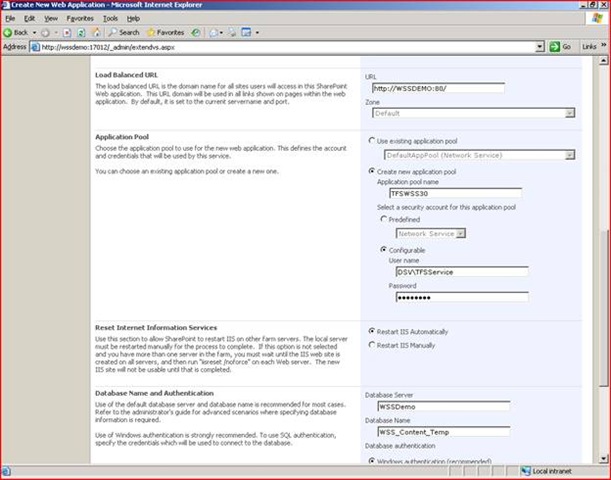
4. In Create New Web Application page, select Use an existing IIS web site & select Default Web Site in the drop down list. In Application Pool settings, ensure that Create a new application pool option is selected & give TFSWSS30 as the name of the new application pool. Ensure that Configurable option is selected & give the Domain\TFSService account as the service account for the application pool. Ensure that Restart IIS automatically is selected. In the Database Server give the SQL Server instance name for TFS 2008. Give WSS_Content_Temp as the Database Name. Click OK to create the new web application with the default web site extened in WSS 3.0.
Attach the content database to the new web application
Delete the temporary content database using the command:
stsadm –o deletecontentdb –url https://<AppTierName> –databasename WSS_Content_Temp
To attach the WSS_Content database to the default web site, open a command prompt window & change to the folder %Program Files%\Common Files\Microsoft Shared\web server extensions\12\BIN. Run the following command:
stsadm –o addcontentdb –url https://<AppTierName> –databasename WSS_Content
Install TFS 2008 Extensions for WSS
Install TFS 2008 extensions for WSS 3.0 from <TFS Installation Location>\wssext folder by running the setup.exe. At the end of installation, after you have clicked Finish, you would be prompted with the dialog box for the WSS 3.0 web part configuration. Provide the https://ATName/sites as the WSS site, https://ATName/Reports as the reports site & https://ATName/ReportServer for the reporting services administrative site & click Apply. Click Exit.

Connect to Team Foundation Server using Team Explorer & verify connectivity.