Filtering On Timestamps
There are situations when you want to narrow a trace down to a certain time frame. However, creating a filter for a timestamp is not very straight forward. We will discuss how timestamps operate and ways to make filtering on timestamps workable.
How Time Stamps Work
With the latest version of Network Monitor 3.4, there are now two different ways timestamps are stored. In the previous capture file format, there is a master timestamp in the file header and then each frame records an offset from that initial time. In the latest 3.4 release, we extended our capture file format to save a higher-resolution timestamp and time zone information per frame. This feature allows you to get an adjusted view of the timestamps and associate trace data to other logs, such as the event log, which also adjusts the time based on your local time zone. The 3.4 file format is still backwards compatible though; however, you won’t be able to access the time zone information. Our help file has all of the details of the file format if you need more information.
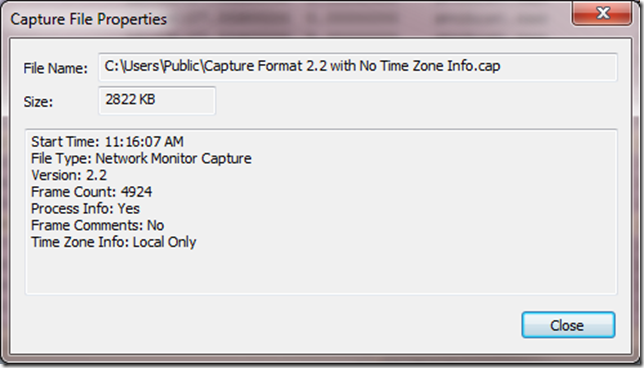
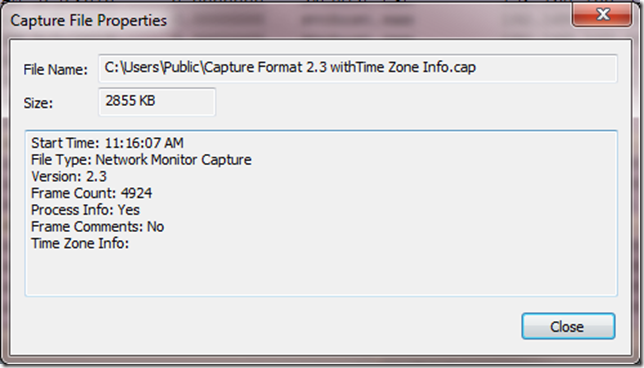
You can determine which version of a capture file you are looking at be by going to the File Menu and selecting Properties on an open trace. It will state the version as well as the time zone information where the trace was originally taken.
Here’s an example of the older format with no time zone information. We can only see the local time of the trace based on when it was taken.
Here’s an example of capture file with time zone information.
Where Are the Time Properties Stored?
We store all Frame related metadata in a top level object called FrameVariable. Within this object you can access all the time related properties as well as many other frame level properties like Frame Length and Media Type. The time related properties we will discuss are listed below:
- FrameVariable.TimeOffset – This is the offset based on the initial time stamped in the capture header.
- FrameVariable.TimeDelta – The distance in time from the last physical frame in the trace.
- FrameVariable.TimeDateLocalAdjusted – Time and Date in the trace adjusted from the time zone where it was taken to your local time zone.
Filtering on Time Offset
Out of all the examples here, Filtering on Time Offset is the most straight forward. The only trick is that the value we use is in 10ths of microseconds while the value we usually display is in fractions of seconds. So if you type in 10,000,000, this really represents 1 second. To filter on all frames between 10 and 20 seconds from the beginning you would type:
FrameVariable.TimeOffset > 100000000 AND FrameVariable.TimeOffset < 200000000
Filtering on Time Delta
This value is also represented in 10ths of microseconds. But the trick with Time Delta is that it’s based on the last physical frame. I discuss this in some detail in this blog about measuring response times. Just remember that if you have a filter applied, the time delta is still based on the last physical frame and not the last one displayed based on your filter. As an example, the following filter finds all frames where the time delta form the last physical frame is 2 seconds.
FrameVariable.TimeDelta > 20000000
Filtering on Time of Day
You can’t filter successfully using a time/date string for any of our time fields. While it would be the natural thing to do, we never implemented a way to convert a time string within a filter due to development constraints. For Time and Date, we instead use the FileTime which is an operating system structure which records the number of 100-nanosecond intervals since January 1, 1601 (UTC). So in order to find the numeric value you need, you have to convert the date into this 64-bit number.
One way to do this is find a frame you know the time of and use it to generate the filter by using Right-Click add as display filter on the Time of Day column. Keep in mind that this is the only column that we’ve enabled this translation for. All other time/date related columns, Time And Date, Time Date Local Adjusted, and Time Local Adjusted, are represented as strings incorrectly and create a filter that shows a string value instead. Obviously this wasn’t the intended behavior, but rather the default behavior for any string data in a column.
Another way to get the value is to convert the time to a FileTime value manually. This might be more useful if it’s difficult to find an example frame to use as a reference. There are actually some web sites which can do this for you; in particular I found this site: https://silisoftware.com/tools/date.php.
Alas, you still have to do some conversion. Since the FileTime is based on UTC you have to subtract the time zone where the trace was captured based on the difference from GMT. So for instance if a trace is taken in EST which is -5 form GMT, I have to subtract 5 hours. For example if I have a timestamp of 11:16:35 AM 3/5/2010, I would need to enter into the above web page, “March 5, 2010 6:16:35AM”. When I do this, it returns a FileTime value of 129122613950000000. Which I can then plug in as a filter:
FrameVariable.TimeOfDay > 129122613950000000
Filtering On Time Date Local Adjusted
Filtering on this property is done as a string. And due to how string comparison work, the time formats don’t always filter correctly. For instance while “10:50:51” < “10:50:52” makes sense, it’s also true that in terms of strings comparisons that “1:50:51 > 10:50:51”. This is because the comparison is strictly based on the ASCII values. So what I recommend is that you use the FrameVariable.TimeOfDay property instead which is still available for 3.4 captures. In this case you can add the column to find the local time, or calculate it manually based on the time zone information shown in the file properties dialog.
Understanding Network Monitor Time Stamps
Filtering on times can be helpful when you want to narrow a large trace based on a time period. In fact you can also use, “NMCap /InputCapture x.cap /capture “FrameVariable.TimeOfDay > xxx /file:out.cap”, to automate this process when you have many traces to look through. Hopefully you now have an understanding for how to filter with Network Monitor timestamps.

