Setting up the Operations Manager Web Part
Setting up the Operations Manager Web Part
Why would you want to do this?
Setting up a Target Application in the SharePoint Secure Store (Optional)
Setting up the Web Part Environment
Configuring the Web Part on a Page
Why would you want to do this?
The Operations Manager Web Part allows you to host dashboards on your SharePoint site. Unlike the web console, these dashboards are “look, but don’t touch”. You can view info, but not navigate elsewhere or run tasks. This is really good for giving people outside of the operations team a look at some operations data. You also don’t need to add all the users of the dashboard to an Operations Manager Role. Instead you can add the groups you want to give access to the dashboard to SharePoint and have them all share a single Operations Manager account and connection.
There are a lot of steps here, but this is a one-time thing. Once its setup, it’s easy to maintain and add new dashboards. Technet describes how to do this, but it’s missing roles, motivations, and pictures so here ya go.
General Prerequisites
You’ll need to setup Operations Manager 2012 with its Web Console installed. You need a SharePoint 2010 site on a different machine. SharePoint is not supported on the same machine as the Web Console as they both want port 80 and anyway it would be slow as tar. You’ll also want some dashboard you want to share. I’m just going to use a built in one as an example.
Installing the Web Part
Role: For this step you must be the SharePoint admin. This step requires running a power shell script to install the Operations Manager SharePoint project on your site(s).
Prerequisites: you’ll need the Operations Manager 2012 installation media.
On the Operations Manager installation media, look under Setup\Amd64\SharePoint. It’s easiest to copy that directory to your SharePoint Server.
On the SharePoint Server, open the SharePoint 2010 Management Shell.
Change to the SharePoint directory you just copied and run install-OperationsManager-DashboardViewer.ps1
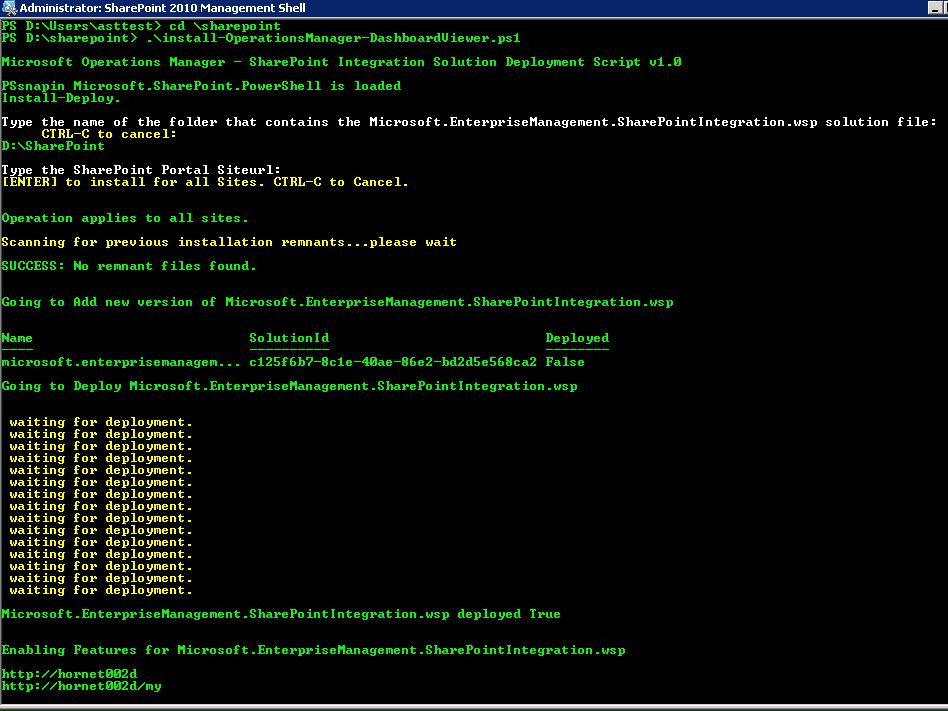
You’ll be prompted for two things: the directory the Operations Manager project is in (which is the full path to your current directory) and the sites you want to install the project on (hit Enter for all). In my example above I just entered D:\SharePoint and hit Enter.
This script adds the project and deploys it to all sites. If you add a site later you may have to rerun this. The directory also contains a script to uninstall the project. That script removes the code from SharePoint, but it leaves 2 temp files in a cache that .Net maintains. If you want to reinstall or upgrade, run the install script and follow it’s instructions to get rid of the temp files.
Setting up a Target Application in the SharePoint Secure Store (Optional)
Reason: You’ll need to do this if the SharePoint server is in a different domain from the Web Console or if you want to use a single shared credential in Operations Manager for all your dashboard users.
Role: The first part of this step is setup by the SharePoint admin. You need to setup a Target Application in the Secure Store.
Prerequisites: You’ll need
1) The email of the contact for the operations team for your management group.
2) The Operations Manager Admin to give you an account in the read-only role of you management group for use in reading the dashboards.
3) Any windows group(s) that you want to grant permission to look at the dashboard.
Note: the Secure Store feature requires the Standard or Enterprise SharePoint 2010. You can’t get this feature with SharePoint Foundation.
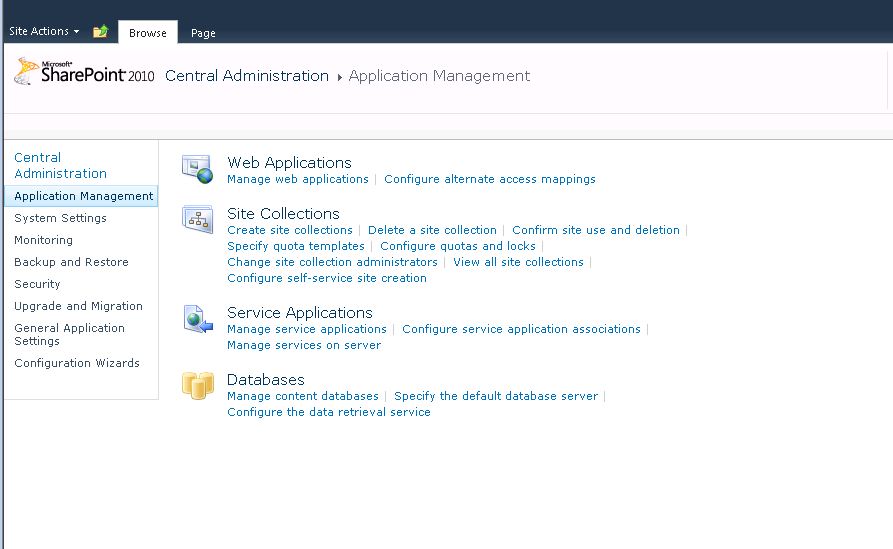
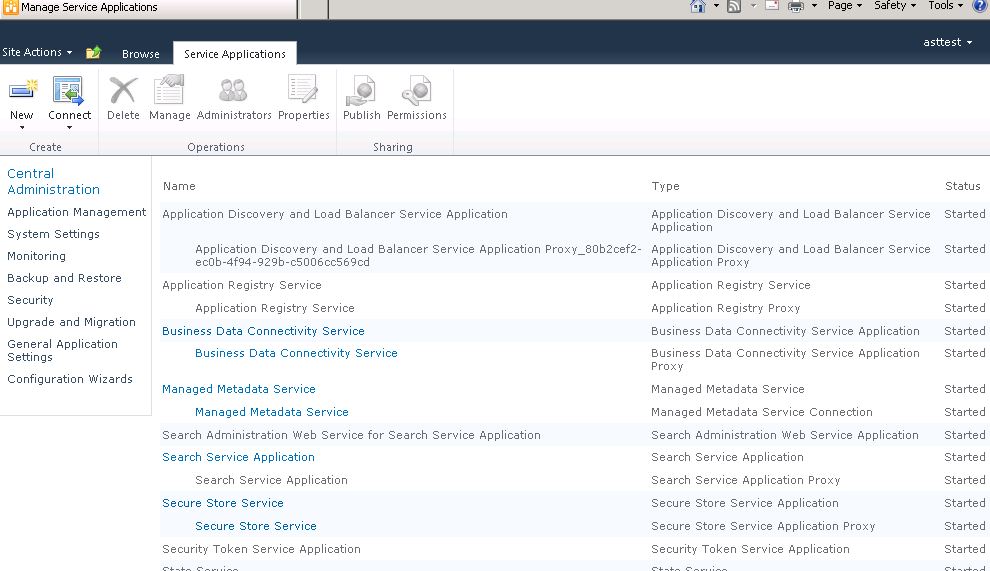
To find the Secure Store, open the SharePoint Central Administration site and navigation to Application Management/Secure Store Service/Secure Store Service (see pics).
If you haven’t already, you’ll need to generate an encryption key for the store. Just press Generate New Key and fill in a pass phrase.
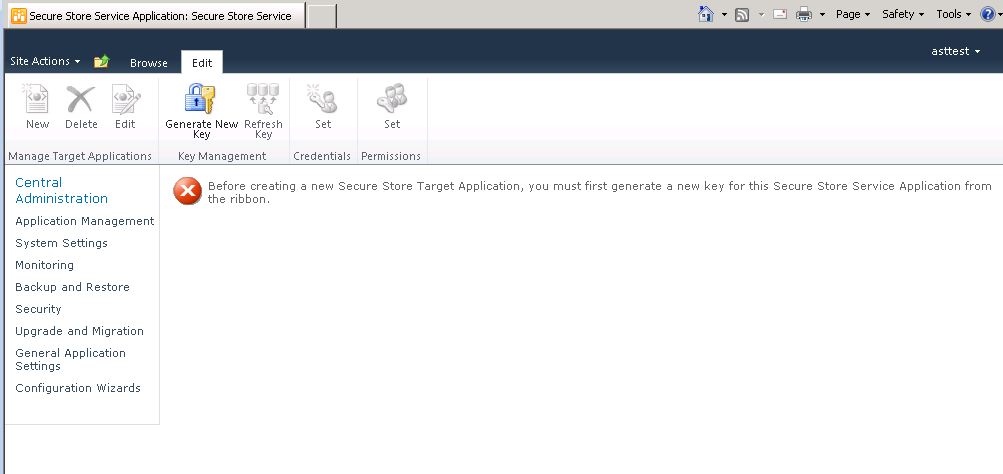
On the same ribbon hit New to create the Target Application. Give it an easy name, fill in a contact email, and choose the Group type. Group type allows anyone in the included groups to access your dashboard. It’s easier to maintain than individual accounts.
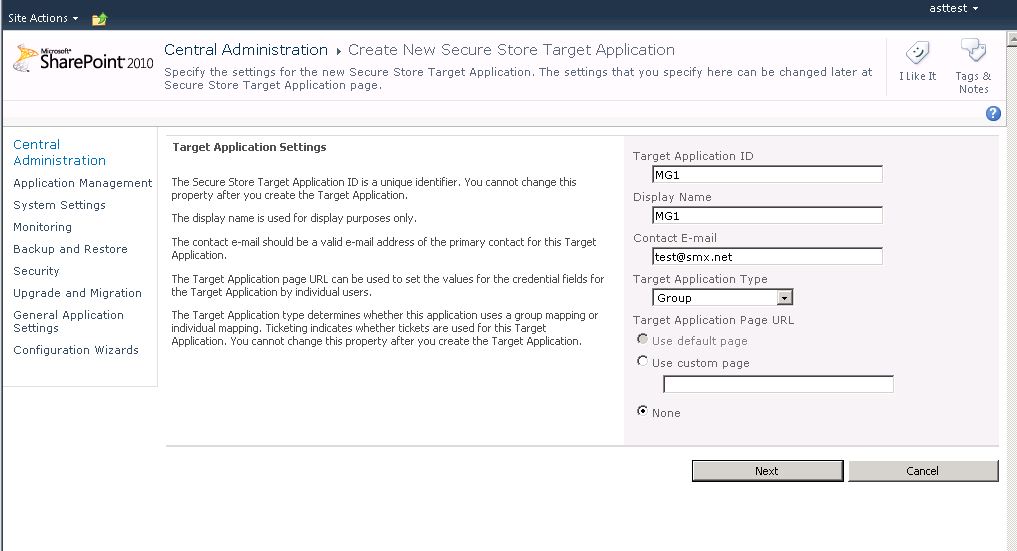
The next page configures the field names for the credential you use to connect to OM. Don’t fill in your user name or password. You really don’t need to change anything here and it will just be confusing if you do. Just hit Next.
.JPG)
The Application Administrators are the people who can give users and groups access to the dashboard. The Members are the users and groups who can connect to SharePoint and access the dashboard. Fill in the accounts you want for these.

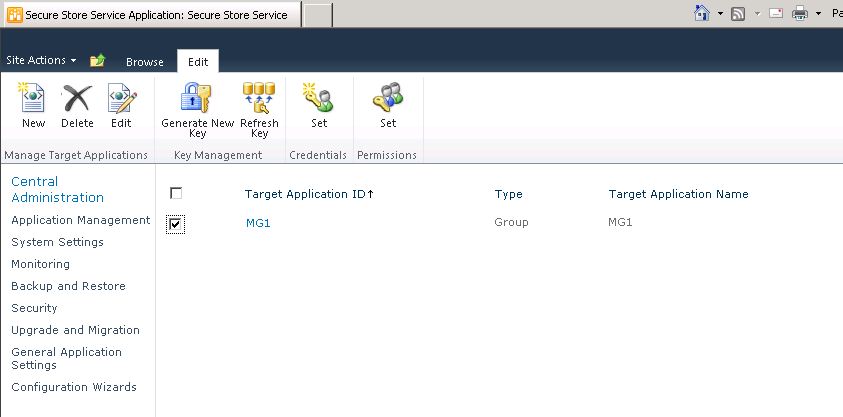
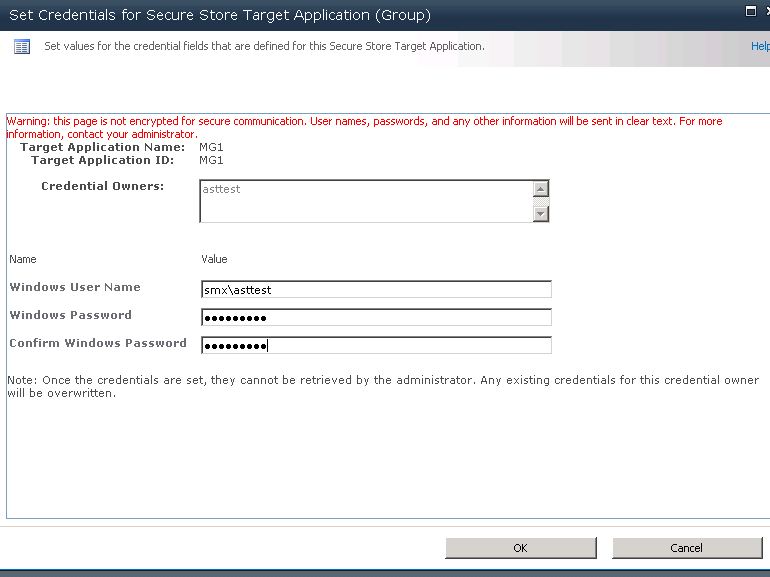
Now that you’ve created the Target Application ID, you’re not quite done. You need to set username and password it’s going to use to connect to OM. Select the checkbox for the application and hit Set.
Now fill in the user name and password of the account that SharePoint will use to talk to the Operations Manager SDK. This account needs to have at least read-only access in the Operations Manager Management group.
Setting up the Web Part Environment
Reason: You need to setup a connection to Operations Manager that can be used by any number of web pages in SharePoint. This connection info is stored in a SharePoint list on the Admin site.
Role: This step must be done by the SharePoint admin.
Prerequisites: the Operations Manager Web Console must be installed and you’ll need its URL. If you are using a secure store key then you’ll need access to or a copy of the web.config file for the Operations Manager Web Console.
The web.config file is normally under Program Files\System Center Operations Manager 2012\WebConsole\WebHost on the web console machine.
There are 2 ways to setup the web part environment. The first is to use the UI. The second is to use a provided PowerShell script. The script is a little easier and can be automated so let’s start with that.
The PowerShell method
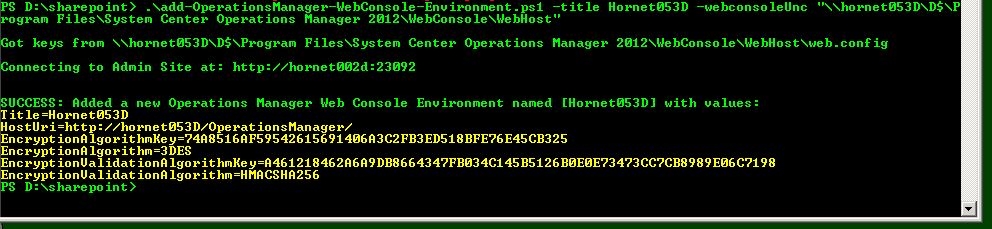
In the same PowerShell window you were using above run the script below with parameters.
add-OperationsManager-WebConsole-Environment.ps1
- title “the name of the connection dashboard users will see. A config group is good.”
-webconsoleUNC “The path to the web.config file, not including the filename”. This is only needed if you use a secure store credential.
- targetApplicationID “optional: the ID you created above if you are using the secure store”
Now here’s the UI method
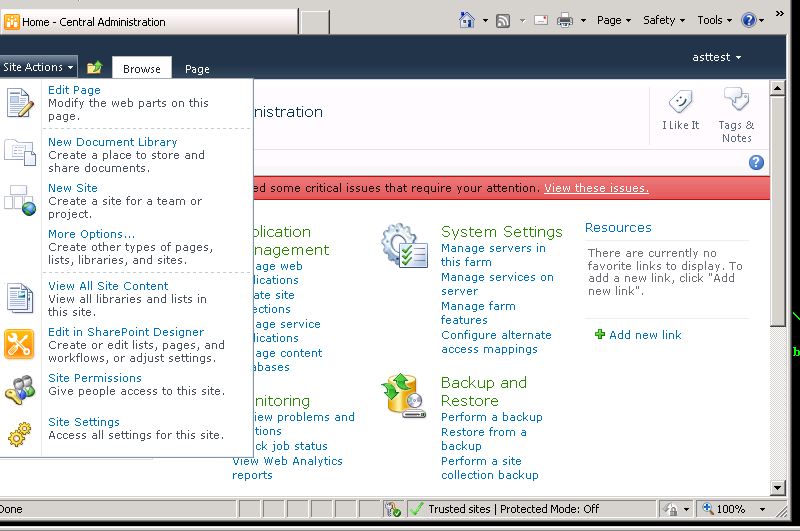
From the start menu, open the SharePoint Central Administration site and choose Site Actions\View All Site Content.
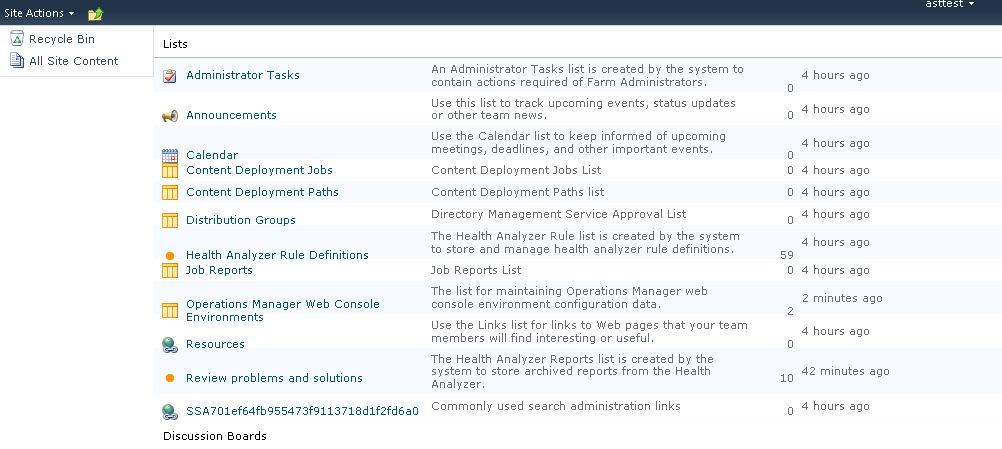
Click on the Operations Manager Web Console Environments list.
Now create a new list item for your management group. The only entries you need to add are the title and Host URI.
If you are using a secure store, you’ll need the OverrideTicketEncryptionKey and the value for its validation algorithm from the Web.Config as well as the TargetApplicationID. Make sure you get the correct IDs (there’s a comment in the web.config point to the correct keys (which are the 2nd set, not the first)
Below is an example without the target id. Note the HostError timeout, which defaults to 15 seconds. If your Web Console and SharePoint servers are not on the same clock time. If they differ by more than 15 seconds, the connection to the Dashboard will fail. It’s best to sync the times, but you can also increase this timeout if you have to. The greater the timeout, the greater the window that is open for a spoofing attack, so it’s best not to make it too large.

Adding the Web Part to a Page
Role: This can be done by any SharePoint author.
Prerequisites: the web part must be installed.
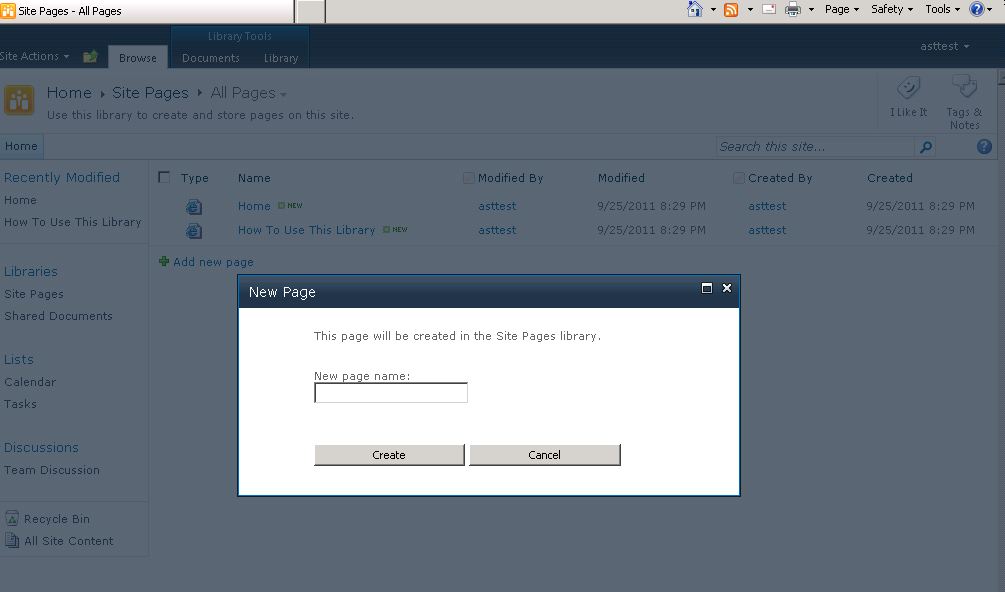
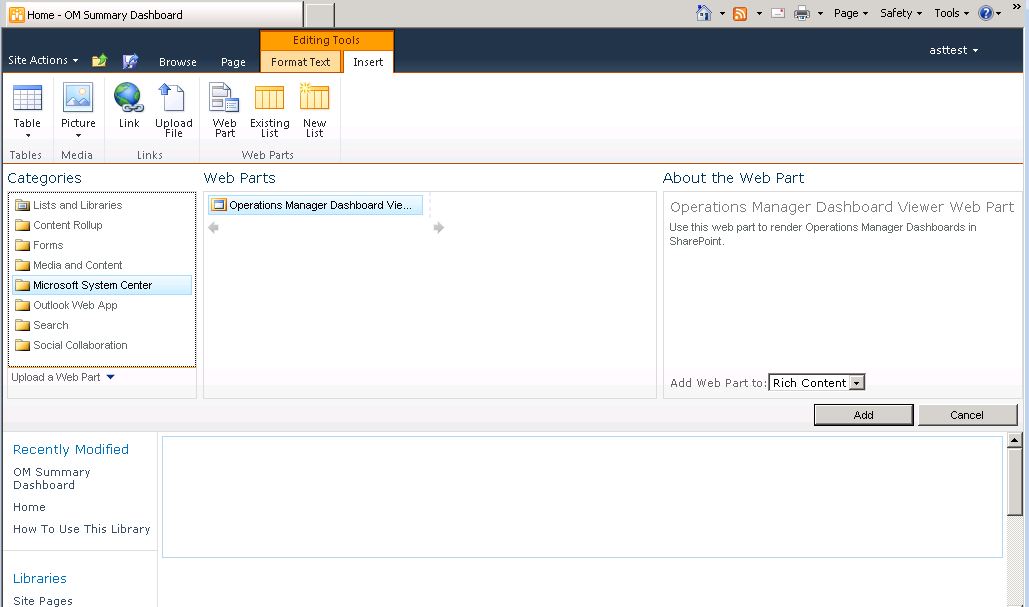
In IE, navigate to the main SharePoint site. Do NOT use the Admin site, the web part is not trusted for use on the Admin site (there’s really no need). Select Site Pages\Add a New Page. Fill in a name for the page and create it.
In this example, I insert the dashboard at the top of the page by going straight to Insert\Web Part\Microsoft System Center\Operations Manager Dashboard Viewer as in the picture below.
Configuring the Web Part on a Page
Role: This can be done by any SharePoint author.
Prerequisites: An Operations Manager web console server must be setup and the environment for it must be setup on the SharePoint Admin site. You need the URL of the dashboard that comes from the Operations Manager web console.
To get your dashboard URL, point a tab of IE at your web console (https://myOMWebConsole/operationsmanager) and navigate to your dashboard. Now copy the URL from the address bar in IE.
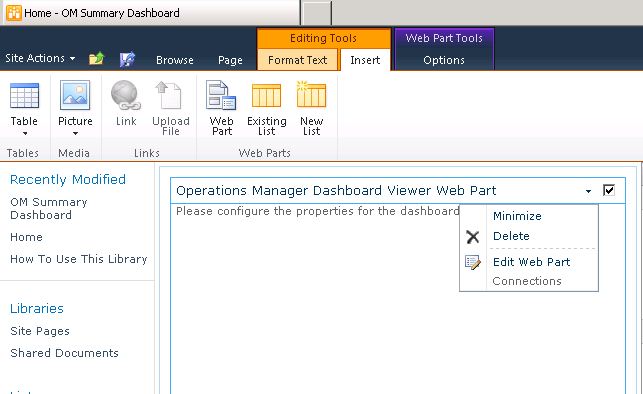
Back in SharePoint, select the Web Part\Edit Web Part as below.
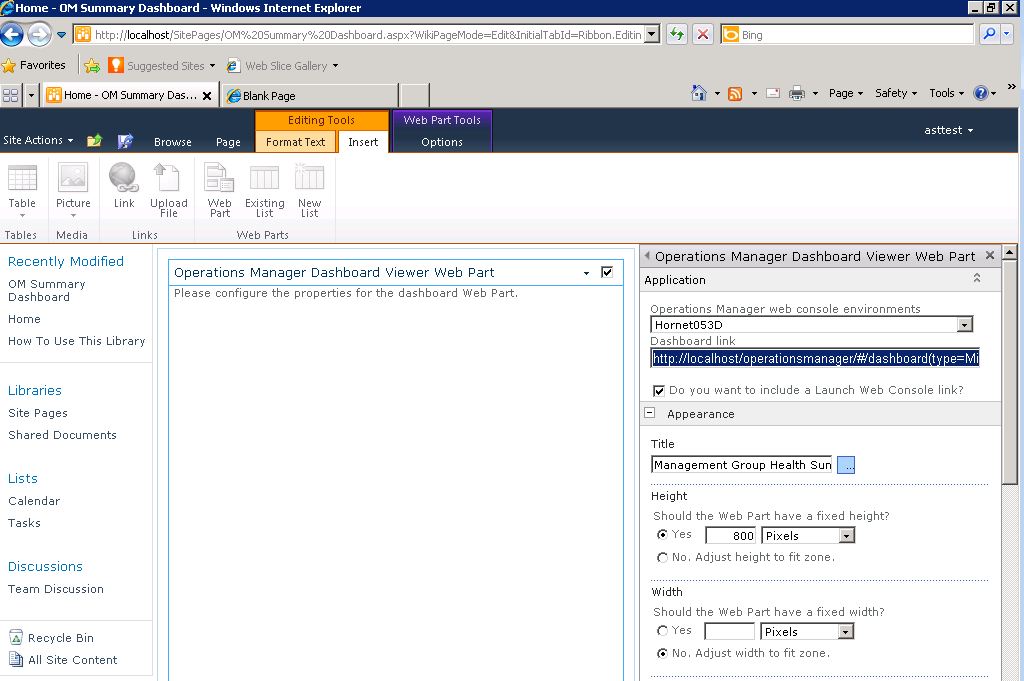
In the web part properties, select the environment and filling the full URL.
Optionally, you can choose to change the title of the dashboard and you can choose to have a direct link to the web console added, however that link doesn’t use the secure store. It’s just a normal link, so it won’t work if the Web Console is behind a firewall or if your user account doesn’t have permissions in OM.
Note that once you hit Apply or OK, the URL will be truncated to a URI that only includes the address after the # sign. This is expected as the connection info part of the environment list item.
Remember to Save your page! If you navigate away now it’s lost.
Final Result
.JPG)
Maintaining Security
Some companies have a policy to periodically change the encryption keys used on secure connections.
Use the PowerShell script update-OperationsManager-WebConsole-Environment.ps1 to update the Override ticket keys same as you created them above.
Most companies would expect to change the password on the account that accesses the Operations Manager Server periodically. Change this password in one place by setting the password in the secure store (see above).