Showing NAV Data in SharePoint using Business Data Catalog – Part 2 of 2
This is the second part of the walkthrough, showing how you can show your Dynamics NAV Data in SharePoint. This part will show you how you can use the Web Service and Application Definition File that you created in Part 1, and some examples on how you can integrate the data into a SharePoint Site.
The first part can be found here:
Showing NAV Data in SharePoint using Business Data Catalog – Part 1 of 2
We are now ready to start using the data in SharePoint. Business Data Catalog is a way to generally expose Business Data to SharePoint, and SharePoint can then use it in multiple ways. In this walkthrough I will show the following scenarios:
- Using NAV Data in Web Parts
- Using NAV Data in SharePoint Lists
- Searching for NAV Data
Importing the Application Definition File to SharePoint
The first you need to do is to import the Application Definition File you created in Part 1.
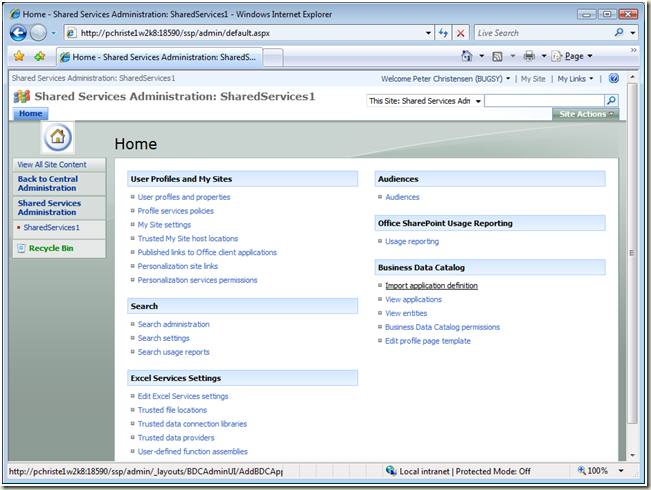
Open up the SharePoint 3.0 Central Administration. There should be a shortcut to this site in your Start Menu. Then select Shared Services Administration for the default Shared Service (called SharedServices1), and click the link called “Import application definition”
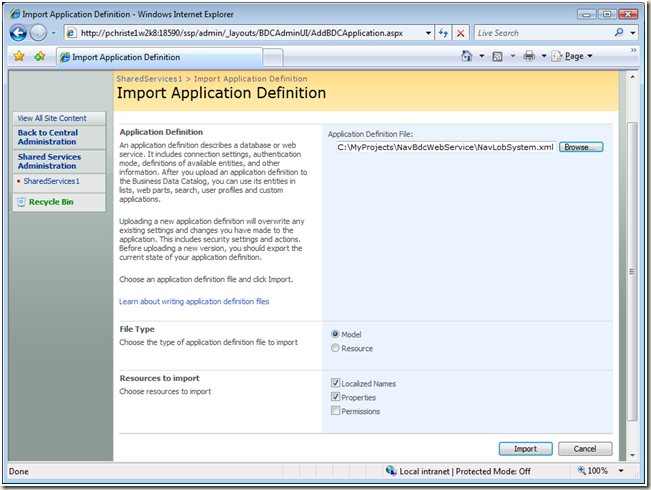
Now you specify the .xml file that you just exported from the Business Data Catalog Definition Editor, and click “Import”. You can leave the other options at their default values:
Adding a Business Data List Web Part to a Page
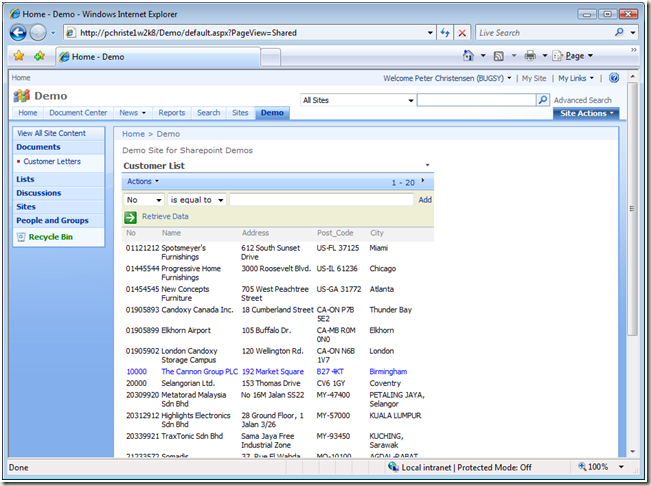
Now it is time to show the NAV Data in one of the BDC Web Parts. Create a New SharePoint Site, or use one of the existing Demo Sites. Please make sure that the Enterprise Site Features in activated for the Site; otherwise you won’t be able to use the BDC Web Parts.
The Site Features can be enabled under “Site Actions->Site Settings->Site Features”
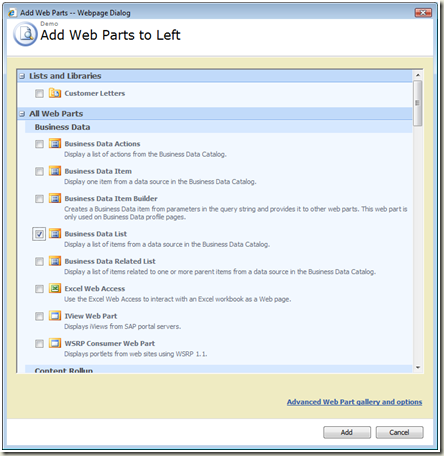
Now, edit the Page, and add a new Web Part of type “Business Data List”
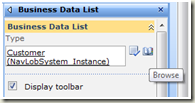
Open the Tool Pane, and specify the Type of the List. You can use the “Browse” button (the small book) to pick the Customer NavLobSystem.
Click OK to close the Tool Pane.
You now have a very wide Web Part with all the columns from your Customer Entity. If you want to remove some of the columns, this can be done from the “Edit View” link. When you are done editing, then click “Exit Edit Mode”, and you are ready to try the Web Part.
You can also try adding a Business Data Item Web Part to the Page, and link the two Web Parts, so the Item shows details for the currently selected Customer in the List.
Using NAV Data in SharePoint Lists
It is also possible to add columns from Business Data to any kind of SharePoint Lists. This can be very useful for e.g. a Document Library.
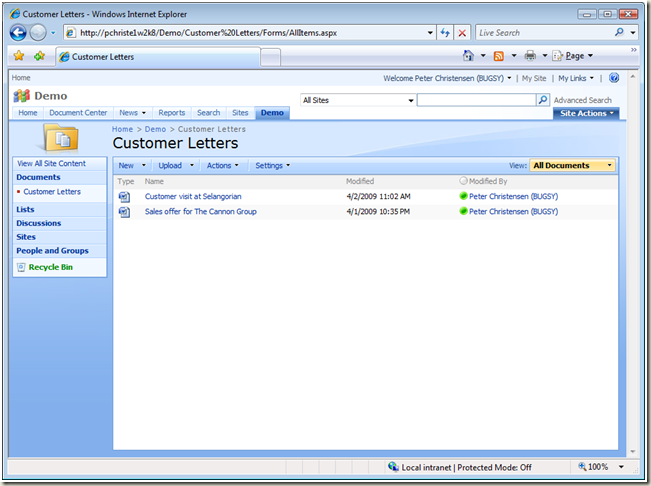
Create a new Document Library to your Page, and add a couple of Documents. In my example I have created a Document Library with “Customer Letters”
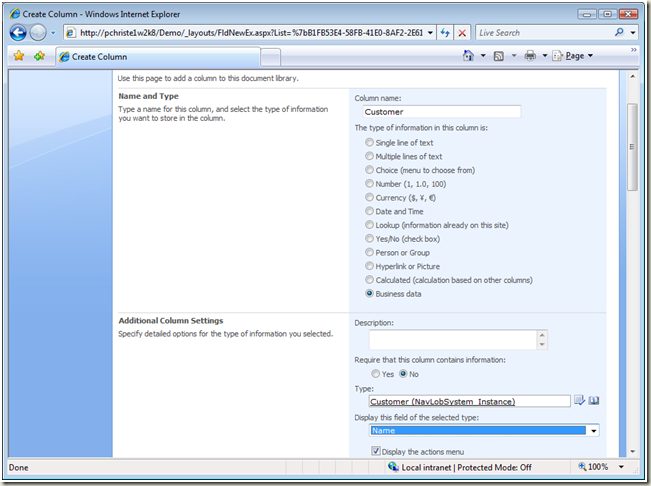
Now, add a new Column to the list, through the “Settings-> Create Column” menu. Give it a Name, and specify that you want to show Business Data. Then specify the Type and which Field to display (e.g. Name).
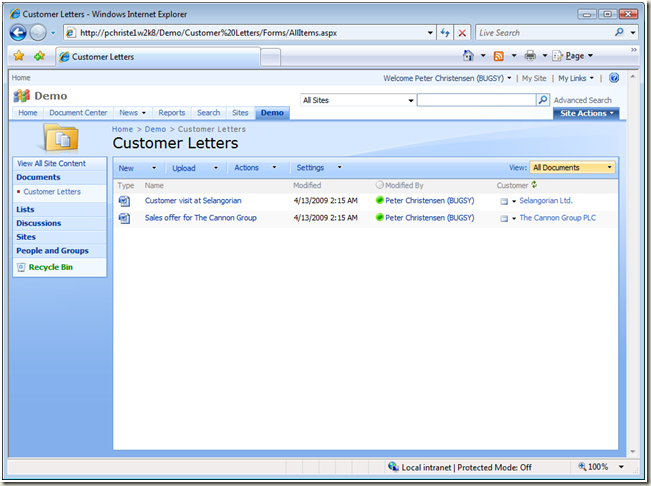
Click OK, and you now have a new Column in the list that you can use to reference Customer Data in NAV.
Searching for NAV Data
Finally I would like to show how you can use the Business data in the SharePoint Search Feature. This will enable you to search for Business Data the same way you search for any other Data on your SharePoint Site.
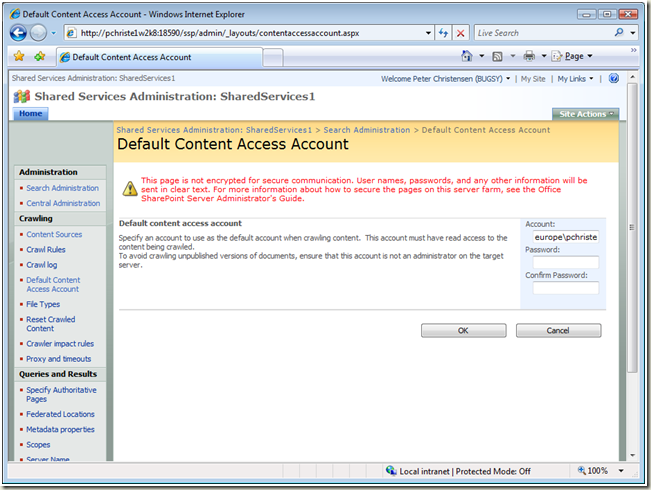
To enable SharePoint Search to crawl your Business data, you need to make sure that the Crawler has permissions to the Business Data through the Web Service. In a real deployment you should use a specific account for this, but for my walkthrough, I simply used my own user account.
On the SharePoint 3.0 Central Administration Site, go to “SharedServices1->Search administration-> Default Content Access Account”
Set the Default Content Access Account, and click OK.
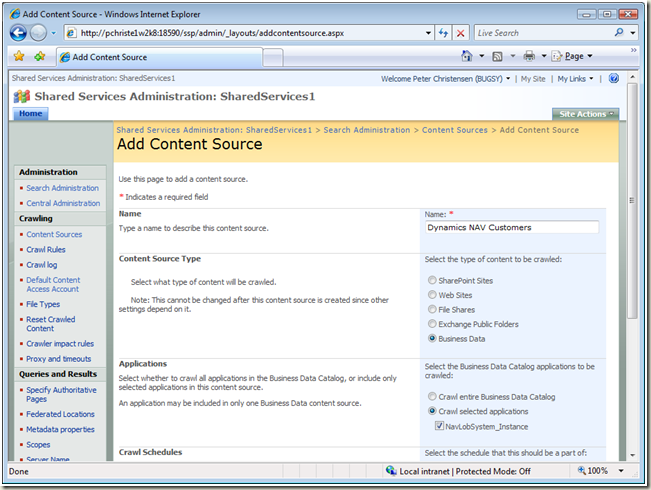
Now you need to define a Content Source for the Crawler, so it knows to crawl your Business Data. Go to “SharedServices1->Search administration->Content Sources”, and click “New Content Source”. Specify the Name, Type and Applications for the NavLobSystem as shown here:
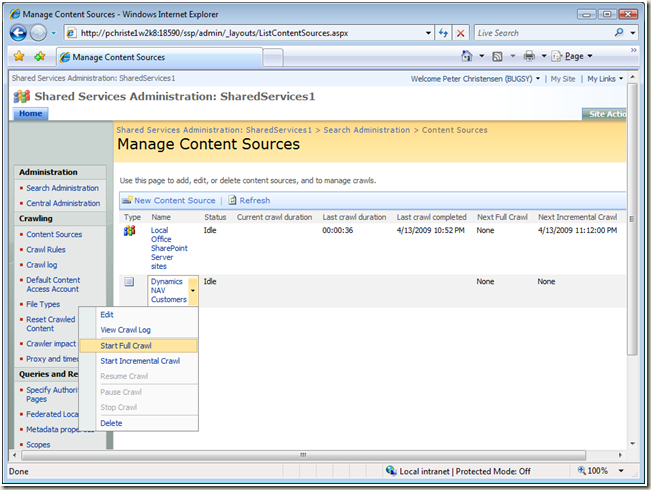
Click OK, and you are now ready to start the first Crawl of your data. The current setup does not support Incremental Crawl, so you need to start a Full Crawl.
On the new Content Source click “Start Full Crawl”
When the Crawl is finished, you should check the Log file to see if it was successful. If that is the case, then you are now ready to search for Business Data.
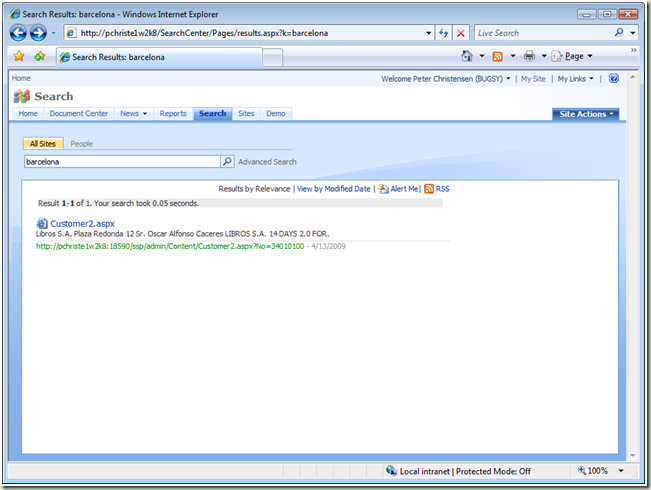
On your Demo SharePoint Site, try searching for “Barcelona”. You should now get one hit from the NAV Demo Data: Customer 34010100 - Libros S.A.
Final Thoughts
This walkthrough became a little longer than I planned, but I hope it shows what steps is needed to show Dynamics NAV data in SharePoint, using the Business Data Catalog. There are many steps, but they are pretty easy as soon as you have tried them.
I think this way of enabling Business Data for SharePoint is a very good way, because it allows you to integrate the data very tightly with SharePoint, in central features like Search and Lists.
Thanks
/Bugsy
