Migrating 2008 R2 Hyper-V VMs to 2012
 The following article is contributed by Andrew Hancock. He is the Managing Director of Cyrus Computer Consultants Ltd, and is a Virtualisation Consultant and Virtualisation Specialist for the Department of Computer Science at The University of Hull.
In this article we will show you How To : Migrate a Windows Server 2008 R2 Hyper-V Virtual Machine (VM) to a Windows Server 2012 Hyper-V host server using the tools which are included with Windows Server 2008 R2 and Windows Server 2012, no additional or third party tools are required, other than Hyper-V manager.
1. Logon to the Windows Server 2008 R2 Hyper-V server
Logon or connect to the Windows Server 2008 R2 Hyper-V server which is hosting the guest virtual machine, which you need to migrate to the Windows Server 2012 Hyper-V server. In this tutorial, we will connect to the Windows Server 2008 R2 Hyper-V server using a Remote Desktop Connection via RDP (Remote Desktop Protocol). You could login via the console on the server, or execute the Hyper-V manager from your Administrator Workstation, with the correct permissions and connect to the Windows Server 2008 R2 Hyper-V server, just ensure that your workstation has the correct amount of storage space, and sufficient network bandwidth to complete the migration task.
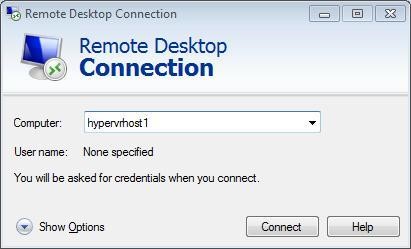
Start the Remote Desktop Connection applet on your workstation, and specify the server’s name. The server we need to connect to, is the Windows Server 2008 R2 Hyper-V server, which is currently hosting the guest virtual machine, which we need to migrate to Windows Server 2012 Hyper-V server. In this tutorial the server name is hypervhost1 which contains the virtual machine we need to migrate.
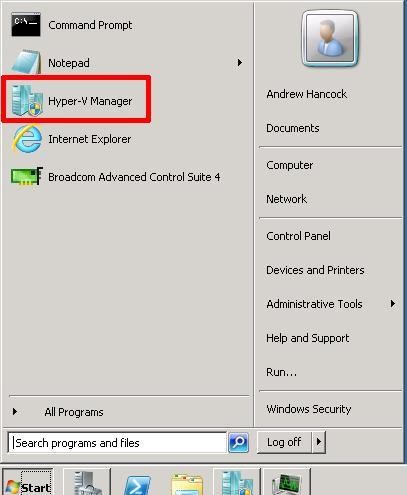
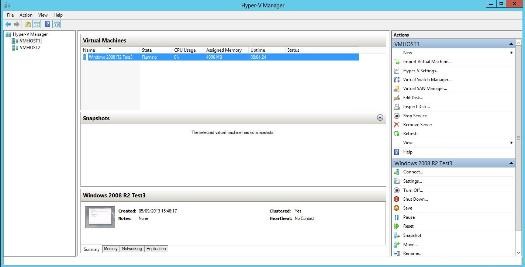
Once connected to the server, start Hyper-V Manager on the server.
2. Pre-flight checks of the source virtual machine to be migrated
· Backup the original source virtual machine as a precaution.
· Shutdown the running virtual machine on Windows Server 2008 R2 Hyper-V server.
· Delete ALL Snapshots or Checkpoints on the virtual machine to be migrated.
· Delete ANY virtual machine Saved State.
· Ensure the MAC address option in the settings of the virtual machine is set to "Static" before migrating.
· Ensure the RAM setting for the virtual machine is set to "Static" , rather than Dynamic.
3. Preparing and Creating the Export Share on the Windows Server 2012 Hyper-V Server
Exporting of a virtual machine can be exported to a local disk or network share. We prefer to Export the virtual machine to a network share on the actual Windows Server 2012 Hyper-V server, which will be hosting the virtual machine, this avoids the manual copy of the virtual machine across the network, so the export is completed in a single operation.
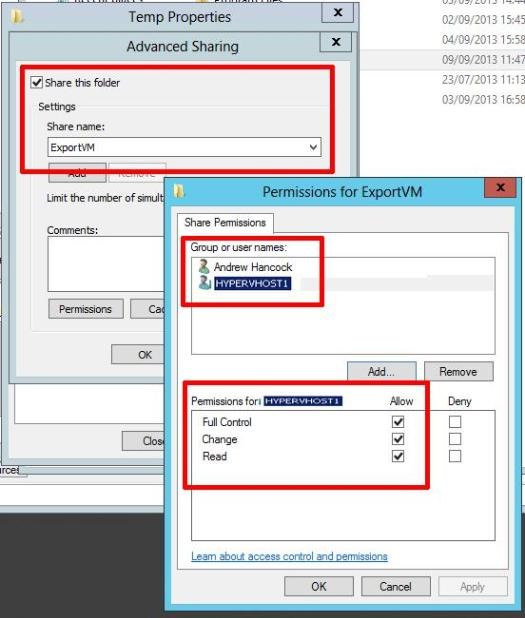
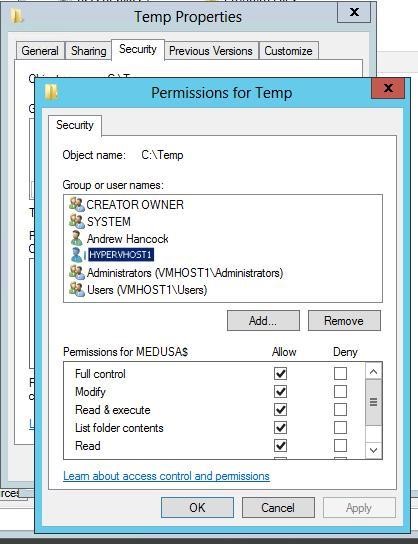
We have seen many issues with configuring this network share, and many Windows Administrators get into difficulty, and receive the following error message 'General access denied error' (0x80070005). , when trying to Export to a network share, this is because the LocalSystem account does not have access to network resources.
Proceed as follows; the permissions need to be set correctly on the share
- Explicitly grant Full Control NTFS permissions to the User account performing the export.
- Explicitly grant Full Control NTFS permissions to the Computer account of the host where the VM is being exported.
- Explicitly grant Full Control Share permissions to the User account performing the export.
- Explicitly grant Full Control Share permissions to the Computer account of the host where VM is being exported.
If the user account is missing from the above the Export will fail.
4. Export the virtual machine
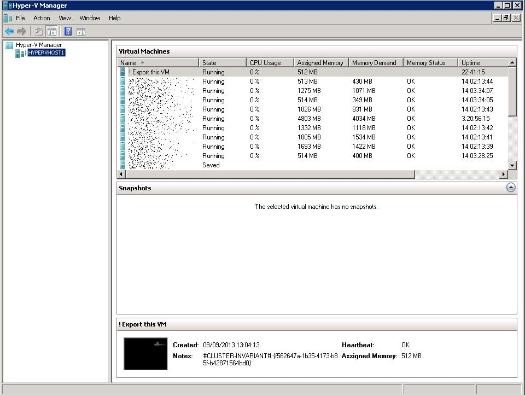
In Hyper-V manager, select the virtual machine to be migrated (exported), Right Click the virtual machine and select Export. If there is no Export option, check the virtual machine has been shut down.
Specify where you want to save the Export virtual machine files. In this tutorial we have specified the server name and share to export the virtual machine files. vmhost1 is the server name of our Windows Server 2012 Hyper-V host, we want to migrate the guest virtual machine to, and ExportVM is the share we created in 3 above.
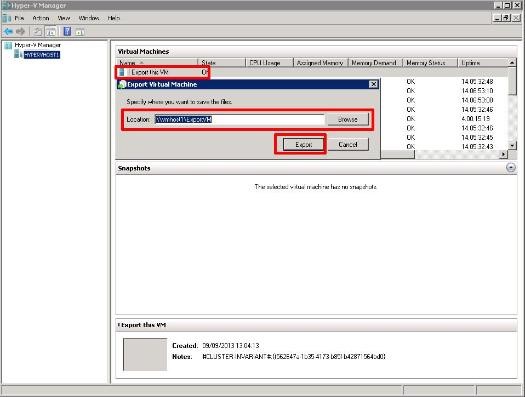
Click Export to export the virtual machine. There is no progress indicator, the Cancel Exporting option disappears when the Task has been completed! A 50GB virtual machine took 6 minutes to export.
5. Logon to the Windows Server 2012 R2 Hyper-V server
Logon or connect to the Windows Server 2012 R2 Hyper-V server which will host the migrated guest virtual machine. In this tutorial, we will connect to the Windows Server 2012 Hyper-V server using a Remote Desktop Connection via RDP (Remote Desktop Protocol). You could login via the console on the server, or execute the Hyper-V manager from your Administrator Workstation, with the correct permissions and connect to the Windows Server 2012 Hyper-V server, just ensure that your workstation has the sufficient network bandwidth to complete the migration (import) task.
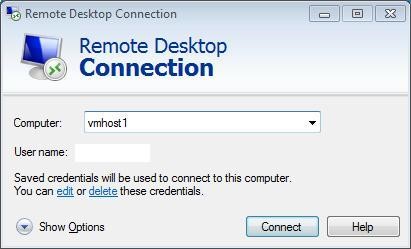
Start the Remote Desktop Connection applet on your workstation, and specify the server’s name. The server we need to connect to, is the Windows Server 2012 Hyper-V server, which will be hosting our new migrated virtual machine. In this tutorial the server name is vmhost1.
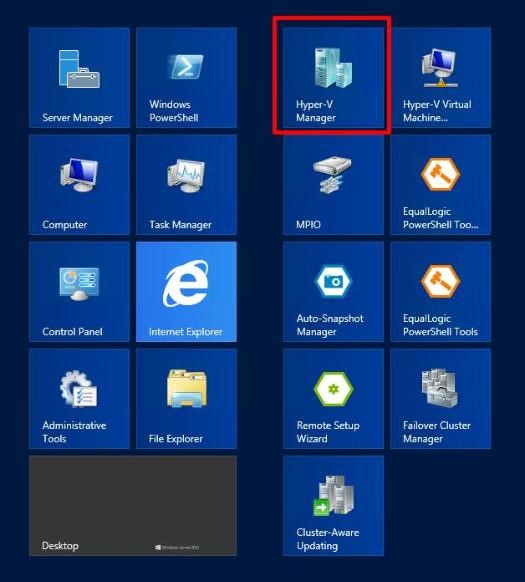
Once connected to the server, start Hyper-V Manager on the server.
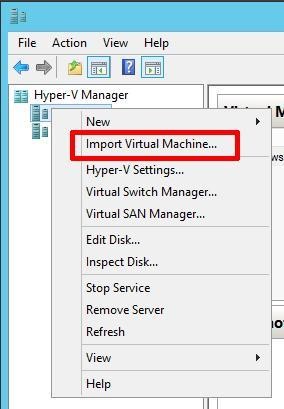
6. Import (Migrate) the Virtual Machine to be Migrated
Select the host VMHOST1, Right Click the Host and select Import Virtual Machine...
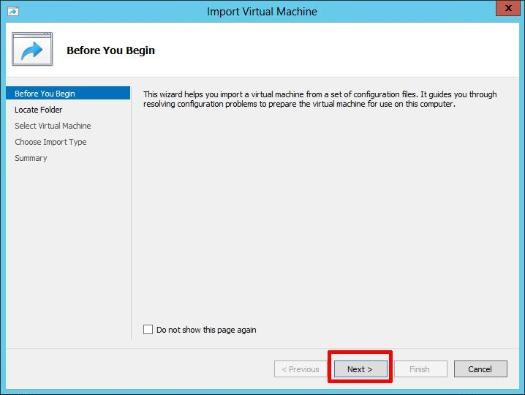
At the Import Virtual Machine wizard, select Next to continue.
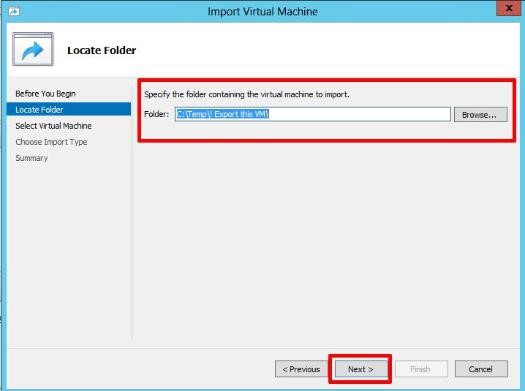
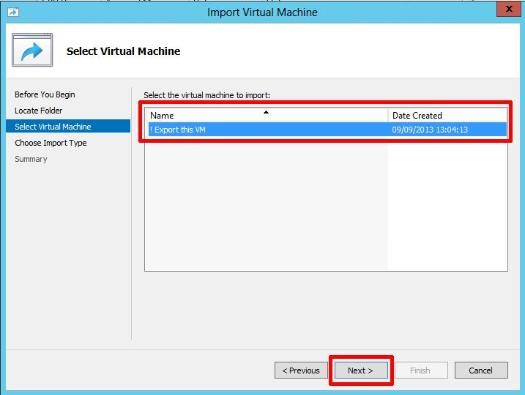
Select the virtual machine to import, followed by Next to continue.
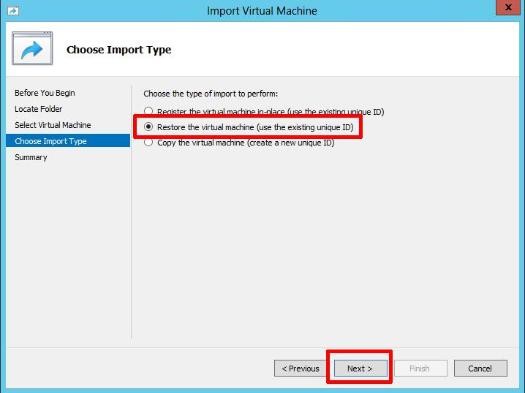
Select Restore the virtual machine (use the existing unique ID), followed by Next.
The configuration will be loaded from the virtual machine files, and then Choose Folders for Virtual Machine Files, followed by Next to continue.
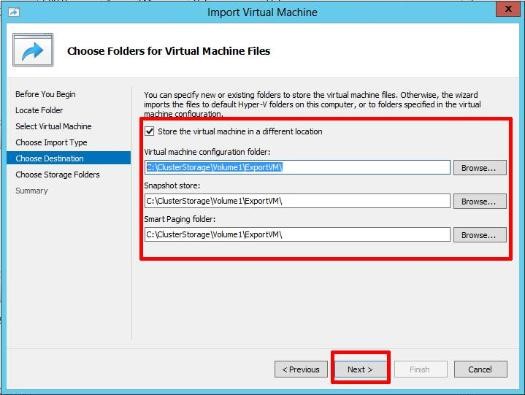
The location specified in this tutorial, is the default location for our clustered shared volume, C:\ClusterStorage\Volume1\ExportVM\
Choose Folders to Store Virtual Hard Disks followed by Next to continue.
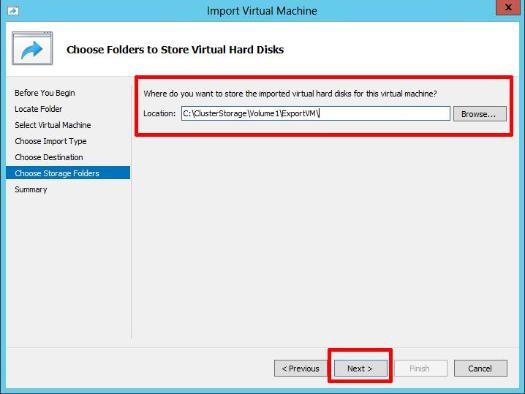
The location specified in this tutorial, is the default location for our clustered shared volume, C:\ClusterStorage\Volume1\ExportVM\
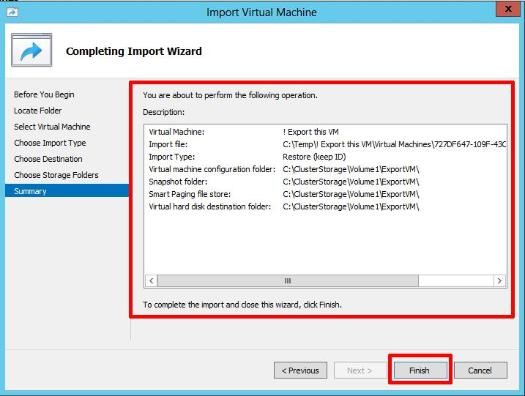
At the Completing the Import Wizard page, check the Summary and Click Finish to Import (Migrate) the virtual machine. The files are coped and imported...


Once the virtual machine has been imported (migrated), select the virtual machine in Hyper-V manager, and start the virtual machine.

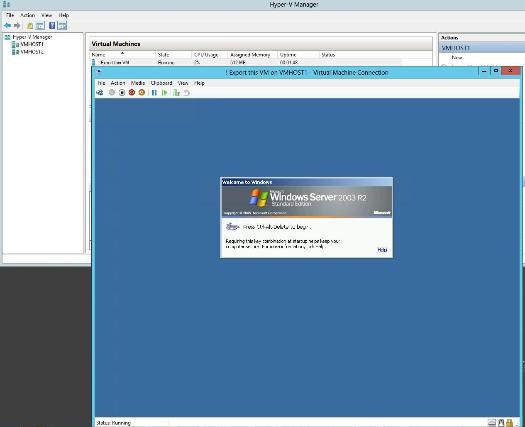
Congratulations, you have successfully Migrated a Windows Server 2008 R2 Hyper-V Virtual Machine (VM) to Windows Server 2012 Hyper-V host server.
This post was originally written for Experts Exchange
Have you migrated 2008 R2 Hyper-V VMs to 2012? How did you find it? Let us know in the comments section below, or via @TechNetUK