How to use dev tunnels in Visual Studio 2022 with ASP.NET Core apps
The dev tunnels feature of Visual Studio 2022 enables ad-hoc connections between machines that can't directly connect to each other. A URL is created that enables any device with an internet connection to connect to an ASP.NET Core project while it runs on localhost.
Use cases
Some of the scenarios that dev tunnels enable:
- Test a web app on other devices, like mobile phones and tablets.
- Test an app with external services. For instance, test and debug Power Platform connectors, Azure Communication Services APIs, or Twilio webhooks.
- Make an app temporarily available to others over the internet, for a presentation or to invite others to review your work on a web app or API.
- As an alternative to other port-forwarding solutions.
Prerequisites
- Visual Studio 2022 version 17.6 or later with the ASP.NET and web development workload installed. You need to be signed in to Visual Studio to create and use dev tunnels. The feature isn't available in Visual Studio for Mac.
- One or more ASP.NET Core projects. This article uses a solution with two sample projects to demonstrate the feature.
Create a tunnel
To create a tunnel:
In Visual Studio 2022, open an ASP.NET Core web project, or a solution with at least one web project set as a startup project.
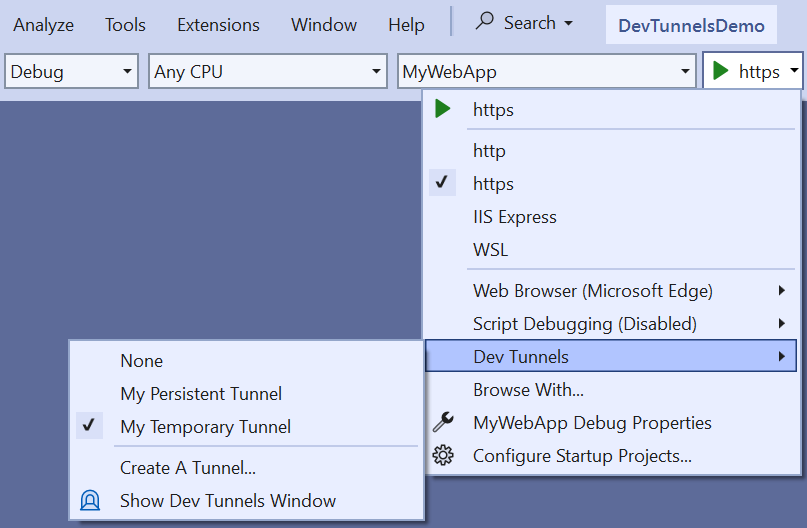
In the debug dropdown, select Dev Tunnels > Create A Tunnel.
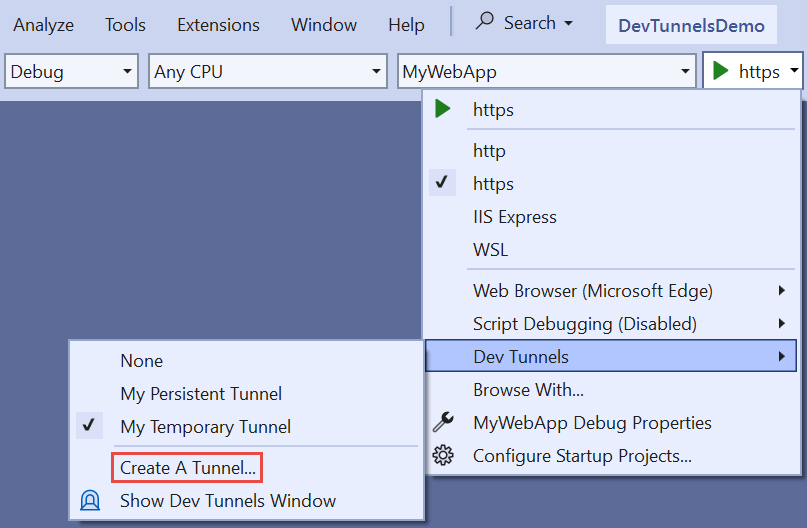
The tunnel creation dialog opens.
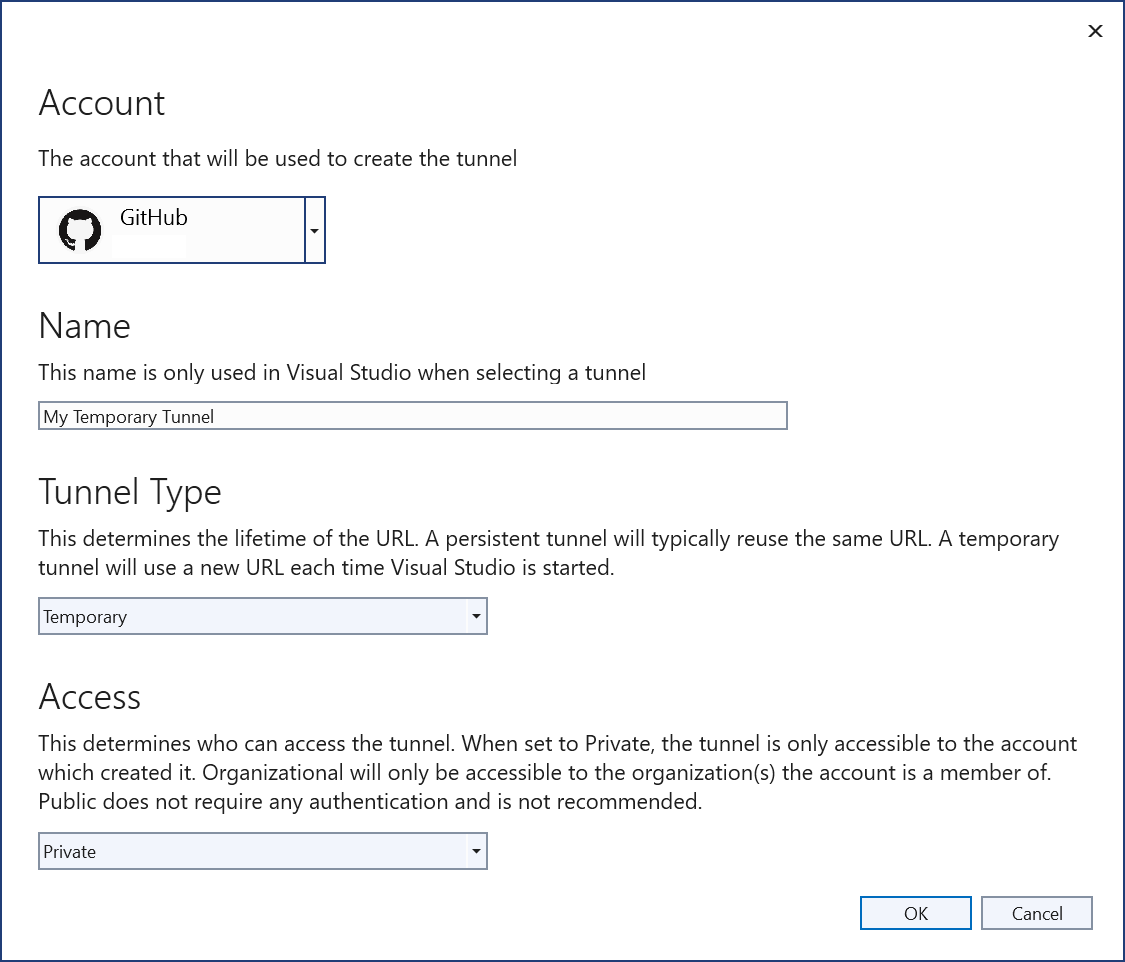
- Select the account to use to create the tunnel. Account types that can be used to create tunnels include Azure, Microsoft Account (MSA), and GitHub.
- Enter a name for the tunnel. This name identifies the tunnel in the Visual Studio UI.
- Choose the tunnel type, Persistent or Temporary:
- A temporary tunnel gets a new URL each time Visual Studio is started.
- A persistent tunnel gets the same URL each time Visual Studio is started. For more information, see Persistent vs. temporary tunnels later in this article.
- Choose the authentication that is required for access to the tunnel. The following options are available:
- Private: The tunnel is accessible only to the account that created it.
- Organization: The tunnel is accessible to accounts in the same organization as the one that created it. If this option is selected for a personal Microsoft account (MSA), the effect is the same as selecting Private. Organization support for Github accounts isn't supported.
- Public: No authentication required. Choose this option only if it's safe to make the web app or API accessible to anyone on the internet.
- Select OK.
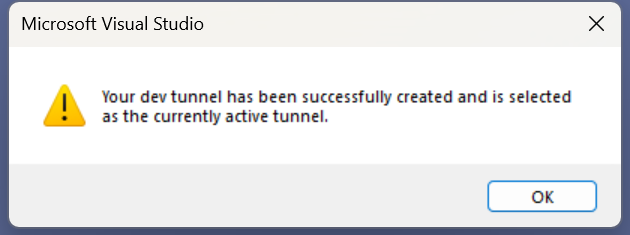
Visual Studio displays confirmation of tunnel creation:
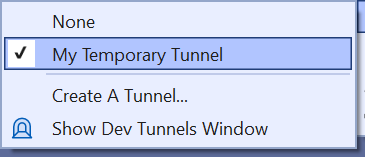
The tunnel appears in the debug dropdown Dev Tunnels flyout:
Specify the active tunnel
A project or solution can have multiple tunnels, but only one at a time is active. The Dev Tunnels flyout in the debug dropdown can specify the active tunnel. When there is an active tunnel, it's used for all ASP.NET Core projects that are started in Visual Studio. Once a tunnel is selected as active, it remains active until Visual Studio is closed. In the following illustration, My Temporary Tunnel is active:
Choose not to use a tunnel by selecting None in the flyout. When Visual Studio is restarted, it defaults back to None.
Use a tunnel
When a tunnel is active and Visual Studio runs a web app, the web browser opens to a tunnel URL instead of a localhost URL. The tunnel URL looks like the following example:
https://0pbvlk3m-7032.usw2.devtunnels.ms
Now any authenticated user can open the same URL on any other internet-connected device. As long as the project continues to run locally, any device with an internet connection can access the web application that is running on a development machine.
For web projects that have browser support, a warning page is shown on the first request sent to the tunnel URL from each device:
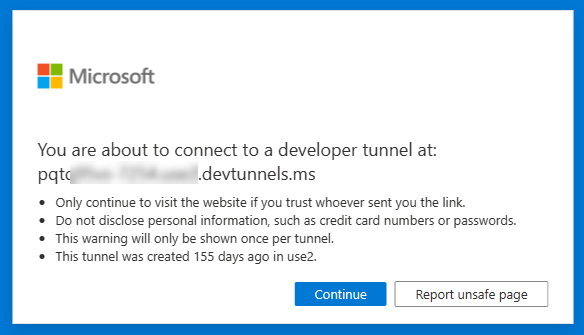
After Continue is selected, the request is routed to the local web app. This notification page isn't shown for API requests using dev tunnels.
Use a tunnel to test on a phone or tablet
To test a web app from an external device like a phone or tablet, navigate to the tunnel URL. To make it easier to reproduce the URL on the external device:
- Navigate to the tunnel URL in an Edge browser on the local machine.
- Generate a QR code to the URL in the Edge browser on the local machine:
- Select the URL bar and the QR code button appears.
- Select the QR code button to generate and view the QR code.
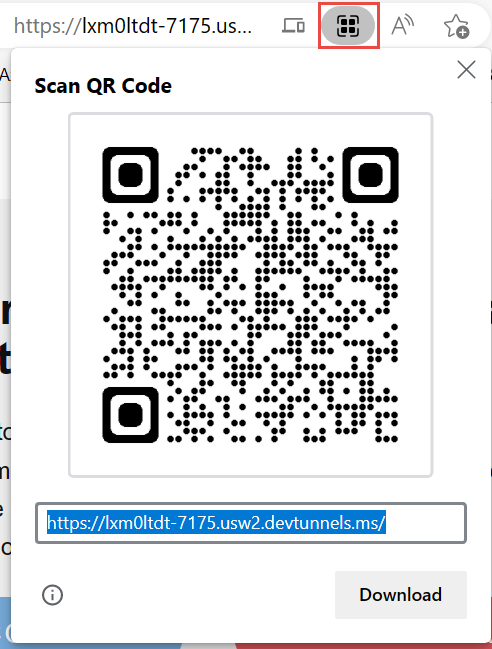
- Scan this QR code with a phone or tablet to navigate to the URL.
Dev Tunnels output window
To show the URL of a tunnel of a running project, select Dev Tunnels in the Show output from dropdown.

This window is especially useful for projects that don't open a browser by default. For example, when working with an Azure Function, this may be the easiest way to discover the public URL that is being used by the dev tunnel.
Dev Tunnels tool window
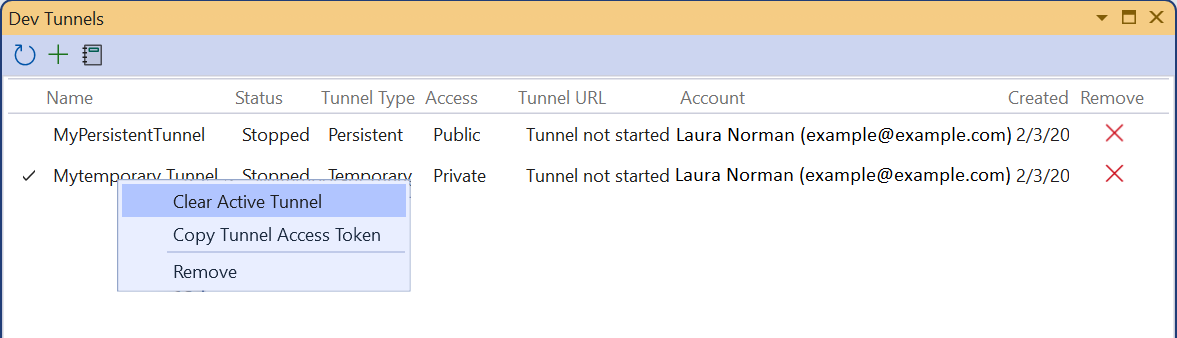
View and manage dev tunnels in the Dev Tunnels tool window:
To open the Dev Tunnels window, select the Show Dev Tunnels Window menu option in the debug dropdown. Alternatively, select View > Other Windows > Dev Tunnels.
From the Dev Tunnels window, create a new tunnel by selecting the green + button.
Delete a tunnel by using the red x button to the right of the tunnel.
The context menu for a tunnel provides the following options:
- Clear Active Tunnel: Shown when a tunnel is configured as active (indicated by the checkmark on the left hand side), this resets it so the solution is not using a tunnel.
- Make Active Tunnel: Shown for tunnels that are not configured as active.
- Copy Tunnel Access Token: Provided for scenarios where a tunnel is created with private or organizational access, and the app is a web API. To authenticate for the tunnel, copy and paste the tunnel access token as a header of the form
X-Tunnel-Authorization tunnel <TOKEN>in the request. If this header is not specified, the request will be blocked because the authentication check failed. - Remove
Tunnel URL environment variables
The dev tunnels feature provides a way to get the tunnel URL of a project programmatically at run time. When an app is launched that uses a tunnel, Visual Studio creates the environment variable VS_TUNNEL_URL. The VS_TUNNEL_URL value is the URL for the tunnel that is used for the current project. VS_TUNNEL_URL can be useful when integrating the app with an external service, where the tunnel URL needs to be passed to the external service.
If multiple ASP.NET Core projects are configured to start in Visual Studio, the app that is starting up gets an environment variable for any project that started before it. The pattern for this variable name is VS_TUNNEL_URL_{ProjectName}, where {ProjectName} is the name of the other project. For example, consider this example showing two projects set to start:
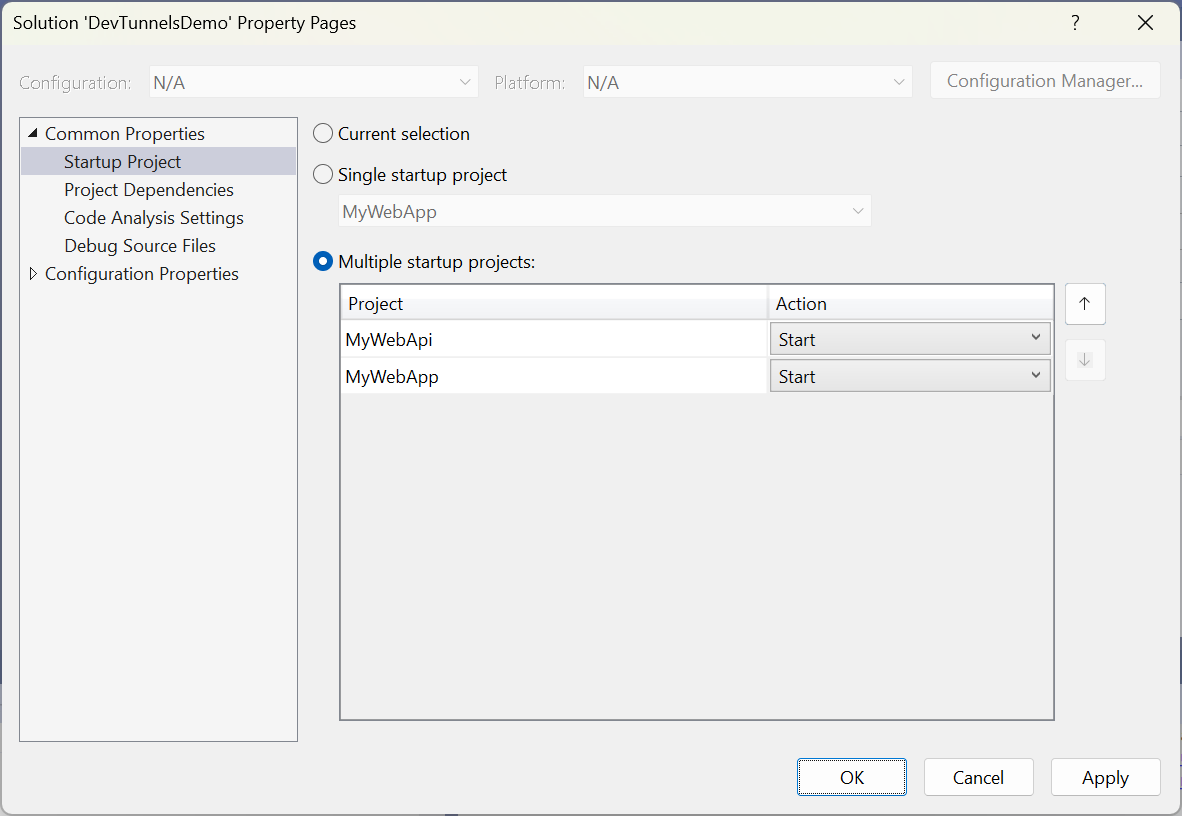
Since MyWebApi is above MyWebApp, it's started before the MyWebApp project. When the MyWebApi project is started, it receives its tunnel URL in the VS_TUNNEL_URL environment variable. When the MyWebApp project is started, it receives its own tunnel URL in VS_TUNNEL_URL and the other project's tunnel URL is provided in the VS_TUNNEL_URL_MyWebApi environment variable.
To illustrate, the following highlighted lines of code have been added to the Program.cs file in MyWebApp:
public class Program
{
    public static void Main(string[] args)
    {
        Console.WriteLine($"Tunnel URL: {Environment.
            GetEnvironmentVariable("VS_TUNNEL_URL")}");
        Console.WriteLine($"API project tunnel URL: {Environment.
            GetEnvironmentVariable("VS_TUNNEL_URL_MyWebApi")}");
When the web app is started the console output looks like the following example:
Tunnel URL: https://lxm0ltdt-7175.usw2.devtunnels.ms/
API project tunnel URL: https://lxm0ltdt-7042.usw2.devtunnels.ms/
info: Microsoft.Hosting.Lifetime[14]
      Now listening on: https://localhost:7175
info: Microsoft.Hosting.Lifetime[14]
      Now listening on: http://localhost:5228
info: Microsoft.Hosting.Lifetime[0]
      Application started. Press Ctrl+C to shut down.
info: Microsoft.Hosting.Lifetime[0]
      Hosting environment: Development
info: Microsoft.Hosting.Lifetime[0]
      Content root path: C:\DevTunnelsDemo\MyWebApp
For information about how to set up multiple startup projects, see How to: Set multiple startup projects.
Persistent versus temporary tunnels
A persistent tunnel is one that uses the same URL after exiting and restarting Visual Studio. Having a URL that doesn't change can be useful when integrating a web app with an external service. For example, implementing a GitHub webhook, or developing an API to integrate with a Power Platform app. In such cases, you might need to specify the callback URL to the external service. With a persistent tunnel, the external service URL only needs to be configured once. Using a temporary tunnel, the tunnel URL must be configured each time Visual Studio restarts.
Persistent doesn't mean the tunnel works when Visual Studio isn't open. A tunnel URL connects to the local machine only if the ASP.NET Core project that the tunnel URL connects to is running in Visual Studio.
A temporary tunnel is fine when the dev tunnel URL needs to work for a short time. For example, sharing in-progress work on a web app with others, or testing an app on an external device. In some cases, it might be best to get a new URL each time Visual Studio starts.
See also
The following resources use an early preview version of the dev tunnels feature, so parts of them are out of date:
ASP.NET Core
Feedback
Coming soon: Throughout 2024 we will be phasing out GitHub Issues as the feedback mechanism for content and replacing it with a new feedback system. For more information see: https://aka.ms/ContentUserFeedback.
Submit and view feedback for