Tutorial: Deploy a Linux app
Applies to: AKS on Azure Stack HCI 22H2, AKS on Windows Server
This tutorial describes how to deploy a multi-container app that includes a web front-end and a Redis database instance on your Kubernetes cluster in AKS enabled by Azure Arc. You also learn how to test and scale your app.
This tutorial assumes a basic understanding of Kubernetes concepts. For more information, see Kubernetes core concepts.
Before you begin
Verify that you have the following requirements ready:
- An AKS cluster with at least one Linux worker node that is up and running.
- A kubeconfig file to access the cluster.
- The AksHci PowerShell module is installed. For more information, see Install-AksHci.
When you do the tutorial procedures:
- Run the commands in a PowerShell window opened with administrative privileges.
- Ensure that OS-specific workloads land on the appropriate container host. If your Kubernetes cluster has a mixture of Linux and Windows worker nodes, you can either use node selectors or taints and tolerations. For more information, see using node selectors and taints and tolerations.
Note
Deploying a target cluster that shares a network with another target cluster can lead to load balancer IP address conflicts.
IP address conflicts can happen if you deploy two workloads that use different ports in target clusters sharing the same AksHciClusterNetwork object. Because of the way the IP addresses and port mappings are allocated inside HA Proxy, it can lead to assignment of duplicate IP addresses. If this occurs, one or both workloads can encounter random network connectivity issues until you re-deploy your workloads. When you re-deploy your workloads, you can either use the same port, which assigns a service IP address to each workload, or you can re-deploy your workloads on target clusters that use different AksHciClusterNetwork objects.
Deploy the app
A Kubernetes manifest file defines a desired state for the cluster, such as which container images to run. This tutorial uses a manifest to create all objects needed to run the Azure vote app. This manifest includes two Kubernetes deployments: one for the sample Azure Vote Python apps, and the other for a Redis instance. Two Kubernetes services are also created: an internal service for the Redis instance, and an external service to access the Azure Vote app from the internet.
Create a file named azure-vote.yaml and copy/paste the following YAML definition:
apiVersion: apps/v1
kind: Deployment
metadata:
  name: azure-vote-back
spec:
  replicas: 1
  selector:
    matchLabels:
      app: azure-vote-back
  template:
    metadata:
      labels:
        app: azure-vote-back
    spec:
      nodeSelector:
        "beta.kubernetes.io/os": linux
      containers:
      - name: azure-vote-back
        image: redis
        resources:
          requests:
            cpu: 100m
            memory: 128Mi
          limits:
            cpu: 250m
            memory: 256Mi
        ports:
        - containerPort: 6379
          name: redis
---
apiVersion: v1
kind: Service
metadata:
  name: azure-vote-back
spec:
  ports:
  - port: 6379
  selector:
    app: azure-vote-back
---
apiVersion: apps/v1
kind: Deployment
metadata:
  name: azure-vote-front
spec:
  replicas: 1
  selector:
    matchLabels:
      app: azure-vote-front
  template:
    metadata:
      labels:
        app: azure-vote-front
    spec:
      nodeSelector:
        "beta.kubernetes.io/os": linux
      containers:
      - name: azure-vote-front
        image: mcr.microsoft.com/azuredocs/azure-vote-front:v1
        resources:
          requests:
            cpu: 100m
            memory: 128Mi
          limits:
            cpu: 250m
            memory: 256Mi
        ports:
        - containerPort: 80
        env:
        - name: REDIS
          value: "azure-vote-back"
---
apiVersion: v1
kind: Service
metadata:
  name: azure-vote-front
spec:
  type: LoadBalancer
  ports:
  - port: 80
  selector:
    app: azure-vote-front
Deploy the app using the kubectl apply command, and specify the name of your YAML manifest:
kubectl apply -f azure-vote.yaml
The following example output shows deployments and services that were created successfully:
deployment "azure-vote-back" created
service "azure-vote-back" created
deployment "azure-vote-front" created
service "azure-vote-front" created
Test the app
When the app runs, a Kubernetes service exposes the app front-end to the internet. This process can take a few minutes to complete.
To monitor progress, use the kubectl get service command with the --watch argument:
kubectl get service azure-vote-front --watch
Initially, the EXTERNAL-IP for the azure-vote-front service is shown as pending:
NAME               TYPE           CLUSTER-IP      EXTERNAL-IP   PORT(S)        AGE
azure-vote-front   LoadBalancer   10.0.37.27      <pending>     80:30572/TCP   22m
When the EXTERNAL-IP address changes from pending to an actual public IP address, use CTRL-C to stop the kubectl watch process. The following example output shows a valid public IP address assigned to the service:
NAME               TYPE           CLUSTER-IP   EXTERNAL-IP     PORT(S)        AGE
azure-vote-front   LoadBalancer   10.0.37.27   52.179.23.131   80:30572/TCP   24m
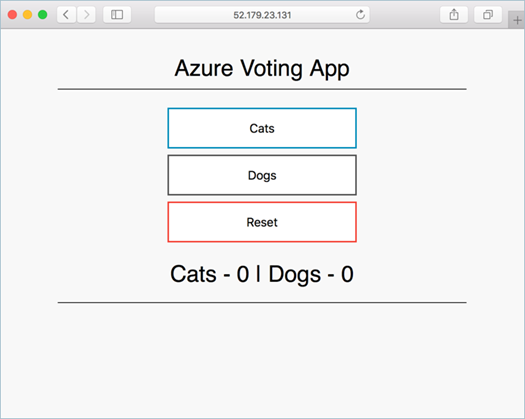
To see the Azure Vote app in action, open a web browser to the external IP address of your service.
Scale application pods
We created a single replica of the Azure Voting App front-end and Redis instance. To see the number and state of pods in your cluster, use the kubectl get command:
kubectl get pods -n default
The following example output shows one front-end pod and one back-end pod:
NAME                                READY     STATUS    RESTARTS   AGE
azure-vote-back-6bdcb87f89-g2pqg    1/1       Running   0          25m
azure-vote-front-84c8bf64fc-cdq86   1/1       Running   0          25m
To change the number of pods in the azure-vote-front deployment, use the kubectl scale command. The following example increases the number of front-end pods to 5:
kubectl scale --replicas=5 deployment/azure-vote-front
Run kubectl get pods again to verify that additional pods were created. After a minute or so, the additional pods are available in your cluster:
kubectl get pods -n default
Name                                READY   STATUS    RESTARTS   AGE
azure-vote-back-6bdcb87f89-g2pqg    1/1     Running   0          31m
azure-vote-front-84c8bf64fc-cdq86   1/1     Running   0          31m
azure-vote-front-84c8bf64fc-56h64   1/1     Running   0          80s
azure-vote-front-84c8bf64fc-djkp8   1/1     Running   0          80s
azure-vote-front-84c8bf64fc-jmmvs   1/1     Running   0          80s
azure-vote-front-84c8bf64fc-znc6z   1/1     Running   0          80s
Next steps
Feedback
Coming soon: Throughout 2024 we will be phasing out GitHub Issues as the feedback mechanism for content and replacing it with a new feedback system. For more information see: https://aka.ms/ContentUserFeedback.
Submit and view feedback for