Deploy a C# ASP.NET web app to a VM in Azure Stack Hub
You can create a virtual machine (VM) to host your C# ASP.NET web app in Azure Stack Hub. This article shows you how to set up your server, configure it to host your C# ASP.NET web app, and then deploy the app right from Visual Studio.
This article is about using Azure Stack Hub. You can run Azure in your data center using Azure Stack Hub. If you are looking for guidance for global Azure, check out Publish an ASP.NET Core app to Azure with Visual Studio.
Create a VM
Create a VM and then install the components you need to host your .NET web app. You will need the IIS Management Console, Web management service, .NET runtime, and Microsoft Web Deploy on your VM. You will need to open the ports for your web server and for Web Deploy from your development machine. When installing the .NET runtime, make sure you're using the same version of .NET on both your target server and development machine.
Create a Windows Server VM.
To install the IIS (with Management Console) and .NET 5.0 components on your VM, run the following script in your PowerShell 5.x console:
# Install IIS (with Management Console)
Install-WindowsFeature -name Web-Server -IncludeManagementTools

# Install Web Management Service
Install-WindowsFeature -Name Web-Mgmt-Service
Download .NET 5.0 on your VM.
Download Web Deploy v3.6. Install it from the MSI file, and then enable all of the features.
In the Azure Stack Hub portal, open the ports that are listed in the network settings for your VM.
a. Open the Azure Stack Hub portal for your tenant.
b. Search for your VM. You might have pinned the VM to your dashboard, or you can search for it in the Search resources box.
c. Select Networking.
d. Select Add inbound port rule under VM.
e. Add an inbound security rule for the following ports:
Port Protocol Description 80 HTTP Hypertext Transfer Protocol (HTTP) is the protocol used to deliver web pages from servers. Clients connect via HTTP with a DNS name or IP address. 443 HTTPS Hypertext Transfer Protocol Secure (HTTPS) is a secure version of HTTP that requires a security certificate and allows for the encrypted transmission of information. 22 SSH Secure Shell (SSH) is an encrypted network protocol for secure communications. You will use this connection with an SSH client to configure the VM and deploy the app. 3389 RDP Optional. The Remote Desktop Protocol allows for a remote desktop connection to use a graphic user interface your machine. 8172 Custom The port used by Web Deploy. For each port:
a. For Source, select Any.
b. For Source port range, type an asterisk (*).
c. For Destination, select Any.
d. For Destination port range, add the port you want to open.
e. For Protocol, select Any.
f. For Action, select Allow.
g. For Priority, leave the default selection.
h. Enter a Name and Description to help you remember why the port is open.
i. Select Add.
In the Overview settings for your VM in Azure Stack Hub, create a DNS name for your server. Users can connect to your website by using the URL.
a. Open the Azure Stack Hub portal for your tenant.
b. Search for your VM. You might have pinned the VM to your dashboard, or you can search for it in the Search resources box.
c. Select Overview.
d. Under DNS, select Configure.
e. For Assignment, select Dynamic.
f. Enter the DNS name label, such as mywebapp, so that your full URL becomes something like mywebapp.region.cloudapp.azurestack.corp.contoso.com.
Create an app
You can use either use the default .NET App in Visual Studio, your own web app, an example at Publish an ASP.NET Core app to Azure with Visual Studio. The article describes how to create and publish an ASP.NET web app to an Azure virtual machine by using the Azure Virtual Machines publishing feature in Visual Studio 2019. After you've installed and made sure that your app is running locally, you'll update your publishing target to the Windows VM in your Azure Stack Hub instance.
Deploy and run the app
Create a publish target from your development machine to your VM in Azure Stack Hub.
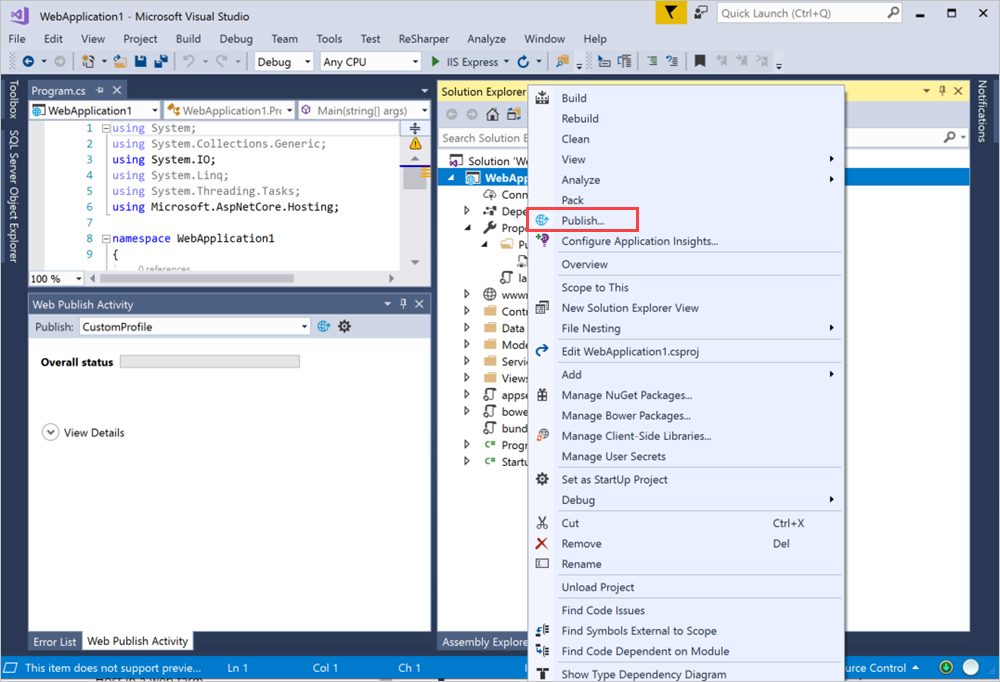
In Solution Explorer, right-click your project, and then select Publish.
In the Publish window, select New.
Select Web Server (IIS).
Select Next > Web Deploy > Next.
For Server enter the DNS name that you defined earlier, such as
mywebapp.region.cloudapp.azurestack.corp.contoso.com.For Site name, enter
Default Web Site, or the name used in IIS on your target server.For User name, enter the user name for the machine.
For Password, enter the password for the machine.
For Destination URL, enter the URL for the site, such as
http://mywebapp.region.cloudapp.azurestack.corp.contoso.com.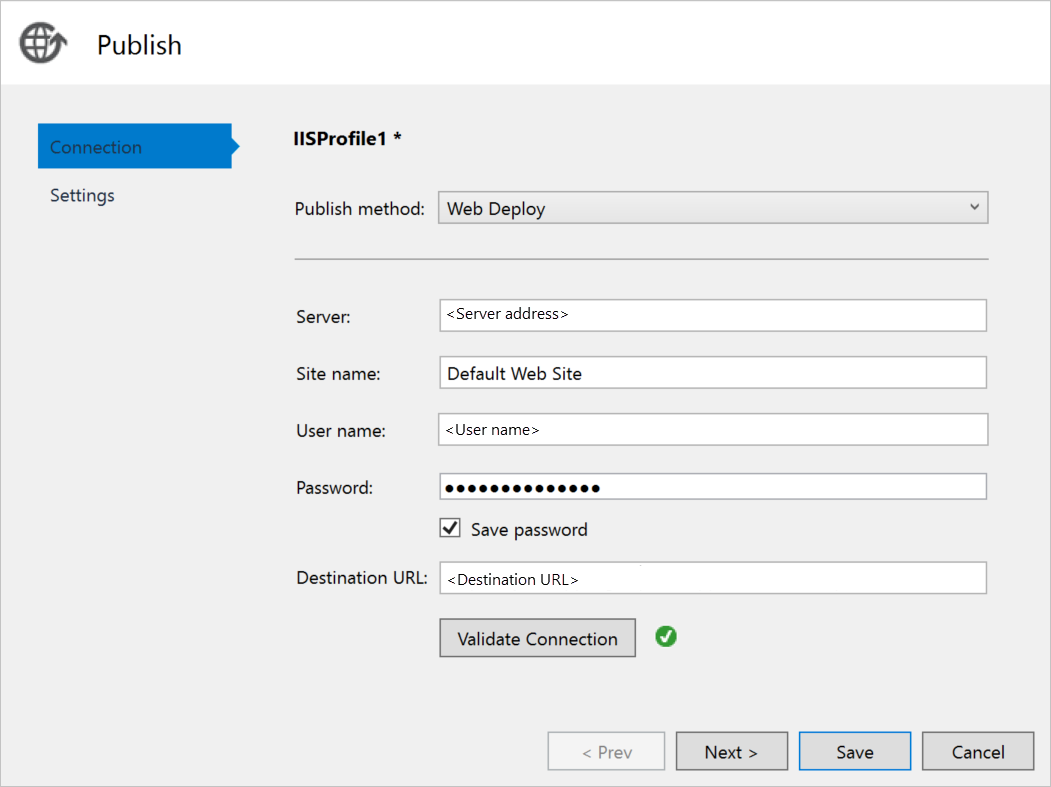
To validate your web-deploy configuration, select Validate connection, and then select Next.
Set Configuration as Release.
Set Target Framework as net5.0.
Set Deployment Mode as Framework-Dependent.
Set Target Runtime as win-x64.
Select Save.
Select Publish. You should see the following output in your console in Visual Studio:
Publish Succeeded.
Web App was published successfully http://mywebapp.region.cloudapp.azurestack.corp.contoso.com/
========== Build: 1 succeeded, 0 failed, 0 up-to-date, 0 skipped ==========
========== Publish: 1 succeeded, 0 failed, 0 skipped ==========
Go to your new server. You should see your running web application.
mywebapp.region.cloudapp.azurestack.corp.contoso.com
Next steps
- Learn how to Set up a development environment in Azure Stack Hub.
- Learn about common deployments for Azure Stack Hub as IaaS.
- To learn the C# programming language and find more resources for C#, see the C# Guide
Feedback
Coming soon: Throughout 2024 we will be phasing out GitHub Issues as the feedback mechanism for content and replacing it with a new feedback system. For more information see: https://aka.ms/ContentUserFeedback.
Submit and view feedback for