Get started with certificate-based authentication in Microsoft Entra ID with federation
Certificate-based authentication (CBA) with federation enables you to be authenticated by Microsoft Entra ID with a client certificate on a Windows, Android, or iOS device when connecting your Exchange online account to:
- Microsoft mobile applications such as Microsoft Outlook and Microsoft Word
- Exchange ActiveSync (EAS) clients
Configuring this feature eliminates the need to enter a username and password combination into certain mail and Microsoft Office applications on your mobile device.
Note
As an alternative, organizations can deploy Microsoft Entra CBA without needing federation. For more information, see Overview of Microsoft Entra certificate-based authentication against Microsoft Entra ID.
This topic:
- Provides you with the steps to configure and utilize CBA for users of tenants in Office 365 Enterprise, Business, Education, and US Government plans.
- Assumes that you already have a public key infrastructure (PKI) and AD FS configured.
Requirements
To configure CBA with federation, the following statements must be true:
- CBA with federation is only supported for Federated environments for browser applications, native clients using modern authentication, or MSAL libraries. The one exception is Exchange Active Sync (EAS) for Exchange Online (EXO), which can be used for federated and managed accounts. To configure Microsoft Entra CBA without needing federation, see How to configure Microsoft Entra certificate-based authentication.
- The root certificate authority and any intermediate certificate authorities must be configured in Microsoft Entra ID.
- Each certificate authority must have a certificate revocation list (CRL) that can be referenced via an internet-facing URL.
- You must have at least one certificate authority configured in Microsoft Entra ID. You can find related steps in the Configure the certificate authorities section.
- For Exchange ActiveSync clients, the client certificate must have the user's routable email address in Exchange online in either the Principal Name or the RFC822 Name value of the Subject Alternative Name field. Microsoft Entra ID maps the RFC822 value to the Proxy Address attribute in the directory.
- Your client device must have access to at least one certificate authority that issues client certificates.
- A client certificate for client authentication must have been issued to your client.
Important
The maximum size of a CRL for Microsoft Entra ID to successfully download and cache is 20MB, and the time required to download the CRL must not exceed 10 seconds. If Microsoft Entra ID can't download a CRL, certificate based authentications using certificates issued by the corresponding CA will fail. Best practices to ensure CRL files are within size constraints are to keep certificate lifetimes to within reasonable limits and to clean up expired certificates.
Step 1: Select your device platform
As a first step, for the device platform you care about, you need to review the following:
- The Office mobile applications support
- The specific implementation requirements
The related information exists for the following device platforms:
Step 2: Configure the certificate authorities
To configure your certificate authorities in Microsoft Entra ID, for each certificate authority, upload the following:
- The public portion of the certificate, in .cer format
- The internet-facing URLs where the Certificate Revocation Lists (CRLs) reside
The schema for a certificate authority looks as follows:
    class TrustedCAsForPasswordlessAuth
    {
       CertificateAuthorityInformation[] certificateAuthorities;
    }

    class CertificateAuthorityInformation

    {
        CertAuthorityType authorityType;
        X509Certificate trustedCertificate;
        string crlDistributionPoint;
        string deltaCrlDistributionPoint;
        string trustedIssuer;
        string trustedIssuerSKI;
    }

    enum CertAuthorityType
    {
        RootAuthority = 0,
        IntermediateAuthority = 1
    }
For the configuration, you can use Microsoft Graph PowerShell:
Start Windows PowerShell with administrator privileges.
Install Microsoft Graph PowerShell:
Install-Module Microsoft.Graph
As a first configuration step, you need to establish a connection with your tenant. As soon as a connection to your tenant exists, you can review, add, delete, and modify the trusted certificate authorities that are defined in your directory.
Connect
To establish a connection with your tenant, use Connect-MgGraph:
Connect-MgGraph
Retrieve
To retrieve the trusted certificate authorities that are defined in your directory, use Get-MgOrganizationCertificateBasedAuthConfiguration.
Get-MgOrganizationCertificateBasedAuthConfiguration
To add, modify, or remove a CA, use the Microsoft Entra admin center:
Sign in to the Microsoft Entra admin center as a Global Administrator.
Browse to Protection > Show more > Security Center (or Identity Secure Score) > Certificate authorities.
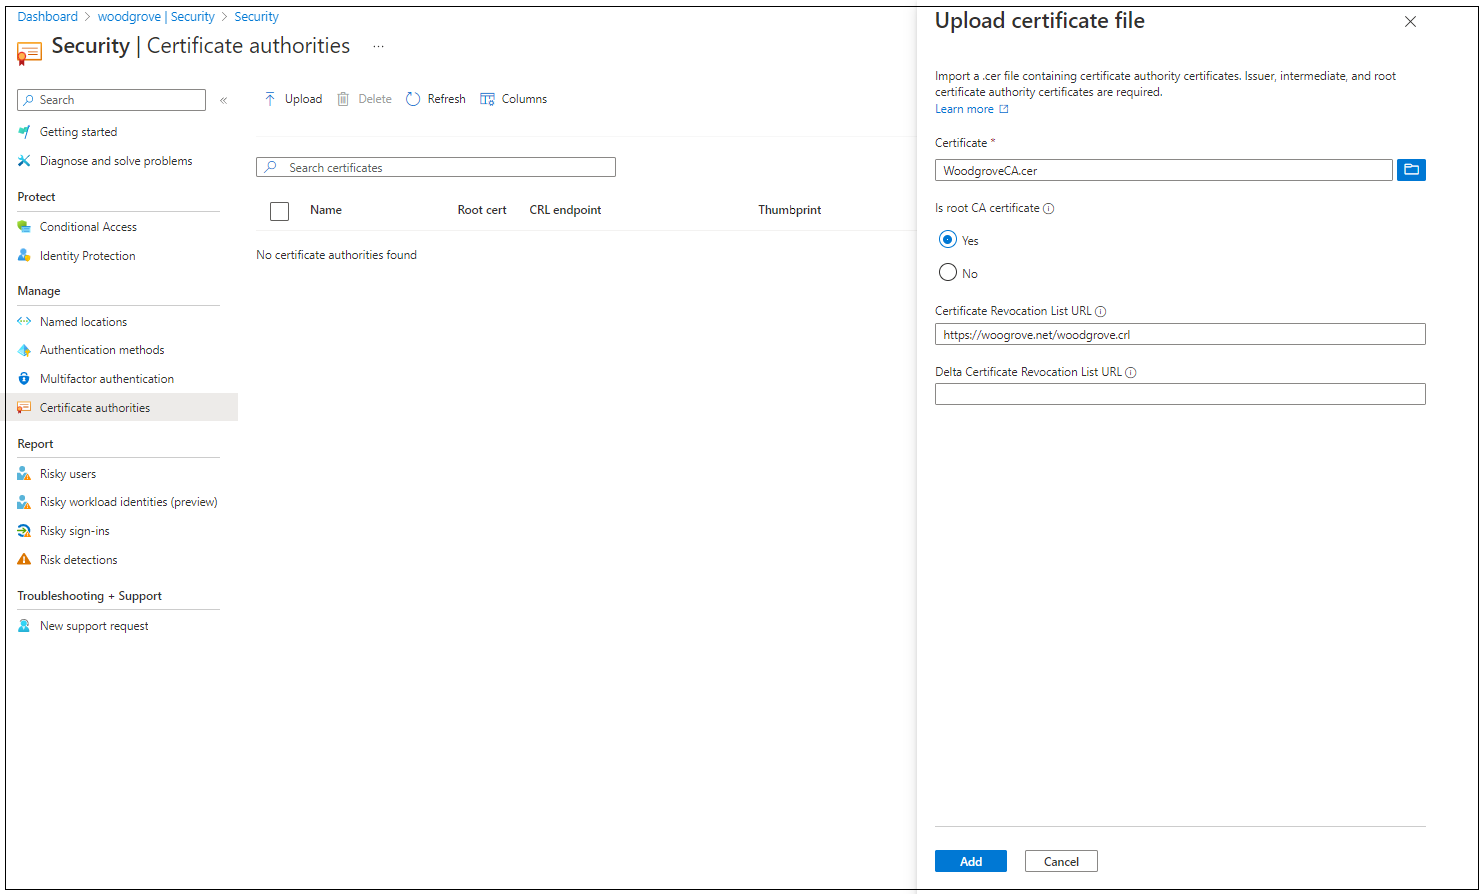
To upload a CA, select Upload:
Select the CA file.
Select Yes if the CA is a root certificate, otherwise select No.
For Certificate Revocation List URL, set the internet-facing URL for the CA base CRL that contains all revoked certificates. If the URL isn't set, authentication with revoked certificates won't fail.
For Delta Certificate Revocation List URL, set the internet-facing URL for the CRL that contains all revoked certificates since the last base CRL was published.
Select Add.
To delete a CA certificate, select the certificate and select Delete.
Select Columns to add or delete columns.
Step 3: Configure revocation
To revoke a client certificate, Microsoft Entra ID fetches the certificate revocation list (CRL) from the URLs uploaded as part of certificate authority information and caches it. The last publish timestamp (Effective Date property) in the CRL is used to ensure the CRL is still valid. The CRL is periodically referenced to revoke access to certificates that are a part of the list.
If a more instant revocation is required (for example, if a user loses a device), the authorization token of the user can be invalidated. To invalidate the authorization token, set the StsRefreshTokenValidFrom field for this particular user using Windows PowerShell. You must update the StsRefreshTokenValidFrom field for each user you want to revoke access for.
To ensure that the revocation persists, you must set the Effective Date of the CRL to a date after the value set by StsRefreshTokenValidFrom and ensure the certificate in question is in the CRL.
Note
Azure AD and MSOnline PowerShell modules are deprecated as of March 30, 2024. To learn more, read the deprecation update. After this date, support for these modules are limited to migration assistance to Microsoft Graph PowerShell SDK and security fixes. The deprecated modules will continue to function through March, 30 2025.
We recommend migrating to Microsoft Graph PowerShell to interact with Microsoft Entra ID (formerly Azure AD). For common migration questions, refer to the Migration FAQ. Note: Versions 1.0.x of MSOnline may experience disruption after June 30, 2024.
The following steps outline the process for updating and invalidating the authorization token by setting the StsRefreshTokenValidFrom field.
Connect to PowerShell:
Connect-MgGraphRetrieve the current StsRefreshTokensValidFrom value for a user:
        $user = Get-MsolUser -UserPrincipalName test@yourdomain.com`
        $user.StsRefreshTokensValidFrom
Configure a new StsRefreshTokensValidFrom value for the user equal to the current timestamp:
Set-MsolUser -UserPrincipalName test@yourdomain.com -StsRefreshTokensValidFrom ("03/05/2021")
The date you set must be in the future. If the date is not in the future, the StsRefreshTokensValidFrom property is not set. If the date is in the future, StsRefreshTokensValidFrom is set to the current time (not the date indicated by Set-MsolUser command).
Step 4: Test your configuration
Testing your certificate
As a first configuration test, you should try to sign in to Outlook Web Access or SharePoint Online using your on-device browser.
If your sign-in is successful, then you know that:
- The user certificate has been provisioned to your test device
- AD FS is configured correctly
Testing Office mobile applications
- On your test device, install an Office mobile application (for example, OneDrive).
- Launch the application.
- Enter your username, and then select the user certificate you want to use.
You should be successfully signed in.
Testing Exchange ActiveSync client applications
To access Exchange ActiveSync (EAS) via certificate-based authentication, an EAS profile containing the client certificate must be available to the application.
The EAS profile must contain the following information:
The user certificate to be used for authentication
The EAS endpoint (for example, outlook.office365.com)
An EAS profile can be configured and placed on the device through the utilization of Mobile device management (MDM) such as Microsoft Intune or by manually placing the certificate in the EAS profile on the device.
Testing EAS client applications on Android
- Configure an EAS profile in the application that satisfies the requirements in the prior section.
- Open the application, and verify that mail is synchronizing.
Next steps
Additional information about certificate-based authentication on Android devices.
Additional information about certificate-based authentication on iOS devices.
Feedback
Coming soon: Throughout 2024 we will be phasing out GitHub Issues as the feedback mechanism for content and replacing it with a new feedback system. For more information see: https://aka.ms/ContentUserFeedback.
Submit and view feedback for