Debug SAML-based single sign-on to applications
In this article, you learn how to find and fix single sign-on issues for applications in Microsoft Entra ID that use SAML-based single sign-on.
Before you begin
We recommend installing the My Apps Secure Sign-in Extension. This browser extension makes it easy to gather the SAML request and SAML response information that you need to resolve issues with single sign-on. In case you can't install the extension, this article shows you how to resolve issues both with and without the extension installed.
To download and install the My Apps Secure Sign-in Extension, use one of the following links.
Tip
Steps in this article might vary slightly based on the portal you start from.
Test SAML-based single sign-on
To test SAML-based single sign-on between Microsoft Entra ID and a target application:
Sign in to the Microsoft Entra admin center as at least a Cloud Application Administrator.
Browse to Identity > Applications > Enterprise applications > All applications.
From the list of enterprise applications, select the application for which you want to test single sign-on, and then from the options on the left, select Single sign-on.
To open the SAML-based single sign-on testing experience, go to Test single sign-on (step 5). If the Test button is greyed out, you need to fill out and save the required attributes first in the Basic SAML Configuration section.
In the Test single sign-on page, use your corporate credentials to sign in to the target application. You can sign in as the current user or as a different user. If you sign in as a different user, a prompt asks you to authenticate.
If you're successfully signed in, the test has passed. In this case, Microsoft Entra ID issued a SAML response token to the application. The application used the SAML token to successfully sign you in.
If you have an error on the company sign-in page or the application's page, use one of the next sections to resolve the error.
Resolve a sign-in error on your company sign-in page
When you try to sign in, you might see an error on your company sign-in page that's similar to the following example.
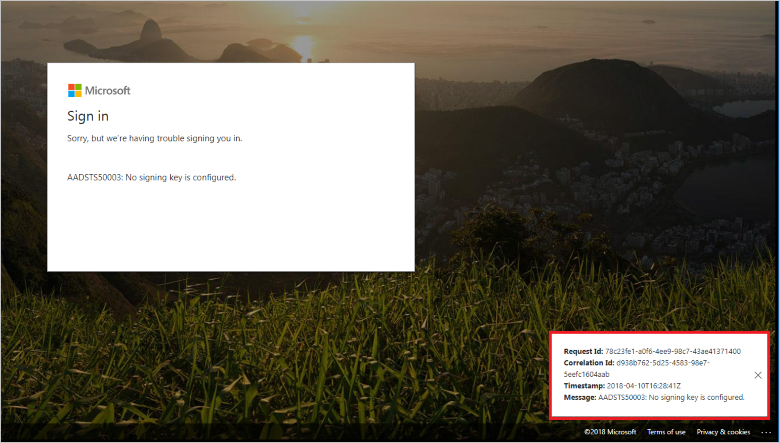
To debug this error, you need the error message and the SAML request. The My Apps Secure Sign-in Extension automatically gathers this information and displays resolution guidance on Microsoft Entra ID.
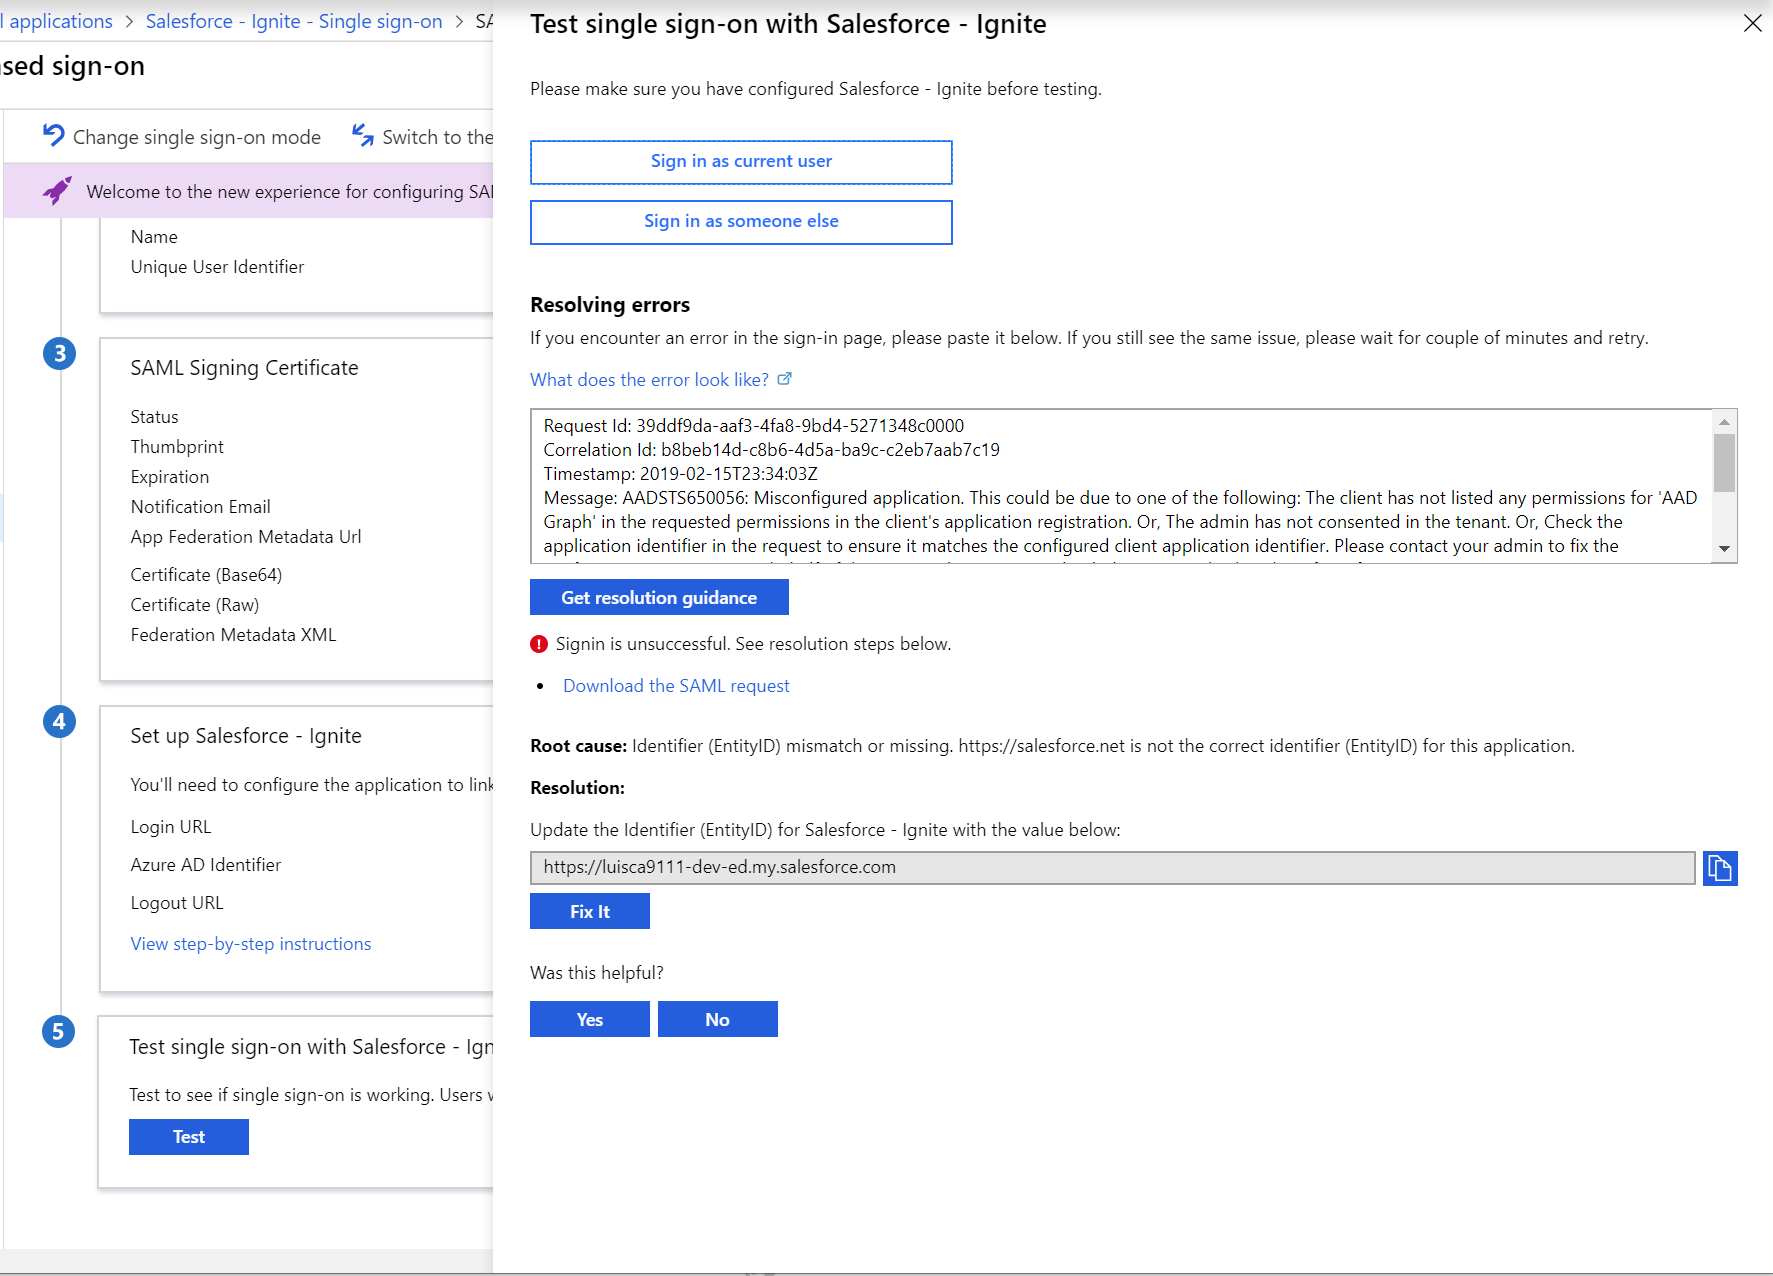
To resolve the sign-in error with the My Apps Secure Sign-in Extension installed
- When an error occurs, the extension redirects you back to the Microsoft Entra ID Test single sign-on page.
- On the Test single sign-on page, select Download the SAML request.
- You should see specific resolution guidance based on the error and the values in the SAML request.
- You see a Fix it button to automatically update the configuration in Microsoft Entra ID to resolve the issue. If you don't see this button, then the sign-in issue isn't due to a misconfiguration on Microsoft Entra ID.
If no resolution is provided for the sign-in error, we suggest that you use the feedback textbox to inform us.
To resolve the error without installing the My Apps Secure Sign-in Extension
- Copy the error message at the bottom right corner of the page. The error message includes:
- A CorrelationID and Timestamp. These values are important when you create a support case with Microsoft because they help the engineers to identify your problem and provide an accurate resolution to your issue.
- A statement identifying the root cause of the problem.
- Go back to Microsoft Entra ID and find the Test single sign-on page.
- In the text box above Get resolution guidance, paste the error message.
- Select Get resolution guidance to display steps for resolving the issue. The guidance might require information from the SAML request or SAML response. If you're not using the My Apps Secure Sign-in Extension, you might need a tool such as Fiddler to retrieve the SAML request and response.
- Verify that the destination in the SAML request corresponds to the SAML Single Sign-on Service URL obtained from Microsoft Entra ID.
- Verify the issuer in the SAML request is the same identifier you've configured for the application in Microsoft Entra ID. Microsoft Entra ID uses the issuer to find an application in your directory.
- Verify AssertionConsumerServiceURL is where the application expects to receive the SAML token from Microsoft Entra ID. You can configure this value in Microsoft Entra ID, but it's not mandatory if it's part of the SAML request.
Resolve a sign-in error on the application page
You might sign in successfully and then see an error on the application's page. This error occurs when Microsoft Entra ID issued a token to the application, but the application doesn't accept the response.
To resolve the error, follow these steps, or watch this short video about how to use Microsoft Entra ID to troubleshoot SAML SSO:
If the application is in the Microsoft Entra Gallery, verify that you've followed all the steps for integrating the application with Microsoft Entra ID. To find the integration instructions for your application, see the list of SaaS application integration tutorials.
Retrieve the SAML response.
- If the My Apps Secure Sign-in extension is installed, from the Test single sign-on page, select download the SAML response.
- If the extension isn't installed, use a tool such as Fiddler to retrieve the SAML response.
Notice these elements in the SAML response token:
User unique identifier of NameID value and format
Claims issued in the token
Certificate used to sign the token.
For more information on the SAML response, see Single Sign-on SAML protocol.
Now that you've reviewed the SAML response, see Error on an application's page after signing in for guidance on how to resolve the problem.
If you're still not able to sign in successfully, you can ask the application vendor what is missing from the SAML response.
Next steps
Now that single sign-on is working to your application, you could Automate user provisioning and deprovisioning to SaaS applications or get started with Conditional Access.
Feedback
Coming soon: Throughout 2024 we will be phasing out GitHub Issues as the feedback mechanism for content and replacing it with a new feedback system. For more information see: https://aka.ms/ContentUserFeedback.
Submit and view feedback for