Advanced Microsoft Entra Verified ID setup
Advanced Verified ID setup is the classic way of setting up Verified ID where you as an admin have to configure Azure KeyVault, take care of registering your decentralized ID and verifying your domain.
In this tutorial, you learn how to use the advanced setup to configure your Microsoft Entra tenant to use the verifiable credentials service.
Specifically, you learn how to:
- Create an Azure Key Vault instance.
- Configure your the Verified ID service using the advanced setup.
- Register an application in Microsoft Entra ID.
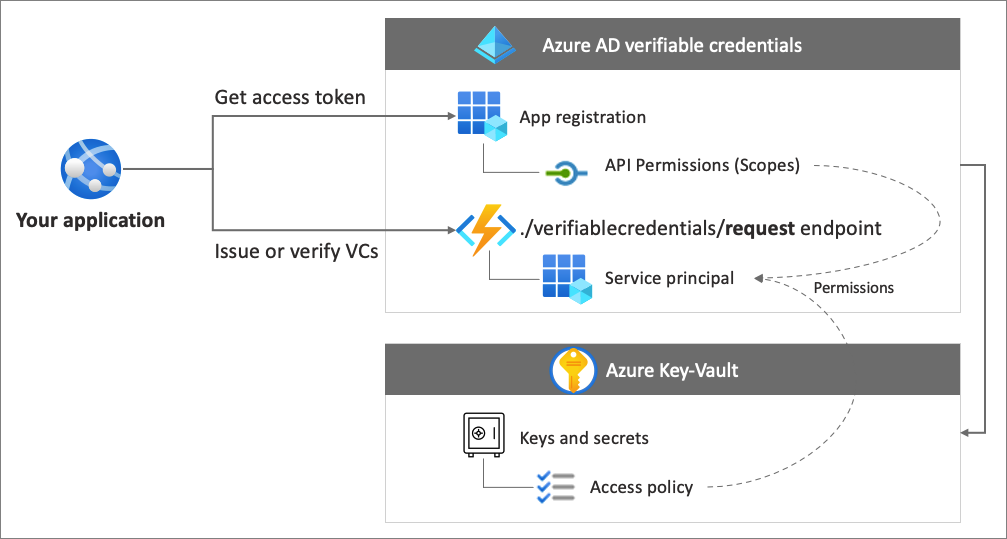
The following diagram illustrates the Verified ID architecture and the component you configure.
Prerequisites
- You need an Azure tenant with an active subscription. If you don't have an Azure subscription, create one for free.
- Ensure that you have the global administrator or the authentication policy administrator permission for the directory you want to configure. If you're not the global administrator, you need the application administrator permission to complete the app registration including granting admin consent.
- Ensure that you have the contributor role for the Azure subscription or the resource group where you are deploying Azure Key Vault.
- Ensure that you provide access permissions for Key Vault. For more information, see Provide access to Key Vault keys, certificates, and secrets with an Azure role-based access control.
Create a key vault
Azure Key Vault is a cloud service that enables the secure storage and access management of secrets and keys. The Verified ID service stores public and private keys in Azure Key Vault. These keys are used to sign and verify credentials.
If you don't have an Azure Key Vault instance available, follow these steps to create a key vault using the Azure portal.
Note
By default, the account that creates a vault is the only one with access. The Verified ID service needs access to the key vault. You must authenticate your key vault, allowing the account used during configuration to create and delete keys. The account used during configuration also requires permissions to sign so that it can create the domain binding for Verified ID. If you use the same account while testing, modify the default policy to grant the account sign permission, in addition to the default permissions granted to vault creators.
Manage access to the key vault
Before you can set up Verified ID, you need to provide Key Vault access. This defines whether a specified admin can perform operations on Key Vault secrets and keys. Provide access permissions to your key vault for both the Verified ID administrator account, and for the Request Service API principal that you created.
After you create your key vault, Verifiable Credentials generates a set of keys used to provide message security. These keys are stored in Key Vault. You use a key set for signing, updating, and recovering verifiable credentials.
Set up Verified ID
To set up Verified ID, follow these steps:
Sign in to the Microsoft Entra admin center as at least a Global Administrator.
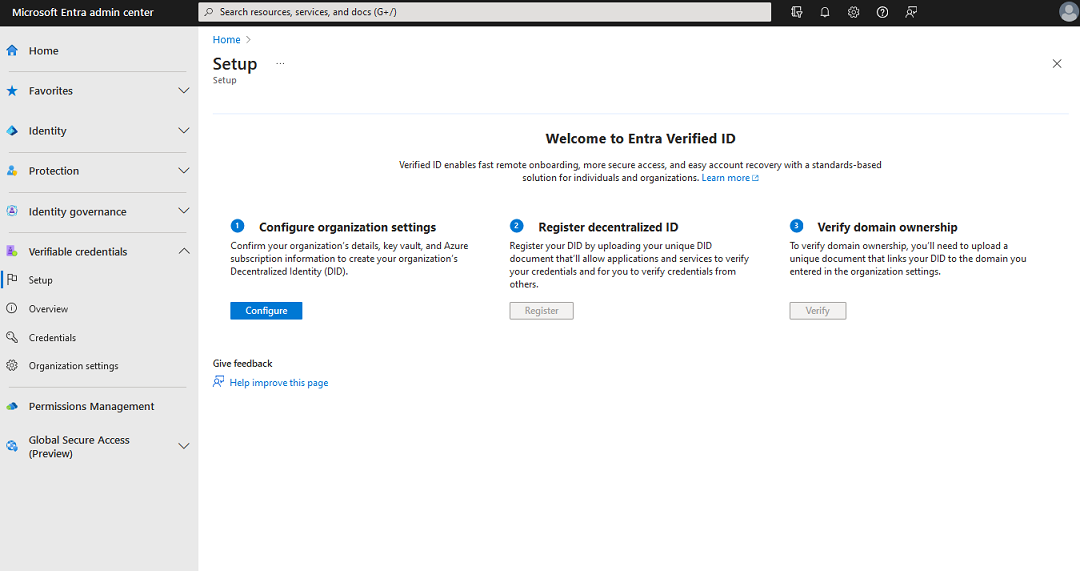
Select Verified ID.
From the left menu, select Setup.
From the middle menu, select Configure organization settings.
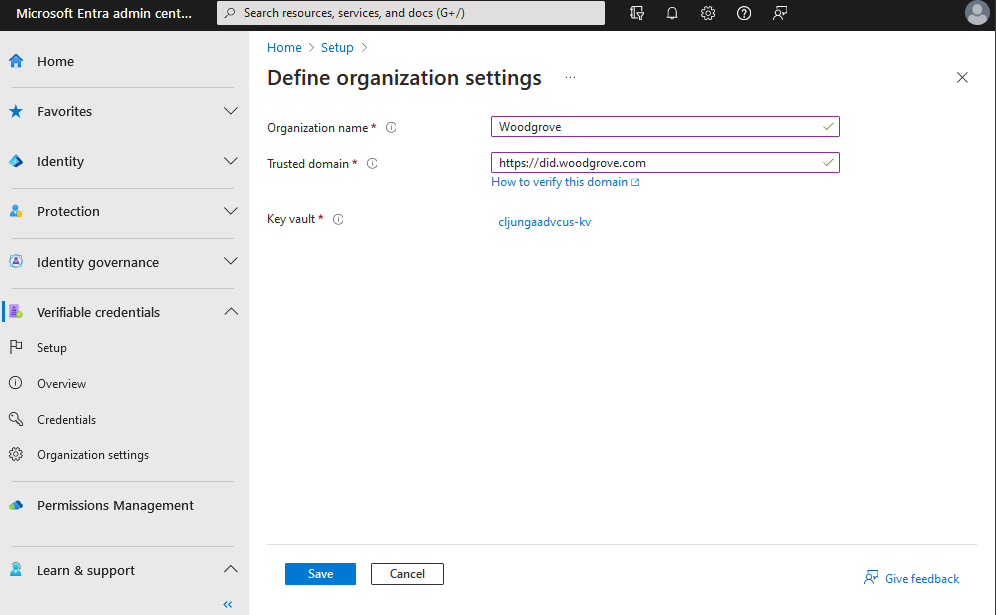
Set up your organization by providing the following information:
Organization name: Enter a name to reference your business within Verified IDs. Your customers don't see this name.
Trusted domain: Enter a domain that's added to a service endpoint in your decentralized identity (DID) document. The domain is what binds your DID to something tangible that the user might know about your business. Microsoft Authenticator and other digital wallets use this information to validate that your DID is linked to your domain. If the wallet can verify the DID, it displays a verified symbol. If the wallet can't verify the DID, it informs the user that the credential was issued by an organization it couldn't validate.
Important
The domain can't be a redirect. Otherwise, the DID and domain can't be linked. Make sure to use HTTPS for the domain. For example:
https://did.woodgrove.com.Key vault: Select the key vault that you created earlier.
Select Save.
Register an application in Microsoft Entra ID
Your application needs to get access tokens when it wants to call into Microsoft Entra Verified ID so it can issue or verify credentials. To get access tokens, you have to register an application and grant API permission for the Verified ID Request Service. For example, use the following steps for a web application:
Sign in to the Microsoft Entra admin center as at least a Global Administrator.
Select Microsoft Entra ID.
Under Applications, select App registrations > New registration.

Enter a display name for your application. For example: verifiable-credentials-app.
For Supported account types, select Accounts in this organizational directory only (Default Directory only - Single tenant).
Select Register to create the application.

Grant permissions to get access tokens
In this step, you grant permissions to the Verifiable Credentials Service Request Service principal.
To add the required permissions, follow these steps:
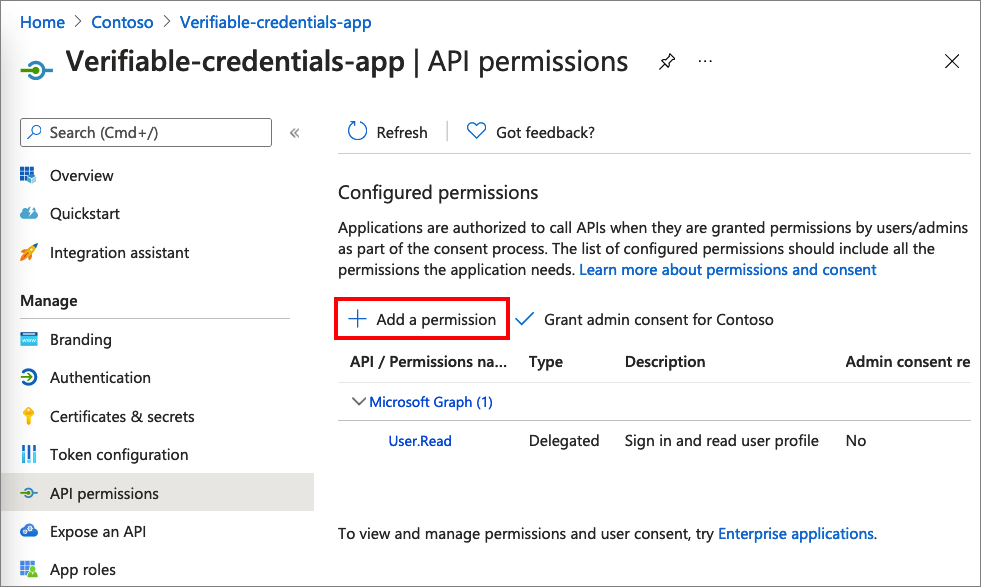
Stay in the verifiable-credentials-app application details page. Select API permissions > Add a permission.
Select APIs my organization uses.
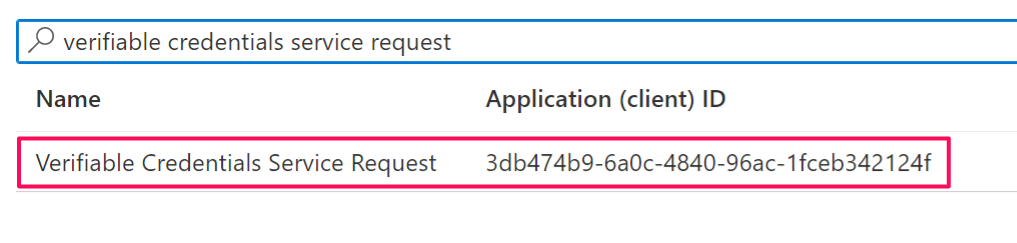
Search for the Verifiable Credentials Service Request service principal and select it.
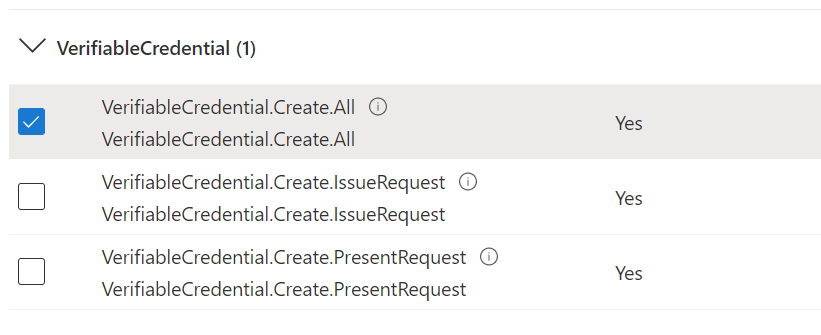
Choose Application Permission, and expand VerifiableCredential.Create.All.
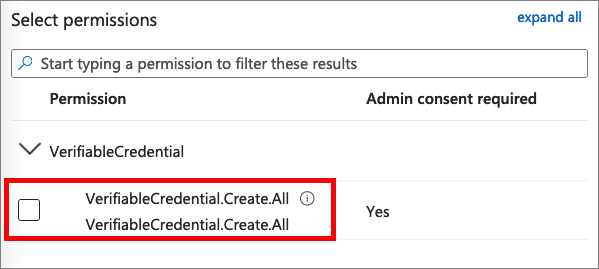
Select Add permissions.
Select Grant admin consent for <your tenant name>.
You can choose to grant issuance and presentation permissions separately if you prefer to segregate the scopes to different applications.
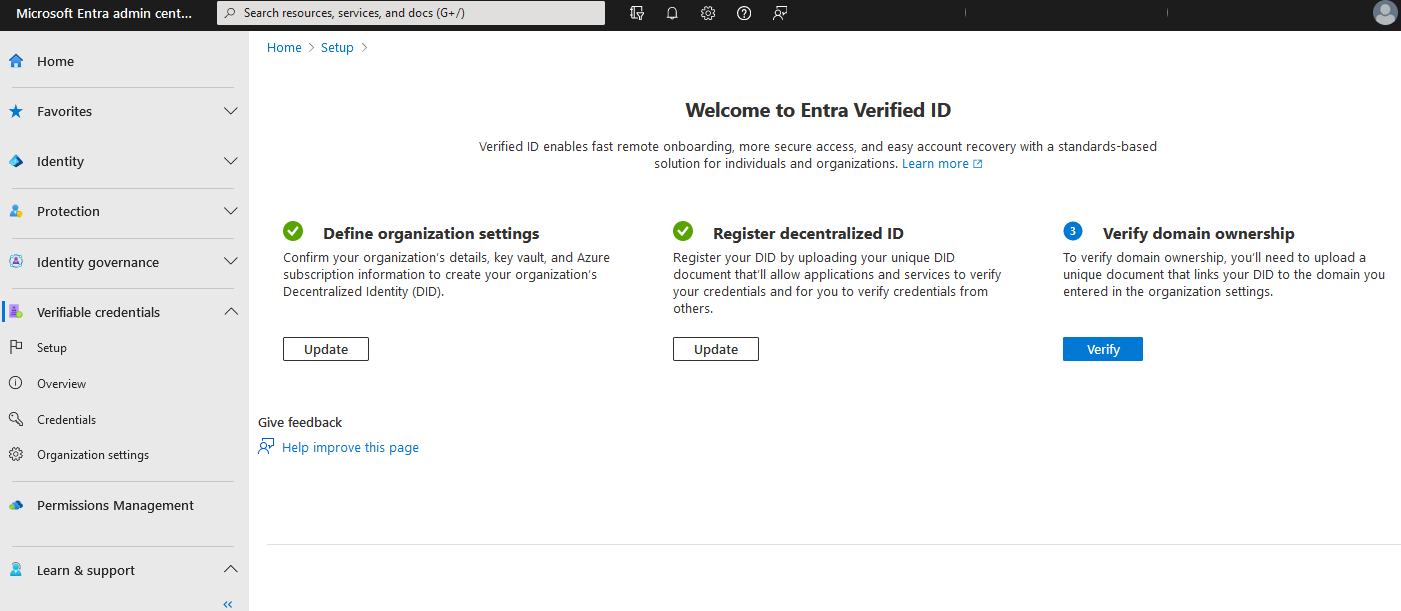
Register decentralized ID and verify domain ownership
After Azure Key Vault is setup, and the service have a signing key, you must complete step 2 and 3 in the setup.
- Sign in to the Microsoft Entra admin center as at least a Global Administrator.
- Select Verifiable credentials.
- From the left menu, select Setup.
- From the middle menu, select Register decentralized ID to register your DID document, as per instructions in article How to register your decentralized ID for did:web. You must complete this step before you can continue to verify your domain. If you selected did:ion as your trust system, you should skip this step.
- From the middle menu, select Verify domain ownership to verify your domain, as per instructions in article Verify domain ownership to your Decentralized Identifier (DID)
Once that you have successfully completed the verification steps, and have green checkmarks on all three steps, you are ready to continue to the next tutorial.
Next steps
Feedback
Coming soon: Throughout 2024 we will be phasing out GitHub Issues as the feedback mechanism for content and replacing it with a new feedback system. For more information see: https://aka.ms/ContentUserFeedback.
Submit and view feedback for