Events
Mar 17, 9 PM - Mar 21, 10 AM
Join the meetup series to build scalable AI solutions based on real-world use cases with fellow developers and experts.
Register nowThis browser is no longer supported.
Upgrade to Microsoft Edge to take advantage of the latest features, security updates, and technical support.
This quickstart explains how to use the Custom Vision website to create an object detector model. Once you build a model, you can test it with new images and integrate it into your own image recognition app.
To use the Custom Vision service, you need to create Custom Vision training and prediction resources in Azure. In the Azure portal, use the Create Custom Vision page to create both a training resource and a prediction resource.
In your web browser, navigate to the Custom Vision website. Sign in with the same account you used to sign in to the Azure portal.

To create your first project, select New Project. The Create new project dialog box appears.
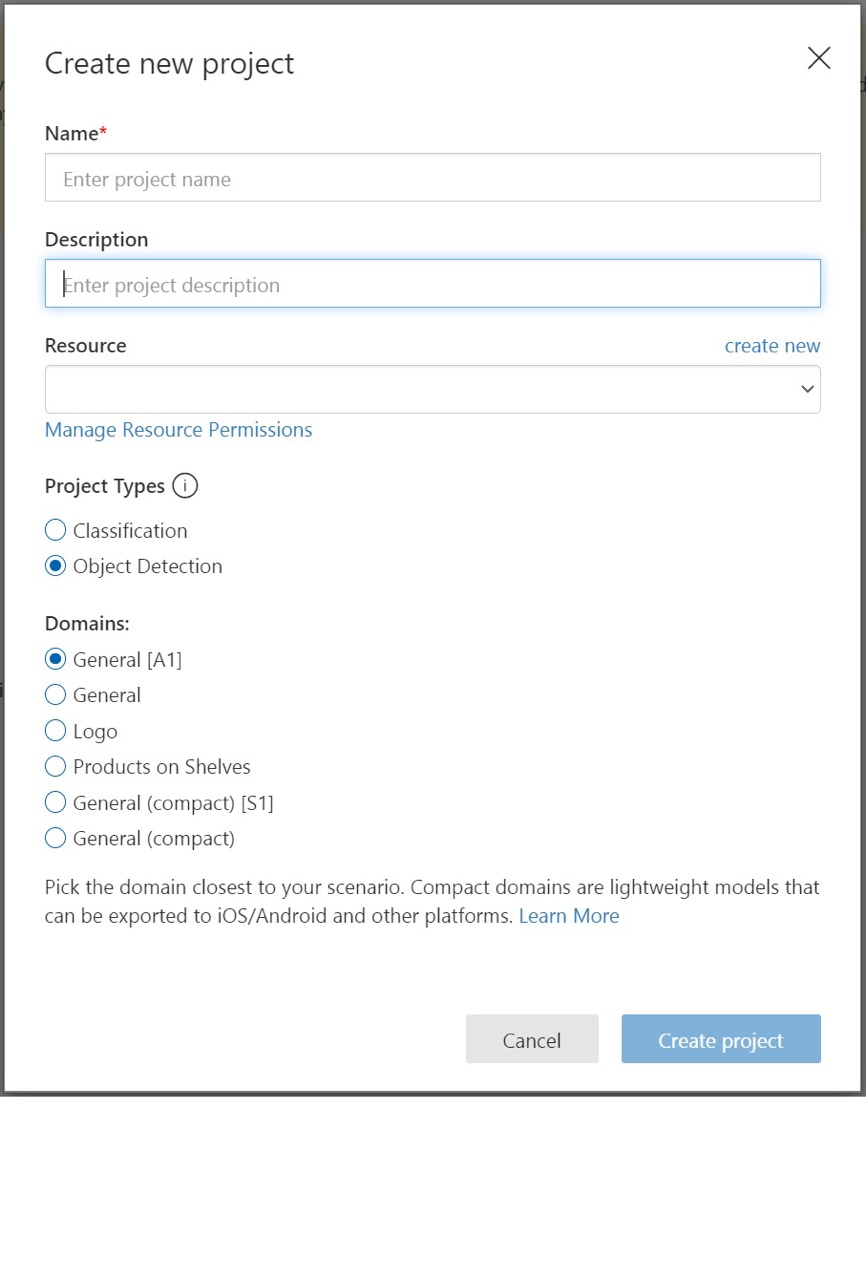
Enter a name and a description for the project. Then select your Custom Vision training resource. If your signed-in account is associated with an Azure account, the Resource dropdown displays all of your compatible Azure resources.
Note
If no resource is available, please confirm that you logged into customvision.ai with the same account as you used to sign in to the Azure portal. Also, please confirm you have selected the same Directory in the Custom Vision website as the directory in the Azure portal where your Custom Vision resources are located. In both sites, you can select your directory from the dropdown account menu at the top right corner of the screen.
Under Project Types, select Object Detection.
Select one of the available domains. Each domain optimizes the detector for specific types of images, as described in the following table. You can change the domain later, if you want.
| Domain | Purpose |
|---|---|
| General | Optimized for a broad range of object detection tasks. If none of the other domains are appropriate, or if you're unsure about which domain to choose, select the General domain. |
| Logo | Optimized for finding brand logos in images. |
| Products on shelves | Optimized for detecting and classifying products on shelves. |
| Compact domains | Optimized for the constraints of real-time object detection on mobile devices. The models generated by compact domains can be exported to run locally. |
Finally, select Create project.
As a minimum, you should use at least 30 images per tag in the initial training set. You should also collect a few extra images to test your model after it's trained.
In order to train your model effectively, use images with visual variety. Select images that vary by:
Additionally, make sure all of your training images meet the following criteria:
In this section, you upload and manually tag images to help train the detector.
To add images, select Add images and then select Browse local files. Select Open to upload the images.
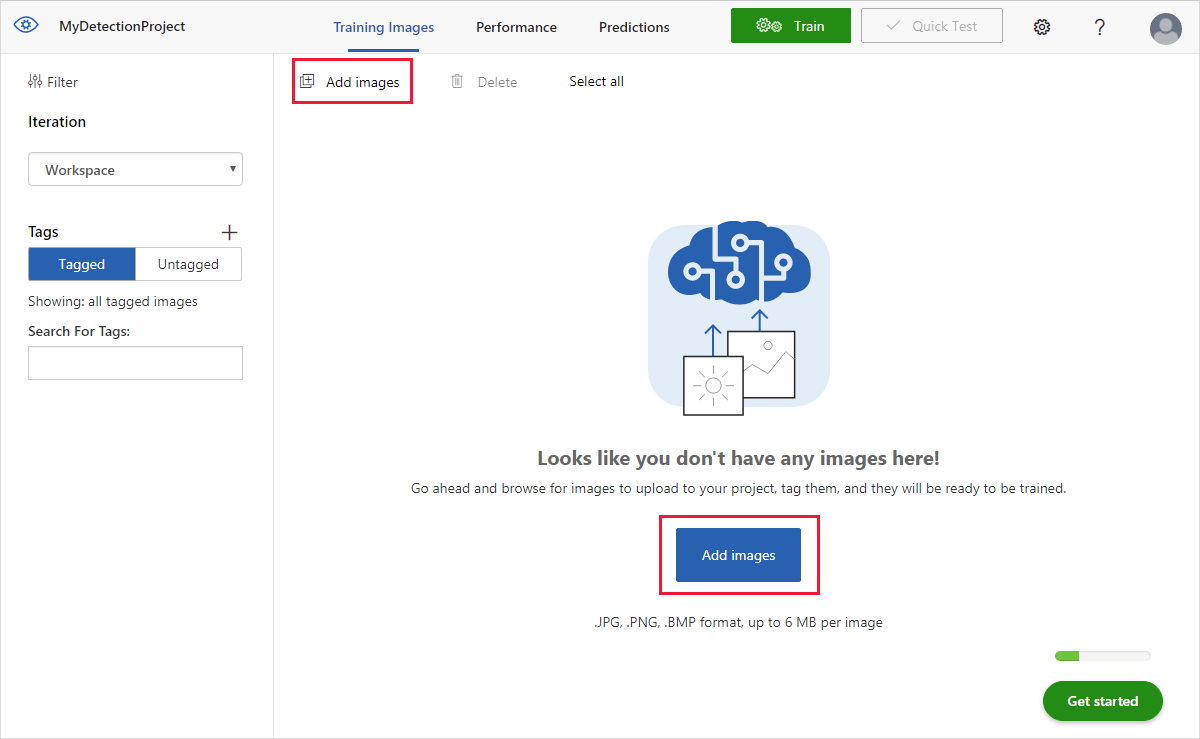
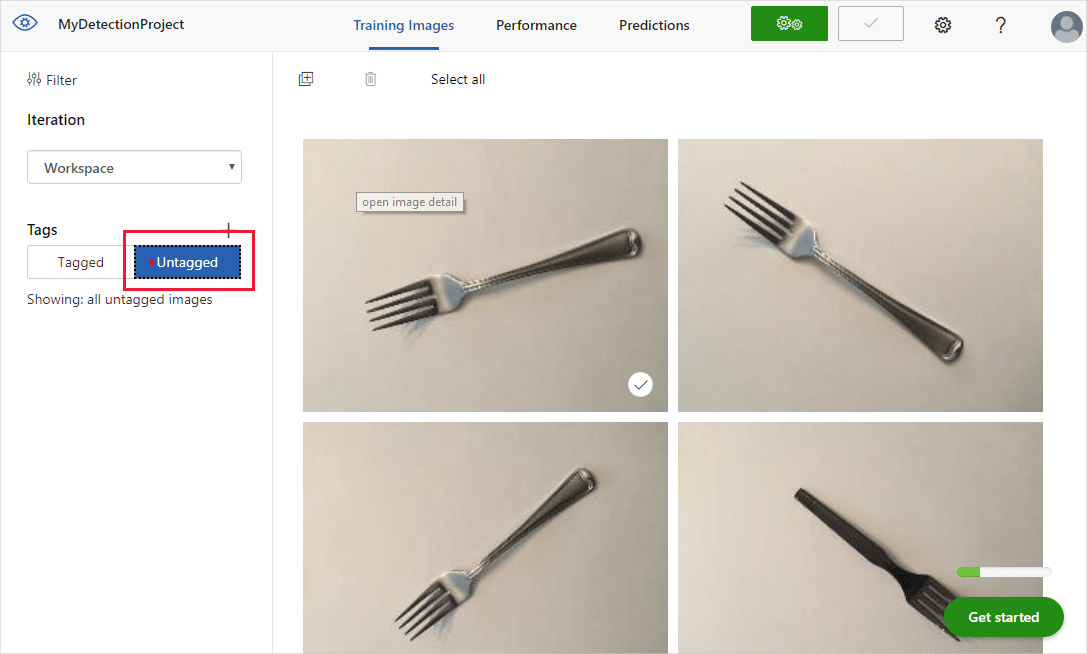
You'll see your uploaded images in the Untagged section of the UI. The next step is to manually tag the objects that you want the detector to learn to recognize. Select the first image to open the tagging dialog window.
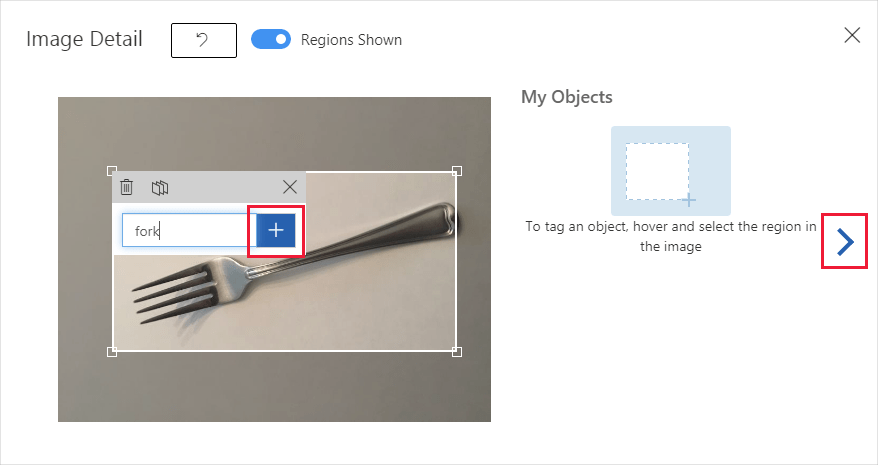
Select and drag a rectangle around the object in your image. Then, enter a new tag name with the + button, or select an existing tag from the drop-down list. It's important to tag every instance of the objects you want to detect, because the detector uses the untagged background area as a negative example in training. When you're done tagging, select the arrow on the right to save your tags and move on to the next image.
To upload another set of images, return to the top of this section and repeat the steps.
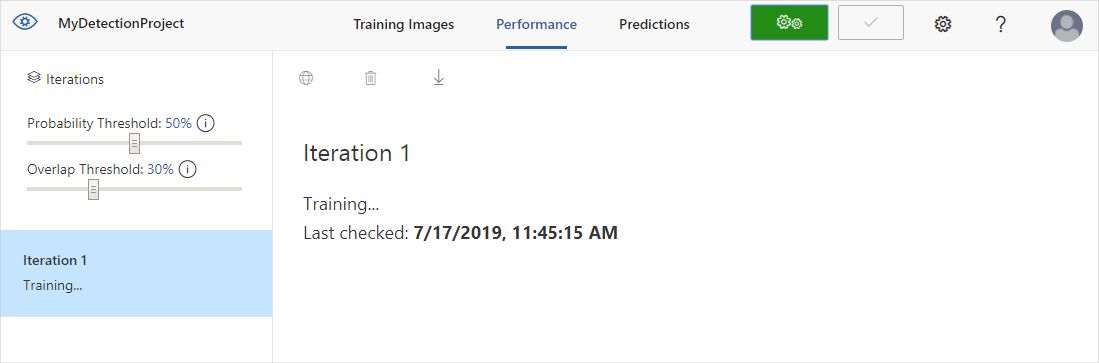
To train the detector model, select the Train button. The detector uses all of the current images and their tags to create a model that identifies each tagged object. This process can take several minutes.

The training process should only take a few minutes. During this time, information about the training process is displayed in the Performance tab.
After training is complete, the model's performance is calculated and displayed. The Custom Vision service uses the images that you submitted for training to calculate precision, recall, and mean average precision. Precision and recall are two different measurements of the effectiveness of a detector:
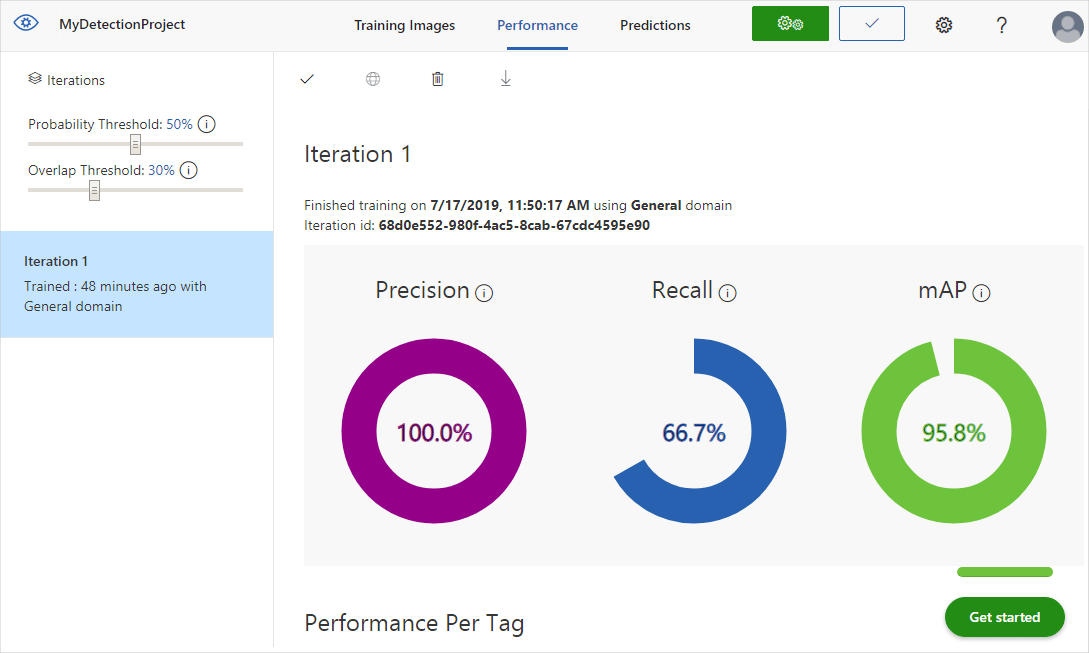
Note the Probability Threshold slider on the left pane of the Performance tab. This is the level of confidence that a prediction needs to have in order to be considered correct (for the purposes of calculating precision and recall).
When you interpret prediction calls with a high probability threshold, they tend to return results with high precision at the expense of recall—the detected classifications are correct, but many remain undetected. A low probability threshold does the opposite—most of the actual classifications are detected, but there are more false positives within that set. With this in mind, you should set the probability threshold according to the specific needs of your project. Later, when you're receiving prediction results on the client side, you should use the same probability threshold value as you used here.
The Overlap Threshold slider deals with how correct an object prediction must be to be considered correct in training. It sets the minimum allowed overlap between the predicted object's bounding box and the actual user-entered bounding box. If the bounding boxes don't overlap to this degree, the prediction isn't considered correct.
Each time you train your detector, you create a new iteration with its own updated performance metrics. You can view all of your iterations in the left pane of the Performance tab. In the left pane, you'll also find the Delete button, which you can use to delete an iteration if it's obsolete. When you delete an iteration, you delete any images that are uniquely associated with it.
To learn how to access your trained models programmatically, see Use your model with the prediction API.
In this quickstart, you learned how to create and train an object detector model using the Custom Vision website. Next, get more information on the iterative process of improving your model.
For an overview, see What is Custom Vision?
Events
Mar 17, 9 PM - Mar 21, 10 AM
Join the meetup series to build scalable AI solutions based on real-world use cases with fellow developers and experts.
Register nowTraining
Learning path
Create vision models with Azure AI Custom Vision - Training
How to create custom computer vision solutions with Azure AI Custom Vision
Certification
Microsoft Certified: Azure Data Scientist Associate - Certifications
Manage data ingestion and preparation, model training and deployment, and machine learning solution monitoring with Python, Azure Machine Learning and MLflow.