Deployment Center for Azure Kubernetes
Important
Deployment Center for Azure Kubernetes Service will be retired on March 31, 2023. Learn more
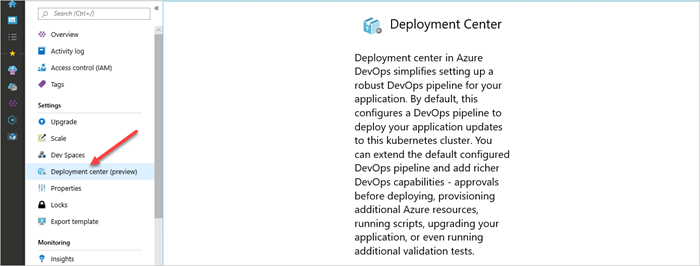
Deployment Center in Azure DevOps simplifies setting up a robust Azure DevOps pipeline for your application. By default, Deployment Center configures an Azure DevOps pipeline to deploy your application updates to the Kubernetes cluster. You can extend the default configured Azure DevOps pipeline and also add richer capabilities: the ability to gain approval before deploying, provision additional Azure resources, run scripts, upgrade your application, and even run more validation tests.
In this tutorial, you will:
- Configure an Azure DevOps pipeline to deploy your application updates to the Kubernetes cluster.
- Examine the continuous integration (CI) pipeline.
- Examine the continuous delivery (CD) pipeline.
- Clean up the resources.
Prerequisites
An Azure subscription. You can get one free through Visual Studio Dev Essentials.
An Azure Kubernetes Service (AKS) cluster.
Create an AKS cluster
Sign in to your Azure portal.
Select the Cloud Shell option on the right side of the menu bar in the Azure portal.
To create the AKS cluster, run the following commands:
# Create a resource group in the South India location:

az group create --name azooaks --location southindia

# Create a cluster named azookubectl with one node.

az aks create --resource-group azooaks --name azookubectl --node-count 1 --enable-addons monitoring --generate-ssh-keys
Deploy application updates to a Kubernetes cluster
Go to the resource group that you created in the previous section.
Select the AKS cluster, and then select Deployment Center (preview) on the left blade. Select Get started.
Choose the location of the code and select Next. Then, select one of the currently supported repositories: Azure Repos or GitHub.
Azure Repos is a set of version control tools that help you manage your code. Whether your software project is large or small, using version control as early as possible is a good idea.
Azure Repos: Choose a repository from your existing project and organization.
GitHub: Authorize and select the repository for your GitHub account.
Deployment Center analyzes the repository and detects your Dockerfile. If you want to update the Dockerfile, you can edit the identified port number.
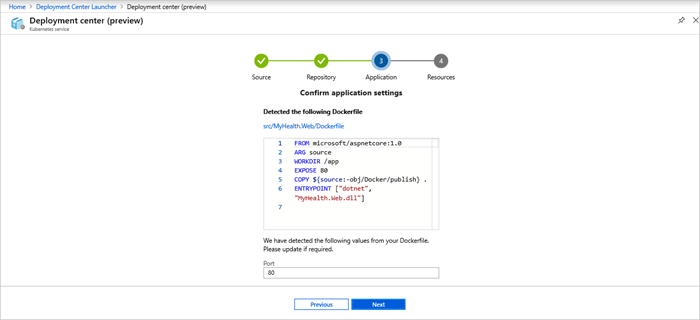
If the repository doesn't contain the Dockerfile, the system displays a message to commit one.

Select an existing container registry or create one, and then select Finish. The pipeline is created automatically and queues a build in Azure Pipelines.
Azure Pipelines is a cloud service that you can use to automatically build and test your code project and make it available to other users. Azure Pipelines combines continuous integration and continuous delivery to constantly and consistently test and build your code and ship it to any target.

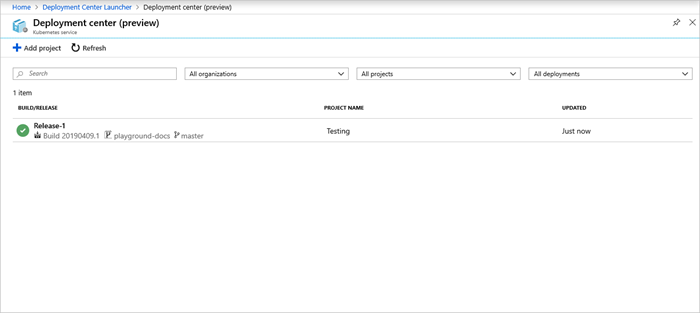
Select the link to see the ongoing pipeline.
You'll see the successful logs after deployment is complete.
Examine the CI pipeline
Deployment Center automatically configures your Azure DevOps organization's CI/CD pipeline. The pipeline can be explored and customized.
Go to the Deployment Center dashboard.
Select the build number from the list of successful logs to view the build pipeline for your project.
Select the ellipsis (...) in the upper-right corner. A menu shows several options, such as queuing a new build, retaining a build, and editing the build pipeline. Select Edit pipeline.
You can examine the different tasks for your build pipeline in this pane. The build performs various tasks, such as collecting sources from the Git repository, creating an image, pushing an image to the container registry, and publishing outputs that are used for deployments.
Select the name of the build pipeline at the top of the pipeline.
Change your build pipeline name to something more descriptive, select Save & queue, and then select Save.
Under your build pipeline, select History. This pane shows an audit trail of your recent build changes. Azure DevOps monitors any changes made to the build pipeline and allows you to compare versions.
Select Triggers. You can include or exclude branches from the CI process.
Select Retention. You can specify policies to keep or remove a number of builds, depending on your scenario.
Examine the CD pipeline
Deployment Center automatically creates and configures the relationship between your Azure DevOps organization and your Azure subscription. The steps involved include setting up an Azure service connection to authenticate your Azure subscription with Azure DevOps. The automated process also creates a release pipeline, which provides continuous delivery to Azure.
Select Pipelines, and then select Releases.
To edit the release pipeline, select Edit.
Select Drop from the Artifacts list. In the previous steps, the construction pipeline you examined produces the output used for the artifact.
Select the Continuous deployment trigger on the right of the Drop option. This release pipeline has an enabled CD trigger that runs a deployment whenever a new build artifact is available. You can also disable the trigger to require manual execution for your deployments.
To examine all the tasks for your pipeline, select Tasks. The release sets the tiller environment, configures the
imagePullSecretsparameter, installs Helm tools, and deploys the Helm charts to the Kubernetes cluster.To view the release history, select View releases.
To see the summary, select Release. Select any of the stages to explore multiple menus, such as a release summary, associated work items, and tests.
Select Commits. This view shows code commits related to this deployment. Compare releases to see the commit differences between deployments.
Select Logs. The logs contain useful deployment information, which you can view during and after deployments.
Clean up resources
You can delete the related resources that you created when you don't need them anymore. Use the delete functionality on the DevOps Projects dashboard.
Next steps
You can modify these build and release pipelines to meet the needs of your team. Or, you can use this CI/CD model as a template for your other pipelines.
Retirement
Deployment Center for Azure Kubernetes will be retired on March 31, 2023 in favor of Automated deployments. We encourage you to switch for enjoy similar capabilities.
Migration Steps
There is no migration required as AKS Deployment center experience does not store any information itself, it just helps users with their Day 0 getting started experience on Azure. Moving forward, the recommended way for users to get started on CI/CD for AKS will be using Automated deployments feature.
For existing pipelines, users will still be able to perform all operations from GitHub Actions or Azure DevOps after the retirement of this experience. Only the ability to create and view pipelines from Azure portal will be removed. See GitHub Actions or Azure DevOps to learn how to get started.
For new application deployments to AKS, instead of using Deployment center users can get the same capabilities by using Automated deployments.
FAQ
- Where can I manage my CD pipeline after this experience is deprecated?
Post retirement, you will not be able to view or create CD pipelines from Azure portal’s AKS blade. However, as with the current experience, you can go to GitHub Actions or Azure DevOps portal and view or update the configured pipelines there.
- Will I lose my earlier configured pipelines?
No. All the created pipelines will still be available and functional in GitHub or Azure DevOps. Only the experience of creating and viewing pipelines from Azure portal will be retired.
- How can I still configure CD pipelines directly through Azure portal?
You can use Automated deployments available in the AKS blade in Azure portal.