Create SAS tokens for storage containers
This content applies to: ![]() v4.0 (preview)
v4.0 (preview) ![]() v3.1 (GA)
v3.1 (GA) ![]() v3.0 (GA)
v3.0 (GA) ![]() v2.1 (GA)
v2.1 (GA)
In this article, learn how to create user delegation, shared access signature (SAS) tokens, using the Azure portal or Azure Storage Explorer. User delegation SAS tokens are secured with Microsoft Entra credentials. SAS tokens provide secure, delegated access to resources in your Azure storage account.

At a high level, here's how SAS tokens work:
Your application submits the SAS token to Azure Storage as part of a REST API request.
If the storage service verifies that the SAS is valid, the request is authorized.
If the SAS token is deemed invalid, the request is declined and the error code 403 (Forbidden) is returned.
Azure Blob Storage offers three resource types:
- Storage accounts provide a unique namespace in Azure for your data.
- Data storage containers are located in storage accounts and organize sets of blobs.
- Blobs are located in containers and store text and binary data such as files, text, and images.
When to use a SAS token
Training custom models. Your assembled set of training documents must be uploaded to an Azure Blob Storage container. You can opt to use a SAS token to grant access to your training documents.
Using storage containers with public access. You can opt to use a SAS token to grant limited access to your storage resources that have public read access.
Important
If your Azure storage account is protected by a virtual network or firewall, you can't grant access with a SAS token. You'll have to use a managed identity to grant access to your storage resource.
Managed identity supports both privately and publicly accessible Azure Blob Storage accounts.
SAS tokens grant permissions to storage resources, and should be protected in the same manner as an account key.
Operations that use SAS tokens should be performed only over an HTTPS connection, and SAS URIs should only be distributed on a secure connection such as HTTPS.
Prerequisites
To get started, you need:
An active Azure account. If you don't have one, you can create a free account.
A Document Intelligence or multi-service resource.
A standard performance Azure Blob Storage account. You need to create containers to store and organize your blob data within your storage account. If you don't know how to create an Azure storage account with a storage container, follow these quickstarts:
- Create a storage account. When you create your storage account, select Standard performance in the Instance details > Performance field.
- Create a container. When you create your container, set Public access level to Container (anonymous read access for containers and blobs) in the New Container window.
Upload your documents
Sign in to the Azure portal.
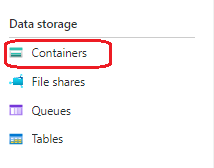
- Select Your storage account → Data storage → Containers.
Select a container from the list.
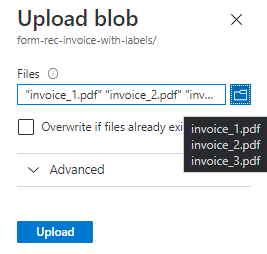
Select Upload from the menu at the top of the page.

The Upload blob window appears. Select your files to upload.
Note
By default, the REST API uses documents located at the root of your container. You can also use data organized in subfolders if specified in the API call. For more information, see Organize your data in subfolders.
Use the Azure portal
The Azure portal is a web-based console that enables you to manage your Azure subscription and resources using a graphical user interface (GUI).
Sign in to the Azure portal.
Navigate to Your storage account > containers > your container.
Select Generate SAS from the menu near the top of the page.
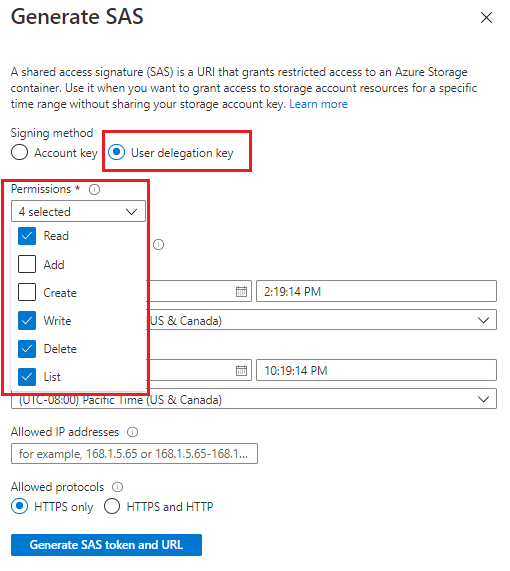
Select Signing method → User delegation key.
Define Permissions by selecting or clearing the appropriate checkbox.
- Make sure the Read, Write, Delete, and List permissions are selected.
Important
If you receive a message similar to the following one, you'll also need to assign access to the blob data in your storage account:

Azure role-based access control (Azure RBAC) is the authorization system used to manage access to Azure resources. Azure RBAC helps you manage access and permissions for your Azure resources.
Assign an Azure role for access to blob data to assign a role that allows for read, write, and delete permissions for your Azure storage container. See Storage Blob Data Contributor.
Specify the signed key Start and Expiry times.
- When you create a SAS token, the default duration is 48 hours. After 48 hours, you'll need to create a new token.
- Consider setting a longer duration period for the time you're using your storage account for Document Intelligence Service operations.
- The value of the expiry time is determined by whether you're using an Account key or User delegation key Signing method:
- Account key: There's no imposed maximum time limit; however, best practices recommended that you configure an expiration policy to limit the interval and minimize compromise. Configure an expiration policy for shared access signatures.
- User delegation key: The value for the expiry time is a maximum of seven days from the creation of the SAS token. The SAS is invalid after the user delegation key expires, so a SAS with an expiry time of greater than seven days will still only be valid for seven days. For more information,see Use Microsoft Entra credentials to secure a SAS.
The Allowed IP addresses field is optional and specifies an IP address or a range of IP addresses from which to accept requests. If the request IP address doesn't match the IP address or address range specified on the SAS token, authorization fails. The IP address or a range of IP addresses must be public IPs, not private. For more information,see, Specify an IP address or IP range.
The Allowed protocols field is optional and specifies the protocol permitted for a request made with the SAS token. The default value is HTTPS.
Select Generate SAS token and URL.
The Blob SAS token query string and Blob SAS URL appear in the lower area of the window. To use the Blob SAS token, append it to a storage service URI.
Copy and paste the Blob SAS token and Blob SAS URL values in a secure location. They're displayed only once and can't be retrieved after the window is closed.
To construct a SAS URL, append the SAS token (URI) to the URL for a storage service.
Use Azure Storage Explorer
Azure Storage Explorer is a free standalone app that enables you to easily manage your Azure cloud storage resources from your desktop.
Get started
You need the Azure Storage Explorer app installed in your Windows, macOS, or Linux development environment.
After the Azure Storage Explorer app is installed, connect it the storage account you're using for Document Intelligence.
Create your SAS tokens
Open the Azure Storage Explorer app on your local machine and navigate to your connected Storage Accounts.
Expand the Storage Accounts node and select Blob Containers.
Expand the Blob Containers node and right-click a storage container node to display the options menu.
Select Get Shared Access Signature from options menu.
In the Shared Access Signature window, make the following selections:
- Select your Access policy (the default is none).
- Specify the signed key Start and Expiry date and time. A short lifespan is recommended because, once generated, a SAS can't be revoked.
- Select the Time zone for the Start and Expiry date and time (default is Local).
- Define your container Permissions by selecting the Read, Write, List, and Delete checkboxes.
- Select key1 or key2.
- Review and select Create.
A new window appears with the Container name, SAS URL, and Query string for your container.
Copy and paste the SAS URL and query string values in a secure location. They'll only be displayed once and can't be retrieved once the window is closed.
To construct a SAS URL, append the SAS token (URI) to the URL for a storage service.
Use your SAS URL to grant access
The SAS URL includes a special set of query parameters. Those parameters indicate how the client accesses the resources.
REST API
To use your SAS URL with the REST API, add the SAS URL to the request body:
{
    "source":"<BLOB SAS URL>"
}
That's it! You've learned how to create SAS tokens to authorize how clients access your data.
Next step
Feedback
Coming soon: Throughout 2024 we will be phasing out GitHub Issues as the feedback mechanism for content and replacing it with a new feedback system. For more information see: https://aka.ms/ContentUserFeedback.
Submit and view feedback for