Get started with Document Intelligence
Important
- Azure Cognitive Services Form Recognizer is now Azure AI Document Intelligence.
- Some platforms are still awaiting the renaming update.
- All mention of Form Recognizer or Document Intelligence in our documentation refers to the same Azure service.
This content applies to: ![]() v4.0 (preview) Earlier versions:
v4.0 (preview) Earlier versions: ![]() v3.1 (GA)
v3.1 (GA) ![]() v3.0 (GA)
v3.0 (GA)
- Get started with Azure AI Document Intelligence latest preview version (2024-02-29-preview).
This content applies to: ![]() v3.1 (GA) Earlier versions:
v3.1 (GA) Earlier versions: ![]() v3.0
v3.0 ![]() v2.1
v2.1
- Get started with Azure Form Recognizer latest GA version (
2023-07-31).
This content applies to: ![]() v3.0 (GA) Newer version:
v3.0 (GA) Newer version: ![]() v3.1
v3.1 ![]() v2.1
v2.1
- Get started with Azure Form Recognizer legacy GA version (
2022-08-31).
Azure AI Document Intelligence / Form Recognizer is a cloud-based Azure AI service that uses machine learning to extract key-value pairs, text, tables, and key data from your documents.
You can easily integrate document processing models into your workflows and applications by using a programming language SDK or calling the REST API.
For this quickstart, we recommend that you use the free service while you're learning the technology. Remember that the number of free pages is limited to 500 per month.
To learn more about the API features and development options, visit our Overview page.
Client library | SDK reference | API reference | Package (NuGet) | Samples | Supported REST API version
In this quickstart, use the following features to analyze and extract data and values from forms and documents:
Layout model—Analyze and extract tables, lines, words, and selection marks like radio buttons and check boxes in documents, without the need to train a model.
Prebuilt model—Analyze and extract common fields from specific document types using a prebuilt model.
Prerequisites
Azure subscription - Create one for free.
The current version of Visual Studio IDE.
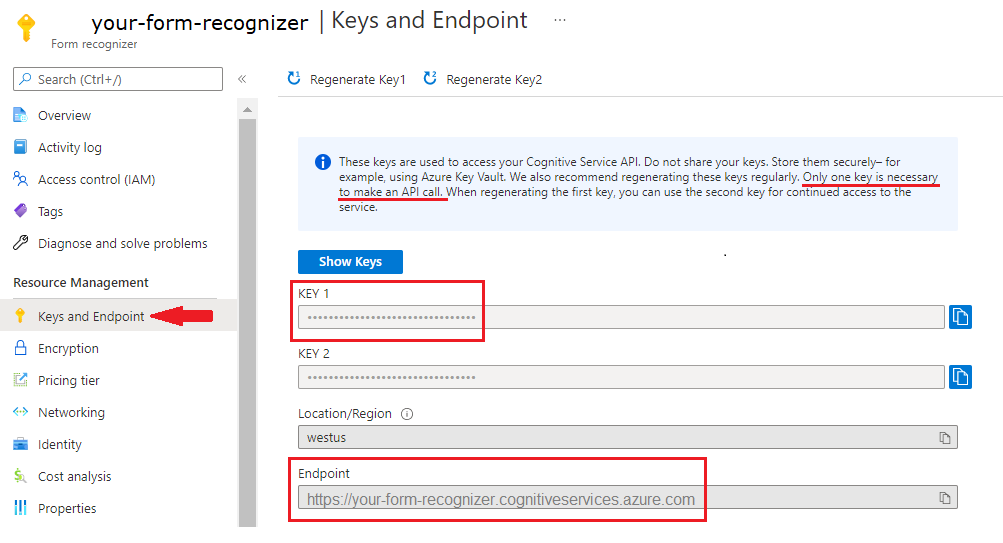
An Azure AI services or Document Intelligence resource. Once you have your Azure subscription, create a single-service or Azure AI multi-service resource, in the Azure portal, to get your key and endpoint.
You can use the free pricing tier (
F0) to try the service, and upgrade later to a paid tier for production.
Tip
Create an Azure AI services resource if you plan to access multiple Azure AI services under a single endpoint/key. For Document Intelligence access only, create a Document Intelligence resource. Please note that you'll need a single-service resource if you intend to use Microsoft Entra authentication.
After your resource deploys, select Go to resource. You need the key and endpoint from the resource you create to connect your application to the Document Intelligence API. You paste your key and endpoint into the code later in the quickstart:
An Azure AI services or Form Recognizer resource. Once you have your Azure subscription, create a single-service or Azure AI multi-service resource, in the Azure portal, to get your key and endpoint.
You can use the free pricing tier (
F0) to try the service, and upgrade later to a paid tier for production.
Tip
Create an Azure AI services resource if you plan to access multiple Azure AI services under a single endpoint/key. For Form Recognizer access only, create a Form Recognizer resource. Please note that you'll need a single-service resource if you intend to use Microsoft Entra authentication.
After your resource deploys, select Go to resource. You need the key and endpoint from the resource you create to connect your application to the Form Recognizer API. You paste your key and endpoint into the code later in the quickstart:
Set up
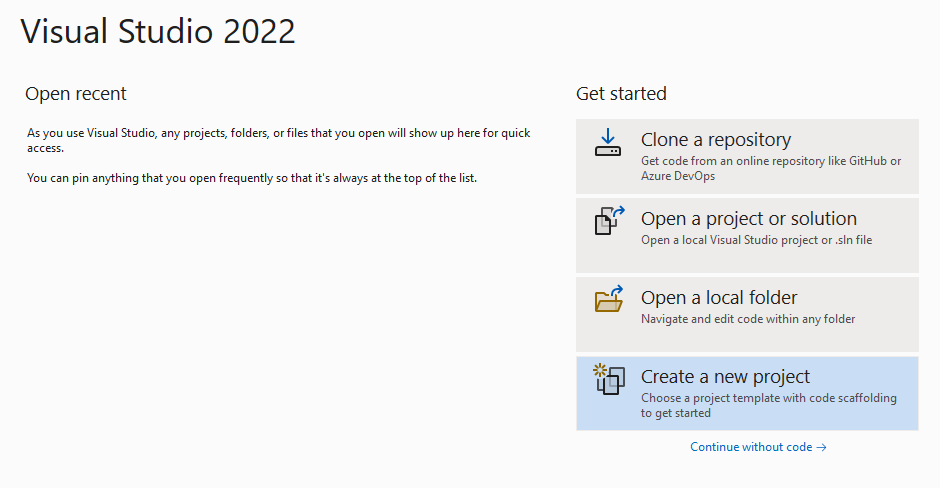
Start Visual Studio.
On the start page, choose Create a new project.
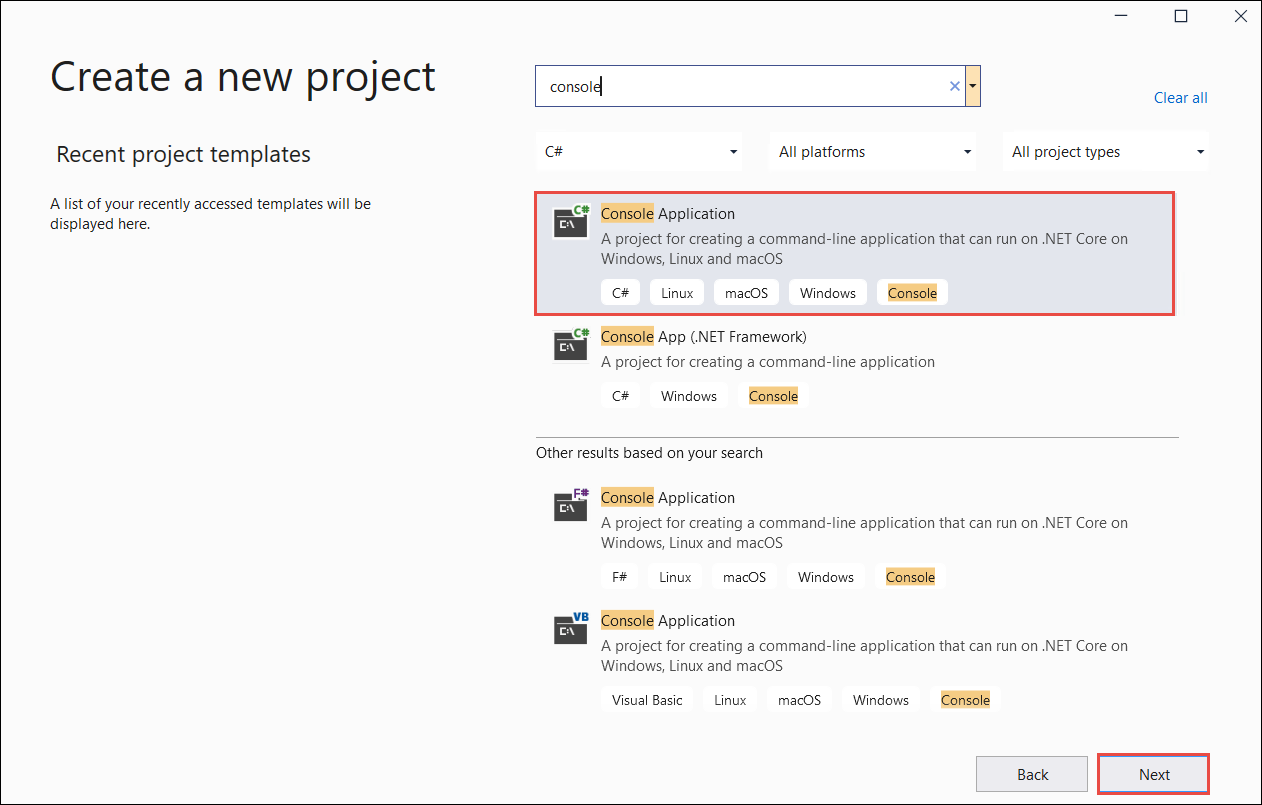
On the Create a new project page, enter console in the search box. Choose the Console Application template, then choose Next.
- In the Configure your new project dialog window, enter
doc_intel_quickstartin the Project name box. Then choose Next.
- In the Configure your new project dialog window, enter
form_recognizer_quickstartin the Project name box. Then choose Next.
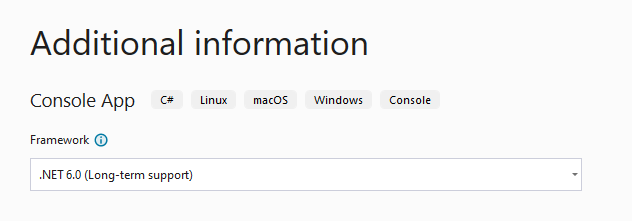
In the Additional information dialog window, select .NET 6.0 (Long-term support), and then select Create.
Install the client library with NuGet
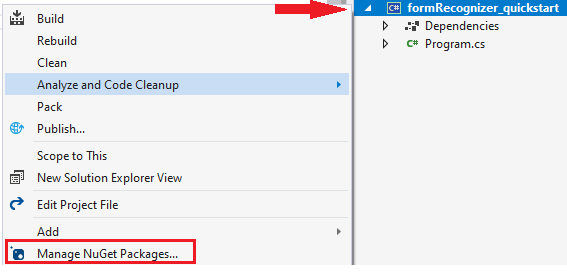
Right-click on your doc_intel_quickstart project and select Manage NuGet Packages... .

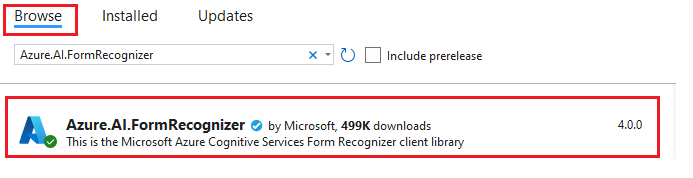
Select the Browse tab and type Azure.AI.DocumentIntelligence. Choose the
Include prereleasecheckbox and select version 1.0.0-beta.1 from the dropdown menu
Right-click on your form_recognizer_quickstart project and select Manage NuGet Packages... .
Select the Browse tab and type Azure.AI.FormRecognizer. Select version 4.1.0 from the dropdown menu
Right-click on your form_recognizer_quickstart project and select Manage NuGet Packages... .
Select the Browse tab and type Azure.AI.FormRecognizer. Select version 4.0.0 from the dropdown menu

Build your application
To interact with the Document Intelligence service, you need to create an instance of the DocumentIntelligenceClient class. To do so, you create an AzureKeyCredential with your key from the Azure portal and a DocumentIntelligenceClient instance with the AzureKeyCredential and your Document Intelligence endpoint.
To interact with the Form Recognizer service, you need to create an instance of the DocumentAnalysisClient class. To do so, you create an AzureKeyCredential with your key from the Azure portal and a DocumentAnalysisClient instance with the AzureKeyCredential and your Form Recognizer endpoint.
Note
- Starting with .NET 6, new projects using the
consoletemplate generate a new program style that differs from previous versions. - The new output uses recent C# features that simplify the code you need to write.
- When you use the newer version, you only need to write the body of the
Mainmethod. You don't need to include top-level statements, global using directives, or implicit using directives. - For more information, see New C# templates generate top-level statements.
Open the Program.cs file.
Delete the pre-existing code, including the line
Console.Writeline("Hello World!"), and select one of the following code samples to copy and paste into your application's Program.cs file:
Important
Remember to remove the key from your code when you're done, and never post it publicly. For production, use a secure way of storing and accessing your credentials like Azure Key Vault. For more information, see Azure AI services security.
Layout model
Extract text, selection marks, text styles, table structures, and bounding region coordinates from documents.
- For this example, you'll need a document file from a URI. You can use our sample document for this quickstart.
- We've added the file URI value to the
Uri fileUrivariable at the top of the script. - To extract the layout from a given file at a URI, use the
StartAnalyzeDocumentFromUrimethod and passprebuilt-layoutas the model ID. The returned value is anAnalyzeResultobject containing data from the submitted document.
Add the following code sample to the Program.cs file. Make sure you update the key and endpoint variables with values from your Azure portal Document Intelligence instance:
using Azure;
using Azure.AI.DocumentIntelligence;

//set `<your-endpoint>` and `<your-key>` variables with the values from the Azure portal to create your `AzureKeyCredential` and `DocumentIntelligenceClient` instance
string endpoint = "<your-endpoint>";
string key = "<your-key>";
AzureKeyCredential credential = new AzureKeyCredential(key);
DocumentIntelligenceClient client = new DocumentIntelligenceClient(new Uri(endpoint), credential);

//sample document
Uri fileUri = new Uri ("https://raw.githubusercontent.com/Azure-Samples/cognitive-services-REST-api-samples/master/curl/form-recognizer/sample-layout.pdf");

Operation<AnalyzeResult> operation = await client.AnalyzeDocumentAsync(WaitUntil.Completed, "prebuilt-layout", fileUri);

AnalyzeResult result = operation.Value;

foreach (DocumentPage page in result.Pages)
{
    Console.WriteLine($"Document Page {page.PageNumber} has {page.Lines.Count} line(s), {page.Words.Count} word(s)," +
        $" and {page.SelectionMarks.Count} selection mark(s).");

    for (int i = 0; i < page.Lines.Count; i++)
    {
        DocumentLine line = page.Lines[i];

        Console.WriteLine($"  Line {i}:");
        Console.WriteLine($"    Content: '{line.Content}'");

        Console.Write("    Bounding polygon, with points ordered clockwise:");
        for (int j = 0; j < line.Polygon.Count; j += 2)
        {
            Console.Write($" ({line.Polygon[j]}, {line.Polygon[j + 1]})");
        }

        Console.WriteLine();
    }

    for (int i = 0; i < page.SelectionMarks.Count; i++)
    {
        DocumentSelectionMark selectionMark = page.SelectionMarks[i];

        Console.WriteLine($"  Selection Mark {i} is {selectionMark.State}.");
        Console.WriteLine($"    State: {selectionMark.State}");

        Console.Write("    Bounding polygon, with points ordered clockwise:");
        for (int j = 0; j < selectionMark.Polygon.Count; j++)
        {
            Console.Write($" ({selectionMark.Polygon[j]}, {selectionMark.Polygon[j + 1]})");
        }

        Console.WriteLine();
    }
}

for (int i = 0; i < result.Paragraphs.Count; i++)
{
    DocumentParagraph paragraph = result.Paragraphs[i];

    Console.WriteLine($"Paragraph {i}:");
    Console.WriteLine($"  Content: {paragraph.Content}");

    if (paragraph.Role != null)
    {
        Console.WriteLine($"  Role: {paragraph.Role}");
    }
}

foreach (DocumentStyle style in result.Styles)
{
    // Check the style and style confidence to see if text is handwritten.
    // Note that value '0.8' is used as an example.

    bool isHandwritten = style.IsHandwritten.HasValue && style.IsHandwritten == true;

    if (isHandwritten && style.Confidence > 0.8)
    {
        Console.WriteLine($"Handwritten content found:");

        foreach (DocumentSpan span in style.Spans)
        {
            var handwrittenContent = result.Content.Substring(span.Offset, span.Length);
            Console.WriteLine($"  {handwrittenContent}");
        }
    }
}

for (int i = 0; i < result.Tables.Count; i++)
{
    DocumentTable table = result.Tables[i];

    Console.WriteLine($"Table {i} has {table.RowCount} rows and {table.ColumnCount} columns.");

    foreach (DocumentTableCell cell in table.Cells)
    {
        Console.WriteLine($"  Cell ({cell.RowIndex}, {cell.ColumnIndex}) is a '{cell.Kind}' with content: {cell.Content}");
    }
}
Run your application
Once you add a code sample to your application, choose the green Start button next to formRecognizer_quickstart to build and run your program, or press F5.

Add the following code sample to the Program.cs file. Make sure you update the key and endpoint variables with values from your Azure portal Form Recognizer instance:
using Azure;
using Azure.AI.FormRecognizer.DocumentAnalysis;

//set `<your-endpoint>` and `<your-key>` variables with the values from the Azure portal to create your `AzureKeyCredential` and `DocumentAnalysisClient` instance
string endpoint = "<your-endpoint>";
string key = "<your-key>";
AzureKeyCredential credential = new AzureKeyCredential(key);
DocumentAnalysisClient client = new DocumentAnalysisClient(new Uri(endpoint), credential);

//sample document
Uri fileUri = new Uri ("https://raw.githubusercontent.com/Azure-Samples/cognitive-services-REST-api-samples/master/curl/form-recognizer/sample-layout.pdf");

AnalyzeDocumentOperation operation = await client.AnalyzeDocumentFromUriAsync(WaitUntil.Completed, "prebuilt-layout", fileUri);

AnalyzeResult result = operation.Value;

foreach (DocumentPage page in result.Pages)
{
    Console.WriteLine($"Document Page {page.PageNumber} has {page.Lines.Count} line(s), {page.Words.Count} word(s),");
    Console.WriteLine($"and {page.SelectionMarks.Count} selection mark(s).");

    for (int i = 0; i < page.Lines.Count; i++)
    {
        DocumentLine line = page.Lines[i];
        Console.WriteLine($"  Line {i} has content: '{line.Content}'.");

        Console.WriteLine($"    Its bounding box is:");
        Console.WriteLine($"      Upper left => X: {line.BoundingPolygon[0].X}, Y= {line.BoundingPolygon[0].Y}");
        Console.WriteLine($"      Upper right => X: {line.BoundingPolygon[1].X}, Y= {line.BoundingPolygon[1].Y}");
        Console.WriteLine($"      Lower right => X: {line.BoundingPolygon[2].X}, Y= {line.BoundingPolygon[2].Y}");
        Console.WriteLine($"      Lower left => X: {line.BoundingPolygon[3].X}, Y= {line.BoundingPolygon[3].Y}");
    }

    for (int i = 0; i < page.SelectionMarks.Count; i++)
    {
        DocumentSelectionMark selectionMark = page.SelectionMarks[i];

        Console.WriteLine($"  Selection Mark {i} is {selectionMark.State}.");
        Console.WriteLine($"    Its bounding box is:");
        Console.WriteLine($"      Upper left => X: {selectionMark.BoundingPolygon[0].X}, Y= {selectionMark.BoundingPolygon[0].Y}");
        Console.WriteLine($"      Upper right => X: {selectionMark.BoundingPolygon[1].X}, Y= {selectionMark.BoundingPolygon[1].Y}");
        Console.WriteLine($"      Lower right => X: {selectionMark.BoundingPolygon[2].X}, Y= {selectionMark.BoundingPolygon[2].Y}");
        Console.WriteLine($"      Lower left => X: {selectionMark.BoundingPolygon[3].X}, Y= {selectionMark.BoundingPolygon[3].Y}");
    }
}

foreach (DocumentStyle style in result.Styles)
{
    // Check the style and style confidence to see if text is handwritten.
    // Note that value '0.8' is used as an example.

    bool isHandwritten = style.IsHandwritten.HasValue && style.IsHandwritten == true;

    if (isHandwritten && style.Confidence > 0.8)
    {
        Console.WriteLine($"Handwritten content found:");

        foreach (DocumentSpan span in style.Spans)
        {
            Console.WriteLine($"  Content: {result.Content.Substring(span.Index, span.Length)}");
        }
    }
}

Console.WriteLine("The following tables were extracted:");

for (int i = 0; i < result.Tables.Count; i++)
{
    DocumentTable table = result.Tables[i];
    Console.WriteLine($"  Table {i} has {table.RowCount} rows and {table.ColumnCount} columns.");

    foreach (DocumentTableCell cell in table.Cells)
    {
        Console.WriteLine($"    Cell ({cell.RowIndex}, {cell.ColumnIndex}) has kind '{cell.Kind}' and content: '{cell.Content}'.");
    }
}
Run your application
Once you add a code sample to your application, choose the green Start button next to formRecognizer_quickstart to build and run your program, or press F5.

Layout model output
Here's a snippet of the expected output:
  Document Page 1 has 69 line(s), 425 word(s), and 15 selection mark(s).
  Line 0 has content: 'UNITED STATES'.
    Its bounding box is:
      Upper left => X: 3.4915, Y= 0.6828
      Upper right => X: 5.0116, Y= 0.6828
      Lower right => X: 5.0116, Y= 0.8265
      Lower left => X: 3.4915, Y= 0.8265
  Line 1 has content: 'SECURITIES AND EXCHANGE COMMISSION'.
    Its bounding box is:
      Upper left => X: 2.1937, Y= 0.9061
      Upper right => X: 6.297, Y= 0.9061
      Lower right => X: 6.297, Y= 1.0498
      Lower left => X: 2.1937, Y= 1.0498
To view the entire output, visit the Azure samples repository on GitHub to view the layout model output.
Add the following code sample to the Program.cs file. Make sure you update the key and endpoint variables with values from your Azure portal Form Recognizer instance:
using Azure;
using Azure.AI.FormRecognizer.DocumentAnalysis;

//set `<your-endpoint>` and `<your-key>` variables with the values from the Azure portal to create your `AzureKeyCredential` and `DocumentAnalysisClient` instance
string endpoint = "<your-endpoint>";
string key = "<your-key>";
AzureKeyCredential credential = new AzureKeyCredential(key);
DocumentAnalysisClient client = new DocumentAnalysisClient(new Uri(endpoint), credential);

//sample document
Uri fileUri = new Uri ("https://raw.githubusercontent.com/Azure-Samples/cognitive-services-REST-api-samples/master/curl/form-recognizer/sample-layout.pdf");

AnalyzeDocumentOperation operation = await client.AnalyzeDocumentFromUriAsync(WaitUntil.Completed, "prebuilt-layout", fileUri);

AnalyzeResult result = operation.Value;

foreach (DocumentPage page in result.Pages)
{
    Console.WriteLine($"Document Page {page.PageNumber} has {page.Lines.Count} line(s), {page.Words.Count} word(s),");
    Console.WriteLine($"and {page.SelectionMarks.Count} selection mark(s).");

    for (int i = 0; i < page.Lines.Count; i++)
    {
        DocumentLine line = page.Lines[i];
        Console.WriteLine($"  Line {i} has content: '{line.Content}'.");

        Console.WriteLine($"    Its bounding polygon (points ordered clockwise):");

        for (int j = 0; j < line.BoundingPolygon.Count; j++)
        {
            Console.WriteLine($"      Point {j} => X: {line.BoundingPolygon[j].X}, Y: {line.BoundingPolygon[j].Y}");
        }
    }

    for (int i = 0; i < page.SelectionMarks.Count; i++)
    {
        DocumentSelectionMark selectionMark = page.SelectionMarks[i];

        Console.WriteLine($"  Selection Mark {i} is {selectionMark.State}.");
        Console.WriteLine($"    Its bounding polygon (points ordered clockwise):");

        for (int j = 0; j < selectionMark.BoundingPolygon.Count; j++)
        {
            Console.WriteLine($"      Point {j} => X: {selectionMark.BoundingPolygon[j].X}, Y: {selectionMark.BoundingPolygon[j].Y}");
        }
    }
}

Console.WriteLine("Paragraphs:");

foreach (DocumentParagraph paragraph in result.Paragraphs)
{
    Console.WriteLine($"  Paragraph content: {paragraph.Content}");

    if (paragraph.Role != null)
    {
        Console.WriteLine($"    Role: {paragraph.Role}");
    }
}

foreach (DocumentStyle style in result.Styles)
{
    // Check the style and style confidence to see if text is handwritten.
    // Note that value '0.8' is used as an example.

    bool isHandwritten = style.IsHandwritten.HasValue && style.IsHandwritten == true;

    if (isHandwritten && style.Confidence > 0.8)
    {
        Console.WriteLine($"Handwritten content found:");

        foreach (DocumentSpan span in style.Spans)
        {
            Console.WriteLine($"  Content: {result.Content.Substring(span.Index, span.Length)}");
        }
    }
}

Console.WriteLine("The following tables were extracted:");

for (int i = 0; i < result.Tables.Count; i++)
{
    DocumentTable table = result.Tables[i];
    Console.WriteLine($"  Table {i} has {table.RowCount} rows and {table.ColumnCount} columns.");

    foreach (DocumentTableCell cell in table.Cells)
    {
        Console.WriteLine($"    Cell ({cell.RowIndex}, {cell.ColumnIndex}) has kind '{cell.Kind}' and content: '{cell.Content}'.");
    }
}
Extract the layout of a document from a file stream
To extract the layout from a given file at a file stream, use the AnalyzeDocument method and pass prebuilt-layout as the model ID. The returned value is an AnalyzeResult object containing data about the submitted document.

string filePath = "<filePath>";
using var stream = new FileStream(filePath, FileMode.Open);

AnalyzeDocumentOperation operation = await client.AnalyzeDocumentAsync(WaitUntil.Completed, "prebuilt-layout", stream);
AnalyzeResult result = operation.Value;

foreach (DocumentPage page in result.Pages)
{
    Console.WriteLine($"Document Page {page.PageNumber} has {page.Lines.Count} line(s), {page.Words.Count} word(s),");
    Console.WriteLine($"and {page.SelectionMarks.Count} selection mark(s).");

    for (int i = 0; i < page.Lines.Count; i++)
    {
        DocumentLine line = page.Lines[i];
        Console.WriteLine($"  Line {i} has content: '{line.Content}'.");

        Console.WriteLine($"    Its bounding polygon (points ordered clockwise):");

        for (int j = 0; j < line.BoundingPolygon.Count; j++)
        {
            Console.WriteLine($"      Point {j} => X: {line.BoundingPolygon[j].X}, Y: {line.BoundingPolygon[j].Y}");
        }
    }

    for (int i = 0; i < page.SelectionMarks.Count; i++)
    {
        DocumentSelectionMark selectionMark = page.SelectionMarks[i];

        Console.WriteLine($"  Selection Mark {i} is {selectionMark.State}.");
        Console.WriteLine($"    Its bounding polygon (points ordered clockwise):");

        for (int j = 0; j < selectionMark.BoundingPolygon.Count; j++)
        {
            Console.WriteLine($"      Point {j} => X: {selectionMark.BoundingPolygon[j].X}, Y: {selectionMark.BoundingPolygon[j].Y}");
        }
    }
}

Console.WriteLine("Paragraphs:");

foreach (DocumentParagraph paragraph in result.Paragraphs)
{
    Console.WriteLine($"  Paragraph content: {paragraph.Content}");

    if (paragraph.Role != null)
    {
        Console.WriteLine($"    Role: {paragraph.Role}");
    }
}

foreach (DocumentStyle style in result.Styles)
{
    // Check the style and style confidence to see if text is handwritten.
    // Note that value '0.8' is used as an example.

    bool isHandwritten = style.IsHandwritten.HasValue && style.IsHandwritten == true;

    if (isHandwritten && style.Confidence > 0.8)
    {
        Console.WriteLine($"Handwritten content found:");

        foreach (DocumentSpan span in style.Spans)
        {
            Console.WriteLine($"  Content: {result.Content.Substring(span.Index, span.Length)}");
        }
    }
}

Console.WriteLine("The following tables were extracted:");

for (int i = 0; i < result.Tables.Count; i++)
{
    DocumentTable table = result.Tables[i];
    Console.WriteLine($"  Table {i} has {table.RowCount} rows and {table.ColumnCount} columns.");

    foreach (DocumentTableCell cell in table.Cells)
    {
        Console.WriteLine($"    Cell ({cell.RowIndex}, {cell.ColumnIndex}) has kind '{cell.Kind}' and content: '{cell.Content}'.");
    }
}
Run your application
Once you add a code sample to your application, choose the green Start button next to formRecognizer_quickstart to build and run your program, or press F5.
Prebuilt model
Analyze and extract common fields from specific document types using a prebuilt model. In this example, we analyze an invoice using the prebuilt-invoice model.
Tip
You aren't limited to invoices—there are several prebuilt models to choose from, each of which has its own set of supported fields. The model to use for the analyze operation depends on the type of document to be analyzed. See model data extraction.
- Analyze an invoice using the prebuilt-invoice model. You can use our sample invoice document for this quickstart.
- We've added the file URI value to the
Uri invoiceUrivariable at the top of the Program.cs file. - To analyze a given file at a URI, use the
StartAnalyzeDocumentFromUrimethod and passprebuilt-invoiceas the model ID. The returned value is anAnalyzeResultobject containing data from the submitted document. - For simplicity, all the key-value pairs that the service returns are not shown here. To see the list of all supported fields and corresponding types, see our Invoice concept page.
Add the following code sample to your Program.cs file. Make sure you update the key and endpoint variables with values from your Azure portal Document Intelligence instance:
using Azure;
using Azure.AI.DocumentIntelligence;

//set `<your-endpoint>` and `<your-key>` variables with the values from the Azure portal to create your `AzureKeyCredential` and `DocumentIntelligenceClient` instance
string endpoint = "<your-endpoint>";
string key = "<your-key>";
AzureKeyCredential credential = new AzureKeyCredential(key);
DocumentIntelligenceClient client = new DocumentIntelligenceClient(new Uri(endpoint), credential);

//sample invoice document

Uri invoiceUri = new Uri ("https://raw.githubusercontent.com/Azure-Samples/cognitive-services-REST-api-samples/master/curl/form-recognizer/sample-invoice.pdf");

Operation<AnalyzeResult> operation = await client.AnalyzeDocumentAsync(WaitUntil.Completed, "prebuilt-invoice", invoiceUri);

AnalyzeResult result = operation.Value;

for (int i = 0; i < result.Documents.Count; i++)
{
    Console.WriteLine($"Document {i}:");

    AnalyzedDocument document = result.Documents[i];

    if (document.Fields.TryGetValue("VendorName", out DocumentField vendorNameField)
        && vendorNameField.Type == DocumentFieldType.String)
    {
        string vendorName = vendorNameField.ValueString;
        Console.WriteLine($"Vendor Name: '{vendorName}', with confidence {vendorNameField.Confidence}");
    }

    if (document.Fields.TryGetValue("CustomerName", out DocumentField customerNameField)
        && customerNameField.Type == DocumentFieldType.String)
    {
        string customerName = customerNameField.ValueString;
        Console.WriteLine($"Customer Name: '{customerName}', with confidence {customerNameField.Confidence}");
    }

    if (document.Fields.TryGetValue("Items", out DocumentField itemsField)
        && itemsField.Type == DocumentFieldType.Array)
    {
        foreach (DocumentField itemField in itemsField.ValueArray)
        {
            Console.WriteLine("Item:");

            if (itemField.Type == DocumentFieldType.Object)
            {
                IReadOnlyDictionary<string, DocumentField> itemFields = itemField.ValueObject;

                if (itemFields.TryGetValue("Description", out DocumentField itemDescriptionField)
                    && itemDescriptionField.Type == DocumentFieldType.String)
                {
                    string itemDescription = itemDescriptionField.ValueString;
                    Console.WriteLine($"  Description: '{itemDescription}', with confidence {itemDescriptionField.Confidence}");
                }

                if (itemFields.TryGetValue("Amount", out DocumentField itemAmountField)
                    && itemAmountField.Type == DocumentFieldType.Currency)
                {
                    CurrencyValue itemAmount = itemAmountField.ValueCurrency;
                    Console.WriteLine($"  Amount: '{itemAmount.CurrencySymbol}{itemAmount.Amount}', with confidence {itemAmountField.Confidence}");
                }
            }
        }
    }

    if (document.Fields.TryGetValue("SubTotal", out DocumentField subTotalField)
        && subTotalField.Type == DocumentFieldType.Currency)
    {
        CurrencyValue subTotal = subTotalField.ValueCurrency;
        Console.WriteLine($"Sub Total: '{subTotal.CurrencySymbol}{subTotal.Amount}', with confidence {subTotalField.Confidence}");
    }

    if (document.Fields.TryGetValue("TotalTax", out DocumentField totalTaxField)
        && totalTaxField.Type == DocumentFieldType.Currency)
    {
        CurrencyValue totalTax = totalTaxField.ValueCurrency;
        Console.WriteLine($"Total Tax: '{totalTax.CurrencySymbol}{totalTax.Amount}', with confidence {totalTaxField.Confidence}");
    }

    if (document.Fields.TryGetValue("InvoiceTotal", out DocumentField invoiceTotalField)
        && invoiceTotalField.Type == DocumentFieldType.Currency)
    {
        CurrencyValue invoiceTotal = invoiceTotalField.ValueCurrency;
        Console.WriteLine($"Invoice Total: '{invoiceTotal.CurrencySymbol}{invoiceTotal.Amount}', with confidence {invoiceTotalField.Confidence}");
    }
}
Run your application
Once you add a code sample to your application, choose the green Start button next to formRecognizer_quickstart to build and run your program, or press F5.
Add the following code sample to your Program.cs file. Make sure you update the key and endpoint variables with values from your Azure portal Form Recognizer instance:
using Azure;
using Azure.AI.FormRecognizer.DocumentAnalysis;

//set `<your-endpoint>` and `<your-key>` variables with the values from the Azure portal to create your `AzureKeyCredential` and `FormRecognizerClient` instance
string endpoint = "<your-endpoint>";
string key = "<your-key>";
AzureKeyCredential credential = new AzureKeyCredential(key);
DocumentAnalysisClient client = new DocumentAnalysisClient(new Uri(endpoint), credential);

//sample invoice document

Uri invoiceUri = new Uri ("https://raw.githubusercontent.com/Azure-Samples/cognitive-services-REST-api-samples/master/curl/form-recognizer/sample-invoice.pdf");

Operation operation = await client.AnalyzeDocumentAsync(WaitUntil.Completed, "prebuilt-invoice", invoiceUri);

AnalyzeResult result = operation.Value;

for (int i = 0; i < result.Documents.Count; i++)
{
    Console.WriteLine($"Document {i}:");

    AnalyzedDocument document = result.Documents[i];

    if (document.Fields.TryGetValue("VendorName", out DocumentField vendorNameField))
    {
        if (vendorNameField.FieldType == DocumentFieldType.String)
        {
            string vendorName = vendorNameField.Value.AsString();
            Console.WriteLine($"Vendor Name: '{vendorName}', with confidence {vendorNameField.Confidence}");
        }
    }

    if (document.Fields.TryGetValue("CustomerName", out DocumentField customerNameField))
    {
        if (customerNameField.FieldType == DocumentFieldType.String)
        {
            string customerName = customerNameField.Value.AsString();
            Console.WriteLine($"Customer Name: '{customerName}', with confidence {customerNameField.Confidence}");
        }
    }

    if (document.Fields.TryGetValue("Items", out DocumentField itemsField))
    {
        if (itemsField.FieldType == DocumentFieldType.List)
        {
            foreach (DocumentField itemField in itemsField.Value.AsList())
            {
                Console.WriteLine("Item:");

                if (itemField.FieldType == DocumentFieldType.Dictionary)
                {
                    IReadOnlyDictionary<string, DocumentField> itemFields = itemField.Value.AsDictionary();

                    if (itemFields.TryGetValue("Description", out DocumentField itemDescriptionField))
                    {
                        if (itemDescriptionField.FieldType == DocumentFieldType.String)
                        {
                            string itemDescription = itemDescriptionField.Value.AsString();

                            Console.WriteLine($"  Description: '{itemDescription}', with confidence {itemDescriptionField.Confidence}");
                        }
                    }

                    if (itemFields.TryGetValue("Amount", out DocumentField itemAmountField))
                    {
                        if (itemAmountField.FieldType == DocumentFieldType.Currency)
                        {
                            CurrencyValue itemAmount = itemAmountField.Value.AsCurrency();

                            Console.WriteLine($"  Amount: '{itemAmount.Symbol}{itemAmount.Amount}', with confidence {itemAmountField.Confidence}");
                        }
                    }
                }
            }
        }
    }

    if (document.Fields.TryGetValue("SubTotal", out DocumentField subTotalField))
    {
        if (subTotalField.FieldType == DocumentFieldType.Currency)
        {
            CurrencyValue subTotal = subTotalField.Value.AsCurrency();
            Console.WriteLine($"Sub Total: '{subTotal.Symbol}{subTotal.Amount}', with confidence {subTotalField.Confidence}");
        }
    }

    if (document.Fields.TryGetValue("TotalTax", out DocumentField totalTaxField))
    {
        if (totalTaxField.FieldType == DocumentFieldType.Currency)
        {
            CurrencyValue totalTax = totalTaxField.Value.AsCurrency();
            Console.WriteLine($"Total Tax: '{totalTax.Symbol}{totalTax.Amount}', with confidence {totalTaxField.Confidence}");
        }
    }

    if (document.Fields.TryGetValue("InvoiceTotal", out DocumentField invoiceTotalField))
    {
        if (invoiceTotalField.FieldType == DocumentFieldType.Currency)
        {
            CurrencyValue invoiceTotal = invoiceTotalField.Value.AsCurrency();
            Console.WriteLine($"Invoice Total: '{invoiceTotal.Symbol}{invoiceTotal.Amount}', with confidence {invoiceTotalField.Confidence}");
        }
    }
}
Run your application
Once you add a code sample to your application, choose the green Start button next to formRecognizer_quickstart to build and run your program, or press F5.
Prebuilt model output
Here's a snippet of the expected output:
  Document 0:
  Vendor Name: 'CONTOSO LTD.', with confidence 0.962
  Customer Name: 'MICROSOFT CORPORATION', with confidence 0.951
  Item:
    Description: 'Test for 23 fields', with confidence 0.899
    Amount: '100', with confidence 0.902
  Sub Total: '100', with confidence 0.979
To view the entire output, visit the Azure samples repository on GitHub to view the prebuilt invoice model output.
Add the following code sample to your Program.cs file. Make sure you update the key and endpoint variables with values from your Azure portal Form Recognizer instance:
using Azure;
using Azure.AI.FormRecognizer.DocumentAnalysis;

//set `<your-endpoint>` and `<your-key>` variables with the values from the Azure portal to create your `AzureKeyCredential` and `FormRecognizerClient` instance
string endpoint = "<your-endpoint>";
string key = "<your-key>";
AzureKeyCredential credential = new AzureKeyCredential(key);
DocumentAnalysisClient client = new DocumentAnalysisClient(new Uri(endpoint), credential);

//sample invoice document

Uri invoiceUri = new Uri ("https://raw.githubusercontent.com/Azure-Samples/cognitive-services-REST-api-samples/master/curl/form-recognizer/sample-invoice.pdf");

AnalyzeDocumentOperation operation = await client.AnalyzeDocumentFromUriAsync(WaitUntil.Completed, "prebuilt-invoice", invoiceUri);

AnalyzeResult result = operation.Value;

for (int i = 0; i < result.Documents.Count; i++)
{
    Console.WriteLine($"Document {i}:");

    AnalyzedDocument document = result.Documents[i];

    if (document.Fields.TryGetValue("VendorName", out DocumentField vendorNameField))
    {
        if (vendorNameField.FieldType == DocumentFieldType.String)
        {
            string vendorName = vendorNameField.Value.AsString();
            Console.WriteLine($"Vendor Name: '{vendorName}', with confidence {vendorNameField.Confidence}");
        }
    }

    if (document.Fields.TryGetValue("CustomerName", out DocumentField customerNameField))
    {
        if (customerNameField.FieldType == DocumentFieldType.String)
        {
            string customerName = customerNameField.Value.AsString();
            Console.WriteLine($"Customer Name: '{customerName}', with confidence {customerNameField.Confidence}");
        }
    }

    if (document.Fields.TryGetValue("Items", out DocumentField itemsField))
    {
        if (itemsField.FieldType == DocumentFieldType.List)
        {
            foreach (DocumentField itemField in itemsField.Value.AsList())
            {
                Console.WriteLine("Item:");

                if (itemField.FieldType == DocumentFieldType.Dictionary)
                {
                    IReadOnlyDictionary<string, DocumentField> itemFields = itemField.Value.AsDictionary();

                    if (itemFields.TryGetValue("Description", out DocumentField itemDescriptionField))
                    {
                        if (itemDescriptionField.FieldType == DocumentFieldType.String)
                        {
                            string itemDescription = itemDescriptionField.Value.AsString();

                            Console.WriteLine($"  Description: '{itemDescription}', with confidence {itemDescriptionField.Confidence}");
                        }
                    }

                    if (itemFields.TryGetValue("Amount", out DocumentField itemAmountField))
                    {
                        if (itemAmountField.FieldType == DocumentFieldType.Currency)
                        {
                            CurrencyValue itemAmount = itemAmountField.Value.AsCurrency();

                            Console.WriteLine($"  Amount: '{itemAmount.Symbol}{itemAmount.Amount}', with confidence {itemAmountField.Confidence}");
                        }
                    }
                }
            }
        }
    }

    if (document.Fields.TryGetValue("SubTotal", out DocumentField subTotalField))
    {
        if (subTotalField.FieldType == DocumentFieldType.Currency)
        {
            CurrencyValue subTotal = subTotalField.Value.AsCurrency();
            Console.WriteLine($"Sub Total: '{subTotal.Symbol}{subTotal.Amount}', with confidence {subTotalField.Confidence}");
        }
    }

    if (document.Fields.TryGetValue("TotalTax", out DocumentField totalTaxField))
    {
        if (totalTaxField.FieldType == DocumentFieldType.Currency)
        {
            CurrencyValue totalTax = totalTaxField.Value.AsCurrency();
            Console.WriteLine($"Total Tax: '{totalTax.Symbol}{totalTax.Amount}', with confidence {totalTaxField.Confidence}");
        }
    }

    if (document.Fields.TryGetValue("InvoiceTotal", out DocumentField invoiceTotalField))
    {
        if (invoiceTotalField.FieldType == DocumentFieldType.Currency)
        {
            CurrencyValue invoiceTotal = invoiceTotalField.Value.AsCurrency();
            Console.WriteLine($"Invoice Total: '{invoiceTotal.Symbol}{invoiceTotal.Amount}', with confidence {invoiceTotalField.Confidence}");
        }
    }
}
Run your application
Once you add a code sample to your application, choose the green Start button next to formRecognizer_quickstart to build and run your program, or press F5.
Client library | SDK reference | REST API reference | Package (Maven) | Samples |Supported REST API version
Client library | SDK reference | REST API reference | Package (Maven) | Samples| Supported REST API version
Client library | SDK reference | REST API reference | Package (Maven) | Samples|Supported REST API version
In this quickstart, use the following features to analyze and extract data and values from forms and documents:
Layout—Analyze and extract tables, lines, words, and selection marks like radio buttons and check boxes in documents, without the need to train a model.
Prebuilt Invoice—Analyze and extract common fields from specific document types using a pretrained model.
Prerequisites
Azure subscription - Create one for free.
The latest version of Visual Studio Code or your preferred IDE. See Java in Visual Studio Code.
Tip
- Visual Studio Code offers a Coding Pack for Java for Windows and macOS.The coding pack is a bundle of VS Code, the Java Development Kit (JDK), and a collection of suggested extensions by Microsoft. The Coding Pack can also be used to fix an existing development environment.
- If you are using VS Code and the Coding Pack For Java, install the Gradle for Java extension.
If you aren't using Visual Studio Code, make sure you have the following installed in your development environment:
A Java Development Kit (JDK) version 8 or later. For more information, see Microsoft Build of OpenJDK.
Gradle, version 6.8 or later.
An Azure AI services or Document Intelligence resource. Once you have your Azure subscription, create a single-service or multi-service Document Intelligence resource, in the Azure portal, to get your key and endpoint. You can use the free pricing tier (
F0) to try the service, and upgrade later to a paid tier for production.Tip
Create an Azure AI services resource if you plan to access multiple Azure AI services under a single endpoint/key. For Document Intelligence access only, create a Document Intelligence resource. Please note that you'll need a single-service resource if you intend to use Microsoft Entra authentication.
After your resource deploys, select Go to resource. You need the key and endpoint from the resource you create to connect your application to the Document Intelligence API. Later, you paste your key and endpoint into the code:
Set up
Create a new Gradle project
In console window (such as cmd, PowerShell, or Bash), create a new directory for your app called doc-intel-app, and navigate to it.
mkdir doc-intel-app && doc-intel-appmkdir doc-intel-app; cd doc-intel-appRun the
gradle initcommand from your working directory. This command creates essential build files for Gradle, including build.gradle.kts, which is used at runtime to create and configure your application.gradle init --type basicWhen prompted to choose a DSL, select Kotlin.
Accept the default project name (doc-intel-app) by selecting Return or Enter.
In console window (such as cmd, PowerShell, or Bash), create a new directory for your app called form-recognize-app, and navigate to it.
mkdir form-recognize-app && form-recognize-appmkdir form-recognize-app; cd form-recognize-appRun the
gradle initcommand from your working directory. This command creates essential build files for Gradle, including build.gradle.kts, which is used at runtime to create and configure your application.gradle init --type basicWhen prompted to choose a DSL, select Kotlin.
Accept the default project name (form-recognize-app) by selecting Return or Enter.
Install the client library
This quickstart uses the Gradle dependency manager. You can find the client library and information for other dependency managers on the Maven Central Repository.
Open the project's build.gradle.kts file in your IDE. Copay and past the following code to include the client library as an implementation statement, along with the required plugins and settings.
   plugins {
       java
       application
   }
   application {
       mainClass.set("DocIntelligence")
   }
   repositories {
       mavenCentral()
   }
   dependencies {
       implementation group: 'com.azure', name: 'azure-ai-documentintelligence', version: '1.0.0-beta.2'

   }
This quickstart uses the Gradle dependency manager. You can find the client library and information for other dependency managers on the Maven Central Repository.
Open the project's build.gradle.kts file in your IDE. Copay and past the following code to include the client library as an implementation statement, along with the required plugins and settings.
   plugins {
       java
       application
   }
   application {
       mainClass.set("FormRecognizer")
   }
   repositories {
       mavenCentral()
   }
   dependencies {
       implementation group: 'com.azure', name: 'azure-ai-formrecognizer', version: '4.1.0'

   }
This quickstart uses the Gradle dependency manager. You can find the client library and information for other dependency managers on the Maven Central Repository.
Open the project's build.gradle.kts file in your IDE. Copay and past the following code to include the client library as an implementation statement, along with the required plugins and settings.
   plugins {
       java
       application
   }
   application {
       mainClass.set("FormRecognizer")
   }
   repositories {
       mavenCentral()
   }
   dependencies {
       implementation group: 'com.azure', name: 'azure-ai-formrecognizer', version: '4.0.0'


   }
Create a Java application
To interact with the Document Intelligence service, you need to create an instance of the DocumentIntelligenceClient class. To do so, you create an AzureKeyCredential with your key from the Azure portal and a DocumentIntelligenceClient instance with the AzureKeyCredential and your Document Intelligence endpoint.
To interact with the Document Intelligence service, you need to create an instance of the DocumentAnalysisClient class. To do so, you create an AzureKeyCredential with your key from the Azure portal and a DocumentAnalysisClient instance with the AzureKeyCredential and your Document Intelligence endpoint.
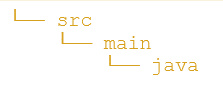
From the doc-intel-app directory, run the following command:
mkdir -p src/main/javaYou create the following directory structure:
Navigate to the
javadirectory and create a file namedDocIntelligence.java.Tip
- You can create a new file using PowerShell.
- Open a PowerShell window in your project directory by holding down the Shift key and right-clicking the folder.
- Type the following command New-Item DocIntelligence.java.
Open the
DocIntelligence.javafile. Copy and paste one of the following code samples into your application:
Navigate to the
javadirectory and create a file namedFormRecognizer.java.Tip
- You can create a new file using PowerShell.
- Open a PowerShell window in your project directory by holding down the Shift key and right-clicking the folder.
- Type the following command New-Item FormRecognizer.java.
Open the
FormRecognizer.javafile. Copy and paste one of the following code samples into your application:
Important
Remember to remove the key from your code when you're done, and never post it publicly. For production, use a secure way of storing and accessing your credentials like Azure Key Vault. For more information, see Azure AI services security.
Layout model
Extract text, selection marks, text styles, table structures, and bounding region coordinates from documents.
- For this example, you'll need a document file at a URI. You can use our sample document for this quickstart.
- To analyze a given file at a URI, you'll use the
beginAnalyzeDocumentFromUrlmethod and passprebuilt-layoutas the model Id. The returned value is anAnalyzeResultobject containing data about the submitted document. - We've added the file URI value to the
documentUrlvariable in the main method.
Add the following code sample to the DocIntelligence.java file. Make sure you update the key and endpoint variables with values from your Azure portal Document Intelligence instance:
import com.azure.ai.documentintelligence;

import com.azure.ai.documentintelligence.models.AnalyzeDocumentRequest;
import com.azure.ai.documentintelligence.models.AnalyzeResult;
import com.azure.ai.documentintelligence.models.AnalyzeResultOperation;
import com.azure.ai.documentintelligence.models.DocumentTable;
import com.azure.core.credential.AzureKeyCredential;
import com.azure.core.util.polling.SyncPoller;

import java.util.List;

public class DocIntelligence {

  // set `<your-endpoint>` and `<your-key>` variables with the values from the Azure portal
  private static final String endpoint = "<your-endpoint>";
  private static final String key = "<your-key>";

  public static void main(String[] args) {

    // create your `DocumentAnalysisClient` instance and `AzureKeyCredential` variable
    DocumentIntelligenceClient client = new DocumentIntelligenceClientBuilder()
      .credential(new AzureKeyCredential(key))
      .endpoint(endpoint)
      .buildClient();

    // sample document
    String documentUrl = "https://raw.githubusercontent.com/Azure-Samples/cognitive-services-REST-api-samples/master/curl/form-recognizer/sample-layout.pdf";
    String modelId = "prebuilt-layout";

    SyncPoller <AnalyzeResultOperation, AnalyzeResultOperation> analyzeLayoutResultPoller =
      client.beginAnalyzeDocument(modelId, documentUrl);

    AnalyzeResult analyzeLayoutResult = analyzeLayoutPoller.getFinalResult().getAnalyzeResult();

    // pages
    analyzeLayoutResult.getPages().forEach(documentPage -> {
      System.out.printf("Page has width: %.2f and height: %.2f, measured with unit: %s%n",
        documentPage.getWidth(),
        documentPage.getHeight(),
        documentPage.getUnit());

      // lines
      documentPage.getLines().forEach(documentLine ->
        System.out.printf("Line '%s' is within a bounding polygon %s.%n",
          documentLine.getContent(),
          documentLine.getPolygon()));

      // words
      documentPage.getWords().forEach(documentWord ->
        System.out.printf("Word '%s' has a confidence score of %.2f.%n",
          documentWord.getContent(),
          documentWord.getConfidence()));

      // selection marks
      documentPage.getSelectionMarks().forEach(documentSelectionMark ->
        System.out.printf("Selection mark is '%s' and is within a bounding polygon %s with confidence %.2f.%n",
          documentSelectionMark.getState().toString(),
          documentSelectionMark.getPolygon(),
          documentSelectionMark.getConfidence()));
    });

    // tables
    List < DocumentTable > tables = analyzeLayoutResult.getTables();
    for (int i = 0; i < tables.size(); i++) {
      DocumentTable documentTable = tables.get(i);
      System.out.printf("Table %d has %d rows and %d columns.%n", i, documentTable.getRowCount(),
        documentTable.getColumnCount());
      documentTable.getCells().forEach(documentTableCell -> {
        System.out.printf("Cell '%s', has row index %d and column index %d.%n", documentTableCell.getContent(),
          documentTableCell.getRowIndex(), documentTableCell.getColumnIndex());
      });
      System.out.println();
    }

    // styles
    analyzeLayoutResult.getStyles().forEach(documentStyle -
      > System.out.printf("Document is handwritten %s.%n", documentStyle.isHandwritten()));
  }
}
Build and run the application
After you add a code sample to your application, navigate back to your main project directory—doc-intel-app.
Build your application with the
buildcommand:gradle buildRun your application with the
runcommand:gradle run
Add the following code sample to the FormRecognizer.java file. Make sure you update the key and endpoint variables with values from your Azure portal Document Intelligence instance:
import com.azure.ai.formrecognizer.*;

import com.azure.ai.formrecognizer.documentanalysis.models.*;
import com.azure.ai.formrecognizer.documentanalysis.DocumentAnalysisClient;
import com.azure.ai.formrecognizer.documentanalysis.DocumentAnalysisClientBuilder;

import com.azure.core.credential.AzureKeyCredential;
import com.azure.core.util.polling.SyncPoller;

import java.io.IOException;
import java.util.List;
import java.util.Arrays;
import java.time.LocalDate;
import java.util.Map;
import java.util.stream.Collectors;

public class FormRecognizer {

  // set `<your-endpoint>` and `<your-key>` variables with the values from the Azure portal
  private static final String endpoint = "<your-endpoint>";
  private static final String key = "<your-key>";

  public static void main(String[] args) {

    // create your `DocumentAnalysisClient` instance and `AzureKeyCredential` variable
    DocumentAnalysisClient client = new DocumentAnalysisClientBuilder()
      .credential(new AzureKeyCredential(key))
      .endpoint(endpoint)
      .buildClient();

    // sample document
    String documentUrl = "https://raw.githubusercontent.com/Azure-Samples/cognitive-services-REST-api-samples/master/curl/form-recognizer/sample-layout.pdf";
    String modelId = "prebuilt-layout";

    SyncPoller < OperationResult, AnalyzeResult > analyzeLayoutResultPoller =
      client.beginAnalyzeDocumentFromUrl(modelId, documentUrl);

    AnalyzeResult analyzeLayoutResult = analyzeLayoutResultPoller.getFinalResult();

    // pages
    analyzeLayoutResult.getPages().forEach(documentPage -> {
      System.out.printf("Page has width: %.2f and height: %.2f, measured with unit: %s%n",
        documentPage.getWidth(),
        documentPage.getHeight(),
        documentPage.getUnit());

      // lines
      documentPage.getLines().forEach(documentLine ->
        System.out.printf("Line %s is within a bounding polygon %s.%n",
          documentLine.getContent(),
          documentLine.getBoundingPolygon().toString()));

      // words
      documentPage.getWords().forEach(documentWord ->
        System.out.printf("Word '%s' has a confidence score of %.2f%n",
          documentWord.getContent(),
          documentWord.getConfidence()));

      // selection marks
      documentPage.getSelectionMarks().forEach(documentSelectionMark ->
        System.out.printf("Selection mark is %s and is within a bounding polygon %s with confidence %.2f.%n",
          documentSelectionMark.getState().toString(),
          documentSelectionMark.getBoundingPolygon().toString(),
          documentSelectionMark.getConfidence()));
    });

    // tables
    List < DocumentTable > tables = analyzeLayoutResult.getTables();
    for (int i = 0; i < tables.size(); i++) {
      DocumentTable documentTable = tables.get(i);
      System.out.printf("Table %d has %d rows and %d columns.%n", i, documentTable.getRowCount(),
        documentTable.getColumnCount());
      documentTable.getCells().forEach(documentTableCell -> {
        System.out.printf("Cell '%s', has row index %d and column index %d.%n", documentTableCell.getContent(),
          documentTableCell.getRowIndex(), documentTableCell.getColumnIndex());
      });
      System.out.println();
    }
  }
  // Utility function to get the bounding polygon coordinates
  private static String getBoundingCoordinates(List < Point > boundingPolygon) {
    return boundingPolygon.stream().map(point -> String.format("[%.2f, %.2f]", point.getX(),
      point.getY())).collect(Collectors.joining(", "));
  }
}
Build and run the application
After you add a code sample to your application, navigate back to your main project directory—form-recognize-app.
Build your application with the
buildcommand:gradle buildRun your application with the
runcommand:gradle run
Layout model output
Here's a snippet of the expected output:
  Table 0 has 5 rows and 3 columns.
  Cell 'Title of each class', has row index 0 and column index 0.
  Cell 'Trading Symbol', has row index 0 and column index 1.
  Cell 'Name of exchange on which registered', has row index 0 and column index 2.
  Cell 'Common stock, $0.00000625 par value per share', has row index 1 and column index 0.
  Cell 'MSFT', has row index 1 and column index 1.
  Cell 'NASDAQ', has row index 1 and column index 2.
  Cell '2.125% Notes due 2021', has row index 2 and column index 0.
  Cell 'MSFT', has row index 2 and column index 1.
  Cell 'NASDAQ', has row index 2 and column index 2.
  Cell '3.125% Notes due 2028', has row index 3 and column index 0.
  Cell 'MSFT', has row index 3 and column index 1.
  Cell 'NASDAQ', has row index 3 and column index 2.
  Cell '2.625% Notes due 2033', has row index 4 and column index 0.
  Cell 'MSFT', has row index 4 and column index 1.
  Cell 'NASDAQ', has row index 4 and column index 2.
To view the entire output, visit the Azure samples repository on GitHub to view the layout model output.
Add the following code sample to the FormRecognizer.java file. Make sure you update the key and endpoint variables with values from your Azure portal Document Intelligence instance:
import com.azure.ai.formrecognizer;

import com.azure.ai.formrecognizer.documentanalysis.DocumentAnalysisClient;
import com.azure.ai.formrecognizer.documentanalysis.DocumentAnalysisClientBuilder;
import com.azure.ai.formrecognizer.documentanalysis.models.AnalyzeResult;
import com.azure.ai.formrecognizer.documentanalysis.models.OperationResult;
import com.azure.ai.formrecognizer.documentanalysis.models.DocumentTable;
import com.azure.ai.formrecognizer.documentanalysis.models.Point;
import com.azure.core.credential.AzureKeyCredential;
import com.azure.core.util.polling.SyncPoller;

import java.util.List;
import java.util.stream.Collectors;

public class FormRecognizer {

  // set `<your-endpoint>` and `<your-key>` variables with the values from the Azure portal
  private static final String endpoint = "<your-endpoint>";
  private static final String key = "<your-key>";

  public static void main(String[] args) {

    // create your `DocumentAnalysisClient` instance and `AzureKeyCredential` variable
    DocumentAnalysisClient client = new DocumentAnalysisClientBuilder()
      .credential(new AzureKeyCredential(key))
      .endpoint(endpoint)
      .buildClient();

    // sample document
    String documentUrl = "https://raw.githubusercontent.com/Azure-Samples/cognitive-services-REST-api-samples/master/curl/form-recognizer/sample-layout.pdf";
    String modelId = "prebuilt-layout";

    SyncPoller < OperationResult, AnalyzeResult > analyzeLayoutPoller =
      client.beginAnalyzeDocumentFromUrl(modelId, documentUrl);

    AnalyzeResult analyzeLayoutResult = analyzeLayoutPoller.getFinalResult();

    // pages
    analyzeLayoutResult.getPages().forEach(documentPage -> {
      System.out.printf("Page has width: %.2f and height: %.2f, measured with unit: %s%n",
        documentPage.getWidth(),
        documentPage.getHeight(),
        documentPage.getUnit());

      // lines
      documentPage.getLines().forEach(documentLine ->
        System.out.printf("Line '%s' is within a bounding polygon %s.%n",
          documentLine.getContent(),
          getBoundingCoordinates(documentLine.getBoundingPolygon())));

      // words
      documentPage.getWords().forEach(documentWord ->
        System.out.printf("Word '%s' has a confidence score of %.2f.%n",
          documentWord.getContent(),
          documentWord.getConfidence()));

      // selection marks
      documentPage.getSelectionMarks().forEach(documentSelectionMark ->
        System.out.printf("Selection mark is '%s' and is within a bounding polygon %s with confidence %.2f.%n",
          documentSelectionMark.getSelectionMarkState().toString(),
          getBoundingCoordinates(documentSelectionMark.getBoundingPolygon()),
          documentSelectionMark.getConfidence()));
    });

    // tables
    List < DocumentTable > tables = analyzeLayoutResult.getTables();
    for (int i = 0; i < tables.size(); i++) {
      DocumentTable documentTable = tables.get(i);
      System.out.printf("Table %d has %d rows and %d columns.%n", i, documentTable.getRowCount(),
        documentTable.getColumnCount());
      documentTable.getCells().forEach(documentTableCell -> {
        System.out.printf("Cell '%s', has row index %d and column index %d.%n", documentTableCell.getContent(),
          documentTableCell.getRowIndex(), documentTableCell.getColumnIndex());
      });
      System.out.println();
    }

    // styles
    analyzeLayoutResult.getStyles().forEach(documentStyle -
      > System.out.printf("Document is handwritten %s.%n", documentStyle.isHandwritten()));
  }

  /**
   * Utility function to get the bounding polygon coordinates.
   */
  private static String getBoundingCoordinates(List < Point > boundingPolygon) {
    return boundingPolygon.stream().map(point -> String.format("[%.2f, %.2f]", point.getX(),
      point.getY())).collect(Collectors.joining(", "));
  }
}
Build and run the application
After you add a code sample to your application, navigate back to your main project directory—form-recognize-app.
Build your application with the
buildcommand:gradle buildRun your application with the
runcommand:gradle run
Prebuilt model
Analyze and extract common fields from specific document types using a prebuilt model. In this example, we analyze an invoice using the prebuilt-invoice model.
Tip
You aren't limited to invoices—there are several prebuilt models to choose from, each of which has its own set of supported fields. The model to use for the analyze operation depends on the type of document to be analyzed. See model data extraction.
- Analyze an invoice using the prebuilt-invoice model. You can use our sample invoice document for this quickstart.
- We've added the file URL value to the
invoiceUrlvariable at the top of the file. - To analyze a given file at a URI, you'll use the
beginAnalyzeDocumentsmethod and passPrebuiltModels.Invoiceas the model Id. The returned value is aresultobject containing data about the submitted document. - For simplicity, all the key-value pairs that the service returns are not shown here. To see the list of all supported fields and corresponding types, see our Invoice concept page.
Add the following code sample to the DocIntelligence.java file. Make sure you update the key and endpoint variables with values from your Azure portal Document Intelligence instance:
import com.azure.ai.documentintelligence;

import com.azure.ai.documentintelligence.models.AnalyzeDocumentRequest;
import com.azure.ai.documentintelligence.models.AnalyzeResult;
import com.azure.ai.documentintelligence.models.AnalyzeResultOperation;
import com.azure.ai.documentintelligence.models.Document;
import com.azure.ai.documentintelligence.models.DocumentField;
import com.azure.ai.documentintelligence.models.DocumentFieldType;
import com.azure.core.credential.AzureKeyCredential;
import com.azure.core.util.polling.SyncPoller;

import java.io.IOException;
import java.time.LocalDate;
import java.util.List;
import java.util.Map;

public class DocIntelligence {

  // set `<your-endpoint>` and `<your-key>` variables with the values from the Azure portal
  private static final String endpoint = "<your-endpoint>";
  private static final String key = "<your-key>";

  public static void main(String[] args) {

    // create your `DocumentAnalysisClient` instance and `AzureKeyCredential` variable
    DocumentIntelligenceClient client = new DocumentIntelligenceClientBuilder()
      .credential(new AzureKeyCredential(key))
      .endpoint(endpoint)
      .buildClient();

    // sample document
    String modelId = "prebuilt-invoice";
    String invoiceUrl = "https://raw.githubusercontent.com/Azure-Samples/cognitive-services-REST-api-samples/master/curl/form-recognizer/sample-invoice.pdf";

    public static void main(final String[] args) throws IOException {
      // Instantiate a client that will be used to call the service.
      DocumentIntelligenceClient client = new DocumentIntelligenceClientBuilder()
        .credential(new AzureKeyCredential("{key}"))
        .endpoint("https://{endpoint}.cognitiveservices.azure.com/")
        .buildClient();

      SyncPoller < OperationResult, AnalyzeResult > analyzeLayoutResultPoller =
        client.beginAnalyzeDocument(modelId, invoiceUrl);

      AnalyzeResult analyzeInvoiceResult = analyzeInvoicesPoller.getFinalResult().getAnalyzeResult();

      for (int i = 0; i < analyzeInvoiceResult.getDocuments().size(); i++) {
        Document analyzedInvoice = analyzeInvoiceResult.getDocuments().get(i);
        Map < String, DocumentField > invoiceFields = analyzedInvoice.getFields();
        System.out.printf("----------- Analyzing invoice  %d -----------%n", i);
        DocumentField vendorNameField = invoiceFields.get("VendorName");
        if (vendorNameField != null) {
          if (DocumentFieldType.STRING == vendorNameField.getType()) {
            String merchantName = vendorNameField.getValueString();
            System.out.printf("Vendor Name: %s, confidence: %.2f%n",
              merchantName, vendorNameField.getConfidence());
          }
        }

        DocumentField vendorAddressField = invoiceFields.get("VendorAddress");
        if (vendorAddressField != null) {
          if (DocumentFieldType.STRING == vendorAddressField.getType()) {
            String merchantAddress = vendorAddressField.getValueString();
            System.out.printf("Vendor address: %s, confidence: %.2f%n",
              merchantAddress, vendorAddressField.getConfidence());
          }
        }

        DocumentField customerNameField = invoiceFields.get("CustomerName");
        if (customerNameField != null) {
          if (DocumentFieldType.STRING == customerNameField.getType()) {
            String merchantAddress = customerNameField.getValueString();
            System.out.printf("Customer Name: %s, confidence: %.2f%n",
              merchantAddress, customerNameField.getConfidence());
          }
        }

        DocumentField customerAddressRecipientField = invoiceFields.get("CustomerAddressRecipient");
        if (customerAddressRecipientField != null) {
          if (DocumentFieldType.STRING == customerAddressRecipientField.getType()) {
            String customerAddr = customerAddressRecipientField.getValueString();
            System.out.printf("Customer Address Recipient: %s, confidence: %.2f%n",
              customerAddr, customerAddressRecipientField.getConfidence());
          }
        }

        DocumentField invoiceIdField = invoiceFields.get("InvoiceId");
        if (invoiceIdField != null) {
          if (DocumentFieldType.STRING == invoiceIdField.getType()) {
            String invoiceId = invoiceIdField.getValueString();
            System.out.printf("Invoice ID: %s, confidence: %.2f%n",
              invoiceId, invoiceIdField.getConfidence());
          }
        }

        DocumentField invoiceDateField = invoiceFields.get("InvoiceDate");
        if (customerNameField != null) {
          if (DocumentFieldType.DATE == invoiceDateField.getType()) {
            LocalDate invoiceDate = invoiceDateField.getValueDate();
            System.out.printf("Invoice Date: %s, confidence: %.2f%n",
              invoiceDate, invoiceDateField.getConfidence());
          }
        }

        DocumentField invoiceTotalField = invoiceFields.get("InvoiceTotal");
        if (customerAddressRecipientField != null) {
          if (DocumentFieldType.NUMBER == invoiceTotalField.getType()) {
            Double invoiceTotal = invoiceTotalField.getValueNumber();
            System.out.printf("Invoice Total: %.2f, confidence: %.2f%n",
              invoiceTotal, invoiceTotalField.getConfidence());
          }
        }

        DocumentField invoiceItemsField = invoiceFields.get("Items");
        if (invoiceItemsField != null) {
          System.out.printf("Invoice Items: %n");
          if (DocumentFieldType.ARRAY == invoiceItemsField.getType()) {
            List < DocumentField > invoiceItems = invoiceItemsField.getValueArray();
            invoiceItems.stream()
              .filter(invoiceItem -> DocumentFieldType.OBJECT == invoiceItem.getType())
              .map(documentField -> documentField.getValueObject())
              .forEach(documentFieldMap -> documentFieldMap.forEach((key, documentField) -> {

                // See a full list of fields found on an invoice here:
                // https://aka.ms/documentintelligence/invoicefields

                if ("Description".equals(key)) {
                  if (DocumentFieldType.STRING == documentField.getType()) {
                    String name = documentField.getValueString();
                    System.out.printf("Description: %s, confidence: %.2fs%n",
                      name, documentField.getConfidence());
                  }
                }
                if ("Quantity".equals(key)) {
                  if (DocumentFieldType.NUMBER == documentField.getType()) {
                    Double quantity = documentField.getValueNumber();
                    System.out.printf("Quantity: %f, confidence: %.2f%n",
                      quantity, documentField.getConfidence());
                  }
                }
                if ("UnitPrice".equals(key)) {
                  if (DocumentFieldType.NUMBER == documentField.getType()) {
                    Double unitPrice = documentField.getValueNumber();
                    System.out.printf("Unit Price: %f, confidence: %.2f%n",
                      unitPrice, documentField.getConfidence());
                  }
                }
                if ("ProductCode".equals(key)) {
                  if (DocumentFieldType.NUMBER == documentField.getType()) {
                    Double productCode = documentField.getValueNumber();
                    System.out.printf("Product Code: %f, confidence: %.2f%n",
                      productCode, documentField.getConfidence());
                  }
                }
              }));
          }
        }
      }
    }
  }
}
Build and run the application
After you add a code sample to your application, navigate back to your main project directory—doc-intel-app.
Build your application with the
buildcommand:gradle buildRun your application with the
runcommand:gradle run
Add the following code sample to the FormRecognizer.java file. Make sure you update the key and endpoint variables with values from your Azure portal Document Intelligence instance:
import com.azure.ai.formrecognizer.*;

import com.azure.ai.formrecognizer.documentanalysis.models.*;
import com.azure.ai.formrecognizer.documentanalysis.DocumentAnalysisClient;
import com.azure.ai.formrecognizer.documentanalysis.DocumentAnalysisClientBuilder;

import com.azure.core.credential.AzureKeyCredential;
import com.azure.core.util.polling.SyncPoller;

import java.io.IOException;
import java.util.List;
import java.util.Arrays;
import java.time.LocalDate;
import java.util.Map;
import java.util.stream.Collectors;

public class FormRecognizer {

  // set `<your-endpoint>` and `<your-key>` variables with the values from the Azure portal
  private static final String endpoint = "<your-endpoint>";
  private static final String key = "<your-key>";

  public static void main(final String[] args) throws IOException {

    // create your `DocumentAnalysisClient` instance and `AzureKeyCredential` variable
    DocumentAnalysisClient client = new DocumentAnalysisClientBuilder()
      .credential(new AzureKeyCredential(key))
      .endpoint(endpoint)
      .buildClient();

    // sample document
    String modelId = "prebuilt-invoice";
    String invoiceUrl = "https://raw.githubusercontent.com/Azure-Samples/cognitive-services-REST-api-samples/master/curl/form-recognizer/sample-invoice.pdf";

    SyncPoller < OperationResult, AnalyzeResult > analyzeInvoicePoller = client.beginAnalyzeDocumentFromUrl(modelId, invoiceUrl);

    AnalyzeResult analyzeInvoiceResult = analyzeInvoicePoller.getFinalResult();

    for (int i = 0; i < analyzeInvoiceResult.getDocuments().size(); i++) {
      AnalyzedDocument analyzedInvoice = analyzeInvoiceResult.getDocuments().get(i);
      Map < String, DocumentField > invoiceFields = analyzedInvoice.getFields();
      System.out.printf("----------- Analyzing invoice  %d -----------%n", i);
      DocumentField vendorNameField = invoiceFields.get("VendorName");
      if (vendorNameField != null) {
        if (DocumentFieldType.STRING == vendorNameField.getType()) {
          String merchantName = vendorNameField.getValueAsString();
          System.out.printf("Vendor Name: %s, confidence: %.2f%n",
            merchantName, vendorNameField.getConfidence());
        }
      }

      DocumentField vendorAddressField = invoiceFields.get("VendorAddress");
      if (vendorAddressField != null) {
        if (DocumentFieldType.STRING == vendorAddressField.getType()) {
          String merchantAddress = vendorAddressField.getValueAsString();
          System.out.printf("Vendor address: %s, confidence: %.2f%n",
            merchantAddress, vendorAddressField.getConfidence());
        }
      }

      DocumentField customerNameField = invoiceFields.get("CustomerName");
      if (customerNameField != null) {
        if (DocumentFieldType.STRING == customerNameField.getType()) {
          String merchantAddress = customerNameField.getValueAsString();
          System.out.printf("Customer Name: %s, confidence: %.2f%n",
            merchantAddress, customerNameField.getConfidence());
        }
      }

      DocumentField customerAddressRecipientField = invoiceFields.get("CustomerAddressRecipient");
      if (customerAddressRecipientField != null) {
        if (DocumentFieldType.STRING == customerAddressRecipientField.getType()) {
          String customerAddr = customerAddressRecipientField.getValueAsString();
          System.out.printf("Customer Address Recipient: %s, confidence: %.2f%n",
            customerAddr, customerAddressRecipientField.getConfidence());
        }
      }

      DocumentField invoiceIdField = invoiceFields.get("InvoiceId");
      if (invoiceIdField != null) {
        if (DocumentFieldType.STRING == invoiceIdField.getType()) {
          String invoiceId = invoiceIdField.getValueAsString();
          System.out.printf("Invoice ID: %s, confidence: %.2f%n",
            invoiceId, invoiceIdField.getConfidence());
        }
      }

      DocumentField invoiceDateField = invoiceFields.get("InvoiceDate");
      if (customerNameField != null) {
        if (DocumentFieldType.DATE == invoiceDateField.getType()) {
          LocalDate invoiceDate = invoiceDateField.getValueAsDate();
          System.out.printf("Invoice Date: %s, confidence: %.2f%n",
            invoiceDate, invoiceDateField.getConfidence());
        }
      }

      DocumentField invoiceTotalField = invoiceFields.get("InvoiceTotal");
      if (customerAddressRecipientField != null) {
        if (DocumentFieldType.DOUBLE == invoiceTotalField.getType()) {
          Double invoiceTotal = invoiceTotalField.getValueAsDouble();
          System.out.printf("Invoice Total: %.2f, confidence: %.2f%n",
            invoiceTotal, invoiceTotalField.getConfidence());
        }
      }

      DocumentField invoiceItemsField = invoiceFields.get("Items");
      if (invoiceItemsField != null) {
        System.out.printf("Invoice Items: %n");
        if (DocumentFieldType.LIST == invoiceItemsField.getType()) {
          List < DocumentField > invoiceItems = invoiceItemsField.getValueAsList();
          invoiceItems.stream()
            .filter(invoiceItem -> DocumentFieldType.MAP == invoiceItem.getType())
            .map(documentField -> documentField.getValueAsMap())
            .forEach(documentFieldMap -> documentFieldMap.forEach((key, documentField) -> {

              // See a full list of fields found on an invoice here:
              // https://aka.ms/formrecognizer/invoicefields

              if ("Description".equals(key)) {
                if (DocumentFieldType.STRING == documentField.getType()) {
                  String name = documentField.getValueAsString();
                  System.out.printf("Description: %s, confidence: %.2fs%n",
                    name, documentField.getConfidence());
                }
              }
              if ("Quantity".equals(key)) {
                if (DocumentFieldType.DOUBLE == documentField.getType()) {
                  Double quantity = documentField.getValueAsDouble();
                  System.out.printf("Quantity: %f, confidence: %.2f%n",
                    quantity, documentField.getConfidence());
                }
              }
              if ("UnitPrice".equals(key)) {
                if (DocumentFieldType.DOUBLE == documentField.getType()) {
                  Double unitPrice = documentField.getValueAsDouble();
                  System.out.printf("Unit Price: %f, confidence: %.2f%n",
                    unitPrice, documentField.getConfidence());
                }
              }
              if ("ProductCode".equals(key)) {
                if (DocumentFieldType.DOUBLE == documentField.getType()) {
                  Double productCode = documentField.getValueAsDouble();
                  System.out.printf("Product Code: %f, confidence: %.2f%n",
                    productCode, documentField.getConfidence());
                }
              }
            }));
        }
      }
    }
  }
}
Build and run the application
After you add a code sample to your application, navigate back to your main project directory—doc-intel-app.
Build your application with the
buildcommand:gradle buildRun your application with the
runcommand:gradle run
Prebuilt model output
Here's a snippet of the expected output:
  ----------- Analyzing invoice  0 -----------
  Analyzed document has doc type invoice with confidence : 1.00
  Vendor Name: CONTOSO LTD., confidence: 0.92
  Vendor address: 123 456th St New York, NY, 10001, confidence: 0.91
  Customer Name: MICROSOFT CORPORATION, confidence: 0.84
  Customer Address Recipient: Microsoft Corp, confidence: 0.92
  Invoice ID: INV-100, confidence: 0.97
  Invoice Date: 2019-11-15, confidence: 0.97
To view the entire output, visit the Azure samples repository on GitHub to view the prebuilt invoice model output.
Add the following code sample to the FormRecognizer.java file. Make sure you update the key and endpoint variables with values from your Azure portal Document Intelligence instance:
import com.azure.ai.formrecognizer;

import com.azure.ai.formrecognizer.documentanalysis.DocumentAnalysisClient;
import com.azure.ai.formrecognizer.documentanalysis.DocumentAnalysisClientBuilder;
import com.azure.ai.formrecognizer.documentanalysis.models.AnalyzeResult;
import com.azure.ai.formrecognizer.documentanalysis.models.AnalyzedDocument;
import com.azure.ai.formrecognizer.documentanalysis.models.DocumentField;
import com.azure.ai.formrecognizer.documentanalysis.models.DocumentFieldType;
import com.azure.ai.formrecognizer.documentanalysis.models.OperationResult;
import com.azure.core.credential.AzureKeyCredential;
import com.azure.core.util.polling.SyncPoller;

import java.io.IOException;
import java.time.LocalDate;
import java.util.List;
import java.util.Map;

public class FormRecognizer {

  // set `<your-endpoint>` and `<your-key>` variables with the values from the Azure portal
  private static final String endpoint = "<your-endpoint>";
  private static final String key = "<your-key>";

  public static void main(String[] args) {

    // create your `DocumentAnalysisClient` instance and `AzureKeyCredential` variable
    DocumentAnalysisClient client = new DocumentAnalysisClientBuilder()
      .credential(new AzureKeyCredential(key))
      .endpoint(endpoint)
      .buildClient();

    // sample document
    String modelId = "prebuilt-invoice";
    String invoiceUrl = "https://raw.githubusercontent.com/Azure-Samples/cognitive-services-REST-api-samples/master/curl/form-recognizer/sample-invoice.pdf";

    SyncPoller < OperationResult, AnalyzeResult > analyzeInvoicePoller = client.beginAnalyzeDocumentFromUrl(modelId, invoiceUrl);

    AnalyzeResult analyzeInvoiceResult = analyzeInvoicePoller.getFinalResult();

    for (int i = 0; i < analyzeInvoiceResult.getDocuments().size(); i++) {
      AnalyzedDocument analyzedInvoice = analyzeInvoiceResult.getDocuments().get(i);
      Map < String, DocumentField > invoiceFields = analyzedInvoice.getFields();
      System.out.printf("----------- Analyzing invoice  %d -----------%n", i);
      DocumentField vendorNameField = invoiceFields.get("VendorName");
      if (vendorNameField != null) {
        if (DocumentFieldType.STRING == vendorNameField.getType()) {
          String merchantName = vendorNameField.getValueAsString();
          System.out.printf("Vendor Name: %s, confidence: %.2f%n",
            merchantName, vendorNameField.getConfidence());
        }
      }

      DocumentField vendorAddressField = invoiceFields.get("VendorAddress");
      if (vendorAddressField != null) {
        if (DocumentFieldType.STRING == vendorAddressField.getType()) {
          String merchantAddress = vendorAddressField.getValueAsString();
          System.out.printf("Vendor address: %s, confidence: %.2f%n",
            merchantAddress, vendorAddressField.getConfidence());
        }
      }

      DocumentField customerNameField = invoiceFields.get("CustomerName");
      if (customerNameField != null) {
        if (DocumentFieldType.STRING == customerNameField.getType()) {
          String merchantAddress = customerNameField.getValueAsString();
          System.out.printf("Customer Name: %s, confidence: %.2f%n",
            merchantAddress, customerNameField.getConfidence());
        }
      }

      DocumentField customerAddressRecipientField = invoiceFields.get("CustomerAddressRecipient");
      if (customerAddressRecipientField != null) {
        if (DocumentFieldType.STRING == customerAddressRecipientField.getType()) {
          String customerAddr = customerAddressRecipientField.getValueAsString();
          System.out.printf("Customer Address Recipient: %s, confidence: %.2f%n",
            customerAddr, customerAddressRecipientField.getConfidence());
        }
      }

      DocumentField invoiceIdField = invoiceFields.get("InvoiceId");
      if (invoiceIdField != null) {
        if (DocumentFieldType.STRING == invoiceIdField.getType()) {
          String invoiceId = invoiceIdField.getValueAsString();
          System.out.printf("Invoice ID: %s, confidence: %.2f%n",
            invoiceId, invoiceIdField.getConfidence());
        }
      }

      DocumentField invoiceDateField = invoiceFields.get("InvoiceDate");
      if (customerNameField != null) {
        if (DocumentFieldType.DATE == invoiceDateField.getType()) {
          LocalDate invoiceDate = invoiceDateField.getValueAsDate();
          System.out.printf("Invoice Date: %s, confidence: %.2f%n",
            invoiceDate, invoiceDateField.getConfidence());
        }
      }

      DocumentField invoiceTotalField = invoiceFields.get("InvoiceTotal");
      if (customerAddressRecipientField != null) {
        if (DocumentFieldType.DOUBLE == invoiceTotalField.getType()) {
          Double invoiceTotal = invoiceTotalField.getValueAsDouble();
          System.out.printf("Invoice Total: %.2f, confidence: %.2f%n",
            invoiceTotal, invoiceTotalField.getConfidence());
        }
      }

      DocumentField invoiceItemsField = invoiceFields.get("Items");
      if (invoiceItemsField != null) {
        System.out.printf("Invoice Items: %n");
        if (DocumentFieldType.LIST == invoiceItemsField.getType()) {
          List < DocumentField > invoiceItems = invoiceItemsField.getValueAsList();
          invoiceItems.stream()
            .filter(invoiceItem -> DocumentFieldType.MAP == invoiceItem.getType())
            .map(documentField -> documentField.getValueAsMap())
            .forEach(documentFieldMap -> documentFieldMap.forEach((key, documentField) -> {

              // See a full list of fields found on an invoice here:
              // https://aka.ms/formrecognizer/invoicefields

              if ("Description".equals(key)) {
                if (DocumentFieldType.STRING == documentField.getType()) {
                  String name = documentField.getValueAsString();
                  System.out.printf("Description: %s, confidence: %.2fs%n",
                    name, documentField.getConfidence());
                }
              }
              if ("Quantity".equals(key)) {
                if (DocumentFieldType.DOUBLE == documentField.getType()) {
                  Double quantity = documentField.getValueAsDouble();
                  System.out.printf("Quantity: %f, confidence: %.2f%n",
                    quantity, documentField.getConfidence());
                }
              }
              if ("UnitPrice".equals(key)) {
                if (DocumentFieldType.DOUBLE == documentField.getType()) {
                  Double unitPrice = documentField.getValueAsDouble();
                  System.out.printf("Unit Price: %f, confidence: %.2f%n",
                    unitPrice, documentField.getConfidence());
                }
              }
              if ("ProductCode".equals(key)) {
                if (DocumentFieldType.DOUBLE == documentField.getType()) {
                  Double productCode = documentField.getValueAsDouble();
                  System.out.printf("Product Code: %f, confidence: %.2f%n",
                    productCode, documentField.getConfidence());
                }
              }
            }));
        }
      }
    }
  }
}
Build and run the application
After you add a code sample to your application, navigate back to your main project directory—doc-intel-app.
Build your application with the
buildcommand:gradle buildRun your application with the
runcommand:gradle run
Client library | SDK reference | REST API reference | Package (npm) | Samples |Supported REST API version
Client library | SDK reference | REST API reference | Package (npm) | Samples |Supported REST API version
In this quickstart, use the following features to analyze and extract data and values from forms and documents:
Layout—Analyze and extract tables, lines, words, and selection marks like radio buttons and check boxes in documents, without the need to train a model.
Prebuilt Invoice—Analyze and extract common fields from specific document types using a pretrained invoice model.
Prerequisites
Azure subscription - Create one for free.
The latest version of Visual Studio Code or your preferred IDE. For more information, see Node.js in Visual Studio Code.
The latest
LTSversion of Node.js.An Azure AI services or Document Intelligence resource. Once you have your Azure subscription, create a single-service or multi-service Document Intelligence resource, in the Azure portal, to get your key and endpoint. You can use the free pricing tier (
F0) to try the service, and upgrade later to a paid tier for production.Tip
Create an Azure AI services resource if you plan to access multiple Azure AI services under a single endpoint/key. For Document Intelligence access only, create a Document Intelligence resource. Please note that you'll need a single-service resource if you intend to use Microsoft Entra authentication.
After your resource deploys, select Go to resource. You need the key and endpoint from the resource you create to connect your application to the Document Intelligence API. You paste your key and endpoint into the code later in the quickstart:
Set up
Create a new Node.js Express application: In a console window (such as cmd, PowerShell, or Bash), create and navigate to a new directory for your app named
doc-intel-app.mkdir doc-intel-app && cd doc-intel-appRun the
npm initcommand to initialize the application and scaffold your project.npm initSpecify your project's attributes using the prompts presented in the terminal.
- The most important attributes are name, version number, and entry point.
- We recommend keeping
index.jsfor the entry point name. The description, test command, GitHub repository, keywords, author, and license information are optional attributes—they can be skipped for this project. - Accept the suggestions in parentheses by selecting Return or Enter.
- After you complete the prompts, a
package.jsonfile will be created in your doc-intel-app directory.
Install the
ai-document-intelligenceclient library andazure/identitynpm packages:npm i @azure-rest/ai-document-intelligence@1.0.0-beta.2 @azure/identityYour app's
package.jsonfile is updated with the dependencies.
Install the
ai-form-recognizerclient library andazure/identitynpm packages:npm i @azure/ai-form-recognizer@5.0.0 @azure/identity- Your app's
package.jsonfile is updated with the dependencies.
- Your app's
Install the
ai-form-recognizerclient library andazure/identitynpm packages:npm i @azure/ai-form-recognizer@4.0.0 @azure/identity
Create a file named
index.jsin the application directory.Tip
- You can create a new file using PowerShell.
- Open a PowerShell window in your project directory by holding down the Shift key and right-clicking the folder.
- Type the following command New-Item index.js.
Build your application
To interact with the Document Intelligence service, you need to create an instance of the DocumentIntelligenceClient class. To do so, you create an AzureKeyCredential with your key from the Azure portal and a DocumentIntelligenceClient instance with the AzureKeyCredential and your Document Intelligence endpoint.
To interact with the Document Intelligence service, you need to create an instance of the DocumentAnalysisClient class. To do so, you create an AzureKeyCredential with your key from the Azure portal and a DocumentAnalysisClient instance with the AzureKeyCredential and your Form
Recognizer endpoint.
Open the
index.jsfile in Visual Studio Code or your favorite IDE. Copy and paste one of the following code samples into your application:
Important
Remember to remove the key from your code when you're done, and never post it publicly. For production, use a secure way of storing and accessing your credentials like Azure Key Vault. For more information, see Azure AI services security.
Layout model
Extract text, selection marks, text styles, table structures, and bounding region coordinates from documents.
- For this example, you'll need a document file from a URL. You can use our sample document for this quickstart.
- We've added the file URL value to the
formUrlvariable near the top of the file.- To analyze a given file from a URL, you'll use the
beginAnalyzeDocumentsmethod and pass inprebuilt-layoutas the model Id.
    const { DocumentIntelligenceClient } = require("@azure-rest/ai-document-intelligence");
    const  { AzureKeyCredential } = require("@azure/core-auth");

    // set `<your-key>` and `<your-endpoint>` variables with the values from the Azure portal.
    const key = "<your-key";
    const endpoint = "<your-endpoint>";

    // sample document
  const formUrl = "https://raw.githubusercontent.com/Azure-Samples/cognitive-services-REST-api-samples/master/curl/form-recognizer/sample-layout.pdf"

async function main() {
    const client = DocumentIntelligenceClient(endpoint, new AzureKeyCredential(key));

    const poller = await client.beginAnalyzeDocument("prebuilt-layout", formUrl);

const {
        pages,
        tables
    } = await poller.pollUntilDone();

    if (pages.length <= 0) {
        console.log("No pages were extracted from the document.");
    } else {
        console.log("Pages:");
        for (const page of pages) {
            console.log("- Page", page.pageNumber, `(unit: ${page.unit})`);
            console.log(`  ${page.width}x${page.height}, angle: ${page.angle}`);
            console.log(`  ${page.lines.length} lines, ${page.words.length} words`);
        }
    }

    if (tables.length <= 0) {
        console.log("No tables were extracted from the document.");
    } else {
        console.log("Tables:");
        for (const table of tables) {
            console.log(
                `- Extracted table: ${table.columnCount} columns, ${table.rowCount} rows (${table.cells.length} cells)`
            );
        }
    }
}

main().catch((error) => {
    console.error("An error occurred:", error);
    process.exit(1);
});
Run your application
After you add a code sample to your application, run your program:
Navigate to the folder where you have your Document Intelligence application (doc-intel-app).
Type the following command in your terminal:
node index.js
Add the following code sample to the index.js file. Make sure you update the key and endpoint variables with values from your Azure portal Document Intelligence instance:
 const { AzureKeyCredential, DocumentAnalysisClient } = require("@azure/ai-form-recognizer");

    // set `<your-key>` and `<your-endpoint>` variables with the values from the Azure portal.
    const key = "<your-key>";
    const endpoint = "<your-endpoint>";

    // sample document
  const formUrl = "https://raw.githubusercontent.com/Azure-Samples/cognitive-services-REST-api-samples/master/curl/form-recognizer/sample-layout.pdf"

  async function main() {
    const client = new DocumentAnalysisClient(endpoint, new AzureKeyCredential(key));

    const poller = await client.beginAnalyzeDocumentFromUrl("prebuilt-layout", formUrl);

    const {
        pages,
        tables
    } = await poller.pollUntilDone();

    if (pages.length <= 0) {
        console.log("No pages were extracted from the document.");
    } else {
        console.log("Pages:");
        for (const page of pages) {
            console.log("- Page", page.pageNumber, `(unit: ${page.unit})`);
            console.log(`  ${page.width}x${page.height}, angle: ${page.angle}`);
            console.log(`  ${page.lines.length} lines, ${page.words.length} words`);
        }
    }

    if (tables.length <= 0) {
        console.log("No tables were extracted from the document.");
    } else {
        console.log("Tables:");
        for (const table of tables) {
            console.log(
                `- Extracted table: ${table.columnCount} columns, ${table.rowCount} rows (${table.cells.length} cells)`
            );
        }
    }
}

main().catch((error) => {
    console.error("An error occurred:", error);
    process.exit(1);
});
Run your application
After you add a code sample to your application, run your program:
Navigate to the folder where you have your Document Intelligence application (doc-intel-app).
Type the following command in your terminal:
node index.js
Layout model output
Here's a snippet of the expected output:
Pages:
- Page 1 (unit: inch)
  8.5x11, angle: 0
  69 lines, 425 words
Tables:
- Extracted table: 3 columns, 5 rows (15 cells)
To view the entire output, visit the Azure samples repository on GitHub to view the layout model output.
Prebuilt model
In this example, we analyze an invoice using the prebuilt-invoice model.
Tip
You aren't limited to invoices—there are several prebuilt models to choose from, each of which has its own set of supported fields. The model to use for the analyze operation depends on the type of document to be analyzed. See model data extraction.
- Analyze an invoice using the prebuilt-invoice model. You can use our sample invoice document for this quickstart.
- We've added the file URL value to the
invoiceUrlvariable at the top of the file. - To analyze a given file at a URI, you'll use the
beginAnalyzeDocumentsmethod and passPrebuiltModels.Invoiceas the model Id. The returned value is aresultobject containing data about the submitted document. - For simplicity, all the key-value pairs that the service returns are not shown here. To see the list of all supported fields and corresponding types, see our Invoice concept page.
const { DocumentIntelligenceClient } = require("@azure-rest/ai-document-intelligence");
const  { AzureKeyCredential } = require("@azure/core-auth");

    // set `<your-key>` and `<your-endpoint>` variables with the values from the Azure portal.
    const key = "<your-key>";
    const endpoint = "<your-endpoint>";

    // sample document
    invoiceUrl = "https://raw.githubusercontent.com/Azure-Samples/cognitive-services-REST-api-samples/master/curl/form-recognizer/sample-invoice.pdf"

async function main() {
    const client = DocumentIntelligenceClient(endpoint, new AzureKeyCredential(key));

    const poller = await client.beginAnalyzeDocument("prebuilt-invoice", invoiceUrl);
if (pages.length <= 0) {
        console.log("No pages were extracted from the document.");
    } else {
        console.log("Pages:");
        for (const page of pages) {
            console.log("- Page", page.pageNumber, `(unit: ${page.unit})`);
            console.log(`  ${page.width}x${page.height}, angle: ${page.angle}`);
            console.log(`  ${page.lines.length} lines, ${page.words.length} words`);
        }
    }

    if (tables.length <= 0) {
        console.log("No tables were extracted from the document.");
    } else {
        console.log("Tables:");
        for (const table of tables) {
            console.log(
                `- Extracted table: ${table.columnCount} columns, ${table.rowCount} rows (${table.cells.length} cells)`
            );
        }
    }
}

main().catch((error) => {
    console.error("An error occurred:", error);
    process.exit(1);
});
Run your application
After you add a code sample to your application, run your program:
Navigate to the folder where you have your Document Intelligence application (doc-intel-app).
Type the following command in your terminal:
node index.js
 const {
    AzureKeyCredential,
    DocumentAnalysisClient
} = require("@azure/ai-form-recognizer");

// set `<your-key>` and `<your-endpoint>` variables with the values from the Azure portal.
const key = "<your-key>";
const endpoint = "<your-endpoint>";
// sample document
invoiceUrl = "https://raw.githubusercontent.com/Azure-Samples/cognitive-services-REST-api-samples/master/curl/form-recognizer/sample-invoice.pdf"

async function main() {
    const client = new DocumentAnalysisClient(endpoint, new AzureKeyCredential(key));

    const poller = await client.beginAnalyzeDocumentFromUrl("prebuilt-invoice", invoiceUrl);

    const {
        pages,
        tables
    } = await poller.pollUntilDone();

    if (pages.length <= 0) {
        console.log("No pages were extracted from the document.");
    } else {
        console.log("Pages:");
        for (const page of pages) {
            console.log("- Page", page.pageNumber, `(unit: ${page.unit})`);
            console.log(`  ${page.width}x${page.height}, angle: ${page.angle}`);
            console.log(`  ${page.lines.length} lines, ${page.words.length} words`);

            if (page.lines && page.lines.length > 0) {
                console.log("  Lines:");

                for (const line of page.lines) {
                    console.log(`  - "${line.content}"`);

                    // The words of the line can also be iterated independently. The words are computed based on their
                    // corresponding spans.
                    for (const word of line.words()) {
                        console.log(`    - "${word.content}"`);
                    }
                }
            }
        }
    }

    if (tables.length <= 0) {
        console.log("No tables were extracted from the document.");
    } else {
        console.log("Tables:");
        for (const table of tables) {
            console.log(
                `- Extracted table: ${table.columnCount} columns, ${table.rowCount} rows (${table.cells.length} cells)`
            );
        }
    }
}

main().catch((error) => {
    console.error("An error occurred:", error);
    process.exit(1);
});
Run your application
After you add a code sample to your application, run your program:
Navigate to the folder where you have your Document Intelligence application (doc-intel-app).
Type the following command in your terminal:
node index.js
Prebuilt model output
Here's a snippet of the expected output:
  Vendor Name: CONTOSO LTD.
  Customer Name: MICROSOFT CORPORATION
  Invoice Date: 2019-11-15T00:00:00.000Z
  Due Date: 2019-12-15T00:00:00.000Z
  Items:
  - <no product code>
    Description: Test for 23 fields
    Quantity: 1
    Date: undefined
    Unit: undefined
    Unit Price: 1
    Tax: undefined
    Amount: 100
To view the entire output, visit the Azure samples repository on GitHub to view the prebuilt invoice model output.
const { AzureKeyCredential, DocumentAnalysisClient } = require("@azure/ai-form-recognizer");

  // set `<your-key>` and `<your-endpoint>` variables with the values from the Azure portal.
      const key = "<your-key>";
      const endpoint = "<your-endpoint>";
// sample document
    invoiceUrl = "https://raw.githubusercontent.com/Azure-Samples/cognitive-services-REST-api-samples/master/curl/form-recognizer/sample-invoice.pdf"

async function main() {
    const client = new DocumentAnalysisClient(endpoint, new AzureKeyCredential(key));

    const poller = await client.beginAnalyzeDocument("prebuilt-invoice", invoiceUrl);

    const {
    documents: [document],
  } = await poller.pollUntilDone();


  if (document) {
    const {
      vendorName,
      customerName,
      invoiceDate,
      dueDate,
      items,
      subTotal,
      previousUnpaidBalance,
      totalTax,
      amountDue,
    } = document.fields;

    // The invoice model has many fields. For details, *see* [Invoice model field extraction](../../concept-invoice.md#field-extraction)
    console.log("Vendor Name:", vendorName && vendorName.value);
    console.log("Customer Name:", customerName && customerName.value);
    console.log("Invoice Date:", invoiceDate && invoiceDate.value);
    console.log("Due Date:", dueDate && dueDate.value);

    console.log("Items:");
    for (const item of (items && items.values) || []) {
      const { productCode, description, quantity, date, unit, unitPrice, tax, amount } =
        item.properties;

      console.log("-", (productCode && productCode.value) || "<no product code>");
      console.log("  Description:", description && description.value);
      console.log("  Quantity:", quantity && quantity.value);
      console.log("  Date:", date && date.value);
      console.log("  Unit:", unit && unit.value);
      console.log("  Unit Price:", unitPrice && unitPrice.value);
      console.log("  Tax:", tax && tax.value);
      console.log("  Amount:", amount && amount.value);
    }

    console.log("Subtotal:", subTotal && subTotal.value);
    console.log("Previous Unpaid Balance:", previousUnpaidBalance && previousUnpaidBalance.value);
    console.log("Tax:", totalTax && totalTax.value);
    console.log("Amount Due:", amountDue && amountDue.value);
  } else {
    throw new Error("Expected at least one receipt in the result.");
  }
}


main().catch((error) => {
    console.error("An error occurred:", error);
    process.exit(1);
});
Run your application
After you add a code sample to your application, run your program:
Navigate to the folder where you have your Document Intelligence application (doc-intel-app).
Type the following command in your terminal:
node index.js
Client library |SDK reference | REST API reference | Package (PyPi) | Samples | Supported REST API version
Client library |SDK reference | REST API reference | Package (PyPi) | Samples | Supported REST API version
Client library | SDK reference | REST API reference | Package (PyPi) | Samples | Supported REST API version
In this quickstart, use the following features to analyze and extract data from forms and documents:
Layout—Analyze and extract tables, lines, words, and selection marks like radio buttons and check boxes, and key-value pairs, without the need to train a model.
Prebuilt Invoice—Analyze and extract common fields from specific document types using a pretrained model.
Prerequisites
Azure subscription - Create one for free.
-
- Your Python installation should include pip. You can check if you have pip installed by running
pip --versionon the command line. Get pip by installing the latest version of Python.
- Your Python installation should include pip. You can check if you have pip installed by running
The latest version of Visual Studio Code or your preferred IDE. For more information, see Getting Started with Python in Visual Studio Code.
An Azure AI services or Document Intelligence resource. Once you have your Azure subscription, create a single-service or multi-service Document Intelligence resource, in the Azure portal, to get your key and endpoint. You can use the free pricing tier (
F0) to try the service, and upgrade later to a paid tier for production.
Tip
Create an Azure AI services resource if you plan to access multiple Azure AI services under a single endpoint/key. For Document Intelligence access only, create a Document Intelligence resource. Please note that you'll need a single-service resource if you intend to use Microsoft Entra authentication.
After your resource deploys, select Go to resource. You need the key and endpoint from the resource you create to connect your application to the Document Intelligence API. You paste your key and endpoint into the code later in the quickstart:
Set up
Open a terminal window in your local environment and install the Azure AI Document Intelligence client library for Python with pip:
pip install azure-ai-documentintelligence==1.0.0b2
pip install azure-ai-formrecognizer==3.3.0
pip install azure-ai-formrecognizer==3.2.0b6
Create your Python application
To interact with the Document Intelligence service, you need to create an instance of the DocumentIntelligenceClient class. To do so, you create an AzureKeyCredential with your key from the Azure portal and a DocumentIntelligenceClient instance with the AzureKeyCredential and your Document Intelligence endpoint.
Create a new Python file called doc_intel_quickstart.py in your preferred editor or IDE.
Open the doc_intel_quickstart.py file and select one of the following code samples to copy and paste into your application:
To interact with the Document Intelligence service, you need to create an instance of the DocumentAnalysisClient class. To do so, you create an AzureKeyCredential with your key from the Azure portal and a DocumentAnalysisClient instance with the AzureKeyCredential and your Document Intelligence endpoint.
Create a new Python file called form_recognizer_quickstart.py in your preferred editor or IDE.
Open the form_recognizer_quickstart.py file and select one of the following code samples to copy and paste into your application:
Important
Remember to remove the key from your code when you're done, and never post it publicly. For production, use a secure way of storing and accessing your credentials like Azure Key Vault. For more information, see Azure AI services security.
Layout model
Extract text, selection marks, text styles, table structures, and bounding region coordinates from documents.
- For this example, you'll need a document file from a URL. You can use our sample document for this quickstart.
- We've added the file URL value to the
formUrlvariable in theanalyze_layoutfunction. - To analyze a given file at a URL, you'll use the
begin_analyze_document_from_urlmethod and pass inprebuilt-layoutas the model Id. The returned value is aresultobject containing data about the submitted document.
Add the following code sample to your doc_intel_quickstart.py application. Make sure you update the key and endpoint variables with values from your Azure portal Document Intelligence instance:
# import libraries
import os
from azure.core.credentials import AzureKeyCredential
from azure.ai.documentintelligence import DocumentIntelligenceClient
from azure.ai.documentintelligence.models import AnalyzeResult

# set `<your-endpoint>` and `<your-key>` variables with the values from the Azure portal
endpoint = "<your-endpoint>"
key = "<your-key>"

# helper functions

def get_words(page, line):
    result = []
    for word in page.words:
        if _in_span(word, line.spans):
            result.append(word)
    return result


def _in_span(word, spans):
    for span in spans:
        if word.span.offset >= span.offset and (
            word.span.offset + word.span.length
        ) <= (span.offset + span.length):
            return True
    return False


def analyze_layout():
    # sample document
    formUrl = "https://raw.githubusercontent.com/Azure-Samples/cognitive-services-REST-api-samples/master/curl/form-recognizer/sample-layout.pdf"

    document_intelligence_client = DocumentIntelligenceClient(
        endpoint=endpoint, credential=AzureKeyCredential(key)
    )

    poller = document_intelligence_client.begin_analyze_document(
        "prebuilt-layout", formUrl
    )

    analyze_request = AnalyzeDocumentRequest(
        url_source=formUrl
    )

    result: AnalyzeResult = poller.result()

    if result.styles and any([style.is_handwritten for style in result.styles]):
        print("Document contains handwritten content")
    else:
        print("Document does not contain handwritten content")

    for page in result.pages:
        print(f"----Analyzing layout from page #{page.page_number}----")
        print(
            f"Page has width: {page.width} and height: {page.height}, measured with unit: {page.unit}"
        )

        if page.lines:
            for line_idx, line in enumerate(page.lines):
                words = get_words(page, line)
                print(
                    f"...Line # {line_idx} has word count {len(words)} and text '{line.content}' "
                    f"within bounding polygon '{line.polygon}'"
                )

                for word in words:
                    print(
                        f"......Word '{word.content}' has a confidence of {word.confidence}"
                    )

        if page.selection_marks:
            for selection_mark in page.selection_marks:
                print(
                    f"Selection mark is '{selection_mark.state}' within bounding polygon "
                    f"'{selection_mark.polygon}' and has a confidence of {selection_mark.confidence}"
                )

    if result.tables:
        for table_idx, table in enumerate(result.tables):
            print(
                f"Table # {table_idx} has {table.row_count} rows and "
                f"{table.column_count} columns"
            )
            if table.bounding_regions:
                for region in table.bounding_regions:
                    print(
                        f"Table # {table_idx} location on page: {region.page_number} is {region.polygon}"
                    )
            for cell in table.cells:
                print(
                    f"...Cell[{cell.row_index}][{cell.column_index}] has text '{cell.content}'"
                )
                if cell.bounding_regions:
                    for region in cell.bounding_regions:
                        print(
                            f"...content on page {region.page_number} is within bounding polygon '{region.polygon}'"
                        )

    print("----------------------------------------")


if __name__ == "__main__":
    analyze_layout()
Run the application
After you add a code sample to your application, build and run your program:
Navigate to the folder where you have your doc_intel_quickstart.py file.
Type the following command in your terminal:
python doc_intel_quickstart.py
Add the following code sample to your form_recognizer_quickstart.py application. Make sure you update the key and endpoint variables with values from your Azure portal Form Recognizer instance:
# import libraries
import os
from azure.ai.formrecognizer import DocumentAnalysisClient
from azure.core.credentials import AzureKeyCredential

# set `<your-endpoint>` and `<your-key>` variables with the values from the Azure portal
endpoint = "<your-endpoint>"
key = "<your-key>"

def format_polygon(polygon):
    if not polygon:
        return "N/A"
    return ", ".join(["[{}, {}]".format(p.x, p.y) for p in polygon])

def analyze_layout():
    # sample document
    formUrl = "https://raw.githubusercontent.com/Azure-Samples/cognitive-services-REST-api-samples/master/curl/form-recognizer/sample-layout.pdf"

    document_analysis_client = DocumentAnalysisClient(
        endpoint=endpoint, credential=AzureKeyCredential(key)
    )

    poller = document_analysis_client.begin_analyze_document(
            "prebuilt-layout", formUrl)
    result = poller.result()

    for idx, style in enumerate(result.styles):
        print(
            "Document contains {} content".format(
                "handwritten" if style.is_handwritten else "no handwritten"
            )
        )

    for page in result.pages:
        print("----Analyzing layout from page #{}----".format(page.page_number))
        print(
            "Page has width: {} and height: {}, measured with unit: {}".format(
                page.width, page.height, page.unit
            )
        )

        for line_idx, line in enumerate(page.lines):
            words = line.get_words()
            print(
                "...Line # {} has word count {} and text '{}' within bounding box '{}'".format(
                    line_idx,
                    len(words),
                    line.content,
                    format_polygon(line.polygon),
                )
            )

            for word in words:
                print(
                    "......Word '{}' has a confidence of {}".format(
                        word.content, word.confidence
                    )
                )

        for selection_mark in page.selection_marks:
            print(
                "...Selection mark is '{}' within bounding box '{}' and has a confidence of {}".format(
                    selection_mark.state,
                    format_polygon(selection_mark.polygon),
                    selection_mark.confidence,
                )
            )

    for table_idx, table in enumerate(result.tables):
        print(
            "Table # {} has {} rows and {} columns".format(
                table_idx, table.row_count, table.column_count
            )
        )
        for region in table.bounding_regions:
            print(
                "Table # {} location on page: {} is {}".format(
                    table_idx,
                    region.page_number,
                    format_polygon(region.polygon),
                )
            )
        for cell in table.cells:
            print(
                "...Cell[{}][{}] has content '{}'".format(
                    cell.row_index,
                    cell.column_index,
                    cell.content,
                )
            )
            for region in cell.bounding_regions:
                print(
                    "...content on page {} is within bounding box '{}'".format(
                        region.page_number,
                        format_polygon(region.polygon),
                    )
                )

    print("----------------------------------------")


if __name__ == "__main__":
    analyze_layout()
Run the application
After you add a code sample to your application, build and run your program:
Navigate to the folder where you have your form_recognizer_quickstart.py file.
Type the following command in your terminal:
python form_recognizer_quickstart.py
Layout model output
Here's a snippet of the expected output:
  ----Analyzing layout from page #1----
  Page has width: 8.5 and height: 11.0, measured with unit: inch
  ...Line # 0 has word count 2 and text 'UNITED STATES' within bounding box '[3.4915, 0.6828], [5.0116, 0.6828], [5.0116, 0.8265], [3.4915, 0.8265]'
  ......Word 'UNITED' has a confidence of 1.0
  ......Word 'STATES' has a confidence of 1.0
  ...Line # 1 has word count 4 and text 'SECURITIES AND EXCHANGE COMMISSION' within bounding box '[2.1937, 0.9061], [6.297, 0.9061], [6.297, 1.0498], [2.1937, 1.0498]'
  ......Word 'SECURITIES' has a confidence of 1.0
  ......Word 'AND' has a confidence of 1.0
  ......Word 'EXCHANGE' has a confidence of 1.0
  ......Word 'COMMISSION' has a confidence of 1.0
  ...Line # 2 has word count 3 and text 'Washington, D.C. 20549' within bounding box '[3.4629, 1.1179], [5.031, 1.1179], [5.031, 1.2483], [3.4629, 1.2483]'
  ......Word 'Washington,' has a confidence of 1.0
  ......Word 'D.C.' has a confidence of 1.0
To view the entire output, visit the Azure samples repository on GitHub to view the layout model output.
Add the following code sample to your form_recognizer_quickstart.py application. Make sure you update the key and endpoint variables with values from your Azure portal Form Recognizer instance:
# import libraries
import os
from azure.ai.formrecognizer import DocumentAnalysisClient
from azure.core.credentials import AzureKeyCredential

# set `<your-endpoint>` and `<your-key>` variables with the values from the Azure portal
endpoint = "<your-endpoint>"
key = "<your-key>"


def analyze_layout():
    # sample document
    formUrl = "https://raw.githubusercontent.com/Azure-Samples/cognitive-services-REST-api-samples/master/curl/form-recognizer/sample-layout.pdf"

    document_analysis_client = DocumentAnalysisClient(
        endpoint=endpoint, credential=AzureKeyCredential(key)
    )

    poller = document_analysis_client.begin_analyze_document_from_url(
        "prebuilt-layout", formUrl
    )
    result = poller.result()

    for idx, style in enumerate(result.styles):
        print(
            "Document contains {} content".format(
                "handwritten" if style.is_handwritten else "no handwritten"
            )
        )

    for page in result.pages:
        print("----Analyzing layout from page #{}----".format(page.page_number))
        print(
            "Page has width: {} and height: {}, measured with unit: {}".format(
                page.width, page.height, page.unit
            )
        )

        for line_idx, line in enumerate(page.lines):
            words = line.get_words()
            print(
                "...Line # {} has word count {} and text '{}' within bounding polygon '{}'".format(
                    line_idx,
                    len(words),
                    line.content,
                    format_polygon(line.polygon),
                )
            )

            for word in words:
                print(
                    "......Word '{}' has a confidence of {}".format(
                        word.content, word.confidence
                    )
                )

        for selection_mark in page.selection_marks:
            print(
                "...Selection mark is '{}' within bounding polygon '{}' and has a confidence of {}".format(
                    selection_mark.state,
                    format_polygon(selection_mark.polygon),
                    selection_mark.confidence,
                )
            )

    for table_idx, table in enumerate(result.tables):
        print(
            "Table # {} has {} rows and {} columns".format(
                table_idx, table.row_count, table.column_count
            )
        )
        for region in table.bounding_regions:
            print(
                "Table # {} location on page: {} is {}".format(
                    table_idx,
                    region.page_number,
                    format_polygon(region.polygon),
                )
            )
        for cell in table.cells:
            print(
                "...Cell[{}][{}] has content '{}'".format(
                    cell.row_index,
                    cell.column_index,
                    cell.content,
                )
            )
            for region in cell.bounding_regions:
                print(
                    "...content on page {} is within bounding polygon '{}'".format(
                        region.page_number,
                        format_polygon(region.polygon),
                    )
                )

    print("----------------------------------------")


if __name__ == "__main__":
    analyze_layout()
Run the application
After you add a code sample to your application, build and run your program:
Navigate to the folder where you have your form_recognizer_quickstart.py file.
Type the following command in your terminal:
python form_recognizer_quickstart.py
Prebuilt model
Analyze and extract common fields from specific document types using a prebuilt model. In this example, we analyze an invoice using the prebuilt-invoice model.
Tip
You aren't limited to invoices—there are several prebuilt models to choose from, each of which has its own set of supported fields. The model to use for the analyze operation depends on the type of document to be analyzed. See model data extraction.
- Analyze an invoice using the prebuilt-invoice model. You can use our sample invoice document for this quickstart.
- We've added the file URL value to the
invoiceUrlvariable at the top of the file. - To analyze a given file at a URI, you'll use the
begin_analyze_document_from_urlmethod and passprebuilt-invoiceas the model Id. The returned value is aresultobject containing data about the submitted document. - For simplicity, all the key-value pairs that the service returns are not shown here. To see the list of all supported fields and corresponding types, see our Invoice concept page.
Add the following code sample to your doc_intel_quickstart.py application. Make sure you update the key and endpoint variables with values from your Azure portal Document Intelligence instance:
# import libraries
import os
from azure.core.credentials import AzureKeyCredential
from azure.ai.documentintelligence import DocumentIntelligenceClient


# set `<your-endpoint>` and `<your-key>` variables with the values from the Azure portal
endpoint = "<your-endpoint>"
key = "<your-key>"

def analyze_invoice():
    # sample document

    invoiceUrl = "https://raw.githubusercontent.com/Azure-Samples/cognitive-services-REST-api-samples/master/curl/form-recognizer/sample-invoice.pdf"

    document_intelligence_client = DocumentIntelligenceClient(
        endpoint=endpoint, credential=AzureKeyCredential(key)
    )

    poller = document_intelligence_client.begin_analyze_document(
        "prebuilt-invoice", invoiceUrl
    )
    invoices = poller.result()

    if invoices.documents:
        for idx, invoice in enumerate(invoices.documents):
            print(f"--------Analyzing invoice #{idx + 1}--------")
            vendor_name = invoice.fields.get("VendorName")
            if vendor_name:
                print(
                    f"Vendor Name: {vendor_name.get('content')} has confidence: {vendor_name.get('confidence')}"
                )
            vendor_address = invoice.fields.get("VendorAddress")
            if vendor_address:
                print(
                    f"Vendor Address: {vendor_address.get('content')} has confidence: {vendor_address.get('confidence')}"
                )
            vendor_address_recipient = invoice.fields.get("VendorAddressRecipient")
            if vendor_address_recipient:
                print(
                    f"Vendor Address Recipient: {vendor_address_recipient.get('content')} has confidence: {vendor_address_recipient.get('confidence')}"
                )
            customer_name = invoice.fields.get("CustomerName")
            if customer_name:
                print(
                    f"Customer Name: {customer_name.get('content')} has confidence: {customer_name.get('confidence')}"
                )
            customer_id = invoice.fields.get("CustomerId")
            if customer_id:
                print(
                    f"Customer Id: {customer_id.get('content')} has confidence: {customer_id.get('confidence')}"
                )
            customer_address = invoice.fields.get("CustomerAddress")
            if customer_address:
                print(
                    f"Customer Address: {customer_address.get('content')} has confidence: {customer_address.get('confidence')}"
                )
            customer_address_recipient = invoice.fields.get("CustomerAddressRecipient")
            if customer_address_recipient:
                print(
                    f"Customer Address Recipient: {customer_address_recipient.get('content')} has confidence: {customer_address_recipient.get('confidence')}"
                )
            invoice_id = invoice.fields.get("InvoiceId")
            if invoice_id:
                print(
                    f"Invoice Id: {invoice_id.get('content')} has confidence: {invoice_id.get('confidence')}"
                )
            invoice_date = invoice.fields.get("InvoiceDate")
            if invoice_date:
                print(
                    f"Invoice Date: {invoice_date.get('content')} has confidence: {invoice_date.get('confidence')}"
                )
            invoice_total = invoice.fields.get("InvoiceTotal")
            if invoice_total:
                print(
                    f"Invoice Total: {invoice_total.get('content')} has confidence: {invoice_total.get('confidence')}"
                )
            due_date = invoice.fields.get("DueDate")
            if due_date:
                print(
                    f"Due Date: {due_date.get('content')} has confidence: {due_date.get('confidence')}"
                )
            purchase_order = invoice.fields.get("PurchaseOrder")
            if purchase_order:
                print(
                    f"Purchase Order: {purchase_order.get('content')} has confidence: {purchase_order.get('confidence')}"
                )
            billing_address = invoice.fields.get("BillingAddress")
            if billing_address:
                print(
                    f"Billing Address: {billing_address.get('content')} has confidence: {billing_address.get('confidence')}"
                )
            billing_address_recipient = invoice.fields.get("BillingAddressRecipient")
            if billing_address_recipient:
                print(
                    f"Billing Address Recipient: {billing_address_recipient.get('content')} has confidence: {billing_address_recipient.get('confidence')}"
                )
            shipping_address = invoice.fields.get("ShippingAddress")
            if shipping_address:
                print(
                    f"Shipping Address: {shipping_address.get('content')} has confidence: {shipping_address.get('confidence')}"
                )
            shipping_address_recipient = invoice.fields.get("ShippingAddressRecipient")
            if shipping_address_recipient:
                print(
                    f"Shipping Address Recipient: {shipping_address_recipient.get('content')} has confidence: {shipping_address_recipient.get('confidence')}"
                )
            print("Invoice items:")
            for idx, item in enumerate(invoice.fields.get("Items").get("valueArray")):
                print(f"...Item #{idx + 1}")
                item_description = item.get("valueObject").get("Description")
                if item_description:
                    print(
                        f"......Description: {item_description.get('content')} has confidence: {item_description.get('confidence')}"
                    )
                item_quantity = item.get("valueObject").get("Quantity")
                if item_quantity:
                    print(
                        f"......Quantity: {item_quantity.get('content')} has confidence: {item_quantity.get('confidence')}"
                    )
                unit = item.get("valueObject").get("Unit")
                if unit:
                    print(
                        f"......Unit: {unit.get('content')} has confidence: {unit.get('confidence')}"
                    )
                unit_price = item.get("valueObject").get("UnitPrice")
                if unit_price:
                    unit_price_code = (
                        unit_price.get("valueCurrency").get("currencyCode")
                        if unit_price.get("valueCurrency").get("currencyCode")
                        else ""
                    )
                    print(
                        f"......Unit Price: {unit_price.get('content')}{unit_price_code} has confidence: {unit_price.get('confidence')}"
                    )
                product_code = item.get("valueObject").get("ProductCode")
                if product_code:
                    print(
                        f"......Product Code: {product_code.get('content')} has confidence: {product_code.get('confidence')}"
                    )
                item_date = item.get("valueObject").get("Date")
                if item_date:
                    print(
                        f"......Date: {item_date.get('content')} has confidence: {item_date.get('confidence')}"
                    )
                tax = item.get("valueObject").get("Tax")
                if tax:
                    print(
                        f"......Tax: {tax.get('content')} has confidence: {tax.get('confidence')}"
                    )
                amount = item.get("valueObject").get("Amount")
                if amount:
                    print(
                        f"......Amount: {amount.get('content')} has confidence: {amount.get('confidence')}"
                    )
            subtotal = invoice.fields.get("SubTotal")
            if subtotal:
                print(
                    f"Subtotal: {subtotal.get('content')} has confidence: {subtotal.get('confidence')}"
                )
            total_tax = invoice.fields.get("TotalTax")
            if total_tax:
                print(
                    f"Total Tax: {total_tax.get('content')} has confidence: {total_tax.get('confidence')}"
                )
            previous_unpaid_balance = invoice.fields.get("PreviousUnpaidBalance")
            if previous_unpaid_balance:
                print(
                    f"Previous Unpaid Balance: {previous_unpaid_balance.get('content')} has confidence: {previous_unpaid_balance.get('confidence')}"
                )
            amount_due = invoice.fields.get("AmountDue")
            if amount_due:
                print(
                    f"Amount Due: {amount_due.get('content')} has confidence: {amount_due.get('confidence')}"
                )
            service_start_date = invoice.fields.get("ServiceStartDate")
            if service_start_date:
                print(
                    f"Service Start Date: {service_start_date.get('content')} has confidence: {service_start_date.get('confidence')}"
                )
            service_end_date = invoice.fields.get("ServiceEndDate")
            if service_end_date:
                print(
                    f"Service End Date: {service_end_date.get('content')} has confidence: {service_end_date.get('confidence')}"
                )
            service_address = invoice.fields.get("ServiceAddress")
            if service_address:
                print(
                    f"Service Address: {service_address.get('content')} has confidence: {service_address.get('confidence')}"
                )
            service_address_recipient = invoice.fields.get("ServiceAddressRecipient")
            if service_address_recipient:
                print(
                    f"Service Address Recipient: {service_address_recipient.get('content')} has confidence: {service_address_recipient.get('confidence')}"
                )
            remittance_address = invoice.fields.get("RemittanceAddress")
            if remittance_address:
                print(
                    f"Remittance Address: {remittance_address.get('content')} has confidence: {remittance_address.get('confidence')}"
                )
            remittance_address_recipient = invoice.fields.get(
                "RemittanceAddressRecipient"
            )
            if remittance_address_recipient:
                print(
                    f"Remittance Address Recipient: {remittance_address_recipient.get('content')} has confidence: {remittance_address_recipient.get('confidence')}"
                )


          print("----------------------------------------")


if __name__ == "__main__":
    analyze_invoice()
Run the application
After you add a code sample to your application, build and run your program:
Navigate to the folder where you have your doc_intel_quickstart.py file.
Type the following command in your terminal:
python doc_intel_quickstart.py
Add the following code sample to your form_recognizer_quickstart.py application. Make sure you update the key and endpoint variables with values from your Azure portal Form Recognizer instance:
# import libraries
import os
from azure.ai.formrecognizer import DocumentAnalysisClient
from azure.core.credentials import AzureKeyCredential

# set `<your-endpoint>` and `<your-key>` variables with the values from the Azure portal
endpoint = "<your-endpoint>"
key = "<your-key>"


def format_bounding_region(bounding_regions):
    if not bounding_regions:
        return "N/A"
    return ", ".join(
        "Page #{}: {}".format(region.page_number, format_polygon(region.polygon))
        for region in bounding_regions
    )


def format_polygon(polygon):
    if not polygon:
        return "N/A"
    return ", ".join(["[{}, {}]".format(p.x, p.y) for p in polygon])


def analyze_invoice():

    invoiceUrl = "https://raw.githubusercontent.com/Azure-Samples/cognitive-services-REST-api-samples/master/curl/form-recognizer/sample-invoice.pdf"

    document_analysis_client = DocumentAnalysisClient(
        endpoint=endpoint, credential=AzureKeyCredential(key)
    )

    poller = document_analysis_client.begin_analyze_document_from_url(
        "prebuilt-invoice", invoiceUrl
    )
    invoices = poller.result()

    for idx, invoice in enumerate(invoices.documents):
        print("--------Recognizing invoice #{}--------".format(idx + 1))
        vendor_name = invoice.fields.get("VendorName")
        if vendor_name:
            print(
                "Vendor Name: {} has confidence: {}".format(
                    vendor_name.value, vendor_name.confidence
                )
            )
        vendor_address = invoice.fields.get("VendorAddress")
        if vendor_address:
            print(
                "Vendor Address: {} has confidence: {}".format(
                    vendor_address.value, vendor_address.confidence
                )
            )
        vendor_address_recipient = invoice.fields.get("VendorAddressRecipient")
        if vendor_address_recipient:
            print(
                "Vendor Address Recipient: {} has confidence: {}".format(
                    vendor_address_recipient.value, vendor_address_recipient.confidence
                )
            )
        customer_name = invoice.fields.get("CustomerName")
        if customer_name:
            print(
                "Customer Name: {} has confidence: {}".format(
                    customer_name.value, customer_name.confidence
                )
            )
        customer_id = invoice.fields.get("CustomerId")
        if customer_id:
            print(
                "Customer Id: {} has confidence: {}".format(
                    customer_id.value, customer_id.confidence
                )
            )
        customer_address = invoice.fields.get("CustomerAddress")
        if customer_address:
            print(
                "Customer Address: {} has confidence: {}".format(
                    customer_address.value, customer_address.confidence
                )
            )
        customer_address_recipient = invoice.fields.get("CustomerAddressRecipient")
        if customer_address_recipient:
            print(
                "Customer Address Recipient: {} has confidence: {}".format(
                    customer_address_recipient.value,
                    customer_address_recipient.confidence,
                )
            )
        invoice_id = invoice.fields.get("InvoiceId")
        if invoice_id:
            print(
                "Invoice Id: {} has confidence: {}".format(
                    invoice_id.value, invoice_id.confidence
                )
            )
        invoice_date = invoice.fields.get("InvoiceDate")
        if invoice_date:
            print(
                "Invoice Date: {} has confidence: {}".format(
                    invoice_date.value, invoice_date.confidence
                )
            )
        invoice_total = invoice.fields.get("InvoiceTotal")
        if invoice_total:
            print(
                "Invoice Total: {} has confidence: {}".format(
                    invoice_total.value, invoice_total.confidence
                )
            )
        due_date = invoice.fields.get("DueDate")
        if due_date:
            print(
                "Due Date: {} has confidence: {}".format(
                    due_date.value, due_date.confidence
                )
            )
        purchase_order = invoice.fields.get("PurchaseOrder")
        if purchase_order:
            print(
                "Purchase Order: {} has confidence: {}".format(
                    purchase_order.value, purchase_order.confidence
                )
            )
        billing_address = invoice.fields.get("BillingAddress")
        if billing_address:
            print(
                "Billing Address: {} has confidence: {}".format(
                    billing_address.value, billing_address.confidence
                )
            )
        billing_address_recipient = invoice.fields.get("BillingAddressRecipient")
        if billing_address_recipient:
            print(
                "Billing Address Recipient: {} has confidence: {}".format(
                    billing_address_recipient.value,
                    billing_address_recipient.confidence,
                )
            )
        shipping_address = invoice.fields.get("ShippingAddress")
        if shipping_address:
            print(
                "Shipping Address: {} has confidence: {}".format(
                    shipping_address.value, shipping_address.confidence
                )
            )
        shipping_address_recipient = invoice.fields.get("ShippingAddressRecipient")
        if shipping_address_recipient:
            print(
                "Shipping Address Recipient: {} has confidence: {}".format(
                    shipping_address_recipient.value,
                    shipping_address_recipient.confidence,
                )
            )
        print("Invoice items:")
        for idx, item in enumerate(invoice.fields.get("Items").value):
            print("...Item #{}".format(idx + 1))
            item_description = item.value.get("Description")
            if item_description:
                print(
                    "......Description: {} has confidence: {}".format(
                        item_description.value, item_description.confidence
                    )
                )
            item_quantity = item.value.get("Quantity")
            if item_quantity:
                print(
                    "......Quantity: {} has confidence: {}".format(
                        item_quantity.value, item_quantity.confidence
                    )
                )
            unit = item.value.get("Unit")
            if unit:
                print(
                    "......Unit: {} has confidence: {}".format(
                        unit.value, unit.confidence
                    )
                )
            unit_price = item.value.get("UnitPrice")
            if unit_price:
                print(
                    "......Unit Price: {} has confidence: {}".format(
                        unit_price.value, unit_price.confidence
                    )
                )
            product_code = item.value.get("ProductCode")
            if product_code:
                print(
                    "......Product Code: {} has confidence: {}".format(
                        product_code.value, product_code.confidence
                    )
                )
            item_date = item.value.get("Date")
            if item_date:
                print(
                    "......Date: {} has confidence: {}".format(
                        item_date.value, item_date.confidence
                    )
                )
            tax = item.value.get("Tax")
            if tax:
                print(
                    "......Tax: {} has confidence: {}".format(tax.value, tax.confidence)
                )
            amount = item.value.get("Amount")
            if amount:
                print(
                    "......Amount: {} has confidence: {}".format(
                        amount.value, amount.confidence
                    )
                )
        subtotal = invoice.fields.get("SubTotal")
        if subtotal:
            print(
                "Subtotal: {} has confidence: {}".format(
                    subtotal.value, subtotal.confidence
                )
            )
        total_tax = invoice.fields.get("TotalTax")
        if total_tax:
            print(
                "Total Tax: {} has confidence: {}".format(
                    total_tax.value, total_tax.confidence
                )
            )
        previous_unpaid_balance = invoice.fields.get("PreviousUnpaidBalance")
        if previous_unpaid_balance:
            print(
                "Previous Unpaid Balance: {} has confidence: {}".format(
                    previous_unpaid_balance.value, previous_unpaid_balance.confidence
                )
            )
        amount_due = invoice.fields.get("AmountDue")
        if amount_due:
            print(
                "Amount Due: {} has confidence: {}".format(
                    amount_due.value, amount_due.confidence
                )
            )
        service_start_date = invoice.fields.get("ServiceStartDate")
        if service_start_date:
            print(
                "Service Start Date: {} has confidence: {}".format(
                    service_start_date.value, service_start_date.confidence
                )
            )
        service_end_date = invoice.fields.get("ServiceEndDate")
        if service_end_date:
            print(
                "Service End Date: {} has confidence: {}".format(
                    service_end_date.value, service_end_date.confidence
                )
            )
        service_address = invoice.fields.get("ServiceAddress")
        if service_address:
            print(
                "Service Address: {} has confidence: {}".format(
                    service_address.value, service_address.confidence
                )
            )
        service_address_recipient = invoice.fields.get("ServiceAddressRecipient")
        if service_address_recipient:
            print(
                "Service Address Recipient: {} has confidence: {}".format(
                    service_address_recipient.value,
                    service_address_recipient.confidence,
                )
            )
        remittance_address = invoice.fields.get("RemittanceAddress")
        if remittance_address:
            print(
                "Remittance Address: {} has confidence: {}".format(
                    remittance_address.value, remittance_address.confidence
                )
            )
        remittance_address_recipient = invoice.fields.get("RemittanceAddressRecipient")
        if remittance_address_recipient:
            print(
                "Remittance Address Recipient: {} has confidence: {}".format(
                    remittance_address_recipient.value,
                    remittance_address_recipient.confidence,
                )
            )

        print("----------------------------------------")

if __name__ == "__main__":
    analyze_invoice()
Run the application
After you add a code sample to your application, build and run your program:
Navigate to the folder where you have your form_recognizer_quickstart.py file.
Type the following command in your terminal:
python form_recognizer_quickstart.py
Prebuilt model output
Here's a snippet of the expected output:
  --------Recognizing invoice #1--------
  Vendor Name: CONTOSO LTD. has confidence: 0.919
  Vendor Address: 123 456th St New York, NY, 10001 has confidence: 0.907
  Vendor Address Recipient: Contoso Headquarters has confidence: 0.919
  Customer Name: MICROSOFT CORPORATION has confidence: 0.84
  Customer Id: CID-12345 has confidence: 0.956
  Customer Address: 123 Other St, Redmond WA, 98052 has confidence: 0.909
  Customer Address Recipient: Microsoft Corp has confidence: 0.917
  Invoice Id: INV-100 has confidence: 0.972
  Invoice Date: 2019-11-15 has confidence: 0.971
  Invoice Total: CurrencyValue(amount=110.0, symbol=$) has confidence: 0.97
  Due Date: 2019-12-15 has confidence: 0.973
To view the entire output, visit the Azure samples repository on GitHub to view the prebuilt invoice model output.
Add the following code sample to your form_recognizer_quickstart.py application. Make sure you update the key and endpoint variables with values from your Azure portal Form Recognizer instance:
# import libraries
import os
from azure.ai.formrecognizer import DocumentAnalysisClient
from azure.core.credentials import AzureKeyCredential

# set `<your-endpoint>` and `<your-key>` variables with the values from the Azure portal
endpoint = "<your-endpoint>"
key = "<your-key>"


def format_polygon(polygon):
    if not polygon:
        return "N/A"
    return ", ".join(["[{}, {}]".format(p.x, p.y) for p in polygon])


def analyze_layout():
    # sample document
    formUrl = "https://raw.githubusercontent.com/Azure-Samples/cognitive-services-REST-api-samples/master/curl/form-recognizer/sample-layout.pdf"

    document_analysis_client = DocumentAnalysisClient(
        endpoint=endpoint, credential=AzureKeyCredential(key)
    )

    poller = document_analysis_client.begin_analyze_document_from_url(
        "prebuilt-layout", formUrl
    )
    result = poller.result()

    for idx, style in enumerate(result.styles):
        print(
            "Document contains {} content".format(
                "handwritten" if style.is_handwritten else "no handwritten"
            )
        )


for page in result.pages:
    print("----Analyzing layout from page #{}----".format(page.page_number))
    print(
        "Page has width: {} and height: {}, measured with unit: {}".format(
            page.width, page.height, page.unit
        )
    )

    for line_idx, line in enumerate(page.lines):
        words = line.get_words()
        print(
            "...Line # {} has word count {} and text '{}' within bounding polygon '{}'".format(
                line_idx,
                len(words),
                line.content,
                format_polygon(line.polygon),
            )
        )

        for word in words:
            print(
                "......Word '{}' has a confidence of {}".format(
                    word.content, word.confidence
                )
            )

    for selection_mark in page.selection_marks:
        print(
            "...Selection mark is '{}' within bounding polygon '{}' and has a confidence of {}".format(
                selection_mark.state,
                format_polygon(selection_mark.polygon),
                selection_mark.confidence,
            )
        )

for table_idx, table in enumerate(result.tables):
    print(
        "Table # {} has {} rows and {} columns".format(
            table_idx, table.row_count, table.column_count
        )
    )
    for region in table.bounding_regions:
        print(
            "Table # {} location on page: {} is {}".format(
                table_idx,
                region.page_number,
                format_polygon(region.polygon),
            )
        )
    for cell in table.cells:
        print(
            "...Cell[{}][{}] has content '{}'".format(
                cell.row_index,
                cell.column_index,
                cell.content,
            )
        )
        for region in cell.bounding_regions:
            print(
                "...content on page {} is within bounding polygon '{}'".format(
                    region.page_number,
                    format_polygon(region.polygon),
                )
            )

print("----------------------------------------")


if __name__ == "__main__":
    analyze_layout()
Run the application
After you add a code sample to your application, build and run your program:
Navigate to the folder where you have your form_recognizer_quickstart.py file.
Type the following command in your terminal:
python form_recognizer_quickstart.py
In this quickstart, learn to use the Document Intelligence REST API to analyze and extract data and values from documents:
Prerequisites
Azure subscription - Create one for free
curl command line tool installed.
PowerShell version 7.*+ (or a similar command-line application.):
To check your PowerShell version, type the following command relative to your operating system:
- Windows:
Get-Host | Select-Object Version - macOS or Linux:
$PSVersionTable
- Windows:
A Document Intelligence (single-service) or Azure AI services (multi-service) resource. Once you have your Azure subscription, create a single-service or multi-service Document Intelligence resource, in the Azure portal, to get your key and endpoint. You can use the free pricing tier (
F0) to try the service, and upgrade later to a paid tier for production.
Tip
Create an Azure AI services resource if you plan to access multiple Azure AI services under a single endpoint/key. For Document Intelligence access only, create a Document Intelligence resource. Please note that you'll need a single-service resource if you intend to use Microsoft Entra authentication.
After your resource deploys, select Go to resource. You need the key and endpoint from the resource you create to connect your application to the Document Intelligence API. You paste your key and endpoint into the code later in the quickstart:
Analyze documents and get results
A POST request is used to analyze documents with a prebuilt or custom model. A GET request is used to retrieve the result of a document analysis call. The modelId is used with POST and resultId with GET operations.
Analyze document (POST Request)
Before you run the cURL command, make the following changes to the post request:
Replace
{endpoint}with the endpoint value from your Azure portal Document Intelligence instance.Replace
{key}with the key value from your Azure portal Document Intelligence instance.Using the following table as a reference, replace
{modelID}and{your-document-url}with your desired values.You need a document file at a URL. For this quickstart, you can use the sample forms provided in the following table for each feature:
Sample documents
| Feature | {modelID} | {your-document-url} |
|---|---|---|
| Read | prebuilt-read | https://raw.githubusercontent.com/Azure-Samples/cognitive-services-REST-api-samples/master/curl/form-recognizer/rest-api/read.png |
| Layout | prebuilt-layout | https://raw.githubusercontent.com/Azure-Samples/cognitive-services-REST-api-samples/master/curl/form-recognizer/rest-api/layout.png |
| Health insurance card | prebuilt-healthInsuranceCard.us | https://raw.githubusercontent.com/Azure-Samples/cognitive-services-REST-api-samples/master/curl/form-recognizer/rest-api/insurance-card.png |
| W-2 | prebuilt-tax.us.w2 | https://raw.githubusercontent.com/Azure-Samples/cognitive-services-REST-api-samples/master/curl/form-recognizer/rest-api/w2.png |
| Invoice | prebuilt-invoice | https://github.com/Azure-Samples/cognitive-services-REST-api-samples/raw/master/curl/form-recognizer/rest-api/invoice.pdf |
| Receipt | prebuilt-receipt | https://raw.githubusercontent.com/Azure-Samples/cognitive-services-REST-api-samples/master/curl/form-recognizer/rest-api/receipt.png |
| ID document | prebuilt-idDocument | https://raw.githubusercontent.com/Azure-Samples/cognitive-services-REST-api-samples/master/curl/form-recognizer/rest-api/identity_documents.png |
Sample documents
| Feature | {modelID} | {your-document-url} |
|---|---|---|
| General Document | prebuilt-document | https://raw.githubusercontent.com/Azure-Samples/cognitive-services-REST-api-samples/master/curl/form-recognizer/sample-layout.pdf |
| Read | prebuilt-read | https://raw.githubusercontent.com/Azure-Samples/cognitive-services-REST-api-samples/master/curl/form-recognizer/rest-api/read.png |
| Layout | prebuilt-layout | https://raw.githubusercontent.com/Azure-Samples/cognitive-services-REST-api-samples/master/curl/form-recognizer/rest-api/layout.png |
| Health insurance card | prebuilt-healthInsuranceCard.us | https://raw.githubusercontent.com/Azure-Samples/cognitive-services-REST-api-samples/master/curl/form-recognizer/rest-api/insurance-card.png |
| W-2 | prebuilt-tax.us.w2 | https://raw.githubusercontent.com/Azure-Samples/cognitive-services-REST-api-samples/master/curl/form-recognizer/rest-api/w2.png |
| Invoice | prebuilt-invoice | https://github.com/Azure-Samples/cognitive-services-REST-api-samples/raw/master/curl/form-recognizer/rest-api/invoice.pdf |
| Receipt | prebuilt-receipt | https://raw.githubusercontent.com/Azure-Samples/cognitive-services-REST-api-samples/master/curl/form-recognizer/rest-api/receipt.png |
| ID document | prebuilt-idDocument | https://raw.githubusercontent.com/Azure-Samples/cognitive-services-REST-api-samples/master/curl/form-recognizer/rest-api/identity_documents.png |
| Business card | prebuilt-businessCard | https://raw.githubusercontent.com/Azure-Samples/cognitive-services-REST-api-samples/de5e0d8982ab754823c54de47a47e8e499351523/curl/form-recognizer/rest-api/business_card.jpg |
Important
Remember to remove the key from your code when you're done, and never post it publicly. For production, use a secure way of storing and accessing your credentials like Azure Key Vault. For more information, see Azure AI services security.
POST request
curl -v -i POST "{endpoint}/documentintelligence/documentModels/{modelId}:analyze?api-version=2024-02-29-preview" -H "Content-Type: application/json" -H "Ocp-Apim-Subscription-Key: {key}" --data-ascii "{'urlSource': '{your-document-url}'}"
curl -v -i POST "{endpoint}/formrecognizer/documentModels/{modelID}:analyze?api-version=2023-07-31" -H "Content-Type: application/json" -H "Ocp-Apim-Subscription-Key: {key}" --data-ascii "{'urlSource': '{your-document-url}'}"
curl -v -i POST "{endpoint}/formrecognizer/documentModels/{modelId}:analyze?api-version=2022-08-31" -H "Content-Type: application/json" -H "Ocp-Apim-Subscription-Key: {key}" --data-ascii "{'urlSource': '{your-document-url}'}"
POST response (resultID)
You receive a 202 (Success) response that includes a read-only Operation-Location header. The value of this header contains a resultID that can be queried to get the status of the asynchronous operation and retrieve the results using a GET request with your same resource subscription key:

Get analyze results (GET Request)
After you call the Analyze document API, call the Get analyze result API to get the status of the operation and the extracted data. Before you run the command, make these changes:
After you call the Analyze document API, call the Get analyze result API to get the status of the operation and the extracted data. Before you run the command, make these changes:
After you call the Analyze document API, call the Get analyze result API to get the status of the operation and the extracted data. Before you run the command, make these changes:
Replace
{resultID}Operation-Location header from the POST response.Replace
{key}with the key value from your Document Intelligence instance in the Azure portal.
GET request
curl -v -X GET "{endpoint}/documentintelligence/documentModels/{modelId}/analyzeResults/{resultId}?api-version=2024-02-29-preview" -H "Ocp-Apim-Subscription-Key: {key}"
curl -v -X GET "{endpoint}/formrecognizer/documentModels/{modelId}/analyzeResults/{resultId}?api-version=2023-07-31" -H "Ocp-Apim-Subscription-Key: {key}"
curl -v -X GET "{endpoint}/formrecognizer/documentModels/{modelId}/analyzeResults/{resultId}?api-version=2022-08-31" -H "Ocp-Apim-Subscription-Key: {key}"
Examine the response
You receive a 200 (Success) response with JSON output. The first field, "status", indicates the status of the operation. If the operation isn't complete, the value of "status" is "running" or "notStarted", and you should call the API again, either manually or through a script. We recommend an interval of one second or more between calls.
Sample response for prebuilt-invoice
{
    "status": "succeeded",
    "createdDateTime": "2024-03-25T19:31:37Z",
    "lastUpdatedDateTime": "2024-03-25T19:31:43Z",
    "analyzeResult": {
        "apiVersion": "2024-02-29-preview",
        "modelId": "prebuilt-invoice",
        "stringIndexType": "textElements"...
    ..."pages": [
            {
                "pageNumber": 1,
                "angle": 0,
                "width": 8.5,
                "height": 11,
                "unit": "inch",
                "words": [
                    {
                        "content": "CONTOSO",
                        "boundingBox": [
                            0.5911,
                            0.6857,
                            1.7451,
                            0.6857,
                            1.7451,
                            0.8664,
                            0.5911,
                            0.8664
                        ],
                        "confidence": 1,
                        "span": {
                            "offset": 0,
                            "length": 7
                                }
                      }],
              }]
      }
}
{
    "status": "succeeded",
    "createdDateTime": "2023-08-25T19:31:37Z",
    "lastUpdatedDateTime": "2023-08-25T19:31:43Z",
    "analyzeResult": {
        "apiVersion": "2023-07-31",
        "modelId": "prebuilt-invoice",
        "stringIndexType": "textElements"...
    ..."pages": [
            {
                "pageNumber": 1,
                "angle": 0,
                "width": 8.5,
                "height": 11,
                "unit": "inch",
                "words": [
                    {
                        "content": "CONTOSO",
                        "boundingBox": [
                            0.5911,
                            0.6857,
                            1.7451,
                            0.6857,
                            1.7451,
                            0.8664,
                            0.5911,
                            0.8664
                        ],
                        "confidence": 1,
                        "span": {
                            "offset": 0,
                            "length": 7
                                }
                      }],
              }]
      }
}
{
    "status": "succeeded",
    "createdDateTime": "2022-09-25T19:31:37Z",
    "lastUpdatedDateTime": "2022-09-25T19:31:43Z",
    "analyzeResult": {
        "apiVersion": "2022-08-31",
        "modelId": "prebuilt-invoice",
        "stringIndexType": "textElements"...
    ..."pages": [
            {
                "pageNumber": 1,
                "angle": 0,
                "width": 8.5,
                "height": 11,
                "unit": "inch",
                "words": [
                    {
                        "content": "CONTOSO",
                        "boundingBox": [
                            0.5911,
                            0.6857,
                            1.7451,
                            0.6857,
                            1.7451,
                            0.8664,
                            0.5911,
                            0.8664
                        ],
                        "confidence": 1,
                        "span": {
                            "offset": 0,
                            "length": 7
                                }
                      }],
              }]
      }
}
Supported document fields
The prebuilt models extract predefined sets of document fields. See Model data extraction for extracted field names, types, descriptions, and examples.
That's it, congratulations!
In this quickstart, you used a document Intelligence model to analyze various forms and documents. Next, explore the Document Intelligence Studio and reference documentation to learn about Document Intelligence API in depth.
Next steps
For an enhanced experience and advanced model quality, try Document Intelligence Studio
For v3.1 to v4.0 migration, see Changelog Migration guides.
This content applies to: ![]() v2.1 | Latest version:
v2.1 | Latest version: ![]() v4.0 (preview)
v4.0 (preview)
Get started with Azure AI Document Intelligence using the programming language of your choice or the REST API. Document Intelligence is a cloud-based Azure AI service that uses machine learning to extract key-value pairs, text, and tables from your documents. We recommend that you use the free service when you're learning the technology. Remember that the number of free pages is limited to 500 per month.
To learn more about Document Intelligence features and development options, visit our Overview page.
Reference documentation | Library source code | Package (NuGet) | Samples
In this quickstart, you use the following APIs to extract structured data from forms and documents:
Prerequisites
Azure subscription - Create one for free.
The current version of Visual Studio IDE.
An Azure AI services or Document Intelligence resource. Once you have your Azure subscription, create a single-service or multi-service Document Intelligence resource in the Azure portal to get your key and endpoint. You can use the free pricing tier (
F0) to try the service, and upgrade later to a paid tier for production.Tip
Create an Azure AI services resource if you plan to access multiple Azure AI services under a single endpoint/key. For Document Intelligence access only, create a Document Intelligence resource. Please note that you'll need a single-service resource if you intend to use Microsoft Entra authentication.
After your resource deploys, select Go to resource. You need the key and endpoint from the resource you create to connect your application to the Document Intelligence API. You paste your key and endpoint into the code later in the quickstart:
Set up
Start Visual Studio 2019.
On the start page, choose Create a new project.
On the Create a new project page, enter console in the search box. Choose the Console Application template, then choose Next.
In the Configure your new project dialog window, enter
formRecognizer_quickstartin the Project name box. Then choose Next.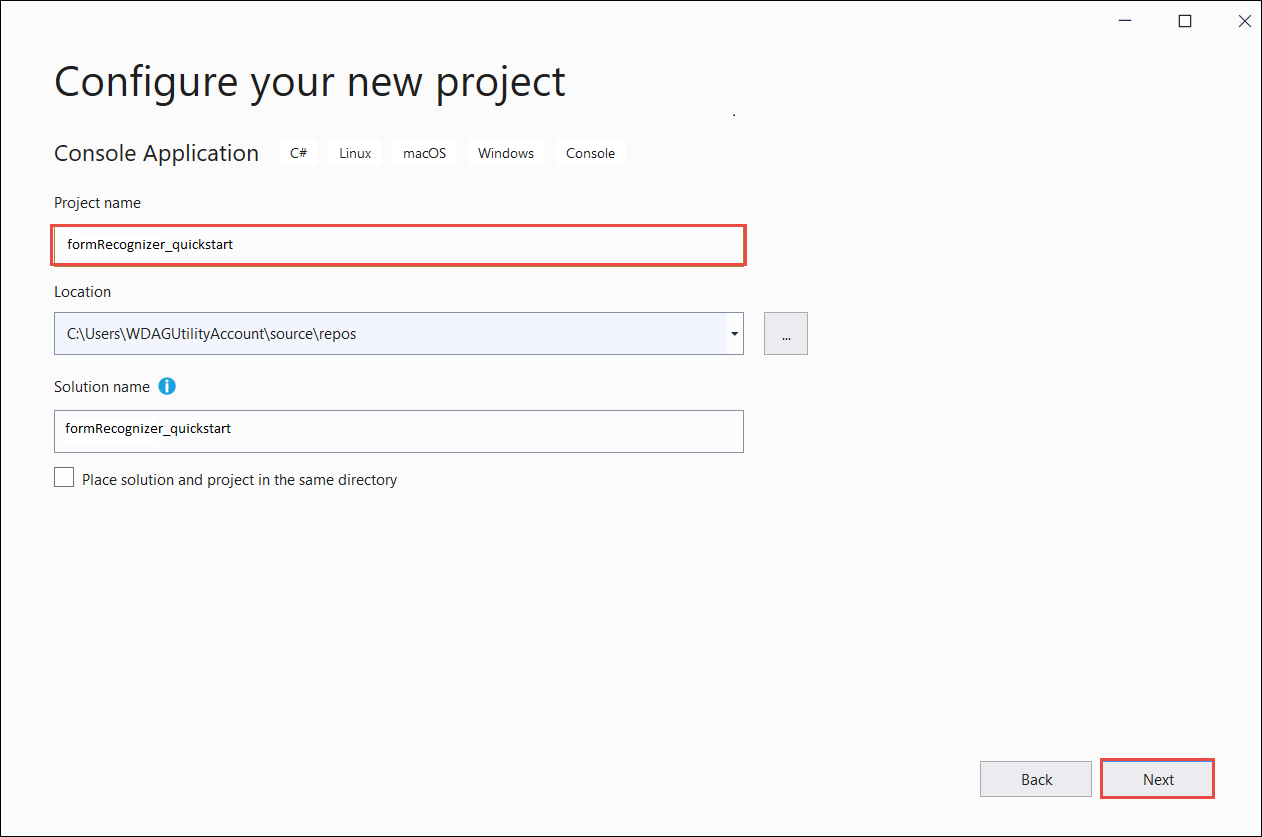
In the Additional information dialog window, select .NET 5.0 (Current), and then select Create.
Install the client library with NuGet
Right-click on your formRecognizer_quickstart project and select Manage NuGet Packages... .
Select the Browse tab and type Azure.AI.FormRecognizer.
Select version 3.1.1 from the dropdown menu and select Install.
Build your application
To interact with the Document Intelligence service, you need to create an instance of the FormRecognizerClient class. To do so, you create an AzureKeyCredential with your key and a FormRecognizerClient instance with the AzureKeyCredential and your Document Intelligence endpoint.
Note
- Starting with .NET 6, new projects using the
consoletemplate generate a new program style that differs from previous versions. - The new output uses recent C# features that simplify the code you need to write.
- When you use the newer version, you only need to write the body of the
Mainmethod. You don't need to include top-level statements, global using directives, or implicit using directives. - For more information, see New C# templates generate top-level statements.
Open the Program.cs file.
Include the following using directives:
using Azure;
using Azure.AI.FormRecognizer;
using Azure.AI.FormRecognizer.Models;
using System.Threading.Tasks;
- Set your
endpointandkeyenvironment variables and create yourAzureKeyCredentialandFormRecognizerClientinstance:
private static readonly string endpoint = "your-form-recognizer-endpoint";
private static readonly string key = "your-api-key";
private static readonly AzureKeyCredential credential = new AzureKeyCredential(key);
Delete the line,
Console.Writeline("Hello World!");, and add one of the Try It code samples to Program.cs file:
Select a code sample to copy and paste into your application's Main method:
Important
Remember to remove the key from your code when you're done, and never post it publicly. For production, use a secure way of storing and accessing your credentials like Azure Key Vault. For more information, see the Azure AI services security article.
Try it: Layout model
Extract text, selection marks, text styles, and table structures, along with their bounding region coordinates from documents.
- For this example, you'll need a document file at a URI. You can use our sample document for this quickstart.
- We've added the file URI value to the
formUrivariable. - To extract the layout from a given file at a URI, use the
StartRecognizeContentFromUriAsyncmethod.
Add the following code to your layout application Program.cs file:
FormRecognizerClient recognizerClient = AuthenticateClient();

Task recognizeContent = RecognizeContent(recognizerClient);
Task.WaitAll(recognizeContent);

private static FormRecognizerClient AuthenticateClient()
            {
                var credential = new AzureKeyCredential(key);
                var client = new FormRecognizerClient(new Uri(endpoint), credential);
                return client;
            }

            private static async Task RecognizeContent(FormRecognizerClient recognizerClient)
        {
            string formUrl = "https://raw.githubusercontent.com/Azure-Samples/cognitive-services-REST-api-samples/master/curl/form-recognizer/sample-layout.pdf";
            FormPageCollection formPages = await recognizerClient
        .StartRecognizeContentFromUri(new Uri(formUrl))
        .WaitForCompletionAsync();

            foreach (FormPage page in formPages)
            {
                Console.WriteLine($"Form Page {page.PageNumber} has {page.Lines.Count} lines.");

                for (int i = 0; i < page.Lines.Count; i++)
                {
                    FormLine line = page.Lines[i];
                    Console.WriteLine($"    Line {i} has {line.Words.Count} word{(line.Words.Count > 1 ? "s" : "")}, and text: '{line.Text}'.");
                }

                for (int i = 0; i < page.Tables.Count; i++)
                {
                    FormTable table = page.Tables[i];
                    Console.WriteLine($"Table {i} has {table.RowCount} rows and {table.ColumnCount} columns.");
                    foreach (FormTableCell cell in table.Cells)
                    {
                        Console.WriteLine($"    Cell ({cell.RowIndex}, {cell.ColumnIndex}) contains text: '{cell.Text}'.");
                    }
                }
            }
        }
    }
}
Try it: Prebuilt model
This sample demonstrates how to analyze data from certain types of common documents with pretrained models, using an invoice as an example.
- For this example, we wll analyze an invoice document using a prebuilt model. You can use our sample invoice document for this quickstart.
- We've added the file URI value to the
invoiceUrivariable at the top of the Main method. - To analyze a given file at a URI, use the
StartRecognizeInvoicesFromUriAsyncmethod. - For simplicity, all the fields that the service returns are not shown here. To see the list of all supported fields and corresponding types, see our Invoice concept page.
Choose a prebuilt model
You aren't limited to invoices—there are several prebuilt models to choose from, each of which has its own set of supported fields. The model to use for the analyze operation depends on the type of document to be analyzed. Here are the prebuilt models currently supported by the Document Intelligence service:
- Invoice: extracts text, selection marks, tables, fields, and key information from invoices.
- Receipt: extracts text and key information from receipts.
- ID document: extracts text and key information from driver licenses and international passports.
- Business-card: extracts text and key information from business cards.
Add the following code to your prebuilt invoice application Program.cs file method
FormRecognizerClient recognizerClient = AuthenticateClient();

  Task analyzeinvoice = AnalyzeInvoice(recognizerClient, invoiceUrl);
  Task.WaitAll(analyzeinvoice);

   private static FormRecognizerClient AuthenticateClient() {
     var credential = new AzureKeyCredential(key);
     var client = new FormRecognizerClient(new Uri(endpoint), credential);
     return client;
   }

   static string invoiceUrl = "https://raw.githubusercontent.com/Azure-Samples/cognitive-services-REST-api-samples/master/curl/form-recognizer/sample-invoice.pdf";

   private static async Task AnalyzeInvoice(FormRecognizerClient recognizerClient, string invoiceUrl) {
     var options = new RecognizeInvoicesOptions() {
       Locale = "en-US"
     };
     RecognizedFormCollection invoices = await recognizerClient.StartRecognizeInvoicesFromUriAsync(new Uri(invoiceUrl), options).WaitForCompletionAsync();

     RecognizedForm invoice = invoices[0];

     FormField invoiceIdField;
     if (invoice.Fields.TryGetValue("InvoiceId", out invoiceIdField)) {
       if (invoiceIdField.Value.ValueType == FieldValueType.String) {
         string invoiceId = invoiceIdField.Value.AsString();
         Console.WriteLine($"    Invoice Id: '{invoiceId}', with confidence {invoiceIdField.Confidence}");
       }
     }

     FormField invoiceDateField;
     if (invoice.Fields.TryGetValue("InvoiceDate", out invoiceDateField)) {
       if (invoiceDateField.Value.ValueType == FieldValueType.Date) {
         DateTime invoiceDate = invoiceDateField.Value.AsDate();
         Console.WriteLine($"    Invoice Date: '{invoiceDate}', with confidence {invoiceDateField.Confidence}");
       }
     }

     FormField dueDateField;
     if (invoice.Fields.TryGetValue("DueDate", out dueDateField)) {
       if (dueDateField.Value.ValueType == FieldValueType.Date) {
         DateTime dueDate = dueDateField.Value.AsDate();
         Console.WriteLine($"    Due Date: '{dueDate}', with confidence {dueDateField.Confidence}");
       }
     }

     FormField vendorNameField;
     if (invoice.Fields.TryGetValue("VendorName", out vendorNameField)) {
       if (vendorNameField.Value.ValueType == FieldValueType.String) {
         string vendorName = vendorNameField.Value.AsString();
         Console.WriteLine($"    Vendor Name: '{vendorName}', with confidence {vendorNameField.Confidence}");
       }
     }

     FormField vendorAddressField;
     if (invoice.Fields.TryGetValue("VendorAddress", out vendorAddressField)) {
       if (vendorAddressField.Value.ValueType == FieldValueType.String) {
         string vendorAddress = vendorAddressField.Value.AsString();
         Console.WriteLine($"    Vendor Address: '{vendorAddress}', with confidence {vendorAddressField.Confidence}");
       }
     }

     FormField customerNameField;
     if (invoice.Fields.TryGetValue("CustomerName", out customerNameField)) {
       if (customerNameField.Value.ValueType == FieldValueType.String) {
         string customerName = customerNameField.Value.AsString();
         Console.WriteLine($"    Customer Name: '{customerName}', with confidence {customerNameField.Confidence}");
       }
     }

     FormField customerAddressField;
     if (invoice.Fields.TryGetValue("CustomerAddress", out customerAddressField)) {
       if (customerAddressField.Value.ValueType == FieldValueType.String) {
         string customerAddress = customerAddressField.Value.AsString();
         Console.WriteLine($"    Customer Address: '{customerAddress}', with confidence {customerAddressField.Confidence}");
       }
     }

     FormField customerAddressRecipientField;
     if (invoice.Fields.TryGetValue("CustomerAddressRecipient", out customerAddressRecipientField)) {
       if (customerAddressRecipientField.Value.ValueType == FieldValueType.String) {
         string customerAddressRecipient = customerAddressRecipientField.Value.AsString();
         Console.WriteLine($"    Customer address recipient: '{customerAddressRecipient}', with confidence {customerAddressRecipientField.Confidence}");
       }
     }

     FormField invoiceTotalField;
     if (invoice.Fields.TryGetValue("InvoiceTotal", out invoiceTotalField)) {
       if (invoiceTotalField.Value.ValueType == FieldValueType.Float) {
         float invoiceTotal = invoiceTotalField.Value.AsFloat();
         Console.WriteLine($"    Invoice Total: '{invoiceTotal}', with confidence {invoiceTotalField.Confidence}");
       }
     }
   }
 }
}
Run your application
Choose the green Start button next to formRecognizer_quickstart to build and run your program, or press F5.
Reference documentation | Library source code | Package (Maven) | Samples
In this quickstart, you use the following APIs to extract structured data from forms and documents:
Prerequisites
Azure subscription - Create one for free.
A Java Development Kit (JDK) version 8 or later. For more information, see supported Java Versions and update schedule.
An Azure AI services or Document Intelligence resource. Once you have your Azure subscription, create a single-service or multi-service Document Intelligence resource in the Azure portal to get your key and endpoint. You can use the free pricing tier (
F0) to try the service, and upgrade later to a paid tier for production.After your resource deploys, select Go to resource. You need the key and endpoint from the resource you create to connect your application to the Document Intelligence API. You paste your key and endpoint into the code later in the quickstart:
Set up
Create a new Gradle project
In a console window (such as cmd, PowerShell, or Bash), create a new directory for your app called form-recognizer-app, and navigate to it.
mkdir form-recognizer-app && form-recognizer-app
Run the
gradle initcommand from your working directory. This command creates essential build files for Gradle, including build.gradle.kts, which is used at runtime to create and configure your application.gradle init --type basicWhen prompted to choose a DSL, select Kotlin.
Accept the default project name (form-recognizer-app)
Install the client library
This quickstart uses the Gradle dependency manager. You can find the client library and information for other dependency managers on the Maven Central Repository.
In your project's build.gradle.kts file, include the client library as an implementation statement, along with the required plugins and settings.
plugins {
    java
    application
}
application {
    mainClass.set("FormRecognizer")
}
repositories {
    mavenCentral()
}
dependencies {
    implementation(group = "com.azure", name = "azure-ai-formrecognizer", version = "3.1.1")
}
Create a Java file
From your working directory, run the following command:
mkdir -p src/main/java
You create the following directory structure:
Navigate to the Java directory and create a file called FormRecognizer.java. Open it in your preferred editor or IDE and add the following package declaration and import statements:
import com.azure.ai.formrecognizer.*;
import com.azure.ai.formrecognizer.models.*;

import java.util.concurrent.atomic.AtomicReference;
import java.util.List;
import java.util.Map;
import java.time.LocalDate;

import com.azure.core.credential.AzureKeyCredential;
import com.azure.core.http.rest.PagedIterable;
import com.azure.core.util.Context;
import com.azure.core.util.polling.SyncPoller;
Select a code sample to copy and paste into your application's main method:
Important
Remember to remove the key from your code when you're done, and never post it publicly. For production, use a secure way of storing and accessing your credentials like Azure Key Vault. For more information, see Azure AI services security.
Try it: Layout model
Extract text, selection marks, text styles, and table structures, along with their bounding region coordinates from documents.
- For this example, you'll need a document file at a URI. You can use our sample document for this quickstart.
- To analyze a given file at a URI, you'll use the
beginRecognizeContentFromUrlmethod. - We've added the file URI value to the
formUrlvariable in the main method.
Update your application's FormRecognizer class, with the following code (be certain to update the key and endpoint variables with values from your Azure portal Document Intelligence instance):
static final String key = "PASTE_YOUR_FORM_RECOGNIZER_KEY_HERE";
static final String endpoint = "PASTE_YOUR_FORM_RECOGNIZER_ENDPOINT_HERE";

public static void main(String[] args) {FormRecognizerClient recognizerClient = new FormRecognizerClientBuilder()
                .credential(new AzureKeyCredential(key)).endpoint(endpoint).buildClient();

    String formUrl = "https://raw.githubusercontent.com/Azure-Samples/cognitive-services-REST-api-samples/master/curl/form-recognizer/sample-layout.pdf";

    System.out.println("Get form content...");
        GetContent(recognizerClient, formUrl);
  }
    private static void GetContent(FormRecognizerClient recognizerClient, String invoiceUri) {
        String analyzeFilePath = invoiceUri;
        SyncPoller<FormRecognizerOperationResult, List<FormPage>> recognizeContentPoller = recognizerClient
                .beginRecognizeContentFromUrl(analyzeFilePath);

        List<FormPage> contentResult = recognizeContentPoller.getFinalResult();
        // </snippet_getcontent_call>
        // <snippet_getcontent_print>
        contentResult.forEach(formPage -> {
            // Table information
            System.out.println("----Recognizing content ----");
            System.out.printf("Has width: %f and height: %f, measured with unit: %s.%n", formPage.getWidth(),
                    formPage.getHeight(), formPage.getUnit());
            formPage.getTables().forEach(formTable -> {
                System.out.printf("Table has %d rows and %d columns.%n", formTable.getRowCount(),
                        formTable.getColumnCount());
                formTable.getCells().forEach(formTableCell -> {
                    System.out.printf("Cell has text %s.%n", formTableCell.getText());
                });
                System.out.println();
            });
        });
    }
Try it: Prebuilt model
This sample demonstrates how to analyze data from certain types of common documents with pretrained models, using an invoice as an example.
- For this example, we wll analyze an invoice document using a prebuilt model. You can use our sample invoice document for this quickstart.
- To analyze a given file at a URI, you'll use the
beginRecognizeInvoicesFromUrl. - We've added the file URI value to the
invoiceUrlvariable in the main method. - For simplicity, all the fields that the service returns are not shown here. To see the list of all supported fields and corresponding types, see our Invoice concept page.
Choose a prebuilt model
You aren't limited to invoices—there are several prebuilt models to choose from, each of which has its own set of supported fields. The model to use for the analyze operation depends on the type of document to be analyzed. Here are the prebuilt models currently supported by the Document Intelligence service:
- Invoice: extracts text, selection marks, tables, fields, and key information from invoices.
- Receipt: extracts text and key information from receipts.
- ID document: extracts text and key information from driver licenses and international passports.
- Business-card: extracts text and key information from business cards.
Update your application's FormRecognizer class, with the following code (be certain to update the key and endpoint variables with values from your Azure portal Document Intelligence instance):
static final String key = "PASTE_YOUR_FORM_RECOGNIZER_KEY_HERE";
static final String endpoint = "PASTE_YOUR_FORM_RECOGNIZER_ENDPOINT_HERE";

public static void main(String[] args) {
    FormRecognizerClient recognizerClient = new FormRecognizerClientBuilder().credential(new AzureKeyCredential(key)).endpoint(endpoint).buildClient();

    String invoiceUrl = "https://raw.githubusercontent.com/Azure-Samples/cognitive-services-REST-api-samples/master/curl/form-recognizer/sample-invoice.pdf";

    System.out.println("Analyze invoice...");
        AnalyzeInvoice(recognizerClient, invoiceUrl);
  }
    private static void AnalyzeInvoice(FormRecognizerClient recognizerClient, String invoiceUrl) {
      SyncPoller < FormRecognizerOperationResult,
        List < RecognizedForm >> recognizeInvoicesPoller = recognizerClient.beginRecognizeInvoicesFromUrl(invoiceUrl);
      List < RecognizedForm > recognizedInvoices = recognizeInvoicesPoller.getFinalResult();

      for (int i = 0; i < recognizedInvoices.size(); i++) {
        RecognizedForm recognizedInvoice = recognizedInvoices.get(i);
        Map < String,
        FormField > recognizedFields = recognizedInvoice.getFields();
        System.out.printf("----------- Recognized invoice info for page %d -----------%n", i);
        FormField vendorNameField = recognizedFields.get("VendorName");
        if (vendorNameField != null) {
            if (FieldValueType.STRING == vendorNameField.getValue().getValueType()) {
                String merchantName = vendorNameField.getValue().asString();
                System.out.printf("Vendor Name: %s, confidence: %.2f%n", merchantName, vendorNameField.getConfidence());
            }
        }

        FormField vendorAddressField = recognizedFields.get("VendorAddress");
        if (vendorAddressField != null) {
            if (FieldValueType.STRING == vendorAddressField.getValue().getValueType()) {
                String merchantAddress = vendorAddressField.getValue().asString();
                System.out.printf("Vendor address: %s, confidence: %.2f%n", merchantAddress, vendorAddressField.getConfidence());
            }
        }

        FormField customerNameField = recognizedFields.get("CustomerName");
        if (customerNameField != null) {
            if (FieldValueType.STRING == customerNameField.getValue().getValueType()) {
                String merchantAddress = customerNameField.getValue().asString();
                System.out.printf("Customer Name: %s, confidence: %.2f%n", merchantAddress, customerNameField.getConfidence());
            }
        }

        FormField customerAddressRecipientField = recognizedFields.get("CustomerAddressRecipient");
        if (customerAddressRecipientField != null) {
            if (FieldValueType.STRING == customerAddressRecipientField.getValue().getValueType()) {
                String customerAddr = customerAddressRecipientField.getValue().asString();
                System.out.printf("Customer Address Recipient: %s, confidence: %.2f%n", customerAddr, customerAddressRecipientField.getConfidence());
            }
        }

        FormField invoiceIdField = recognizedFields.get("InvoiceId");
        if (invoiceIdField != null) {
            if (FieldValueType.STRING == invoiceIdField.getValue().getValueType()) {
                String invoiceId = invoiceIdField.getValue().asString();
                System.out.printf("Invoice Id: %s, confidence: %.2f%n", invoiceId, invoiceIdField.getConfidence());
            }
        }

        FormField invoiceDateField = recognizedFields.get("InvoiceDate");
        if (customerNameField != null) {
            if (FieldValueType.DATE == invoiceDateField.getValue().getValueType()) {
                LocalDate invoiceDate = invoiceDateField.getValue().asDate();
                System.out.printf("Invoice Date: %s, confidence: %.2f%n", invoiceDate, invoiceDateField.getConfidence());
            }
        }

        FormField invoiceTotalField = recognizedFields.get("InvoiceTotal");
        if (customerAddressRecipientField != null) {
            if (FieldValueType.FLOAT == invoiceTotalField.getValue().getValueType()) {
                Float invoiceTotal = invoiceTotalField.getValue().asFloat();
                System.out.printf("Invoice Total: %.2f, confidence: %.2f%n", invoiceTotal, invoiceTotalField.getConfidence());
            }
        }
    }
}
Build and run your application
Navigate back to your main project directory—form-recognizer-app.
- Build your application with the
buildcommand:
gradle build
- Run your application with the
runcommand:
gradle run
Reference documentation | Library source code | Package (npm) | Samples
In this quickstart, you use the following APIs to extract structured data from forms and documents:
Prerequisites
Azure subscription - Create one for free.
The latest version of Visual Studio Code or your preferred IDE.
The latest LTS version of Node.js
An Azure AI services or Document Intelligence resource. Once you have your Azure subscription, create a single-service or multi-service Document Intelligence resource in the Azure portal to get your key and endpoint. You can use the free pricing tier (
F0) to try the service, and upgrade later to a paid tier for production.Tip
Create an Azure AI services resource if you plan to access multiple Azure AI services under a single endpoint/key. For Document Intelligence access only, create a Document Intelligence resource. Please note that you'll need a single-service resource if you intend to use Microsoft Entra authentication.
After your resource deploys, select Go to resource. You need the key and endpoint from the resource you create to connect your application to the Document Intelligence API. You paste your key and endpoint into the code later in the quickstart:
Set up
Create a new Node.js application. In a console window (such as cmd, PowerShell, or Bash), create a new directory for your app, and navigate to it.
mkdir form-recognizer-app && cd form-recognizer-appRun the
npm initcommand to create a node application with apackage.jsonfile.npm initInstall the
ai-form-recognizerclient library npm package:npm install @azure/ai-form-recognizerYour app's
package.jsonfile is updated with the dependencies.Create a file named
index.js, open it, and import the following libraries:const { FormRecognizerClient, AzureKeyCredential } = require("@azure/ai-form-recognizer");Create variables for your resource's Azure endpoint and key:
const key = "PASTE_YOUR_FORM_RECOGNIZER_KEY_HERE";
const endpoint = "PASTE_YOUR_FORM_RECOGNIZER_ENDPOINT_HERE";
At this point, your JavaScript application should contain the following lines of code:
const { FormRecognizerClient, AzureKeyCredential } = require("@azure/ai-form-recognizer");

const endpoint = "PASTE_YOUR_FORM_RECOGNIZER_ENDPOINT_HERE";
const key = "PASTE_YOUR_FORM_RECOGNIZER_KEY_HERE";
Select a code sample to copy and paste into your application:
Important
Remember to remove the key from your code when you're done, and never post it publicly. For production, use a secure way of storing and accessing your credentials like Azure Key Vault. For more information, see Azure AI services security.
Try it: Layout model
- For this example, you'll need a document file at a URI. You can use our sample document for this quickstart.
- We've added the file URI value to the
formUrlvariable near the top of the file. - To analyze a given file at a URI, you'll use the
beginRecognizeContentmethod.
Add the following code to your layout application on the line below the key variable
const formUrl = "https://raw.githubusercontent.com/Azure-Samples/cognitive-services-REST-api-samples/master/curl/form-recognizer/sample-invoice.pdf";

const formUrl = "https://raw.githubusercontent.com/Azure-Samples/cognitive-services-REST-api-samples/master/curl/form-recognizer/sample-invoice.pdf";

async function recognizeContent() {
    const client = new FormRecognizerClient(endpoint, new AzureKeyCredential(key));
    const poller = await client.beginRecognizeContentFromUrl(formUrl);
    const pages = await poller.pollUntilDone();

    if (!pages || pages.length === 0) {
        throw new Error("Expecting non-empty list of pages!");
    }

    for (const page of pages) {
        console.log(
            `Page ${page.pageNumber}: width ${page.width} and height ${page.height} with unit ${page.unit}`
        );
        for (const table of page.tables) {
            for (const cell of table.cells) {
                console.log(`cell [${cell.rowIndex},${cell.columnIndex}] has text ${cell.text}`);
            }
        }
    }
}

recognizeContent().catch((err) => {
    console.error("The sample encountered an error:", err);
});
Try it: Prebuilt model
This sample demonstrates how to analyze data from certain types of common documents with pretrained models, using an invoice as an example. See our prebuilt concept page for a complete list of invoice fields
- For this example, we wll analyze an invoice document using a prebuilt model. You can use our sample invoice document for this quickstart.
- We've added the file URI value to the
invoiceUrlvariable at the top of the file. - To analyze a given file at a URI, you'll use the
beginRecognizeInvoicesmethod. - For simplicity, all the fields that the service returns are not shown here. To see the list of all supported fields and corresponding types, see our Invoice concept page.
Choose a prebuilt model
You aren't limited to invoices—there are several prebuilt models to choose from, each of which has its own set of supported fields. The model to use for the analyze operation depends on the type of document to be analyzed. Here are the prebuilt models currently supported by the Document Intelligence service:
- Invoice: extracts text, selection marks, tables, fields, and key information from invoices.
- Receipt: extracts text and key information from receipts.
- ID document: extracts text and key information from driver licenses and international passports.
- Business-card: extracts text and key information from business cards.
Add the following code to your prebuilt invoice application below the key variable
const invoiceUrl = "https://raw.githubusercontent.com/Azure-Samples/cognitive-services-REST-api-samples/master/curl/form-recognizer/sample-invoice.pdf";

async function recognizeInvoices() {

    const client = new FormRecognizerClient(endpoint, new AzureKeyCredential(key));

    const poller = await client.beginRecognizeInvoicesFromUrl(invoiceUrl);
    const [invoice] = await poller.pollUntilDone();

    if (invoice === undefined) {
        throw new Error("Failed to extract data from at least one invoice.");
    }

    /**
     * This is a helper function for printing a simple field with an elemental type.
     */
    function fieldToString(field) {
        const {
            name,
            valueType,
            value,
            confidence
        } = field;
        return `${name} (${valueType}): '${value}' with confidence ${confidence}'`;
    }

    console.log("Invoice fields:");

    /**
     * Invoices contain a lot of optional fields, but they are all of elemental types
     * such as strings, numbers, and dates, so we will just enumerate them all.
     */
    for (const [name, field] of Object.entries(invoice.fields)) {
        if (field.valueType !== "array" && field.valueType !== "object") {
            console.log(`- ${name} ${fieldToString(field)}`);
        }
    }

    // Invoices also support nested line items, so we can iterate over them.
    let idx = 0;

    console.log("- Items:");

    const items = invoice.fields["Items"]?.value;
    for (const item of items ?? []) {
        const value = item.value;

        // Each item has several subfields that are nested within the item. We'll
        // map over this list of the subfields and filter out any fields that
        // weren't found. Not all fields will be returned every time, only those
        // that the service identified for the particular document in question.

        const subFields = [
                "Description",
                "Quantity",
                "Unit",
                "UnitPrice",
                "ProductCode",
                "Date",
                "Tax",
                "Amount"
            ]
            .map((fieldName) => value[fieldName])
            .filter((field) => field !== undefined);

        console.log(
            [
                `  - Item #${idx}`,
                // Now we will convert those fields into strings to display
                ...subFields.map((field) => `    - ${fieldToString(field)}`)
            ].join("\n")
        );
    }
}

recognizeInvoices().catch((err) => {
    console.error("The sample encountered an error:", err);
});
Reference documentation | Library source code | Package (PyPi) | Samples
In this quickstart, you use the following APIs to extract structured data from forms and documents:
Prerequisites
Azure subscription - Create one for free
-
- Your Python installation should include pip. You can check if you have pip installed by running
pip --versionon the command line. Get pip by installing the latest version of Python.
- Your Python installation should include pip. You can check if you have pip installed by running
An Azure AI services or Document Intelligence resource. Once you have your Azure subscription, create a single-service or multi-service Document Intelligence resource in the Azure portal to get your key and endpoint. You can use the free pricing tier (
F0) to try the service, and upgrade later to a paid tier for production.Tip
Create an Azure AI services resource if you plan to access multiple Azure AI services under a single endpoint/key. For Document Intelligence access only, create a Document Intelligence resource. Please note that you'll need a single-service resource if you intend to use Microsoft Entra authentication.
After your resource deploys, select Go to resource. You need the key and endpoint from the resource you create to connect your application to the Document Intelligence API. You paste your key and endpoint into the code later in the quickstart:
Set up
Open a terminal window in your local environment and install the Azure AI Document Intelligence client library for Python with pip:
pip install azure-ai-formrecognizer
Create a new Python application
Create a new Python application called form_recognizer_quickstart.py in your preferred editor or IDE. Then import the following libraries:
import os
from azure.ai.formrecognizer import FormRecognizerClient
from azure.core.credentials import AzureKeyCredential
Create variables for your Azure resource endpoint and key
endpoint = "YOUR_FORM_RECOGNIZER_ENDPOINT"
key = "YOUR_FORM_RECOGNIZER_KEY"
At this point, your Python application should contain the following lines of code:
import os
from azure.core.exceptions import ResourceNotFoundError
from azure.ai.formrecognizer import DocumentAnalysisClient
from azure.core.credentials import AzureKeyCredential

endpoint = "YOUR_FORM_RECOGNIZER_ENDPOINT"
key = "YOUR_FORM_RECOGNIZER_KEY"
Select a code sample to copy and paste into your application:
Important
Remember to remove the key from your code when you're done, and never post it publicly. For production, use a secure way of storing and accessing your credentials like Azure Key Vault. For more information, see Azure AI services security.
Try it: Layout model
- For this example, you'll need a document file at a URI. You can use our sample document for this quickstart.
- We've added the file URI value to the
formUrlvariable near the top of the file. - To analyze a given file at a URI, you'll use the
begin_recognize_content_from_urlmethod.
Add the following code to your layout application on the line below the key variable
  def format_bounding_box(bounding_box):
    if not bounding_box:
        return "N/A"
    return ", ".join(["[{}, {}]".format(p.x, p.y) for p in bounding_box])

 def recognize_content():
    # sample document
    formUrl = "https://raw.githubusercontent.com/Azure-Samples/cognitive-services-REST-api-samples/master/curl/form-recognizer/sample-layout.pdf"

    form_recognizer_client = FormRecognizerClient(
        endpoint=endpoint, credential=AzureKeyCredential(key)
    )

    poller = form_recognizer_client.begin_recognize_content_from_url(formUrl)
    form_pages = poller.result()

    for idx, content in enumerate(form_pages):
        print(
            "Page has width: {} and height: {}, measured with unit: {}".format(
                content.width, content.height, content.unit
            )
        )
        for table_idx, table in enumerate(content.tables):
            print(
                "Table # {} has {} rows and {} columns".format(
                    table_idx, table.row_count, table.column_count
                )
            )
            print(
                "Table # {} location on page: {}".format(
                    table_idx, format_bounding_box(table.bounding_box)
                )
            )
            for cell in table.cells:
                print(
                    "...Cell[{}][{}] has text '{}' within bounding box '{}'".format(
                        cell.row_index,
                        cell.column_index,
                        cell.text,
                        format_bounding_box(cell.bounding_box),
                    )
                )

        for line_idx, line in enumerate(content.lines):
            print(
                "Line # {} has word count '{}' and text '{}' within bounding box '{}'".format(
                    line_idx,
                    len(line.words),
                    line.text,
                    format_bounding_box(line.bounding_box),
                )
            )
            if line.appearance:
                if (
                    line.appearance.style_name == "handwriting"
                    and line.appearance.style_confidence > 0.8
                ):
                    print(
                        "Text line '{}' is handwritten and might be a signature.".format(
                            line.text
                        )
                    )
            for word in line.words:
                print(
                    "...Word '{}' has a confidence of {}".format(
                        word.text, word.confidence
                    )
                )

        for selection_mark in content.selection_marks:
            print(
                "Selection mark is '{}' within bounding box '{}' and has a confidence of {}".format(
                    selection_mark.state,
                    format_bounding_box(selection_mark.bounding_box),
                    selection_mark.confidence,
                )
            )
        print("----------------------------------------")


if __name__ == "__main__":
    recognize_content()
Try it: Prebuilt model
This sample demonstrates how to analyze data from certain types of common documents with pretrained models, using an invoice as an example. See our prebuilt concept page for a complete list of invoice fields
- For this example, we wll analyze an invoice document using a prebuilt model. You can use our sample invoice document for this quickstart.
- We've added the file URI value to the ``formUrl` variable at the top of the file.
- To analyze a given file at a URI, you'll use the ``begin_recognize_invoices_from_url` method.
- For simplicity, all the fields that the service returns are not shown here. To see the list of all supported fields and corresponding types, see our Invoice concept page.
Choose a prebuilt model
You aren't limited to invoices—there are several prebuilt models to choose from, each of which has its own set of supported fields. The model to use for the analyze operation depends on the type of document to be analyzed. Here are the prebuilt models currently supported by the Document Intelligence service:
- Invoice: extracts text, selection marks, tables, fields, and key information from invoices.
- Receipt: extracts text and key information from receipts.
- ID document: extracts text and key information from driver licenses and international passports.
- Business-card: extracts text and key information from business cards.
Add the following code to your prebuilt invoice application below the key variable
def recognize_invoice():

    invoiceUrl = "https://raw.githubusercontent.com/Azure-Samples/cognitive-services-REST-api-samples/master/curl/form-recognizer/sample-invoice.pdf"

    form_recognizer_client = FormRecognizerClient(
        endpoint=endpoint, credential=AzureKeyCredential(key)
    )

    poller = form_recognizer_client.begin_recognize_invoices_from_url(
        invoiceUrl, locale="en-US"
    )
    invoices = poller.result()

    for idx, invoice in enumerate(invoices):
        vendor_name = invoice.fields.get("VendorName")
        if vendor_name:
            print(
                "Vendor Name: {} has confidence: {}".format(
                    vendor_name.value, vendor_name.confidence
                )
            )
        vendor_address = invoice.fields.get("VendorAddress")
        if vendor_address:
            print(
                "Vendor Address: {} has confidence: {}".format(
                    vendor_address.value, vendor_address.confidence
                )
            )
        vendor_address_recipient = invoice.fields.get("VendorAddressRecipient")
        if vendor_address_recipient:
            print(
                "Vendor Address Recipient: {} has confidence: {}".format(
                    vendor_address_recipient.value, vendor_address_recipient.confidence
                )
            )
        customer_name = invoice.fields.get("CustomerName")
        if customer_name:
            print(
                "Customer Name: {} has confidence: {}".format(
                    customer_name.value, customer_name.confidence
                )
            )
        customer_id = invoice.fields.get("CustomerId")
        if customer_id:
            print(
                "Customer Id: {} has confidence: {}".format(
                    customer_id.value, customer_id.confidence
                )
            )
        customer_address = invoice.fields.get("CustomerAddress")
        if customer_address:
            print(
                "Customer Address: {} has confidence: {}".format(
                    customer_address.value, customer_address.confidence
                )
            )
        customer_address_recipient = invoice.fields.get("CustomerAddressRecipient")
        if customer_address_recipient:
            print(
                "Customer Address Recipient: {} has confidence: {}".format(
                    customer_address_recipient.value,
                    customer_address_recipient.confidence,
                )
            )
        invoice_id = invoice.fields.get("InvoiceId")
        if invoice_id:
            print(
                "Invoice Id: {} has confidence: {}".format(
                    invoice_id.value, invoice_id.confidence
                )
            )
        invoice_date = invoice.fields.get("InvoiceDate")
        if invoice_date:
            print(
                "Invoice Date: {} has confidence: {}".format(
                    invoice_date.value, invoice_date.confidence
                )
            )
        invoice_total = invoice.fields.get("InvoiceTotal")
        if invoice_total:
            print(
                "Invoice Total: {} has confidence: {}".format(
                    invoice_total.value, invoice_total.confidence
                )
            )
        due_date = invoice.fields.get("DueDate")
        if due_date:
            print(
                "Due Date: {} has confidence: {}".format(
                    due_date.value, due_date.confidence
                )
            )
        purchase_order = invoice.fields.get("PurchaseOrder")
        if purchase_order:
            print(
                "Purchase Order: {} has confidence: {}".format(
                    purchase_order.value, purchase_order.confidence
                )
            )
        billing_address = invoice.fields.get("BillingAddress")
        if billing_address:
            print(
                "Billing Address: {} has confidence: {}".format(
                    billing_address.value, billing_address.confidence
                )
            )
        billing_address_recipient = invoice.fields.get("BillingAddressRecipient")
        if billing_address_recipient:
            print(
                "Billing Address Recipient: {} has confidence: {}".format(
                    billing_address_recipient.value,
                    billing_address_recipient.confidence,
                )
            )
        shipping_address = invoice.fields.get("ShippingAddress")
        if shipping_address:
            print(
                "Shipping Address: {} has confidence: {}".format(
                    shipping_address.value, shipping_address.confidence
                )
            )
        shipping_address_recipient = invoice.fields.get("ShippingAddressRecipient")
        if shipping_address_recipient:
            print(
                "Shipping Address Recipient: {} has confidence: {}".format(
                    shipping_address_recipient.value,
                    shipping_address_recipient.confidence,
                )
            )
        print("Invoice items:")
        for idx, item in enumerate(invoice.fields.get("Items").value):
            item_description = item.value.get("Description")
            if item_description:
                print(
                    "......Description: {} has confidence: {}".format(
                        item_description.value, item_description.confidence
                    )
                )
            item_quantity = item.value.get("Quantity")
            if item_quantity:
                print(
                    "......Quantity: {} has confidence: {}".format(
                        item_quantity.value, item_quantity.confidence
                    )
                )
            unit = item.value.get("Unit")
            if unit:
                print(
                    "......Unit: {} has confidence: {}".format(
                        unit.value, unit.confidence
                    )
                )
            unit_price = item.value.get("UnitPrice")
            if unit_price:
                print(
                    "......Unit Price: {} has confidence: {}".format(
                        unit_price.value, unit_price.confidence
                    )
                )
            product_code = item.value.get("ProductCode")
            if product_code:
                print(
                    "......Product Code: {} has confidence: {}".format(
                        product_code.value, product_code.confidence
                    )
                )
            item_date = item.value.get("Date")
            if item_date:
                print(
                    "......Date: {} has confidence: {}".format(
                        item_date.value, item_date.confidence
                    )
                )
            tax = item.value.get("Tax")
            if tax:
                print(
                    "......Tax: {} has confidence: {}".format(tax.value, tax.confidence)
                )
            amount = item.value.get("Amount")
            if amount:
                print(
                    "......Amount: {} has confidence: {}".format(
                        amount.value, amount.confidence
                    )
                )
        subtotal = invoice.fields.get("SubTotal")
        if subtotal:
            print(
                "Subtotal: {} has confidence: {}".format(
                    subtotal.value, subtotal.confidence
                )
            )
        total_tax = invoice.fields.get("TotalTax")
        if total_tax:
            print(
                "Total Tax: {} has confidence: {}".format(
                    total_tax.value, total_tax.confidence
                )
            )
        previous_unpaid_balance = invoice.fields.get("PreviousUnpaidBalance")
        if previous_unpaid_balance:
            print(
                "Previous Unpaid Balance: {} has confidence: {}".format(
                    previous_unpaid_balance.value, previous_unpaid_balance.confidence
                )
            )
        amount_due = invoice.fields.get("AmountDue")
        if amount_due:
            print(
                "Amount Due: {} has confidence: {}".format(
                    amount_due.value, amount_due.confidence
                )
            )
        service_start_date = invoice.fields.get("ServiceStartDate")
        if service_start_date:
            print(
                "Service Start Date: {} has confidence: {}".format(
                    service_start_date.value, service_start_date.confidence
                )
            )
        service_end_date = invoice.fields.get("ServiceEndDate")
        if service_end_date:
            print(
                "Service End Date: {} has confidence: {}".format(
                    service_end_date.value, service_end_date.confidence
                )
            )
        service_address = invoice.fields.get("ServiceAddress")
        if service_address:
            print(
                "Service Address: {} has confidence: {}".format(
                    service_address.value, service_address.confidence
                )
            )
        service_address_recipient = invoice.fields.get("ServiceAddressRecipient")
        if service_address_recipient:
            print(
                "Service Address Recipient: {} has confidence: {}".format(
                    service_address_recipient.value,
                    service_address_recipient.confidence,
                )
            )
        remittance_address = invoice.fields.get("RemittanceAddress")
        if remittance_address:
            print(
                "Remittance Address: {} has confidence: {}".format(
                    remittance_address.value, remittance_address.confidence
                )
            )
        remittance_address_recipient = invoice.fields.get("RemittanceAddressRecipient")
        if remittance_address_recipient:
            print(
                "Remittance Address Recipient: {} has confidence: {}".format(
                    remittance_address_recipient.value,
                    remittance_address_recipient.confidence,
                )
            )


if __name__ == "__main__":
    recognize_invoice()
Run your application
Navigate to the folder where you have your form_recognizer_quickstart.py file.
Type the following command in your terminal:
python form_recognizer_quickstart.py
| Document Intelligence REST API | Azure REST API reference |
In this quickstart, you use the following APIs to extract structured data from forms and documents:
Prerequisites
Azure subscription - Create one for free
cURL installed.
PowerShell version 6.0+, or a similar command-line application.
An Azure AI services or Document Intelligence resource. Once you have your Azure subscription, create a single-service or multi-service Document Intelligence resource in the Azure portal to get your key and endpoint. You can use the free pricing tier (
F0) to try the service, and upgrade later to a paid tier for production.Tip
Create an Azure AI services resource if you plan to access multiple Azure AI services under a single endpoint/key. For Document Intelligence access only, create a Document Intelligence resource. Please note that you'll need a single-service resource if you intend to use Microsoft Entra authentication.
After your resource deploys, select Go to resource. You need the key and endpoint from the resource you create to connect your application to the Document Intelligence API. You paste your key and endpoint into the code later in the quickstart:
Select a code sample to copy and paste into your application:
Important
Remember to remove the key from your code when you're done, and never post it publicly. For production, use a secure way of storing and accessing your credentials like Azure Key Vault. For more information, see Azure AI services security.
Try it: Layout model
- For this example, you'll need a document file at a URI. You can use our sample document for this quickstart.
- Replace
{endpoint}with the endpoint that you obtained with your Document Intelligence subscription. - Replace
{key}with the key you copied from the previous step. - Replace
\"{your-document-url}with a sample document URL:
https://raw.githubusercontent.com/Azure-Samples/cognitive-services-REST-api-samples/master/curl/form-recognizer/sample-layout.pdf
Request
curl -v -i POST "https://{endpoint}/formrecognizer/v2.1/layout/analyze" -H "Content-Type: application/json" -H "Ocp-Apim-Subscription-Key: {key}" --data-ascii "{'urlSource': '{your-document-url}'}"
Operation-Location
You receive a 202 (Success) response that includes an Operation-Location header. The value of this header contains a result ID that you can use to query the status of the asynchronous operation and get the results:
https://cognitiveservice/formrecognizer/v2.1/layout/analyzeResults/{resultId}.
In the following example, as part of the URL, the string after analyzeResults/ is the result ID.
https://cognitiveservice/formrecognizer/v2/layout/analyzeResults/54f0b076-4e38-43e5-81bd-b85b8835fdfb
Get layout results
After you've called the Analyze Layout API, you call the Get Analyze Layout Result API to get the status of the operation and the extracted data. Before you run the command, make these changes:
- Replace
{endpoint}with the endpoint that you obtained with your Document Intelligence subscription. - Replace
{key}with the key you copied from the previous step. - Replace
{resultId}with the result ID from the previous step.
Request
curl -v -X GET "https://{endpoint}/formrecognizer/v2.1/layout/analyzeResults/{resultId}" -H "Ocp-Apim-Subscription-Key: {key}"
Examine the results
You receive a 200 (success) response with JSON content.
See the following invoice image and its corresponding JSON output.
- The
"readResults"node contains every line of text with its respective bounding box placement on the page. - The
selectionMarksnode shows every selection mark (checkbox, radio mark) and whether its status isselectedorunselected. - The
"pageResults"section includes the tables extracted. For each table, the text, row, and column index, row and column spanning, bounding box, and more are extracted.
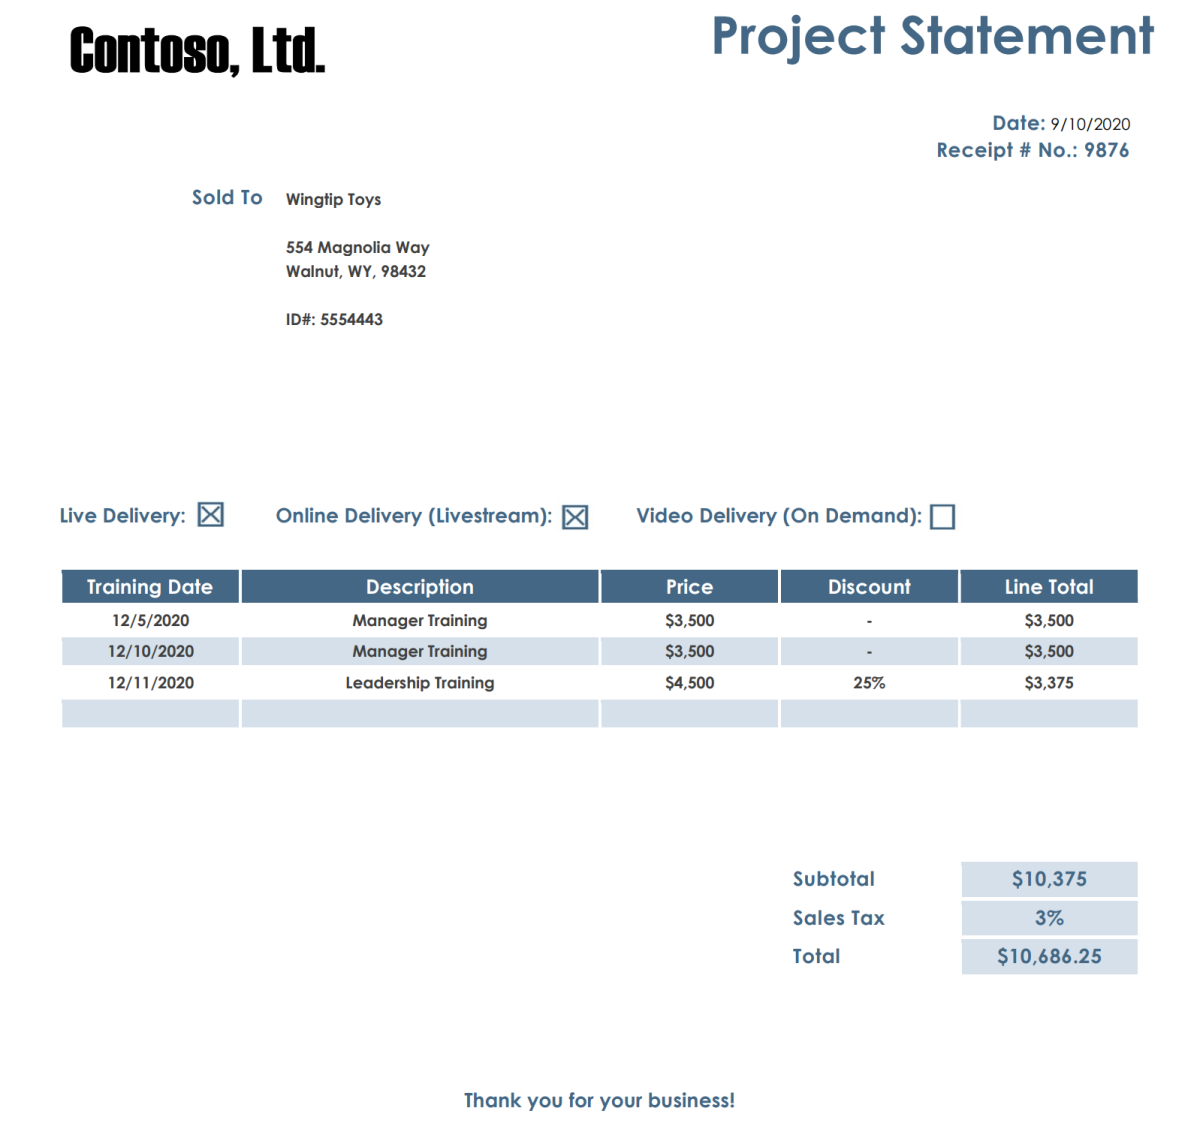
Response body
You can view the full sample output on GitHub.
Try it: Prebuilt model
- For this example, we wll analyze an invoice document using a prebuilt model. You can use our sample invoice document for this quickstart.
Choose a prebuilt model
You aren't limited to invoices—there are several prebuilt models to choose from, each of which has its own set of supported fields. The model to use for the analyze operation depends on the type of document to be analyzed. Here are the prebuilt models currently supported by the Document Intelligence service:
- Invoice: extracts text, selection marks, tables, fields, and key information from invoices.
- Receipt: extracts text and key information from receipts.
- ID document: extracts text and key information from driver licenses and international passports.
- Business-card: extracts text and key information from business cards.
Before you run the command, make these changes:
Replace
{endpoint}with the endpoint that you obtained with your Document Intelligence subscription.Replace
{key}with the key you copied from the previous step.Replace
\"{your-document-url}with a sample invoice URL:https://raw.githubusercontent.com/Azure-Samples/cognitive-services-REST-api-samples/master/curl/form-recognizer/sample-invoice.pdf
Request
curl -v -i POST https://{endpoint}/formrecognizer/v2.1/prebuilt/invoice/analyze" -H "Content-Type: application/json" -H "Ocp-Apim-Subscription-Key: {key}" --data-ascii "{'urlSource': '{your invoice URL}'}"
Operation-Location
You receive a 202 (Success) response that includes an Operation-Location header. The value of this header contains a result ID that you can use to query the status of the asynchronous operation and get the results:
https://cognitiveservice/formrecognizer/v2.1/prebuilt/receipt/analyzeResults/{resultId}
In the following example, as part of the URL, the string after analyzeResults/ is the result ID:
https://cognitiveservice/formrecognizer/v2.1/prebuilt/invoice/analyzeResults/54f0b076-4e38-43e5-81bd-b85b8835fdfb
Get invoice results
After you've called the Analyze Invoice API, you call the Get Analyze Invoice Result API to get the status of the operation and the extracted data. Before you run the command, make these changes:
- Replace
{endpoint}with the endpoint that you obtained with your Document Intelligence key. You can find it on your Document Intelligence resource Overview tab. - Replace
{resultId}with the result ID from the previous step. - Replace
{key}with your key.
Request
curl -v -X GET "https://{endpoint}/formrecognizer/v2.1/prebuilt/invoice/analyzeResults/{resultId}" -H "Ocp-Apim-Subscription-Key: {key}"
Examine the response
You receive a 200 (Success) response with JSON output.
- The
"readResults"field contains every line of text that was extracted from the invoice. - The
"pageResults"includes the tables and selections marks extracted from the invoice. - The
"documentResults"field contains key/value information for the most relevant parts of the invoice.
See the Sample invoice document.
Response body
See the full sample output on GitHub.
That's it, well done!
Next steps
For an enhanced experience and advanced model quality, try the Document Intelligence Studio.
The Studio supports any model trained with v2.1 labeled data.
The changelogs provide detailed information about migrating from v3.1 to v4.0.
Feedback
Coming soon: Throughout 2024 we will be phasing out GitHub Issues as the feedback mechanism for content and replacing it with a new feedback system. For more information see: https://aka.ms/ContentUserFeedback.
Submit and view feedback for