Use managed identities to access App Configuration
Microsoft Entra managed identities simplify secrets management for your cloud application. With a managed identity, your code can use the service principal created for the Azure service it runs on. You use a managed identity instead of a separate credential stored in Azure Key Vault or a local connection string.
Azure App Configuration and its .NET, .NET Framework, and Java Spring client libraries have managed identity support built into them. Although you aren't required to use it, the managed identity eliminates the need for an access token that contains secrets. Your code can access the App Configuration store using only the service endpoint. You can embed this URL in your code directly without exposing any secret.
This article shows how you can take advantage of the managed identity to access App Configuration. It builds on the web app introduced in the quickstarts. Before you continue, Create an ASP.NET Core app with App Configuration first.
This article shows how you can take advantage of the managed identity to access App Configuration. It builds on the web app introduced in the quickstarts. Before you continue, Create a Java Spring app with Azure App Configuration first.
Important
Managed identity can't be used to authenticate locally running applications. Your application must be deployed to an Azure service that supports Managed Identity. This article uses Azure App Service as an example. However, the same concept applies to any other Azure service that supports managed identity. For example, Azure Kubernetes Service, Azure Virtual Machine, and Azure Container Instances. If your workload is hosted in one of those services, you can also leverage the service's managed identity support.
You can use any code editor to do the steps in this tutorial. Visual Studio Code is an excellent option available on the Windows, macOS, and Linux platforms.
In this article, you learn how to:
- Grant a managed identity access to App Configuration.
- Configure your app to use a managed identity when you connect to App Configuration.
Prerequisites
To complete this tutorial, you must have:
- An Azure account with an active subscription. Create one for free.
- An Azure App Configuration store. Create a store.
- .NET SDK 6.0 or later.
- An Azure account with an active subscription. Create one for free.
- An Azure App Configuration store. Create a store.
- A supported Java Development Kit (JDK) with version 11.
- Apache Maven version 3.0 or above.
If you don't have an Azure subscription, create an Azure free account before you begin.
Add a managed identity
To set up a managed identity in the portal, you first create an application and then enable the feature.
Access your App Services resource in the Azure portal. If you don't have an existing App Services resource to use, create one.
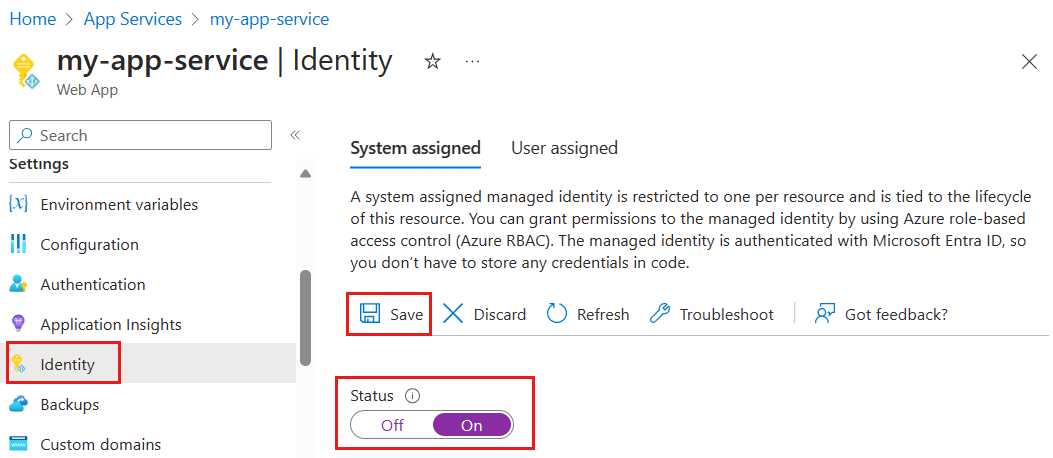
Scroll down to the Settings group in the left pane, and select Identity.
On the System assigned tab, switch Status to On and select Save.
When prompted, answer Yes to turn on the system-assigned managed identity.
Grant access to App Configuration
The following steps describe how to assign the App Configuration Data Reader role to App Service. For detailed steps, see Assign Azure roles using the Azure portal.
In the Azure portal, select your App Configuration store.
Select Access control (IAM).
Select Add > Add role assignment.
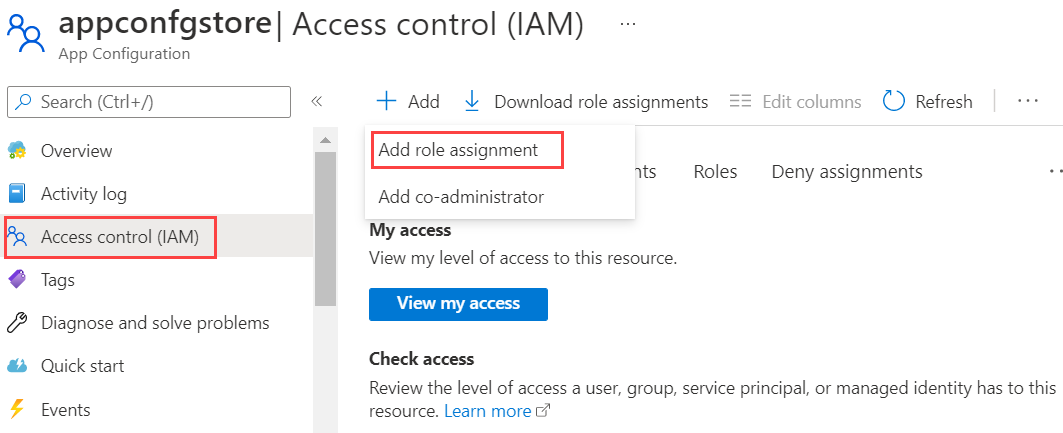
If you don't have permission to assign roles, then the Add role assignment option will be disabled. For more information, see Azure built-in roles.
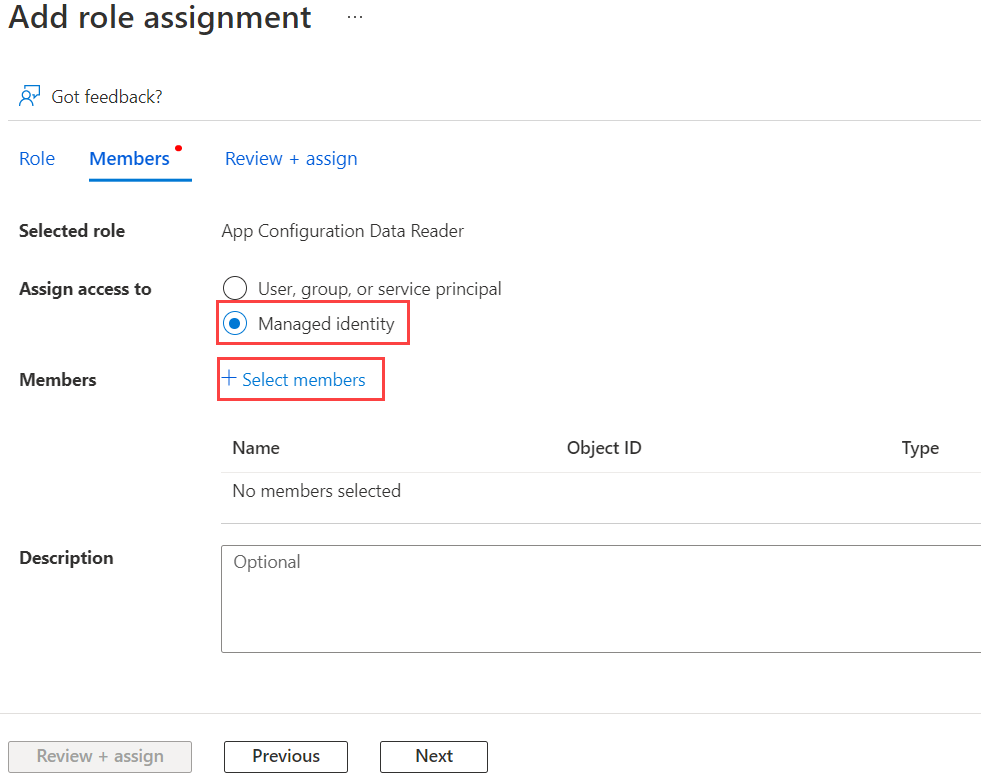
On the Role tab, select the App Configuration Data Reader role and then select Next.

On the Members tab, select Managed identity and then select Select members.
Select your Azure subscription, for Managed identity select App Service, then select your App Service name.
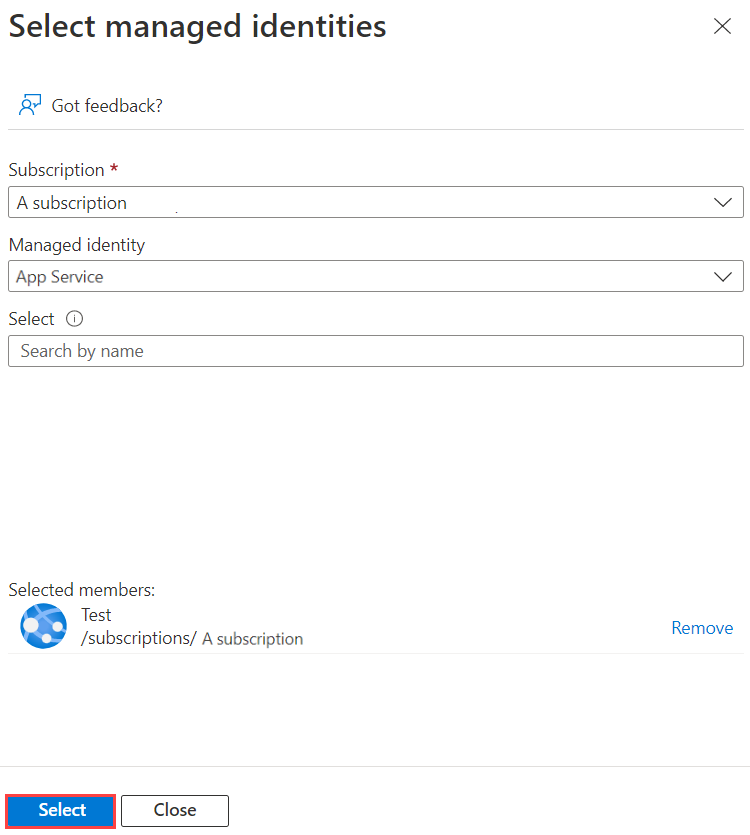
On the Review + assign tab, select Review + assign to assign the role.
Use a managed identity
Add a reference to the
Azure.Identitypackage:dotnet add package Azure.IdentityFind the endpoint to your App Configuration store. This URL is listed on the Access keys tab for the store in the Azure portal.
Open the appsettings.json file and add the following script. Replace <service_endpoint>, including the brackets, with the URL to your App Configuration store.
"AppConfig": {
    "Endpoint": "<service_endpoint>"
}
Open the Program.cs file and add a reference to the
Azure.IdentityandMicrosoft.Azure.Services.AppAuthenticationnamespaces:using Azure.Identity;To access values stored in App Configuration, update the
Builderconfiguration to use theAddAzureAppConfiguration()method.var builder = WebApplication.CreateBuilder(args); builder.Configuration.AddAzureAppConfiguration(options => options.Connect( new Uri(builder.Configuration["AppConfig:Endpoint"]), new ManagedIdentityCredential()));Note
If you want to use a user-assigned managed identity, be sure to specify the
clientIdwhen creating the ManagedIdentityCredential.new ManagedIdentityCredential("<your_clientId>")As explained in the Managed Identities for Azure resources FAQs, there is a default way to resolve which managed identity is used. In this case, the Azure Identity library enforces you to specify the desired identity to avoid possible runtime issues in the future. For instance, if a new user-assigned managed identity is added or if the system-assigned managed identity is enabled. So, you will need to specify the
clientIdeven if only one user-assigned managed identity is defined, and there is no system-assigned managed identity.
Find the endpoint to your App Configuration store. This URL is listed on the Overview tab for the store in the Azure portal.
Open
bootstrap.properties, remove the connection-string property and replace it with endpoint for System Assigned Identity:
spring.cloud.azure.appconfiguration.stores[0].endpoint=<service_endpoint>
for User Assigned Identity:
spring.cloud.azure.appconfiguration.stores[0].endpoint=<service_endpoint>
spring.cloud.azure.credential.managed-identity-enabled= true
spring.cloud.azure.credential.client-id= <client_id>
Note
For more information see Spring Cloud Azure authentication.
Deploy your application
You must deploy your app to an Azure service when you use managed identities. Managed identities can't be used for authentication of locally running apps. To deploy the .NET Core app that you created in the Create an ASP.NET Core app with App Configuration quickstart and modified to use managed identities, follow the guidance in Publish your web app.
Using managed identities requires you to deploy your app to an Azure service. Managed identities can't be used for authentication of locally running apps. To deploy the Spring app that you created in the Create a Java Spring app with Azure App Configuration quickstart and modified to use managed identities, follow the guidance in Publish your web app.
In addition to App Service, many other Azure services support managed identities. For more information, see Services that support managed identities for Azure resources.
Clean up resources
If you don't want to continue using the resources created in this article, delete the resource group you created here to avoid charges.
Important
Deleting a resource group is irreversible. The resource group and all the resources in it are permanently deleted. Ensure that you don't accidentally delete the wrong resource group or resources. If you created the resources for this article inside a resource group that contains other resources you want to keep, delete each resource individually from its respective pane instead of deleting the resource group.
- Sign in to the Azure portal, and select Resource groups.
- In the Filter by name box, enter the name of your resource group.
- In the result list, select the resource group name to see an overview.
- Select Delete resource group.
- You're asked to confirm the deletion of the resource group. Enter the name of your resource group to confirm, and select Delete.
After a few moments, the resource group and all its resources are deleted.
Next steps
In this tutorial, you added an Azure managed identity to streamline access to App Configuration and improve credential management for your app. To learn more about how to use App Configuration, continue to the Azure CLI samples.
Feedback
Coming soon: Throughout 2024 we will be phasing out GitHub Issues as the feedback mechanism for content and replacing it with a new feedback system. For more information see: https://aka.ms/ContentUserFeedback.
Submit and view feedback for