Create a custom Image Analysis model (preview)
Image Analysis 4.0 allows you to train a custom model using your own training images. By manually labeling your images, you can train a model to apply custom tags to the images (image classification) or detect custom objects (object detection). Image Analysis 4.0 models are especially effective at few-shot learning, so you can get accurate models with less training data.
This guide shows you how to create and train a custom image classification model. The few differences between training an image classification model and object detection model are noted.
Prerequisites
- Azure subscription - Create one for free
- Once you have your Azure subscription, create a Vision resource in the Azure portal to get your key and endpoint. If you're following this guide using Vision Studio, you must create your resource in the East US region. After it deploys, select Go to resource. Copy the key and endpoint to a temporary location to use later on.
- An Azure Storage resource - Create one
- A set of images with which to train your classification model. You can use the set of sample images on GitHub. Or, you can use your own images. You only need about 3-5 images per class.
Note
We do not recommend you use custom models for business critical environments due to potential high latency. When customers train custom models in Vision Studio, those custom models belong to the Vision resource that they were trained under and the customer is able to make calls to those models using the Analyze Image API. When they make these calls, the custom model is loaded in memory and the prediction infrastructure is initialized. While this happens, customers might experience longer than expected latency to receive prediction results.
Create a new custom model
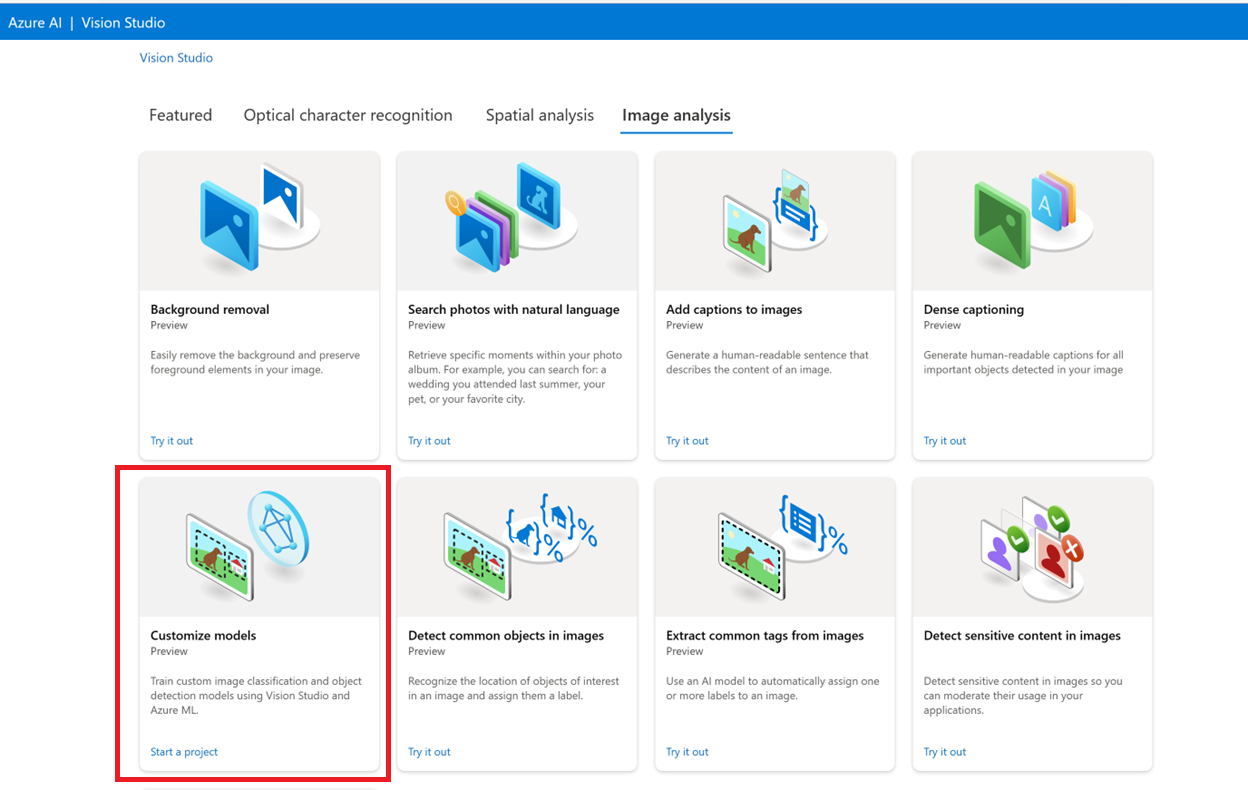
Begin by going to Vision Studio and selecting the Image analysis tab. Then select the Customize models tile.
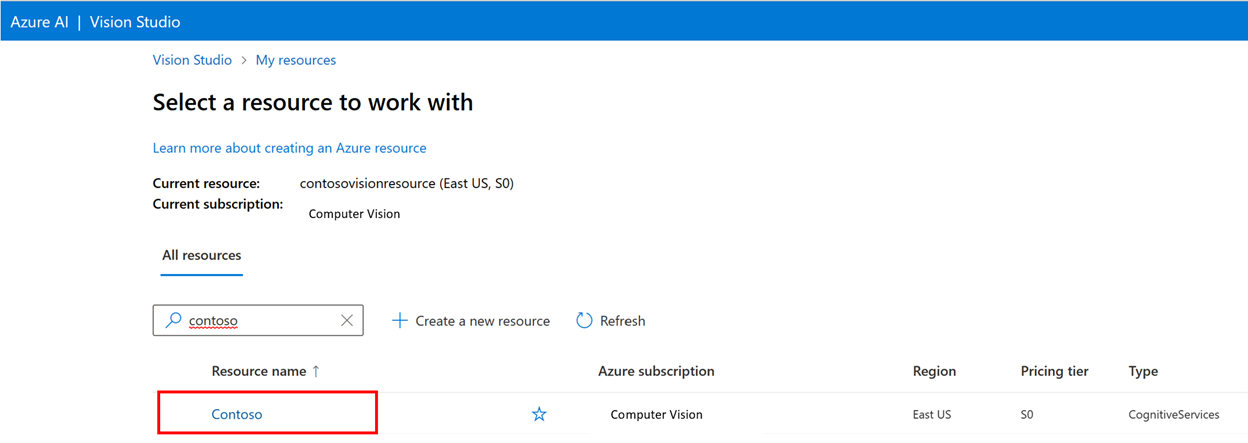
Then, sign in with your Azure account and select your Vision resource. If you don't have one, you can create one from this screen.
Important
To train a custom model in Vision Studio, your Azure subscription needs to be approved for access. Please request access using this form.
Prepare training images
You need to upload your training images to an Azure Blob Storage container. Go to your storage resource in the Azure portal and navigate to the Storage browser tab. Here you can create a blob container and upload your images. Put them all at the root of the container.
Add a dataset
To train a custom model, you need to associate it with a Dataset where you provide images and their label information as training data. In Vision Studio, select the Datasets tab to view your datasets.
To create a new dataset, select add new dataset. In the popup window, enter a name and select a dataset type for your use case. Image classification models apply content labels to the entire image, while Object detection models apply object labels to specific locations in the image. Product recognition models are a subcategory of object detection models that are optimized for detecting retail products.
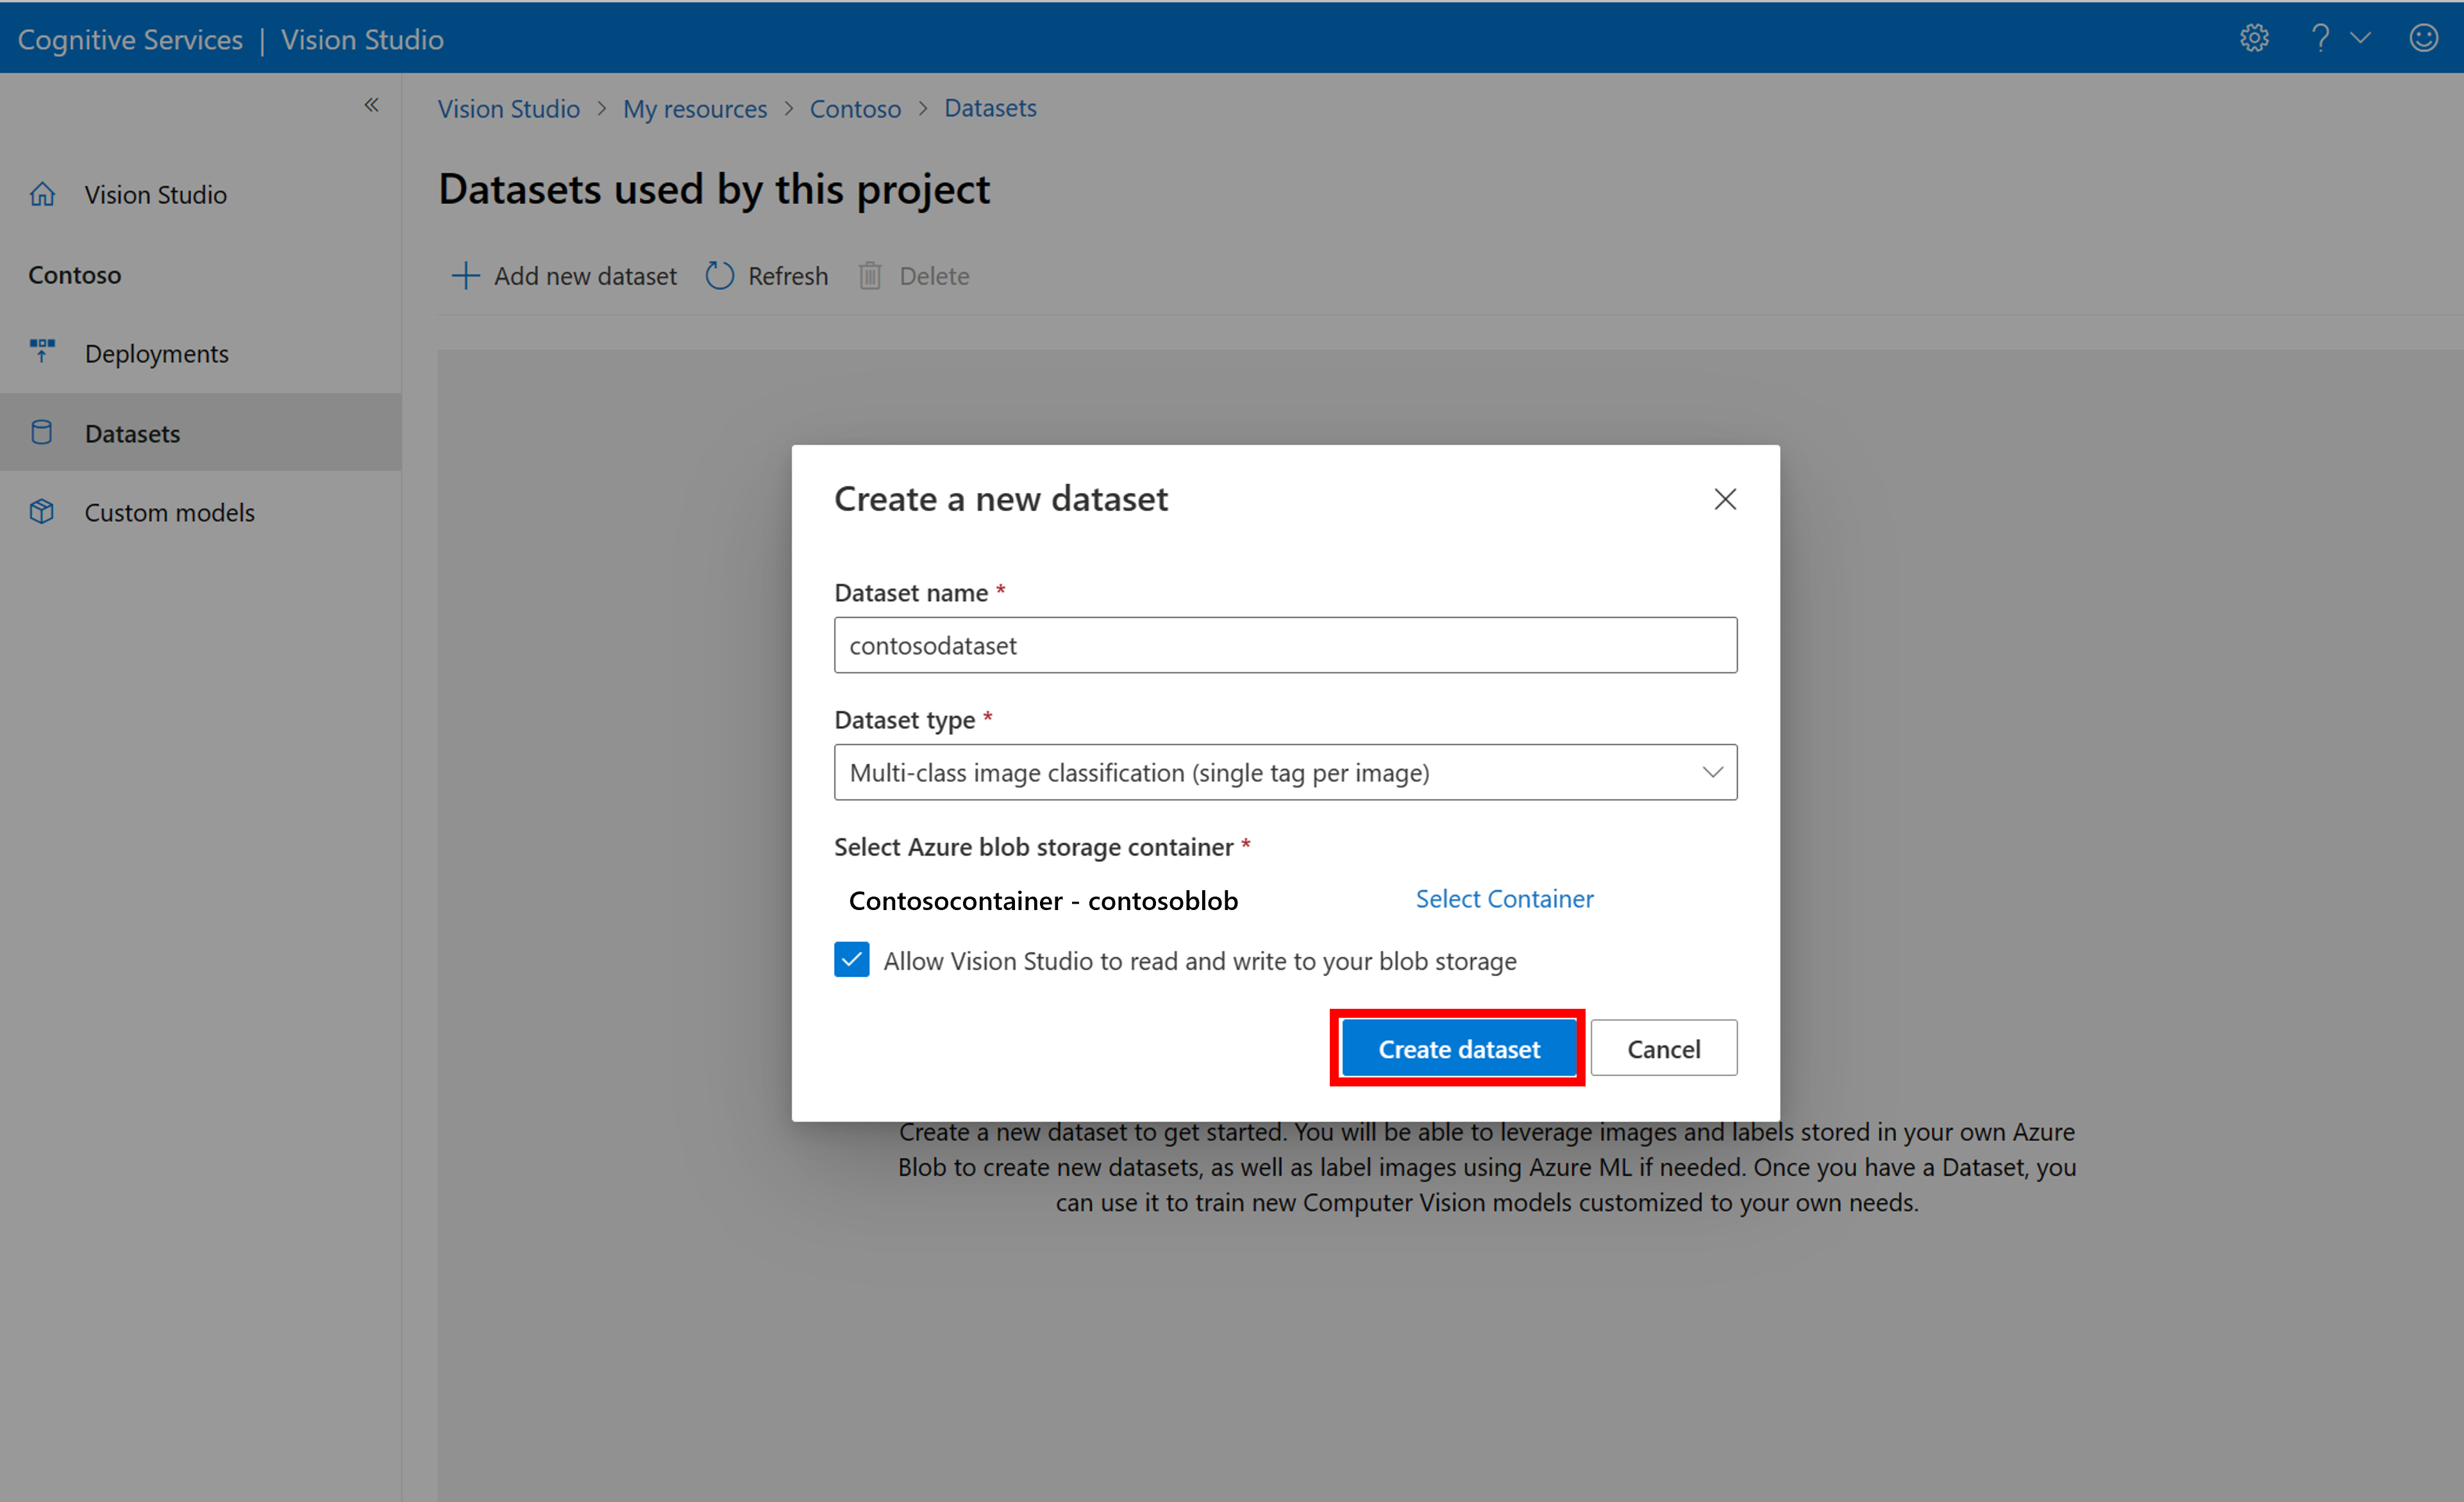
Then, select the container from the Azure Blob Storage account where you stored the training images. Check the box to allow Vision Studio to read and write to the blob storage container. This is a necessary step to import labeled data. Create the dataset.
Create an Azure Machine Learning labeling project
You need a COCO file to convey the labeling information. An easy way to generate a COCO file is to create an Azure Machine Learning project, which comes with a data-labeling workflow.
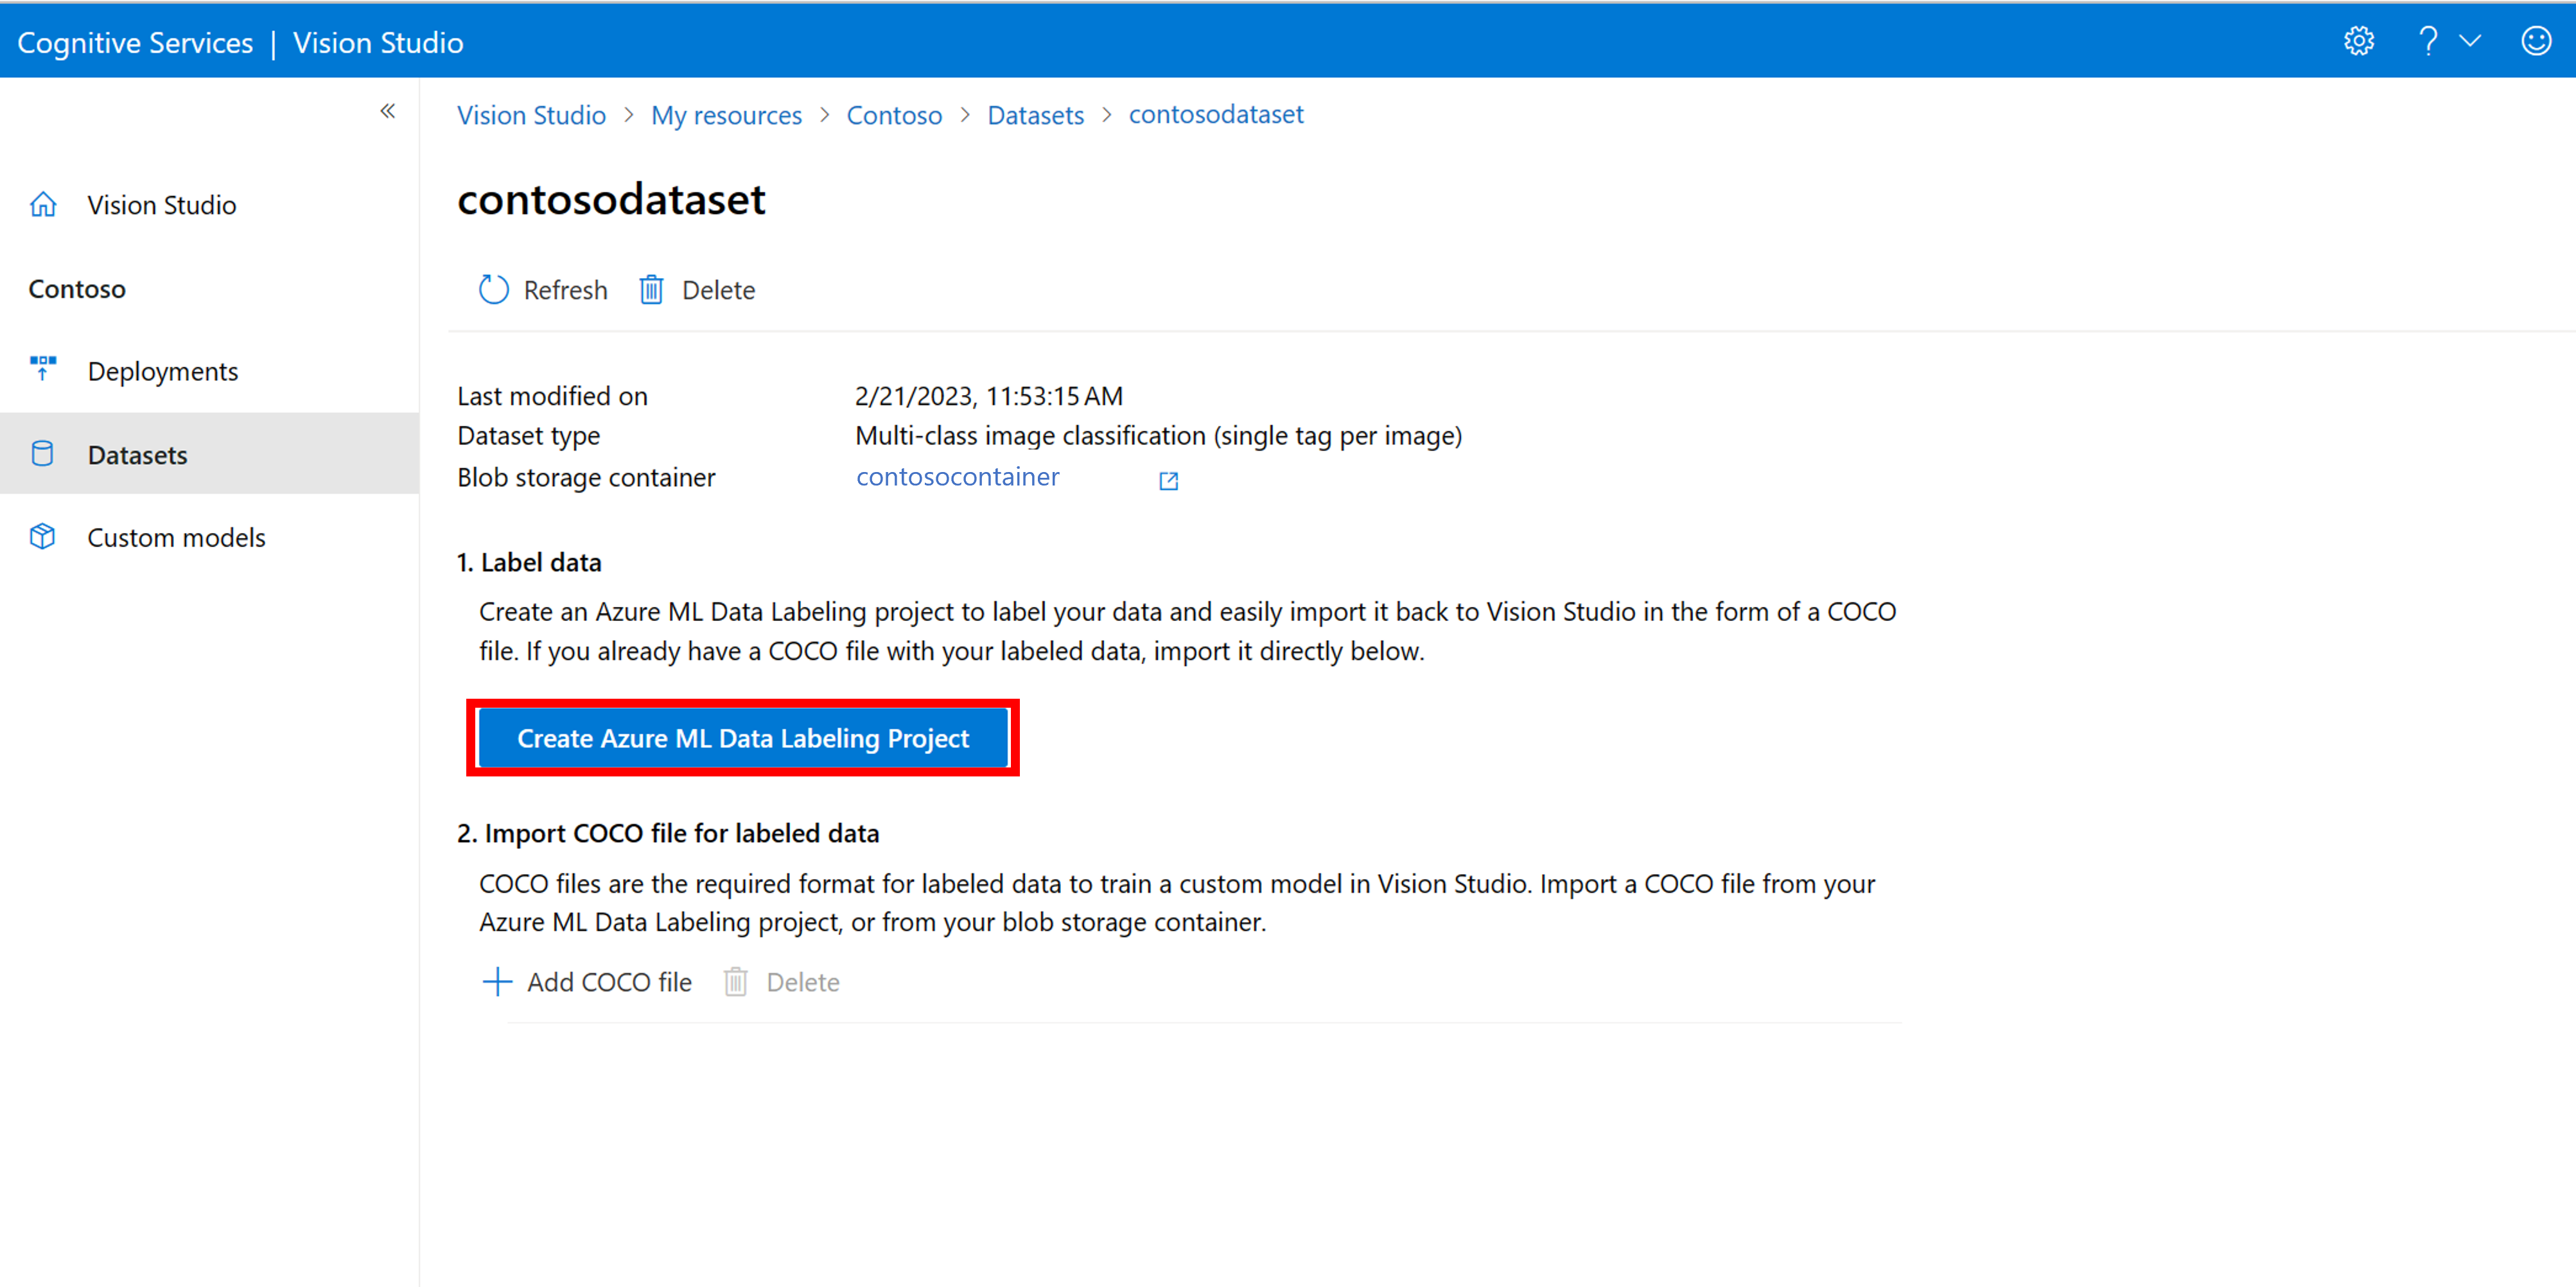
In the dataset details page, select Add a new Data Labeling project. Name it and select Create a new workspace. That opens a new Azure portal tab where you can create the Azure Machine Learning project.
Once the Azure Machine Learning project is created, return to the Vision Studio tab and select it under Workspace. The Azure Machine Learning portal will then open in a new browser tab.
Azure Machine Learning: Create labels
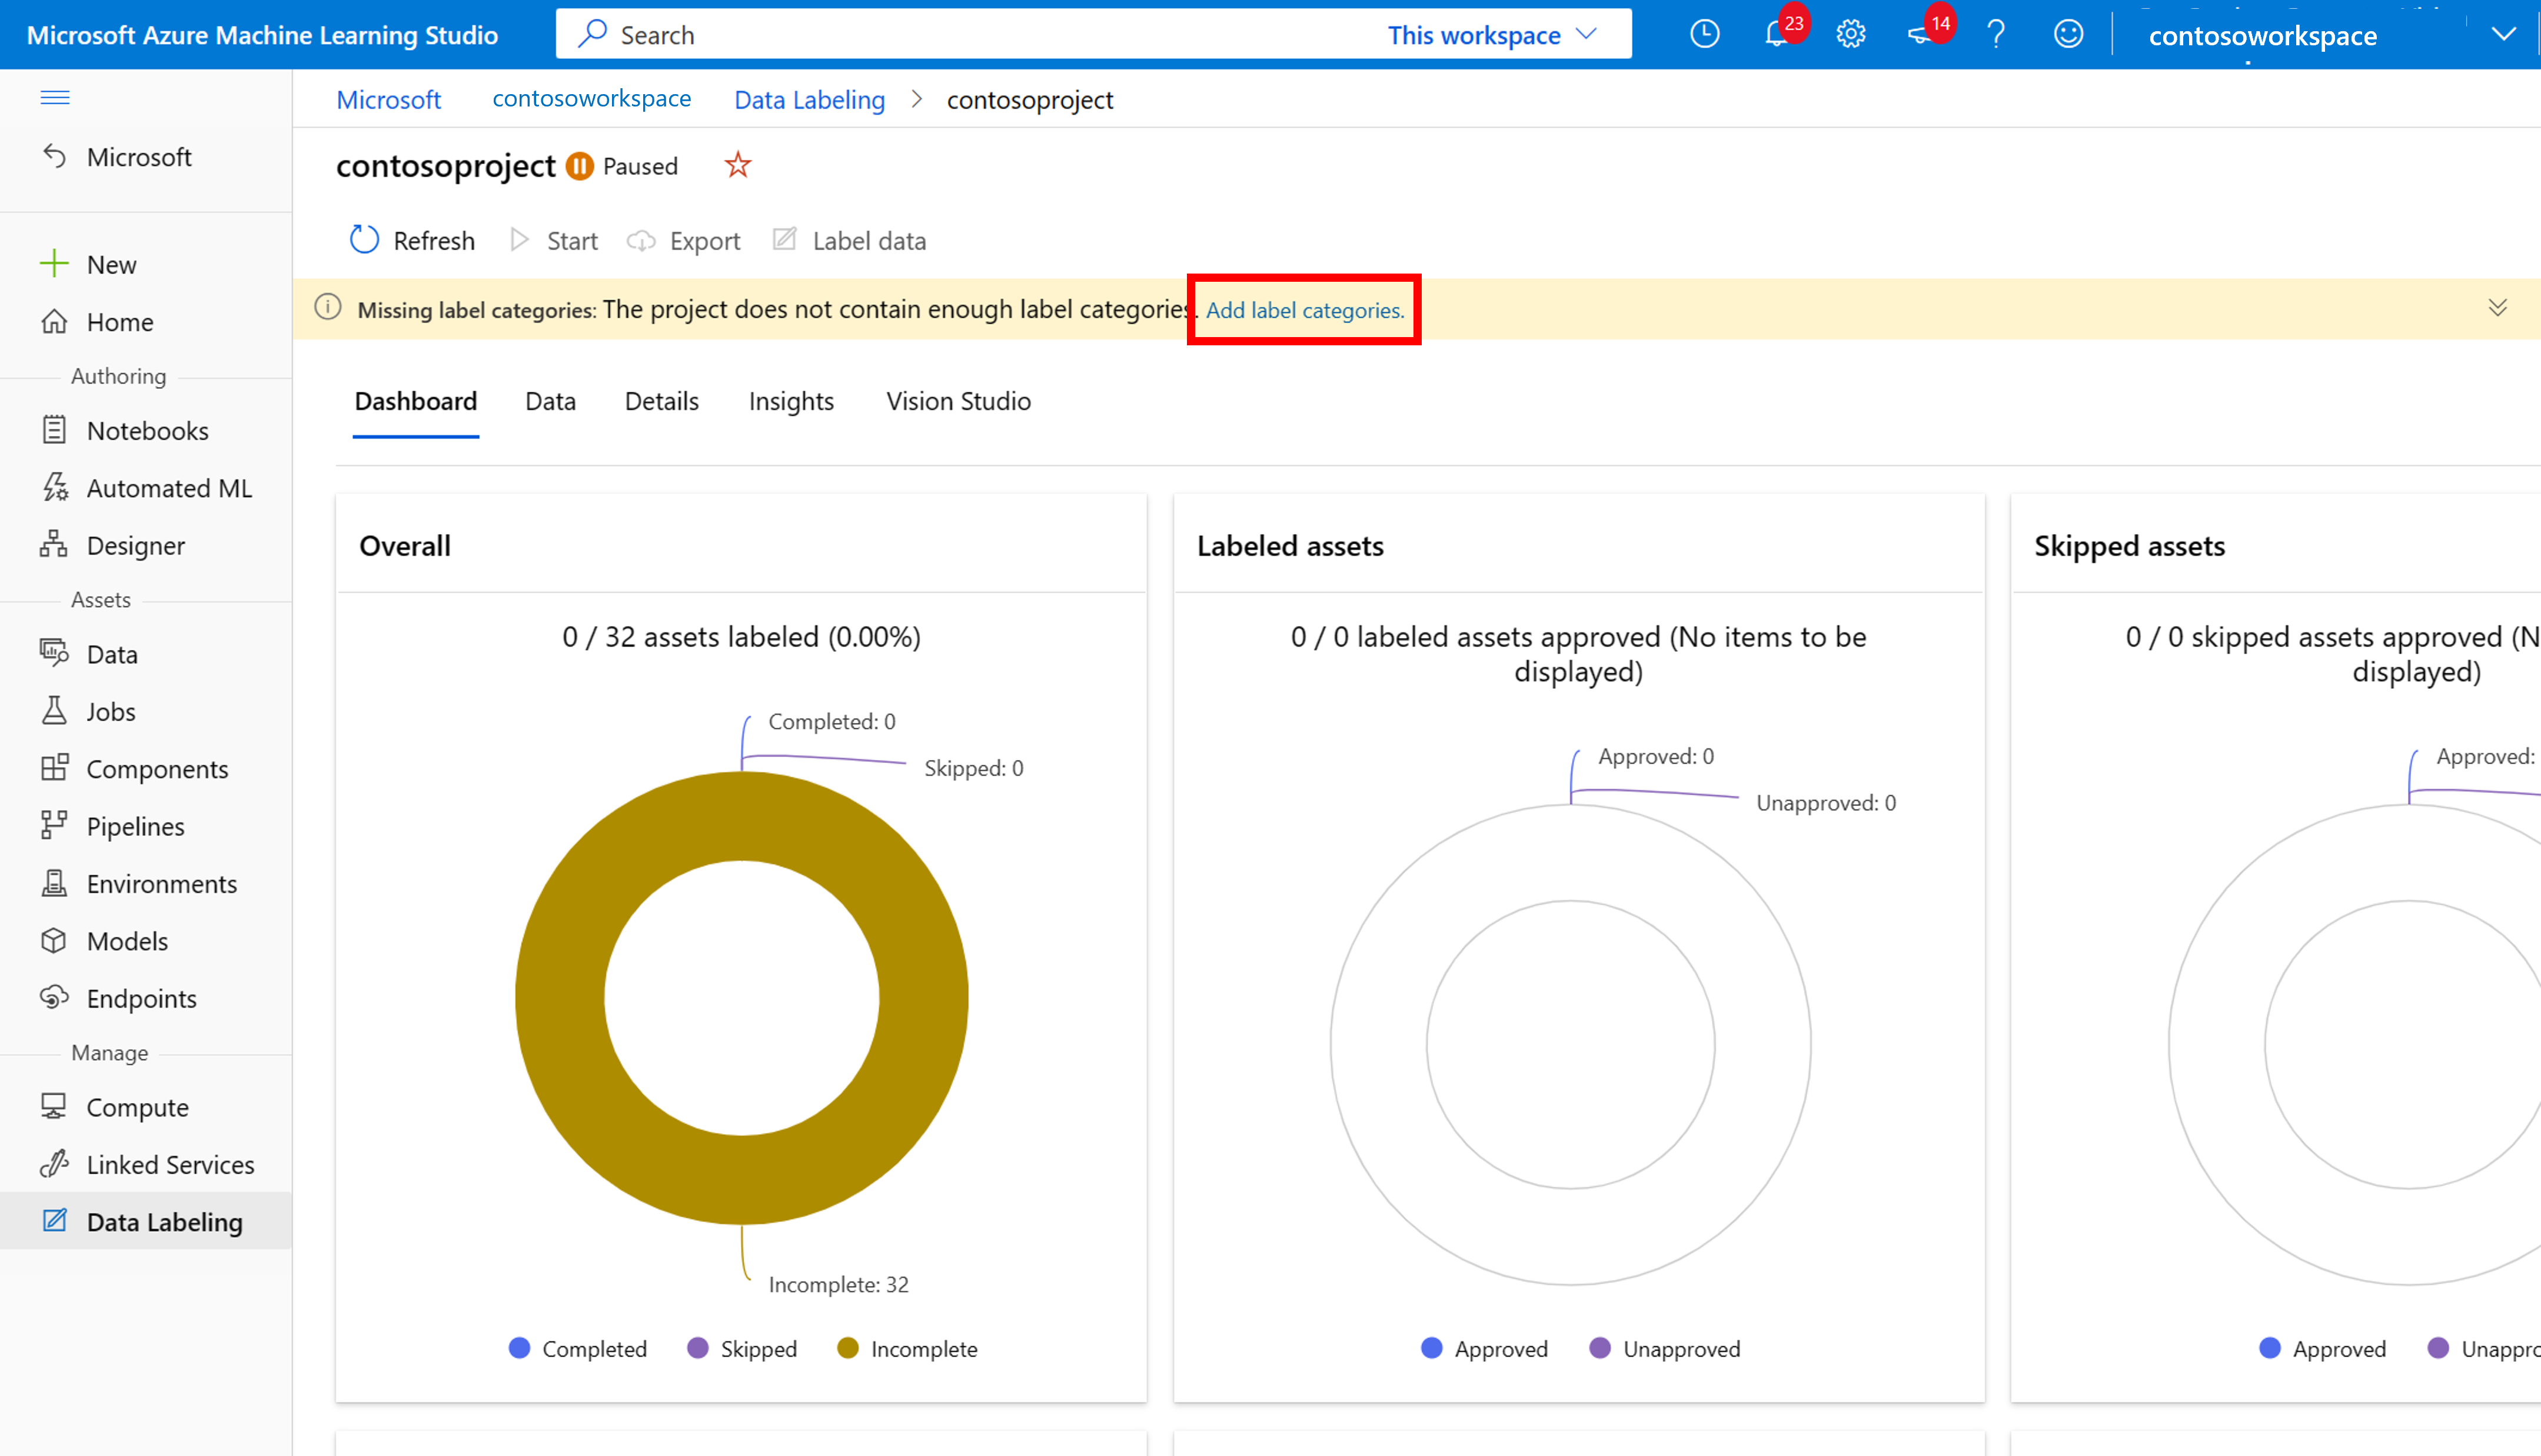
To start labeling, follow the Please add label classes prompt to add label classes.
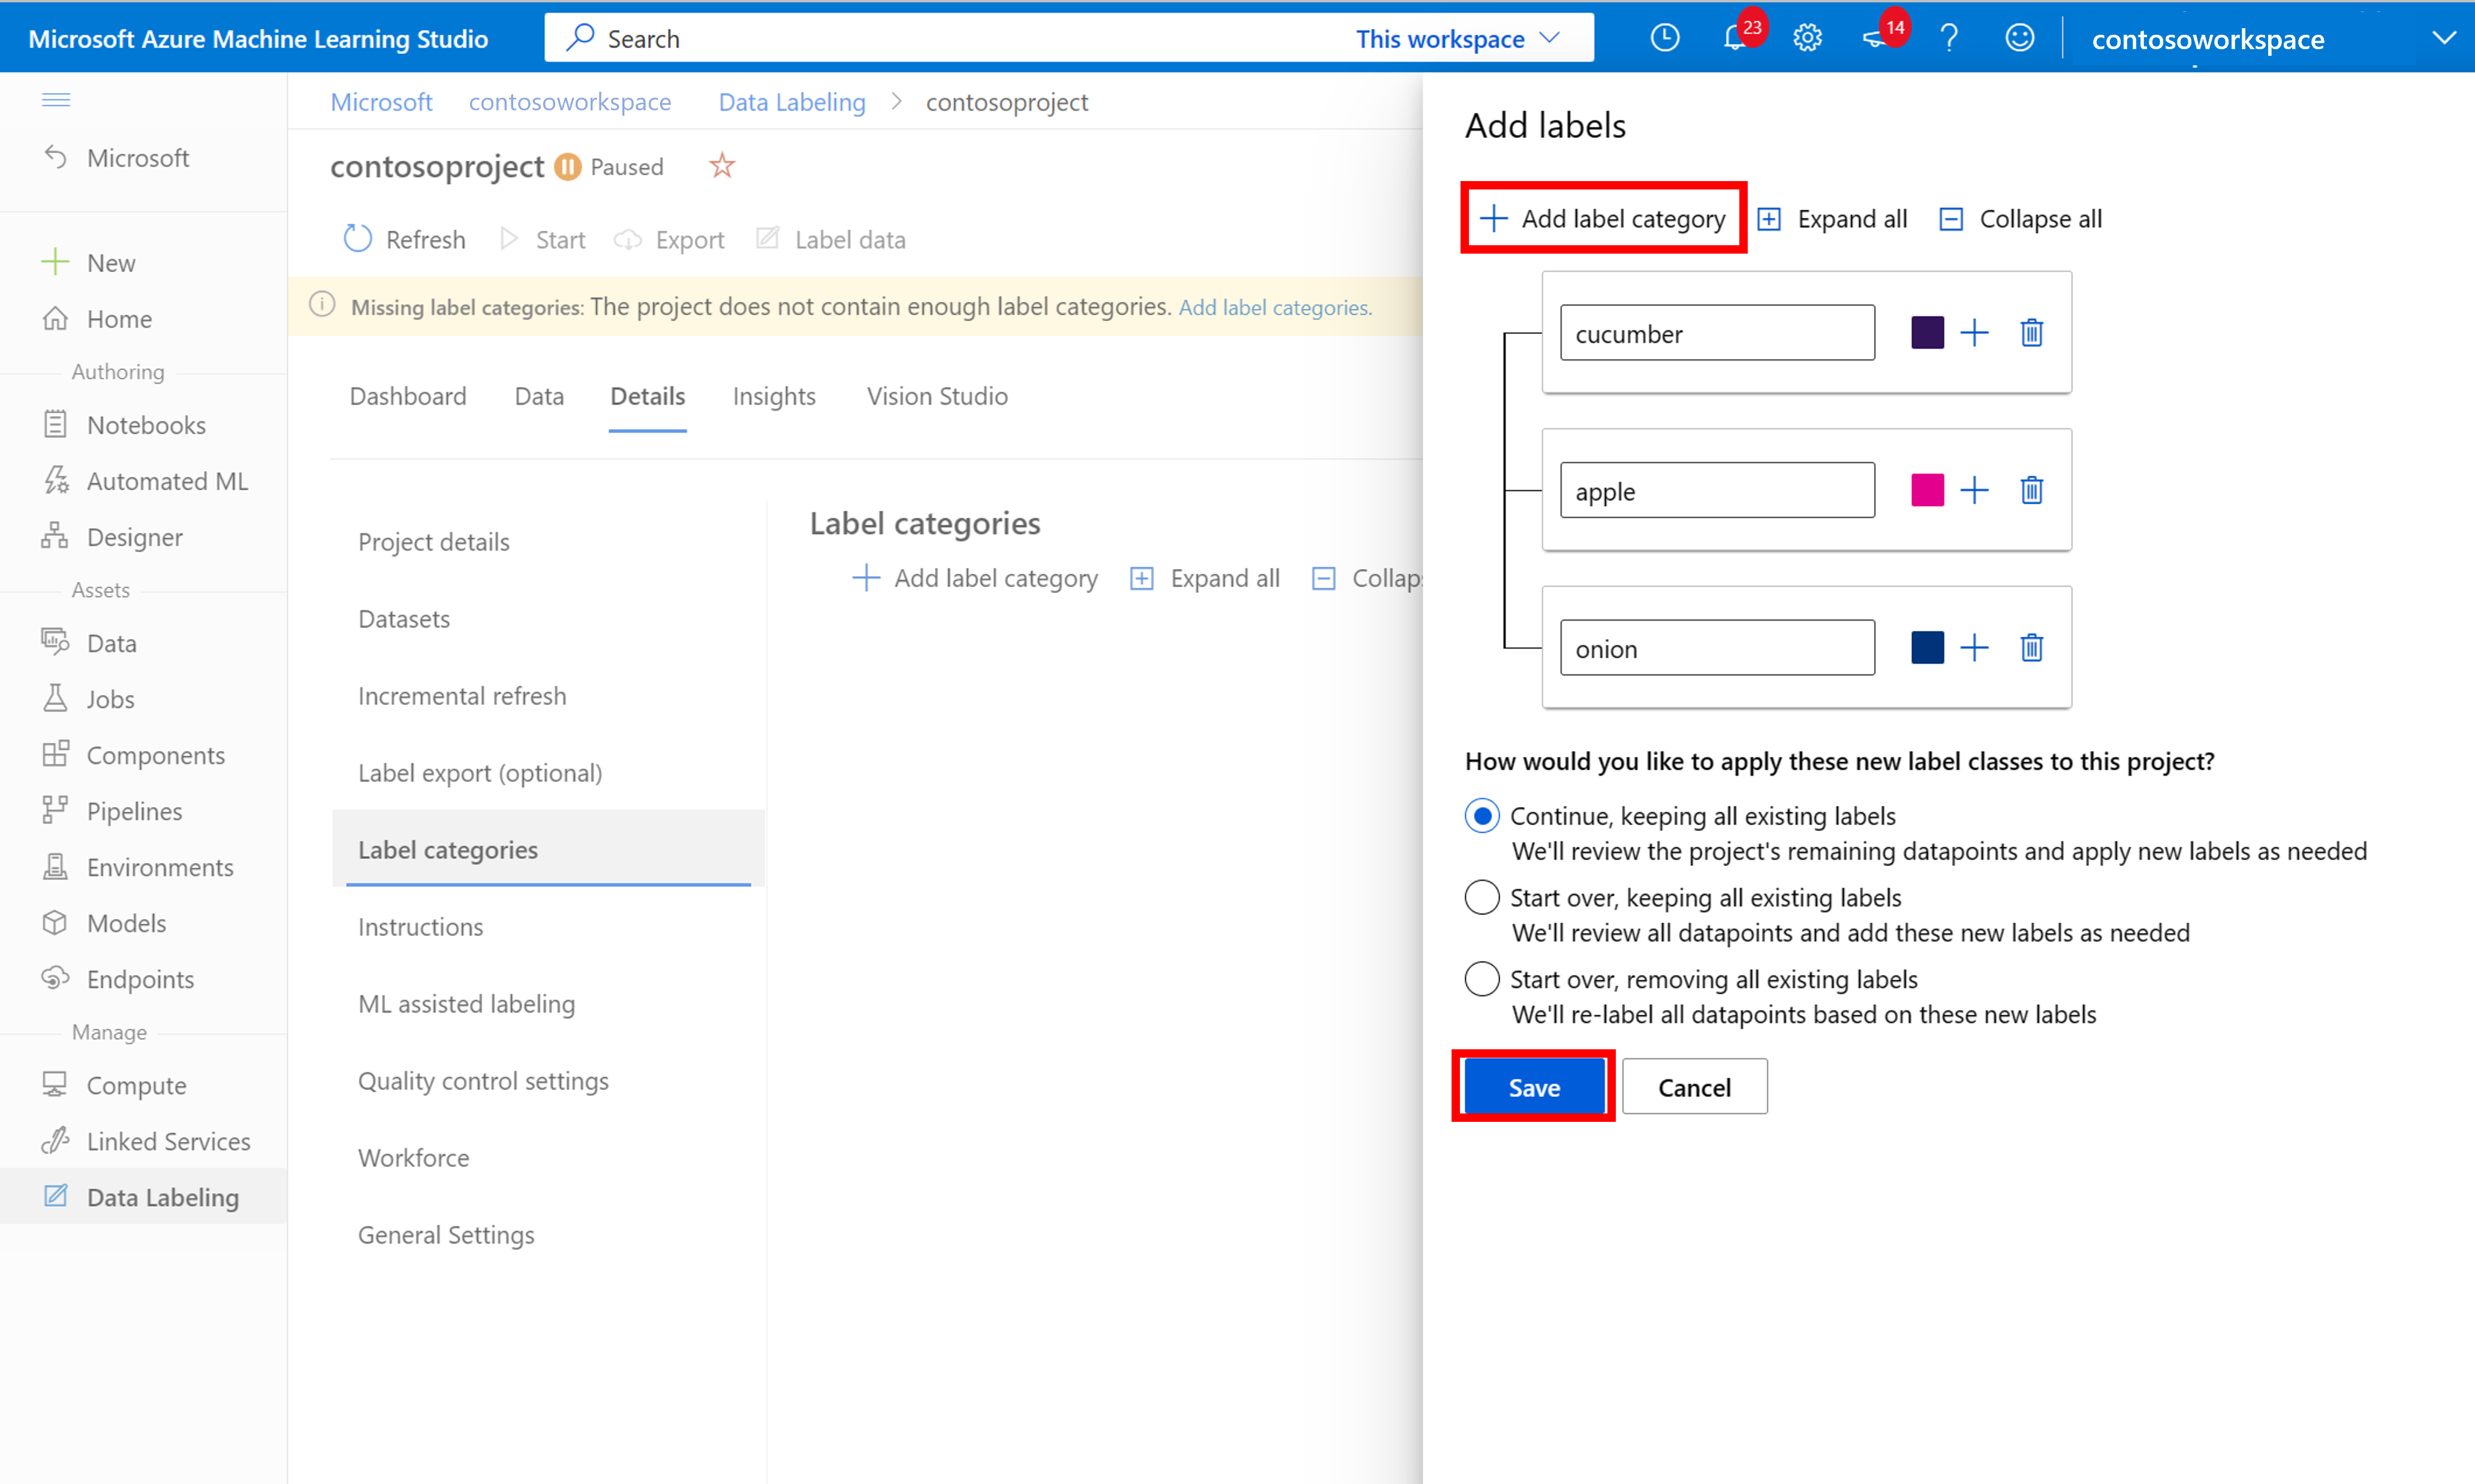
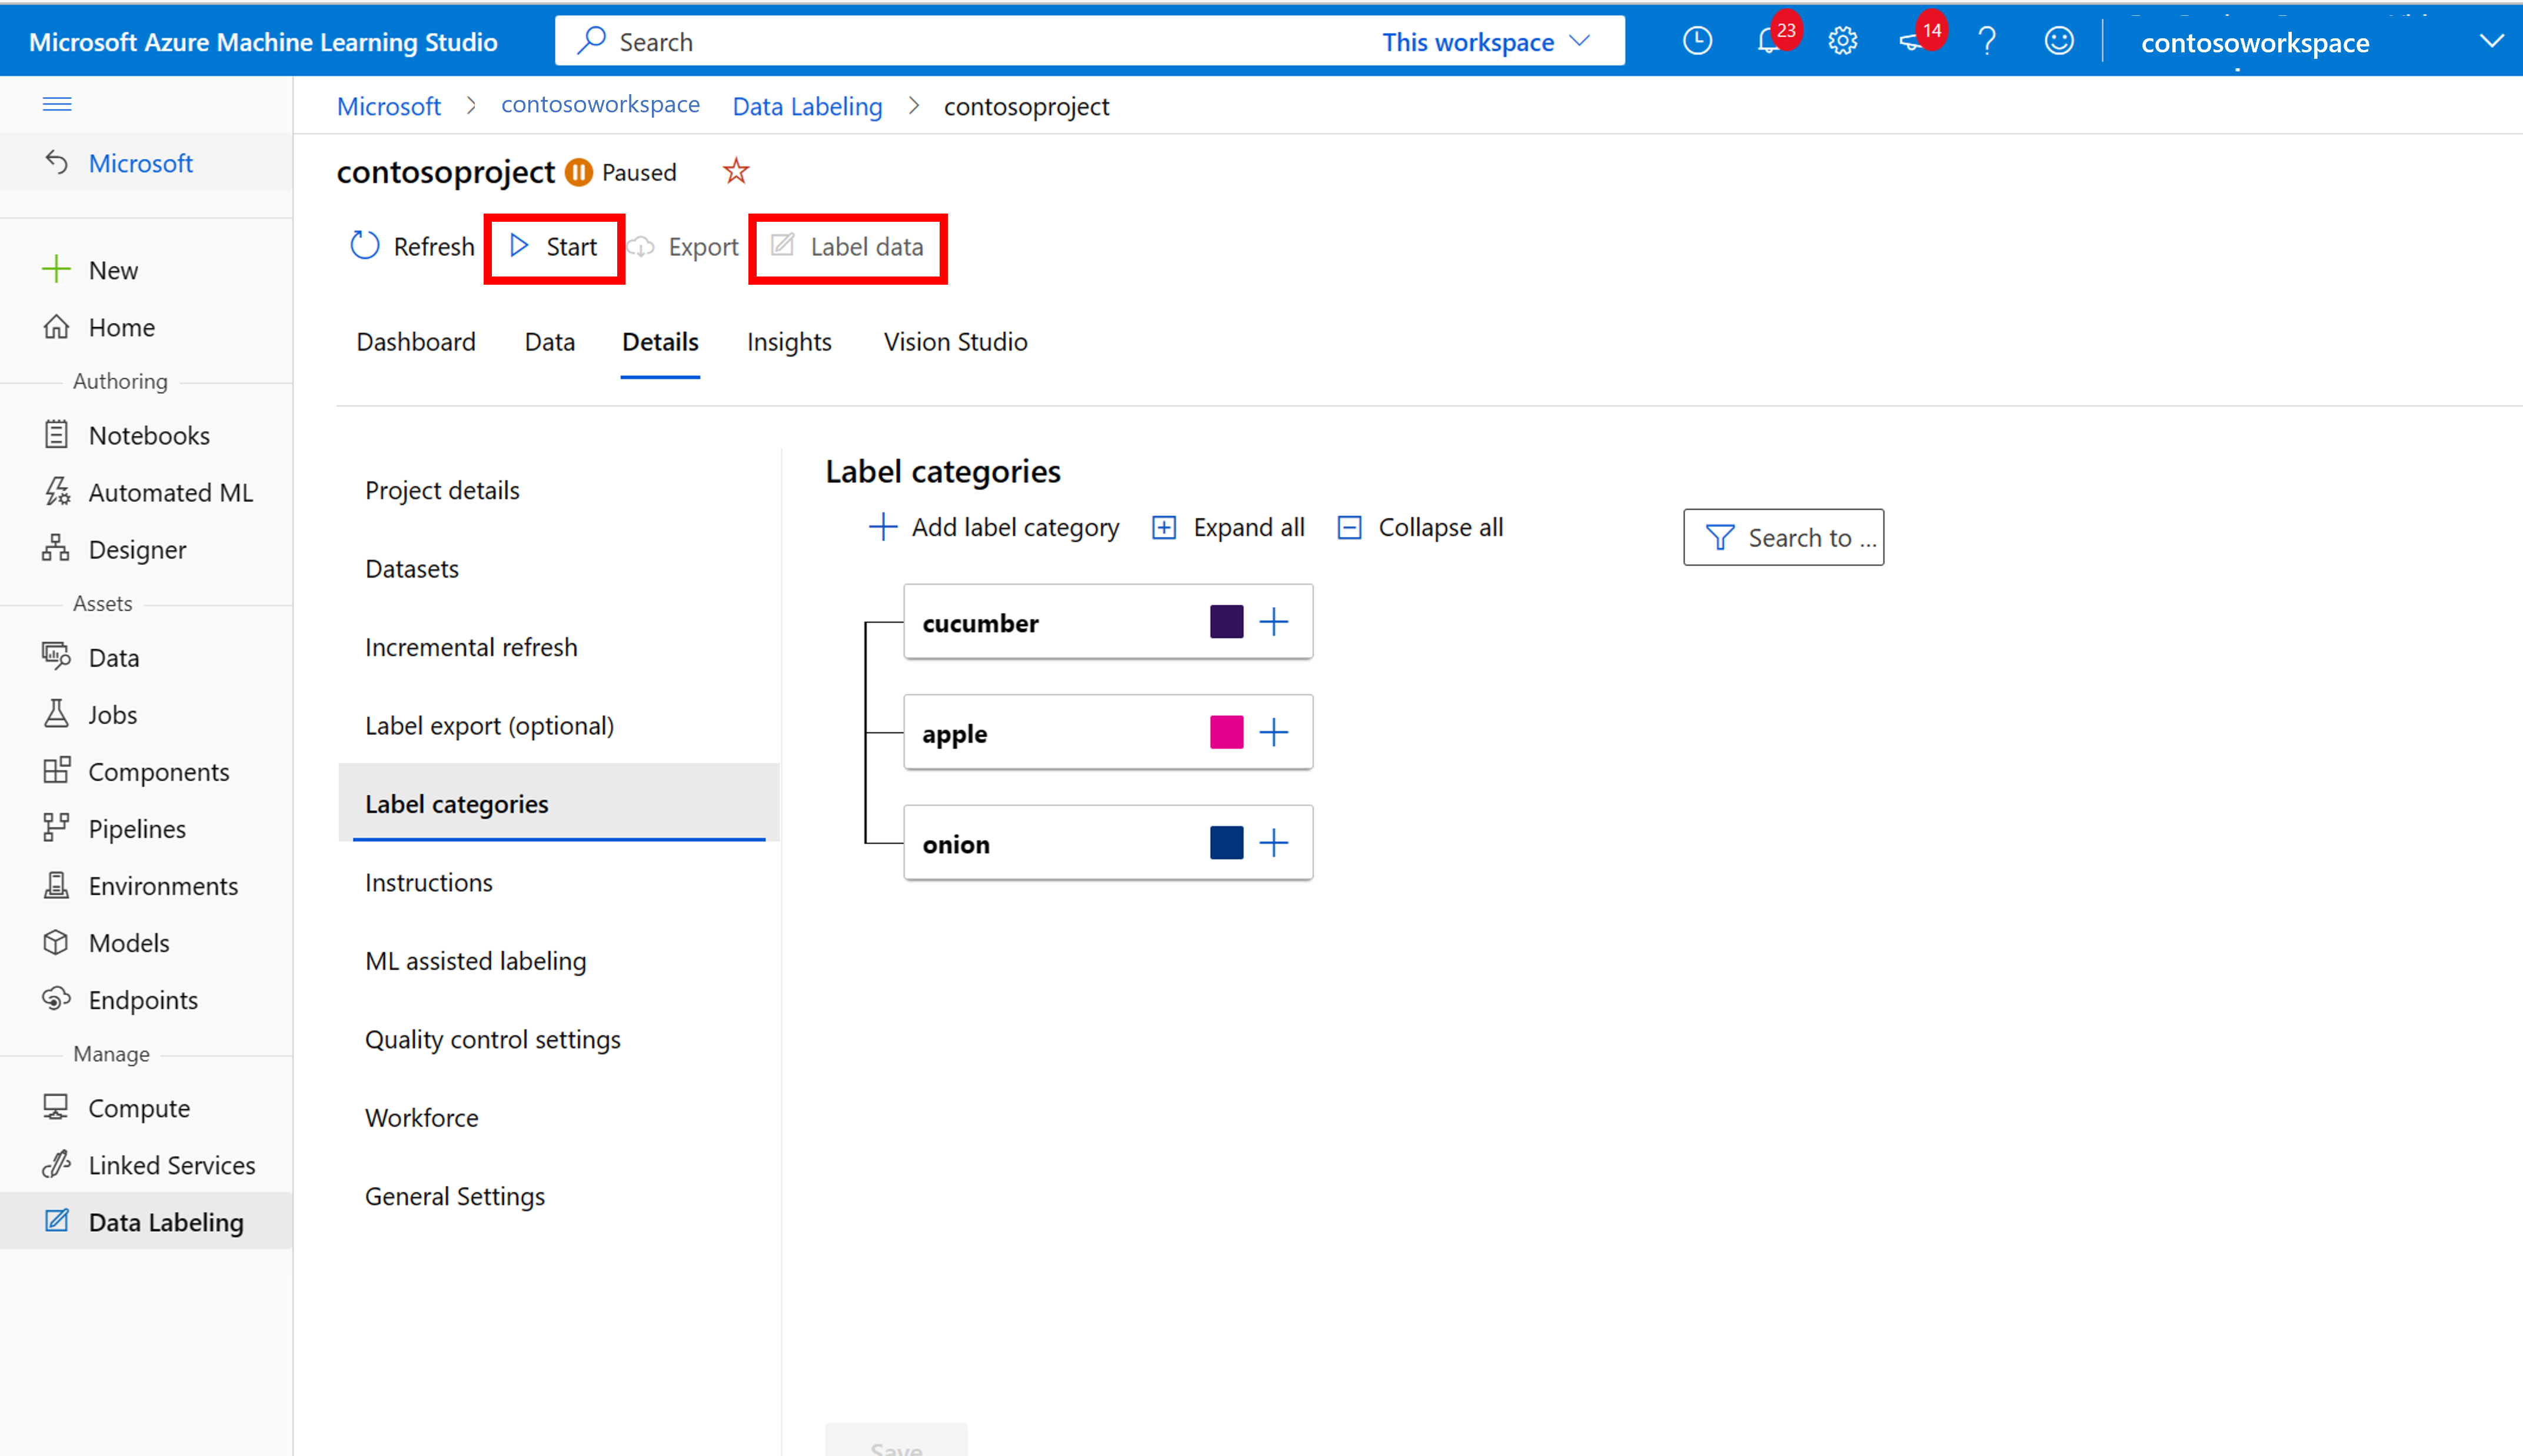
Once you've added all the class labels, save them, select start on the project, and then select Label data at the top.
Azure Machine Learning: Manually label training data
Choose Start labeling and follow the prompts to label all of your images. When you're finished, return to the Vision Studio tab in your browser.
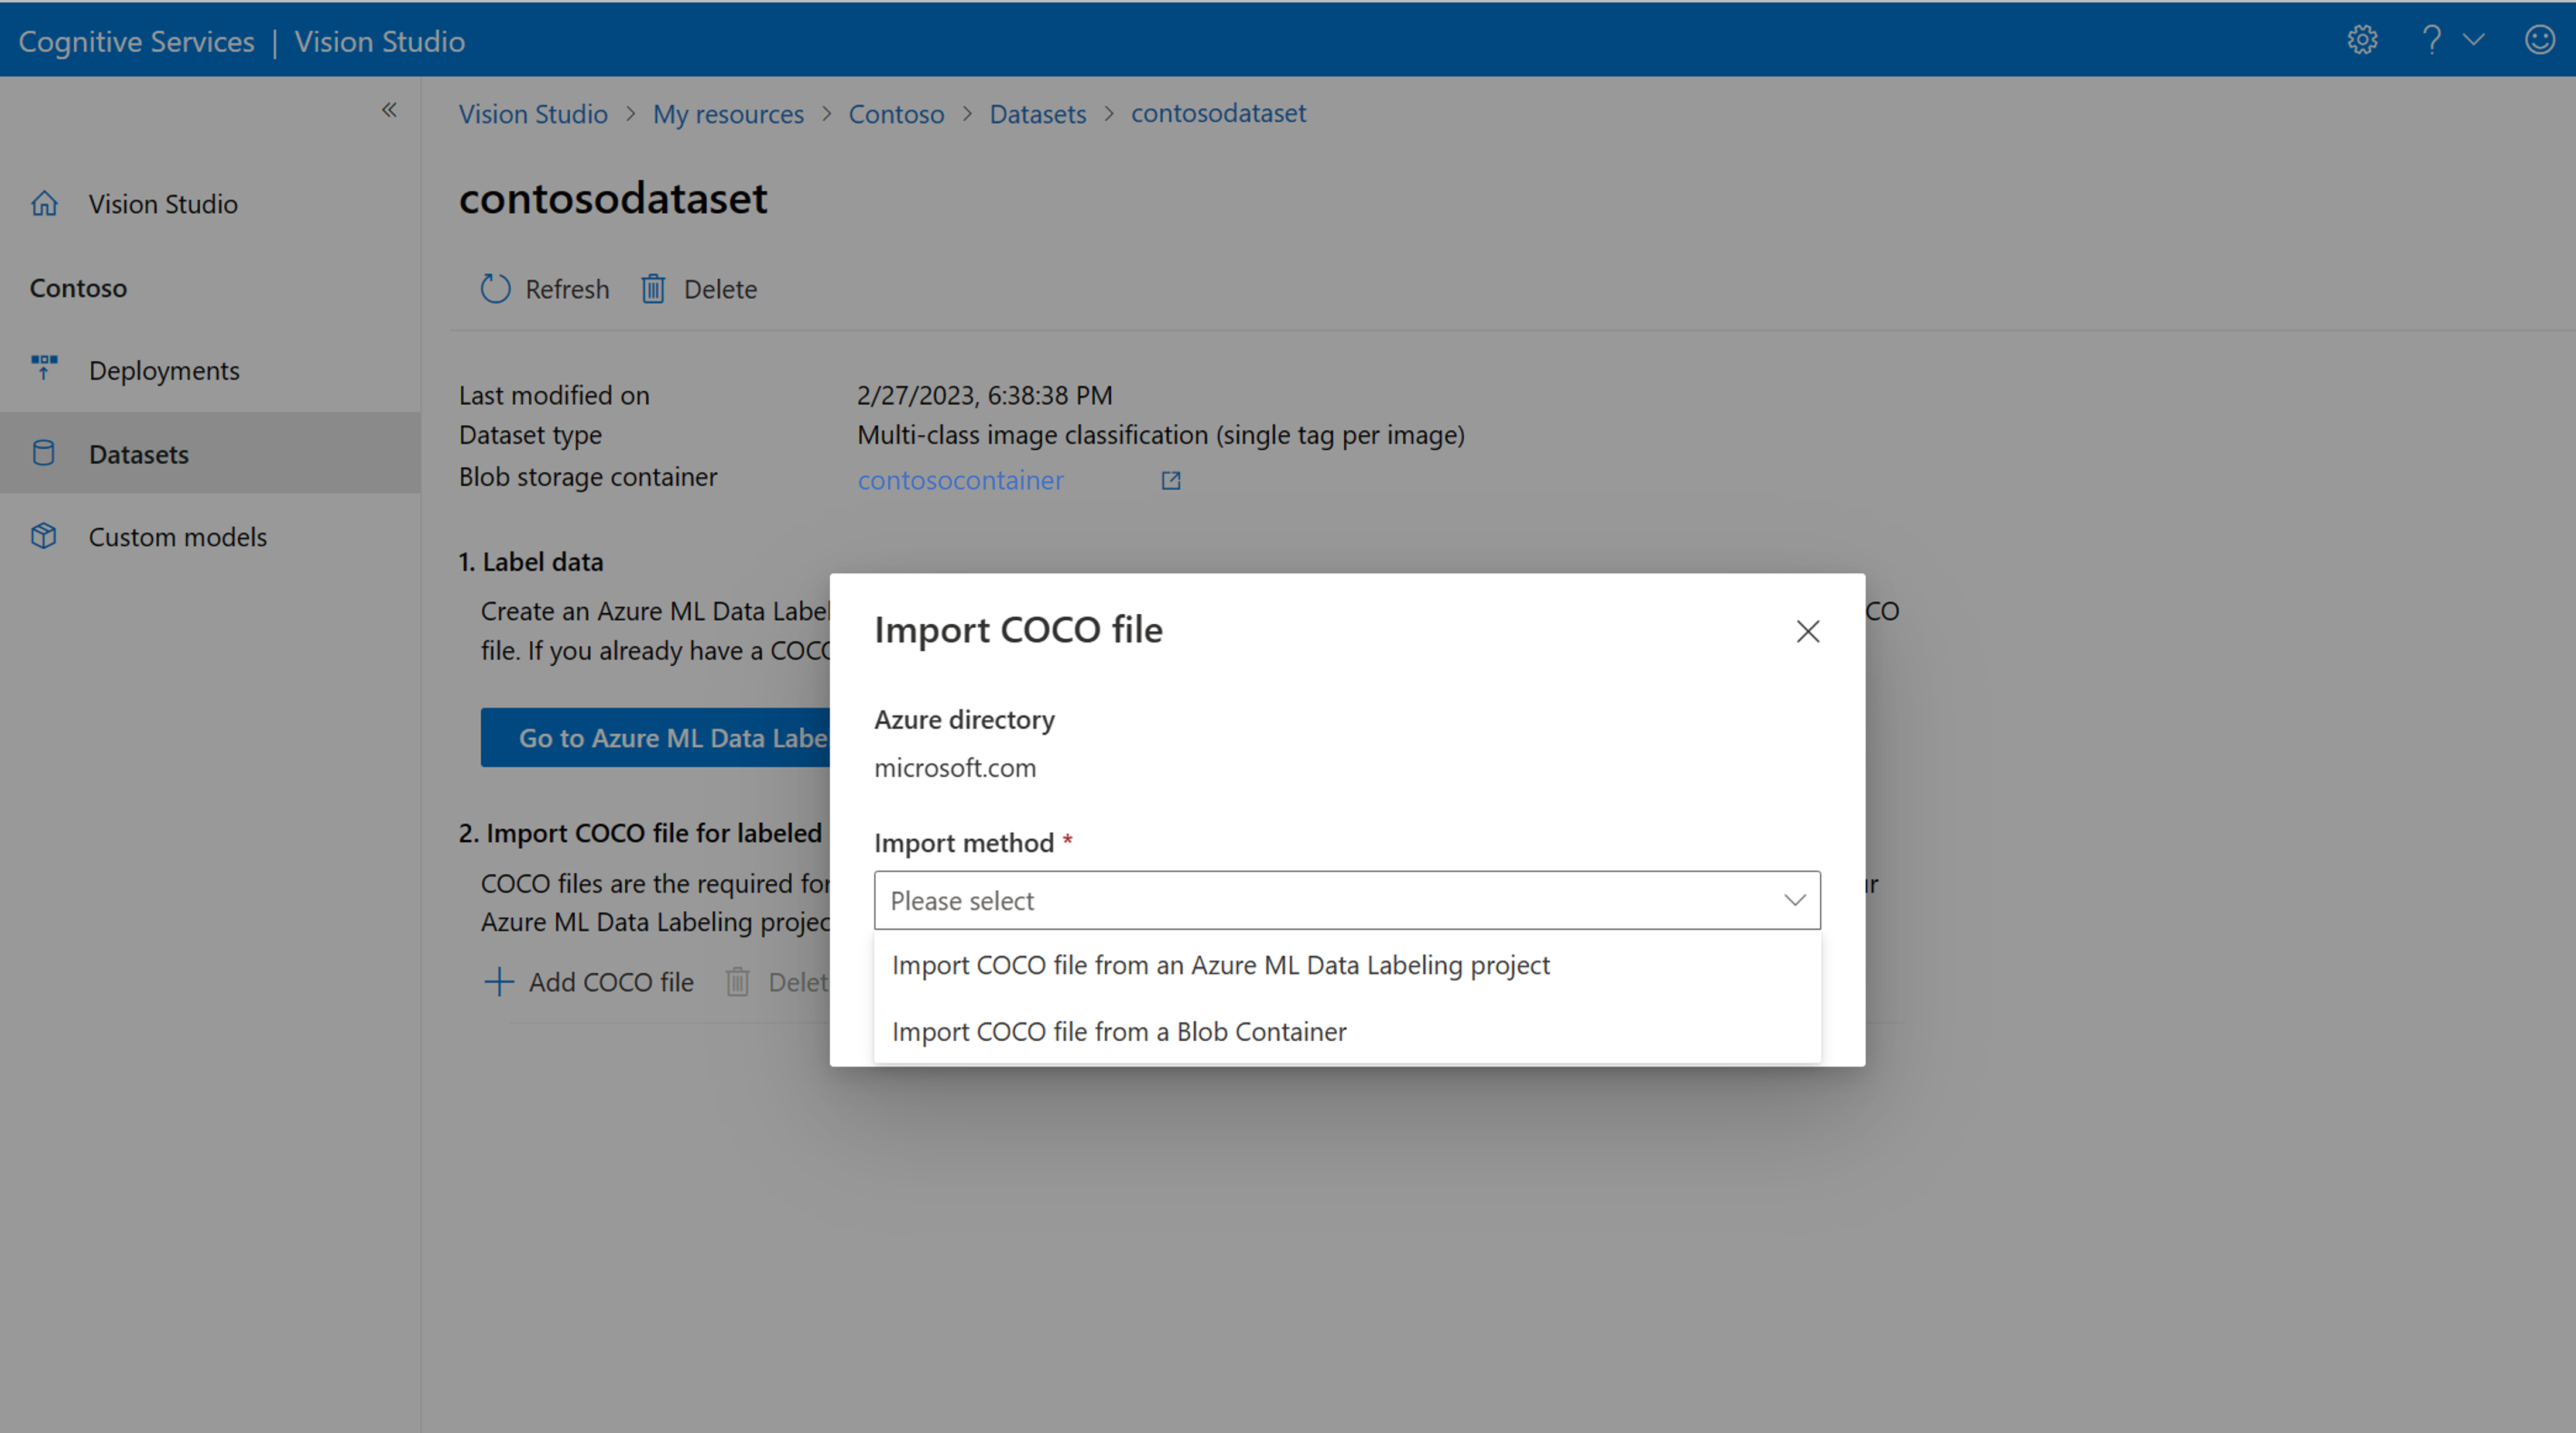
Now select Add COCO file, then select Import COCO file from an Azure ML Data Labeling project. This imports the labeled data from Azure Machine Learning.
The COCO file you just created is now stored in the Azure Storage container that you linked to this project. You can now import it into the model customization workflow. Select it from the drop-down list. Once the COCO file is imported into the dataset, the dataset can be used for training a model.
Note
Import COCO files from elsewhere
If you have a ready-made COCO file you want to import, go to the Datasets tab and select Add COCO files to this dataset. You can choose to add a specific COCO file from a Blob storage account or import from the Azure Machine Learning labeling project.
Currently, Microsoft is addressing an issue which causes COCO file import to fail with large datasets when initiated in Vision Studio. To train using a large dataset, it's recommended to use the REST API instead.
About COCO files
COCO files are JSON files with specific required fields: "images", "annotations", and "categories". A sample COCO file will look like this:
{
 "images": [
   {
     "id": 1,
     "width": 500,
     "height": 828,
     "file_name": "0.jpg",
     "absolute_url": "https://blobstorage1.blob.core.windows.net/cpgcontainer/0.jpg"
   },
    {
      "id": 2,
      "width": 754,
      "height": 832,
      "file_name": "1.jpg",
      "absolute_url": "https://blobstorage1.blob.core.windows.net/cpgcontainer/1.jpg"
    },

   ...

  ],
  "annotations": [
    {
      "id": 1,
      "category_id": 7,
      "image_id": 1,
      "area": 0.407,
      "bbox": [
        0.02663142641129032,
        0.40691584277841153,
        0.9524163571731749,
        0.42766634515266866
      ]
    },
    {
      "id": 2,
      "category_id": 9,
      "image_id": 2,
      "area": 0.27,
      "bbox": [
        0.11803319477782331,
        0.41586723392402375,
        0.7765206955096307,
        0.3483334397217212
      ]
    },
    ...

  ],
  "categories": [
    {
      "id": 1,
      "name": "vegall original mixed vegetables"
    },
    {
      "id": 2,
      "name": "Amy's organic soups lentil vegetable"
    },
    {
      "id": 3,
      "name": "Arrowhead 8oz"
    },

    ...

  ]
}
COCO file field reference
If you're generating your own COCO file from scratch, make sure all the required fields are filled with the correct details. The following tables describe each field in a COCO file:
"images"
| Key | Type | Description | Required? |
|---|---|---|---|
id |
integer | Unique image ID, starting from 1 | Yes |
width |
integer | Width of the image in pixels | Yes |
height |
integer | Height of the image in pixels | Yes |
file_name |
string | A unique name for the image | Yes |
absolute_url or coco_url |
string | Image path as an absolute URI to a blob in a blob container. The Vision resource must have permission to read the annotation files and all referenced image files. | Yes |
The value for absolute_url can be found in your blob container's properties:
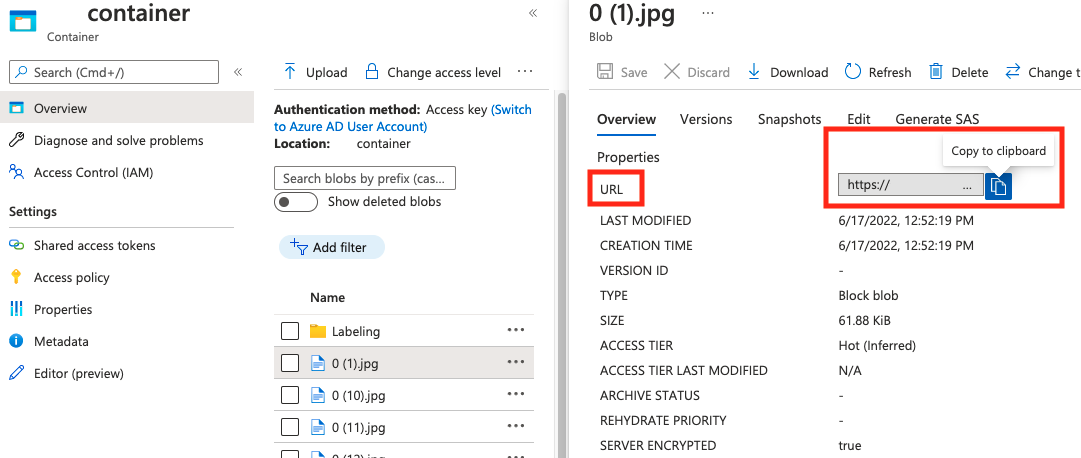
"annotations"
| Key | Type | Description | Required? |
|---|---|---|---|
id |
integer | ID of the annotation | Yes |
category_id |
integer | ID of the category defined in the categories section |
Yes |
image_id |
integer | ID of the image | Yes |
area |
integer | Value of 'Width' x 'Height' (third and fourth values of bbox) |
No |
bbox |
list[float] | Relative coordinates of the bounding box (0 to 1), in the order of 'Left', 'Top', 'Width', 'Height' | Yes |
"categories"
| Key | Type | Description | Required? |
|---|---|---|---|
id |
integer | Unique ID for each category (label class). These should be present in the annotations section. |
Yes |
name |
string | Name of the category (label class) | Yes |
COCO file verification
You can use our Python sample code to check the format of a COCO file.
Train the custom model
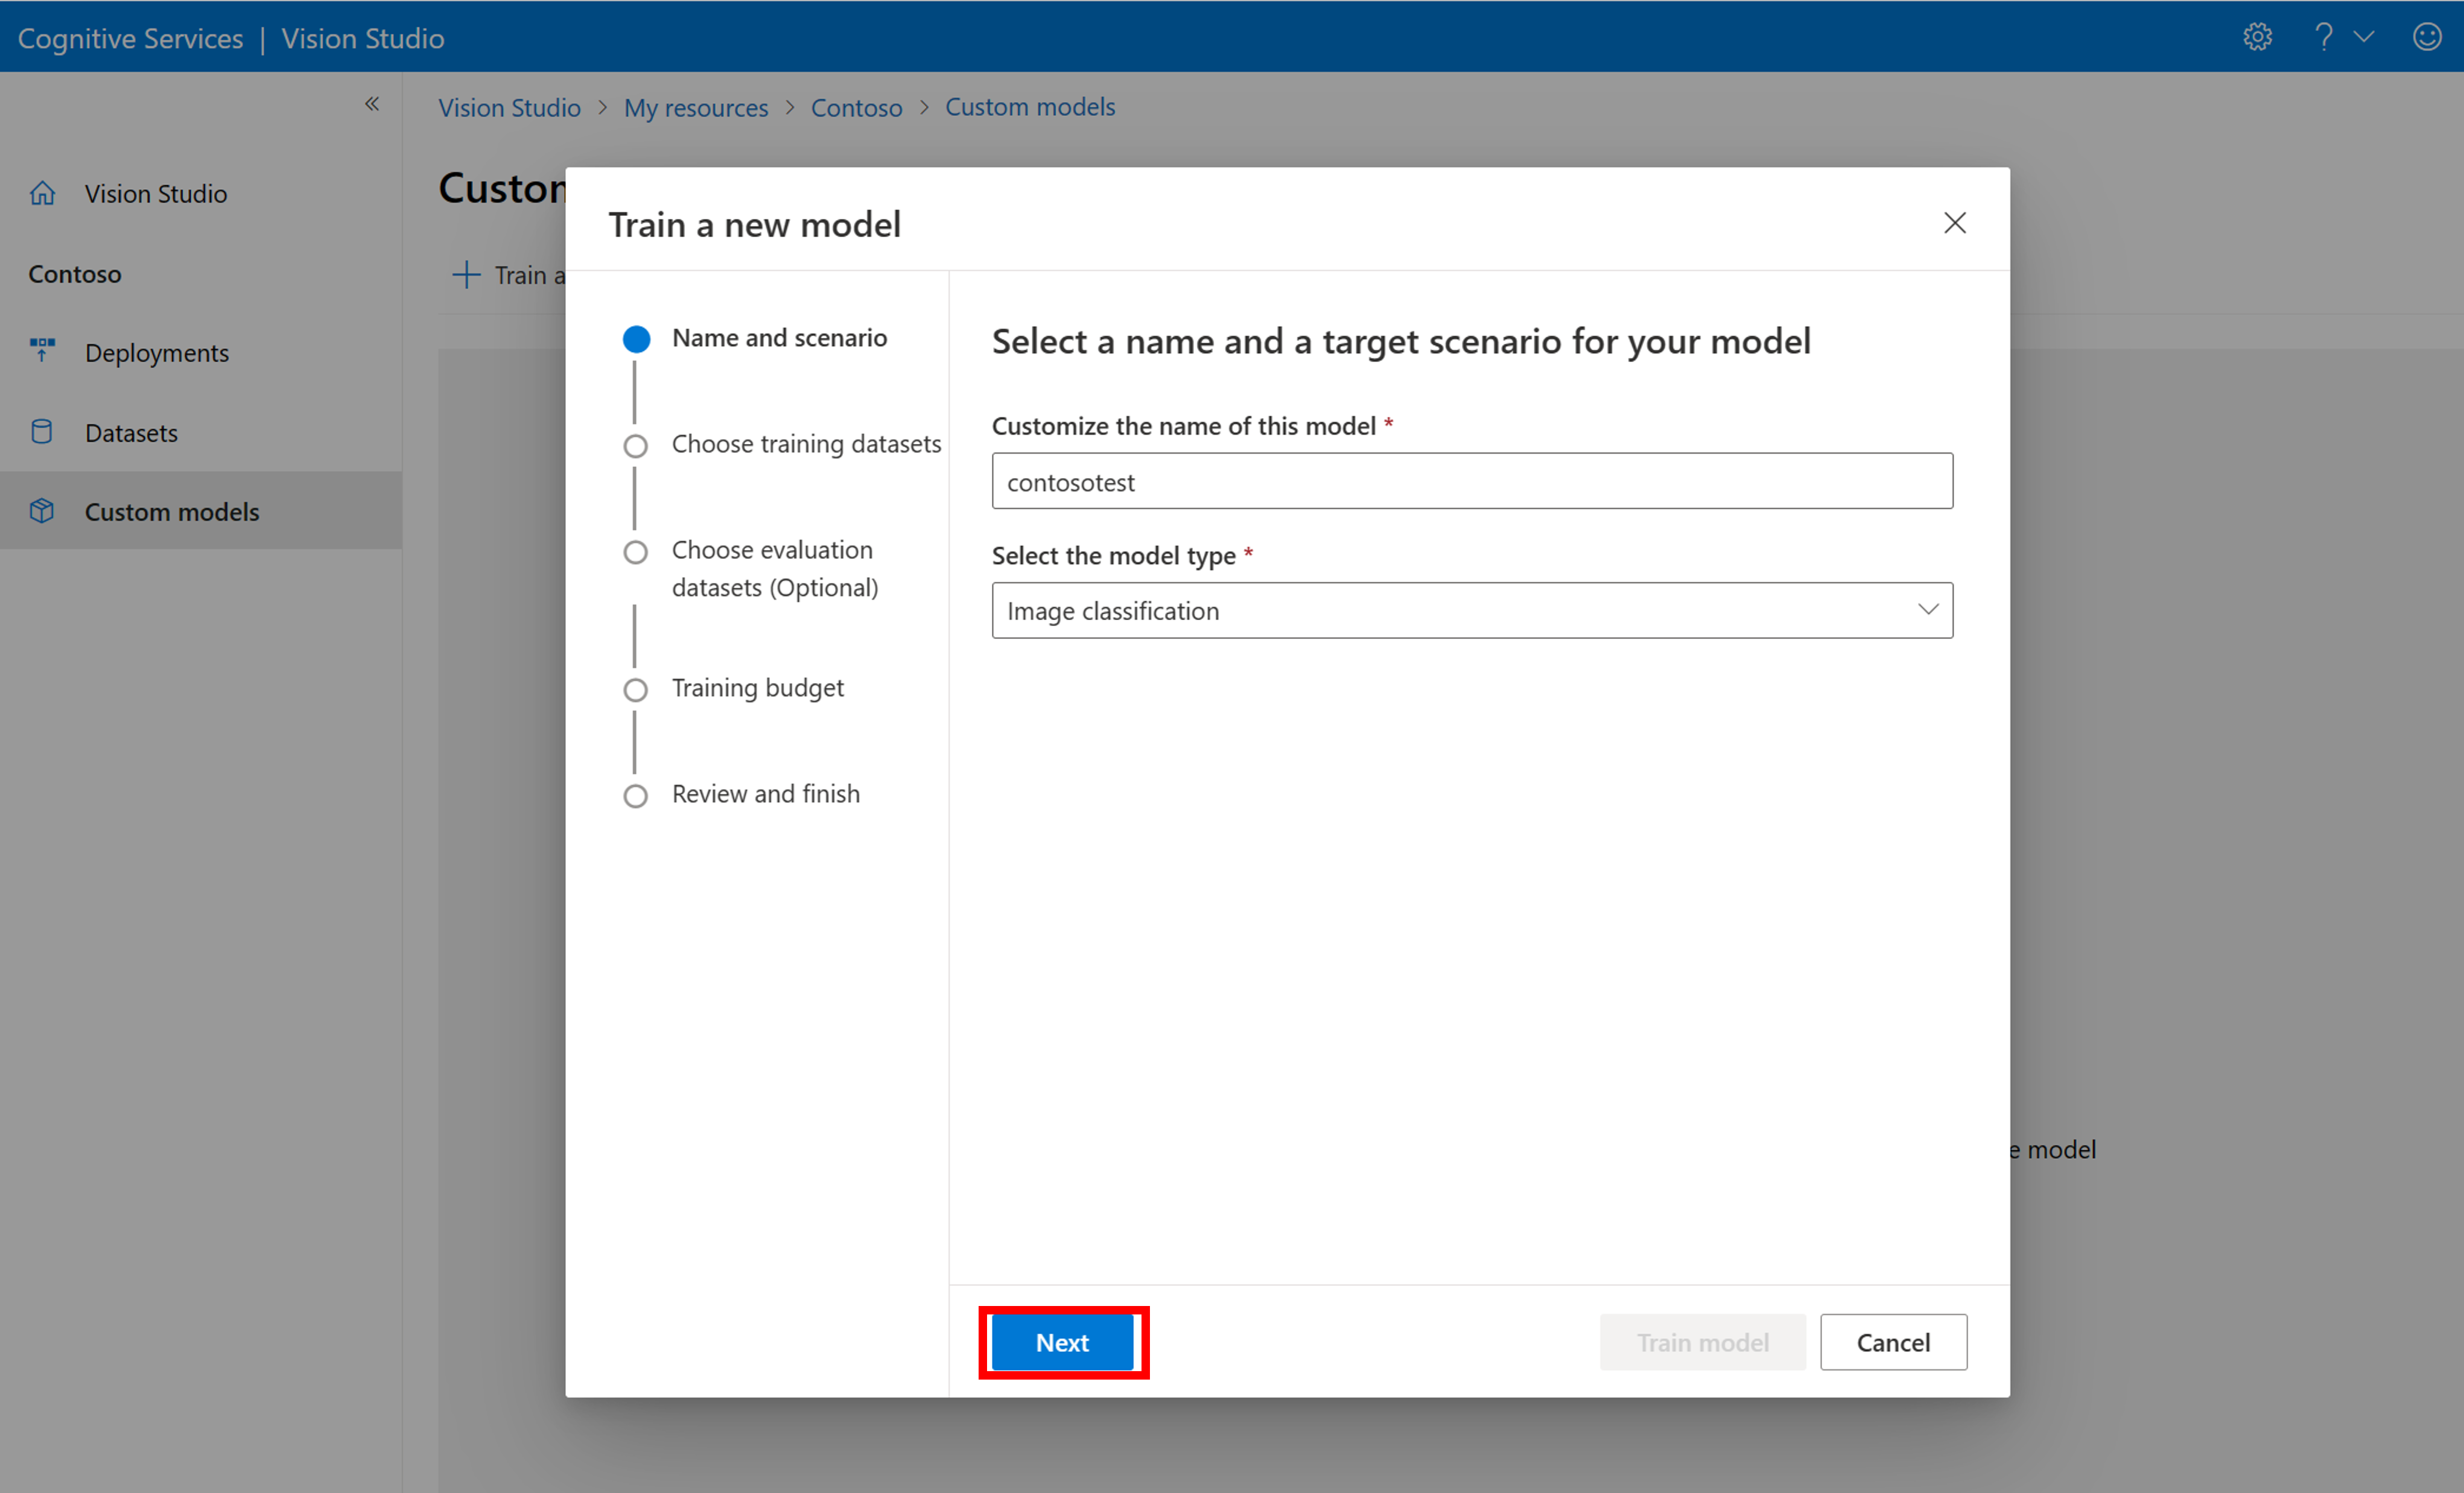
To start training a model with your COCO file, go to the Custom models tab and select Add a new model. Enter a name for the model and select Image classification or Object detection as the model type.
Select your dataset, which is now associated with the COCO file containing the labeling information.
Then select a time budget and train the model. For small examples, you can use a 1 hour budget.
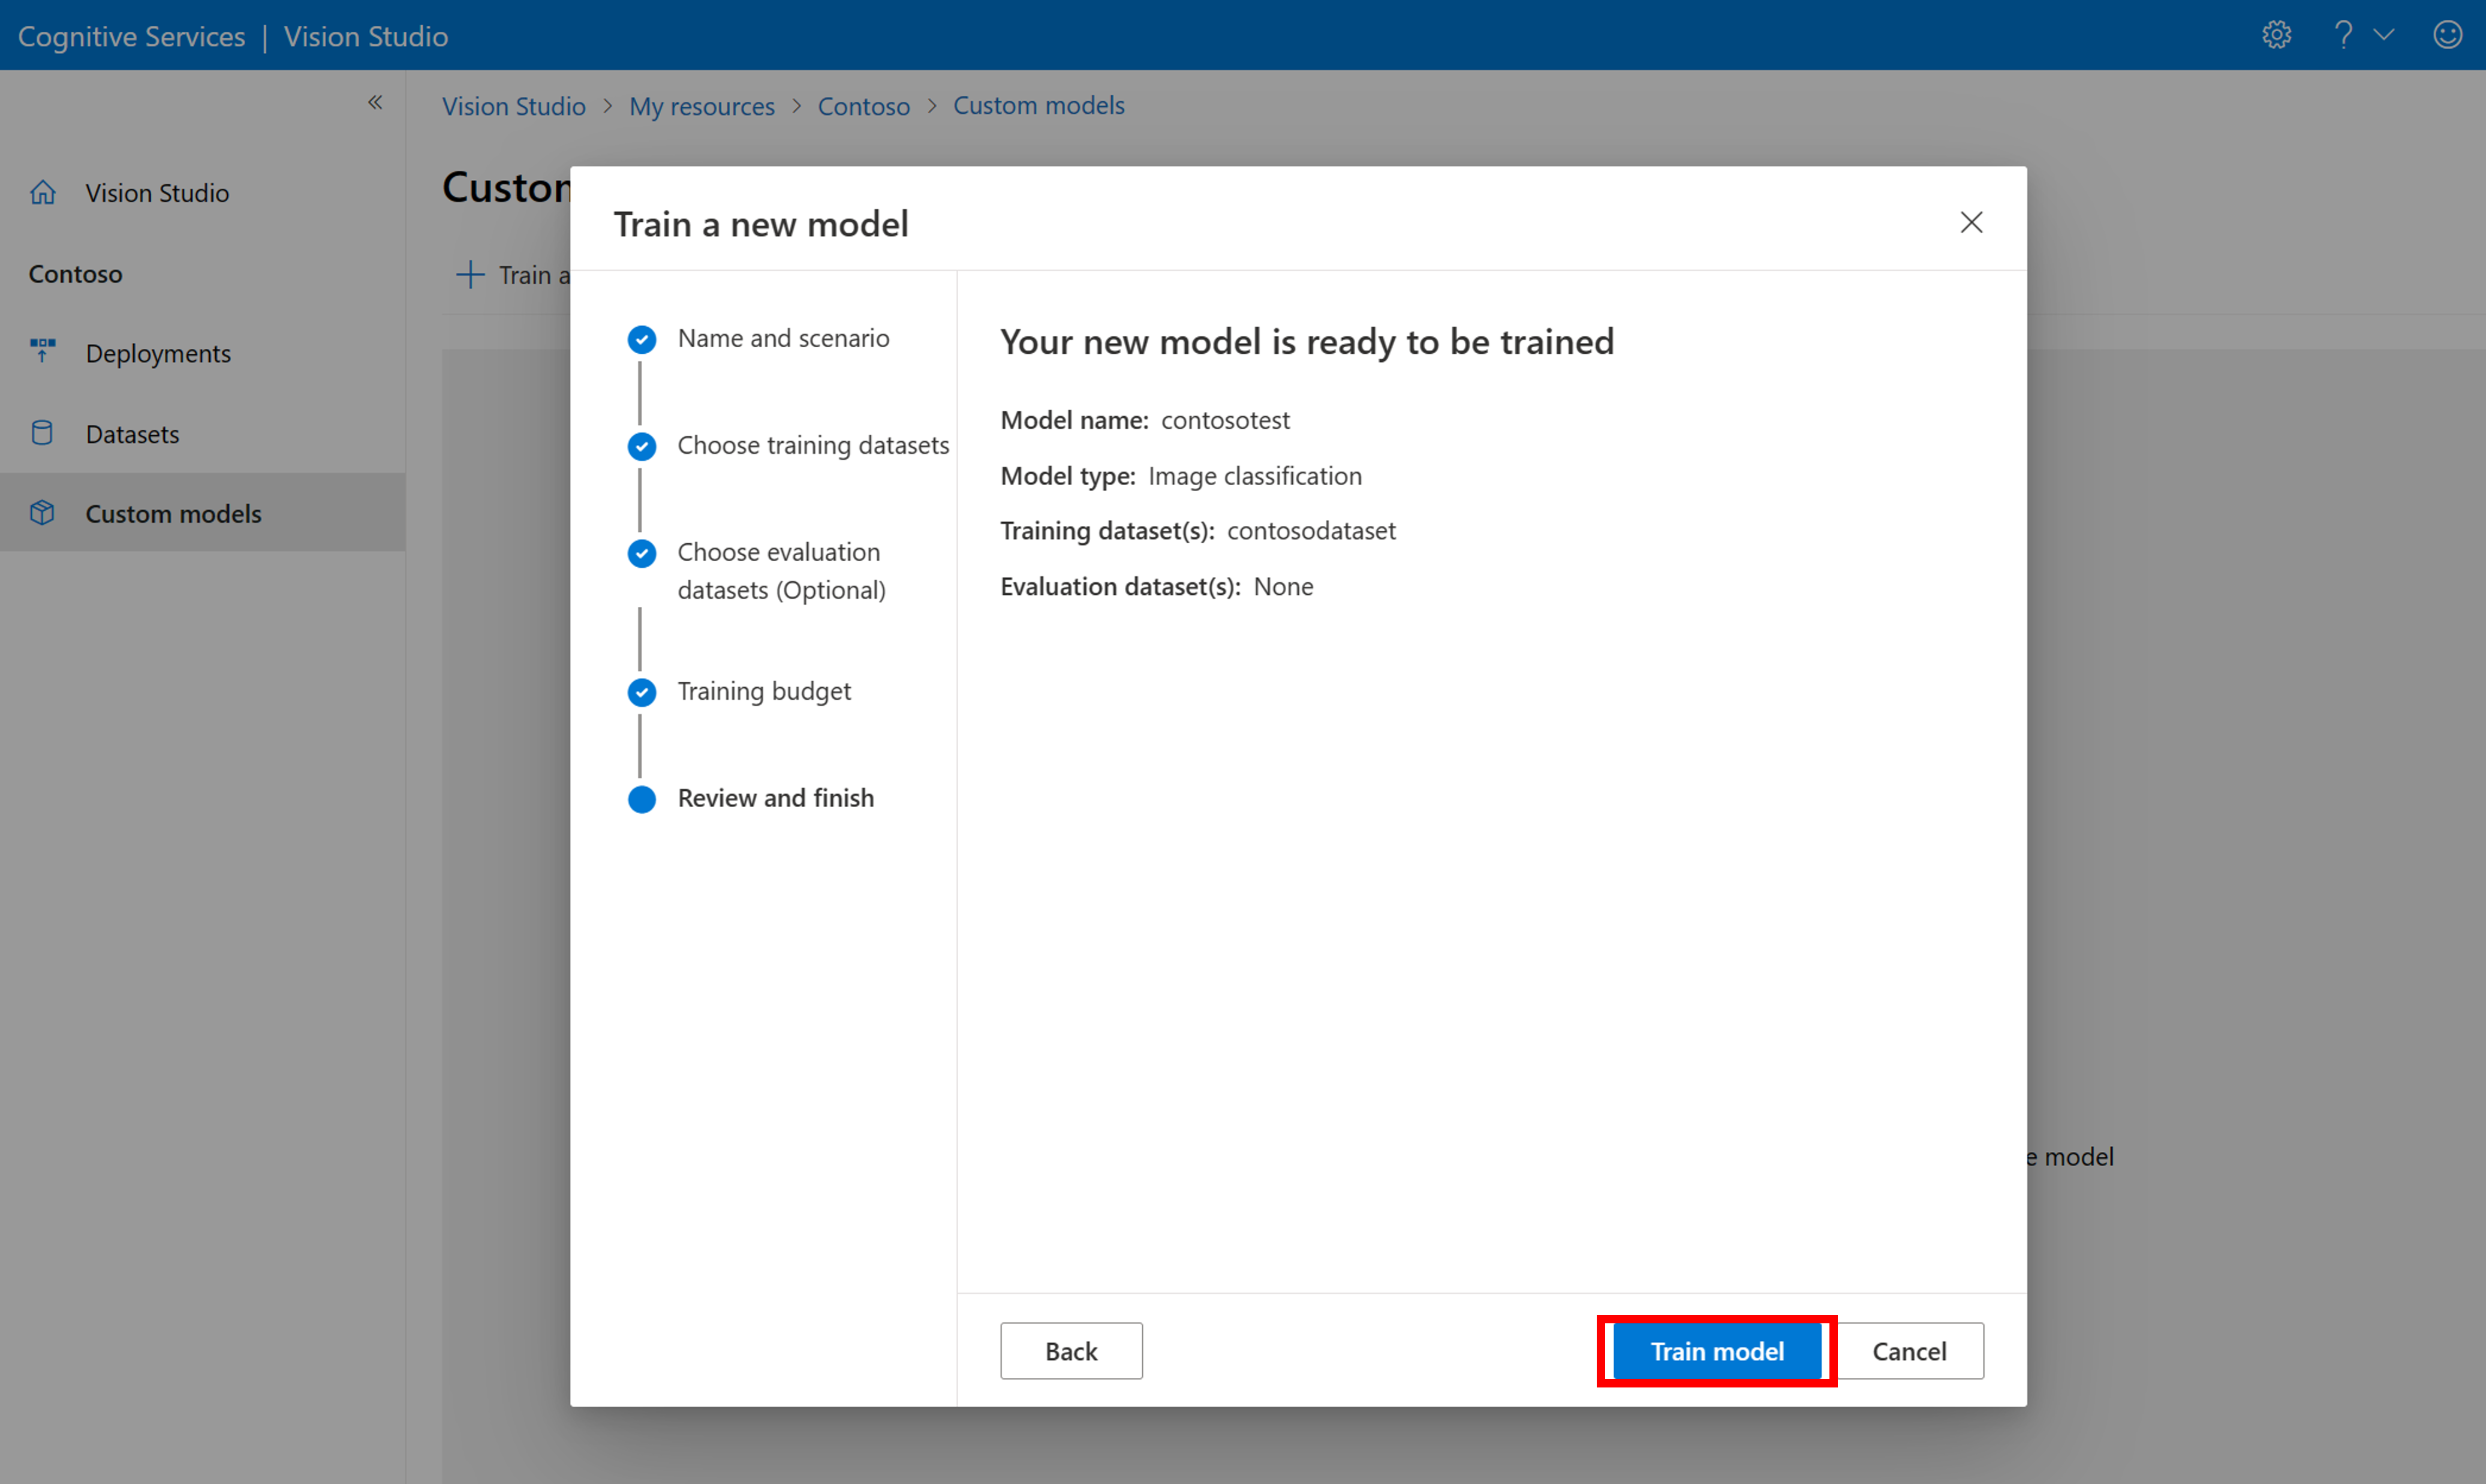
It may take some time for the training to complete. Image Analysis 4.0 models can be accurate with only a small set of training data, but they take longer to train than previous models.
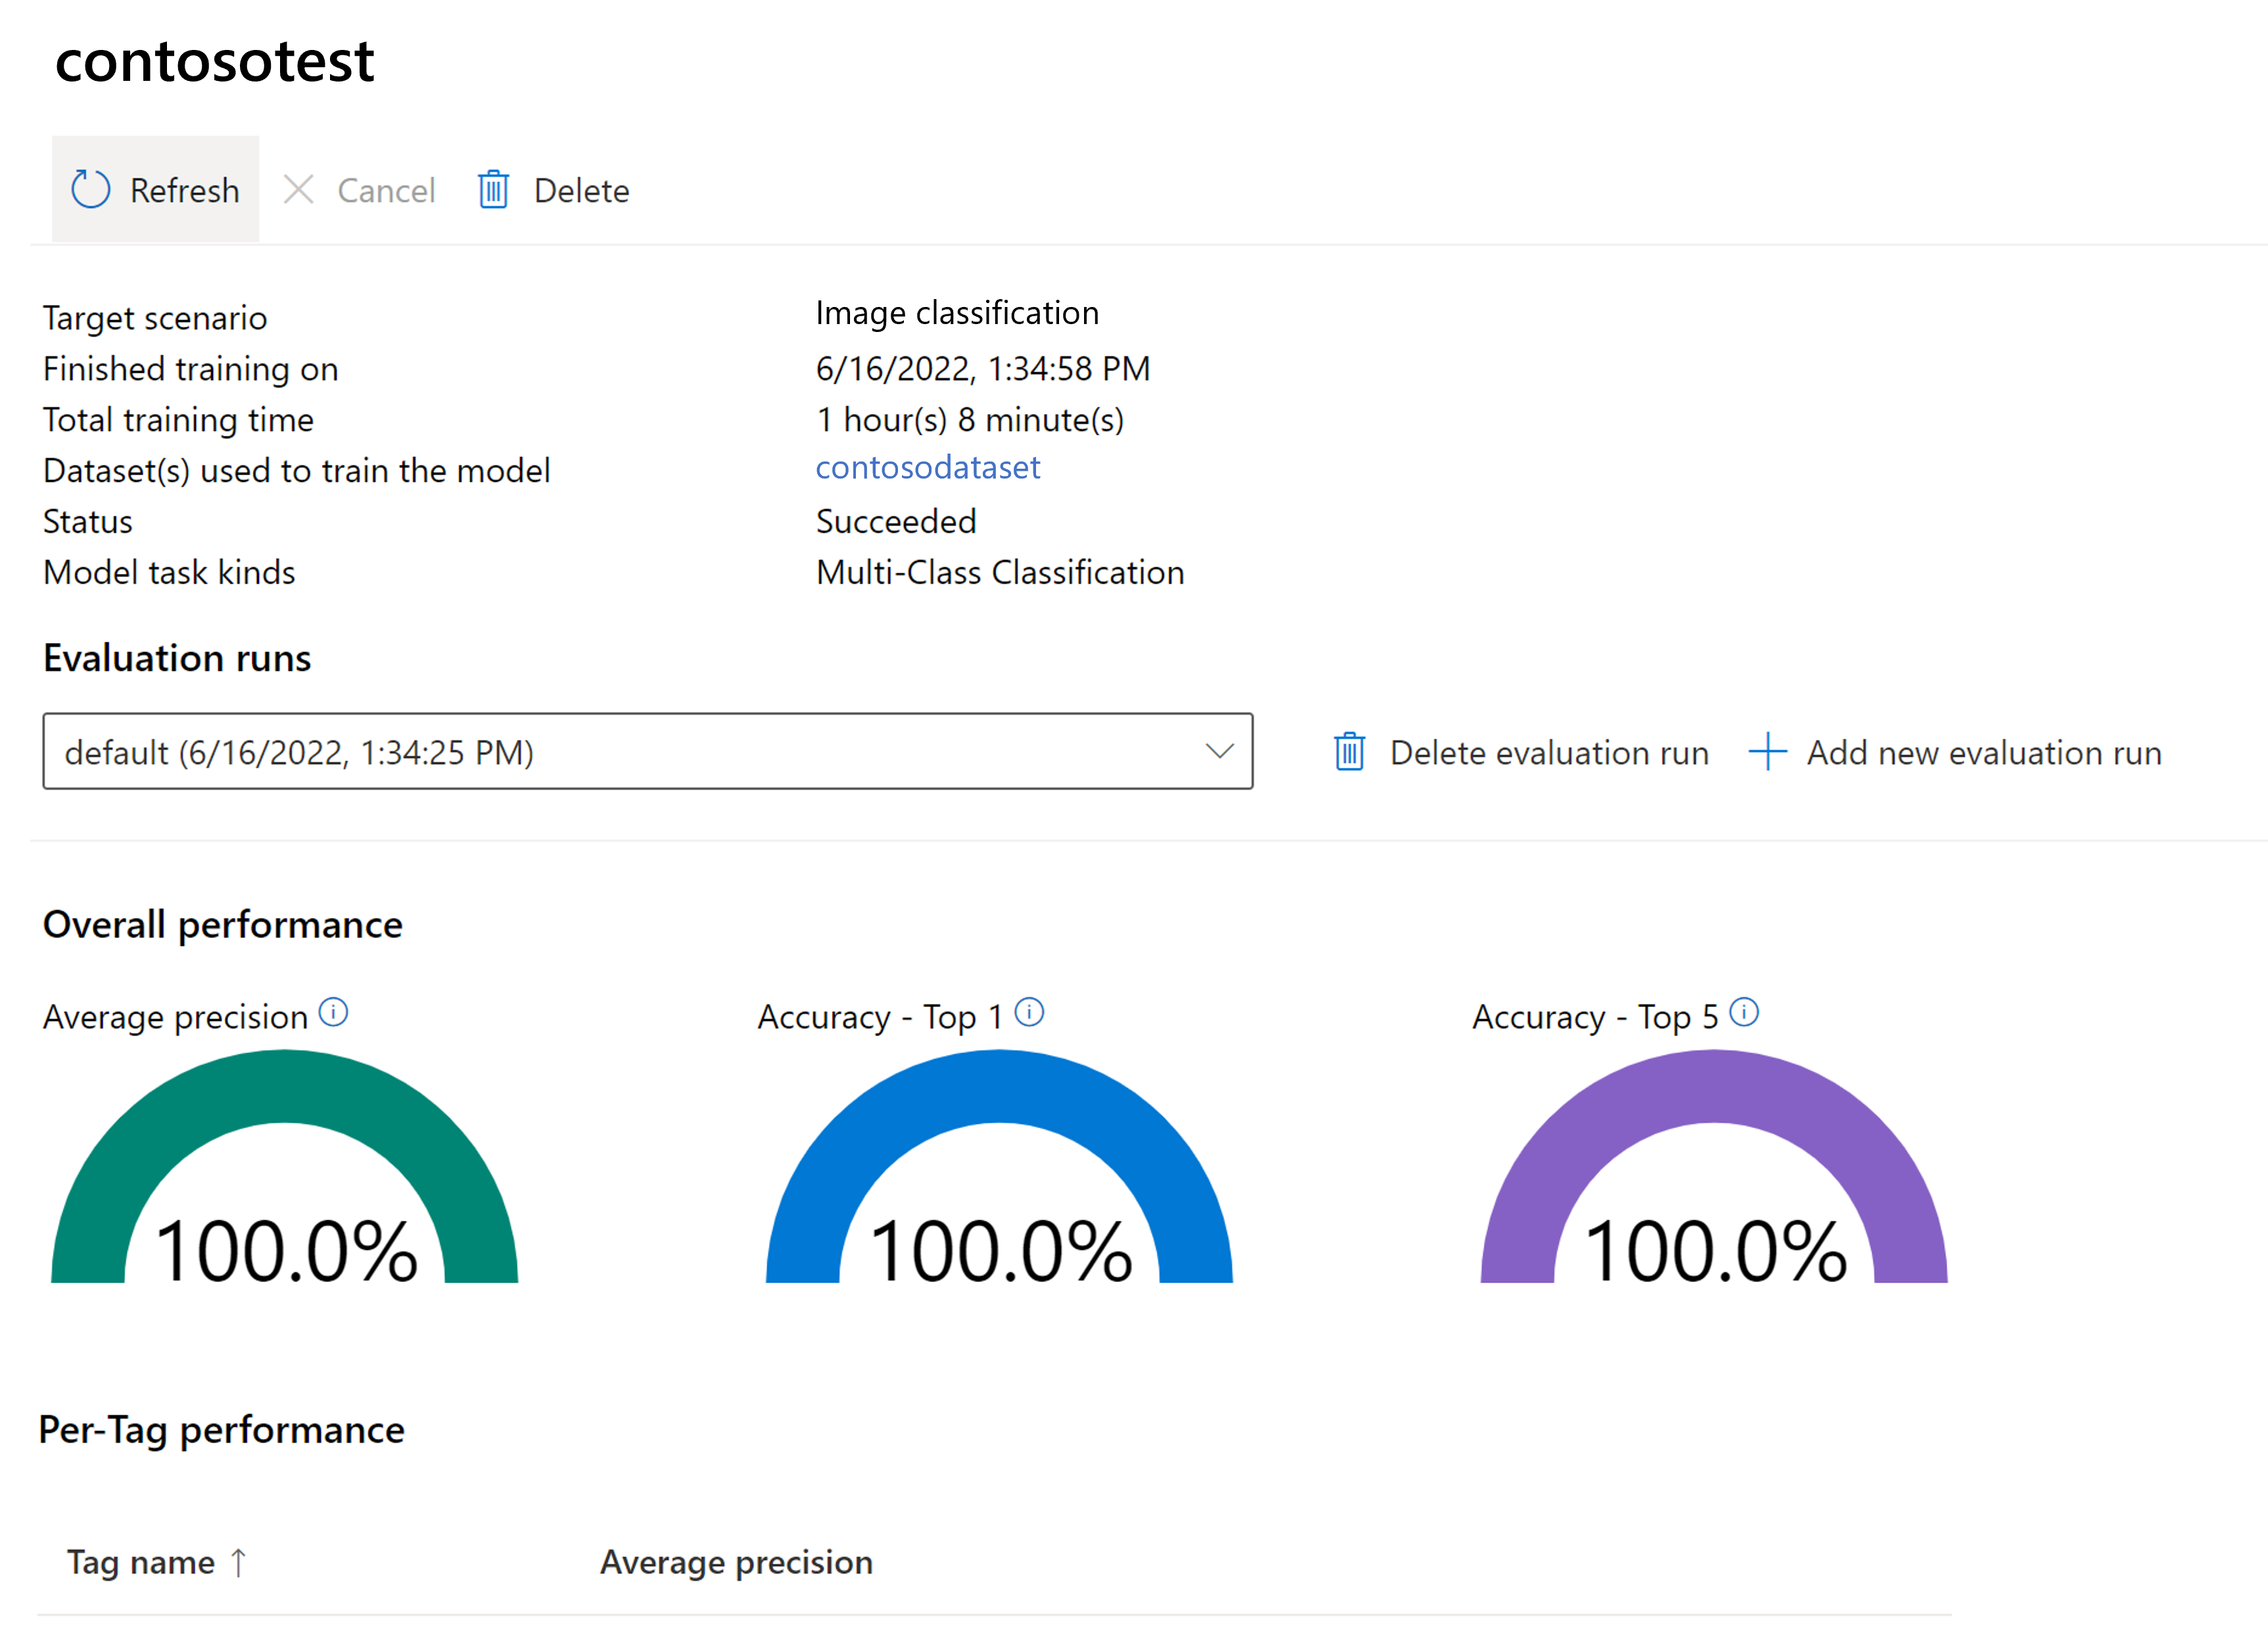
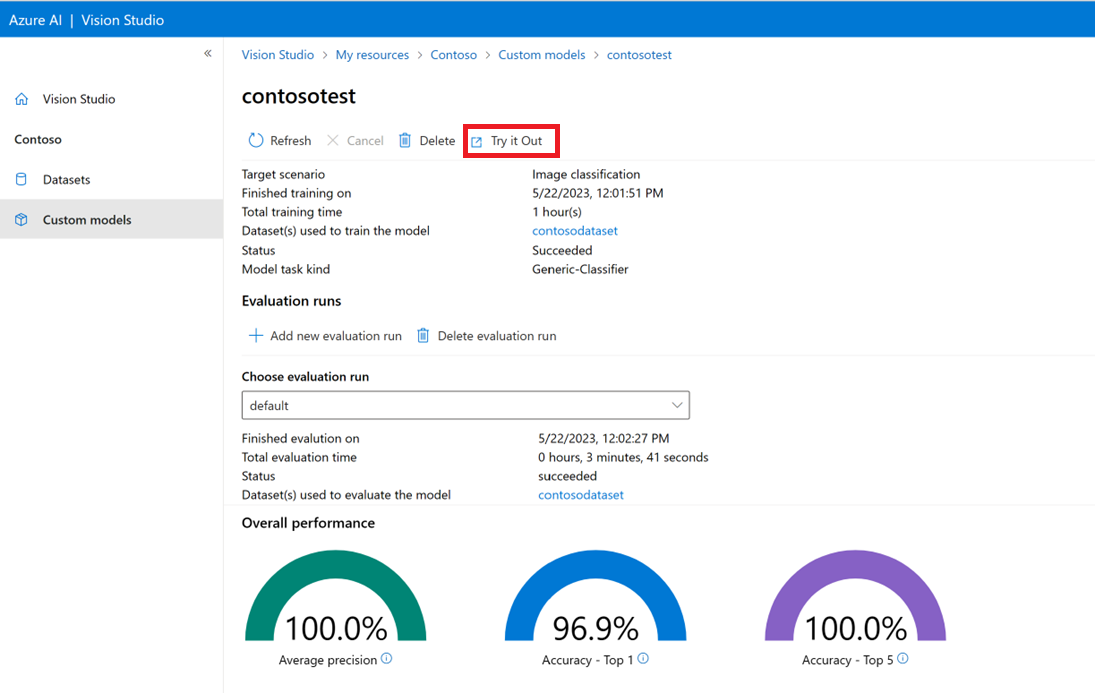
Evaluate the trained model
After training has completed, you can view the model's performance evaluation. The following metrics are used:
- Image classification: Average Precision, Accuracy Top 1, Accuracy Top 5
- Object detection: Mean Average Precision @ 30, Mean Average Precision @ 50, Mean Average Precision @ 75
If an evaluation set isn't provided when training the model, the reported performance is estimated based on part of the training set. We strongly recommend you use an evaluation dataset (using the same process as above) to have a reliable estimation of your model performance.
Test custom model in Vision Studio
Once you've built a custom model, you can test by selecting the Try it out button on the model evaluation screen.
This takes you to the Extract common tags from images page. Choose your custom model from the drop-down menu and upload a test image.
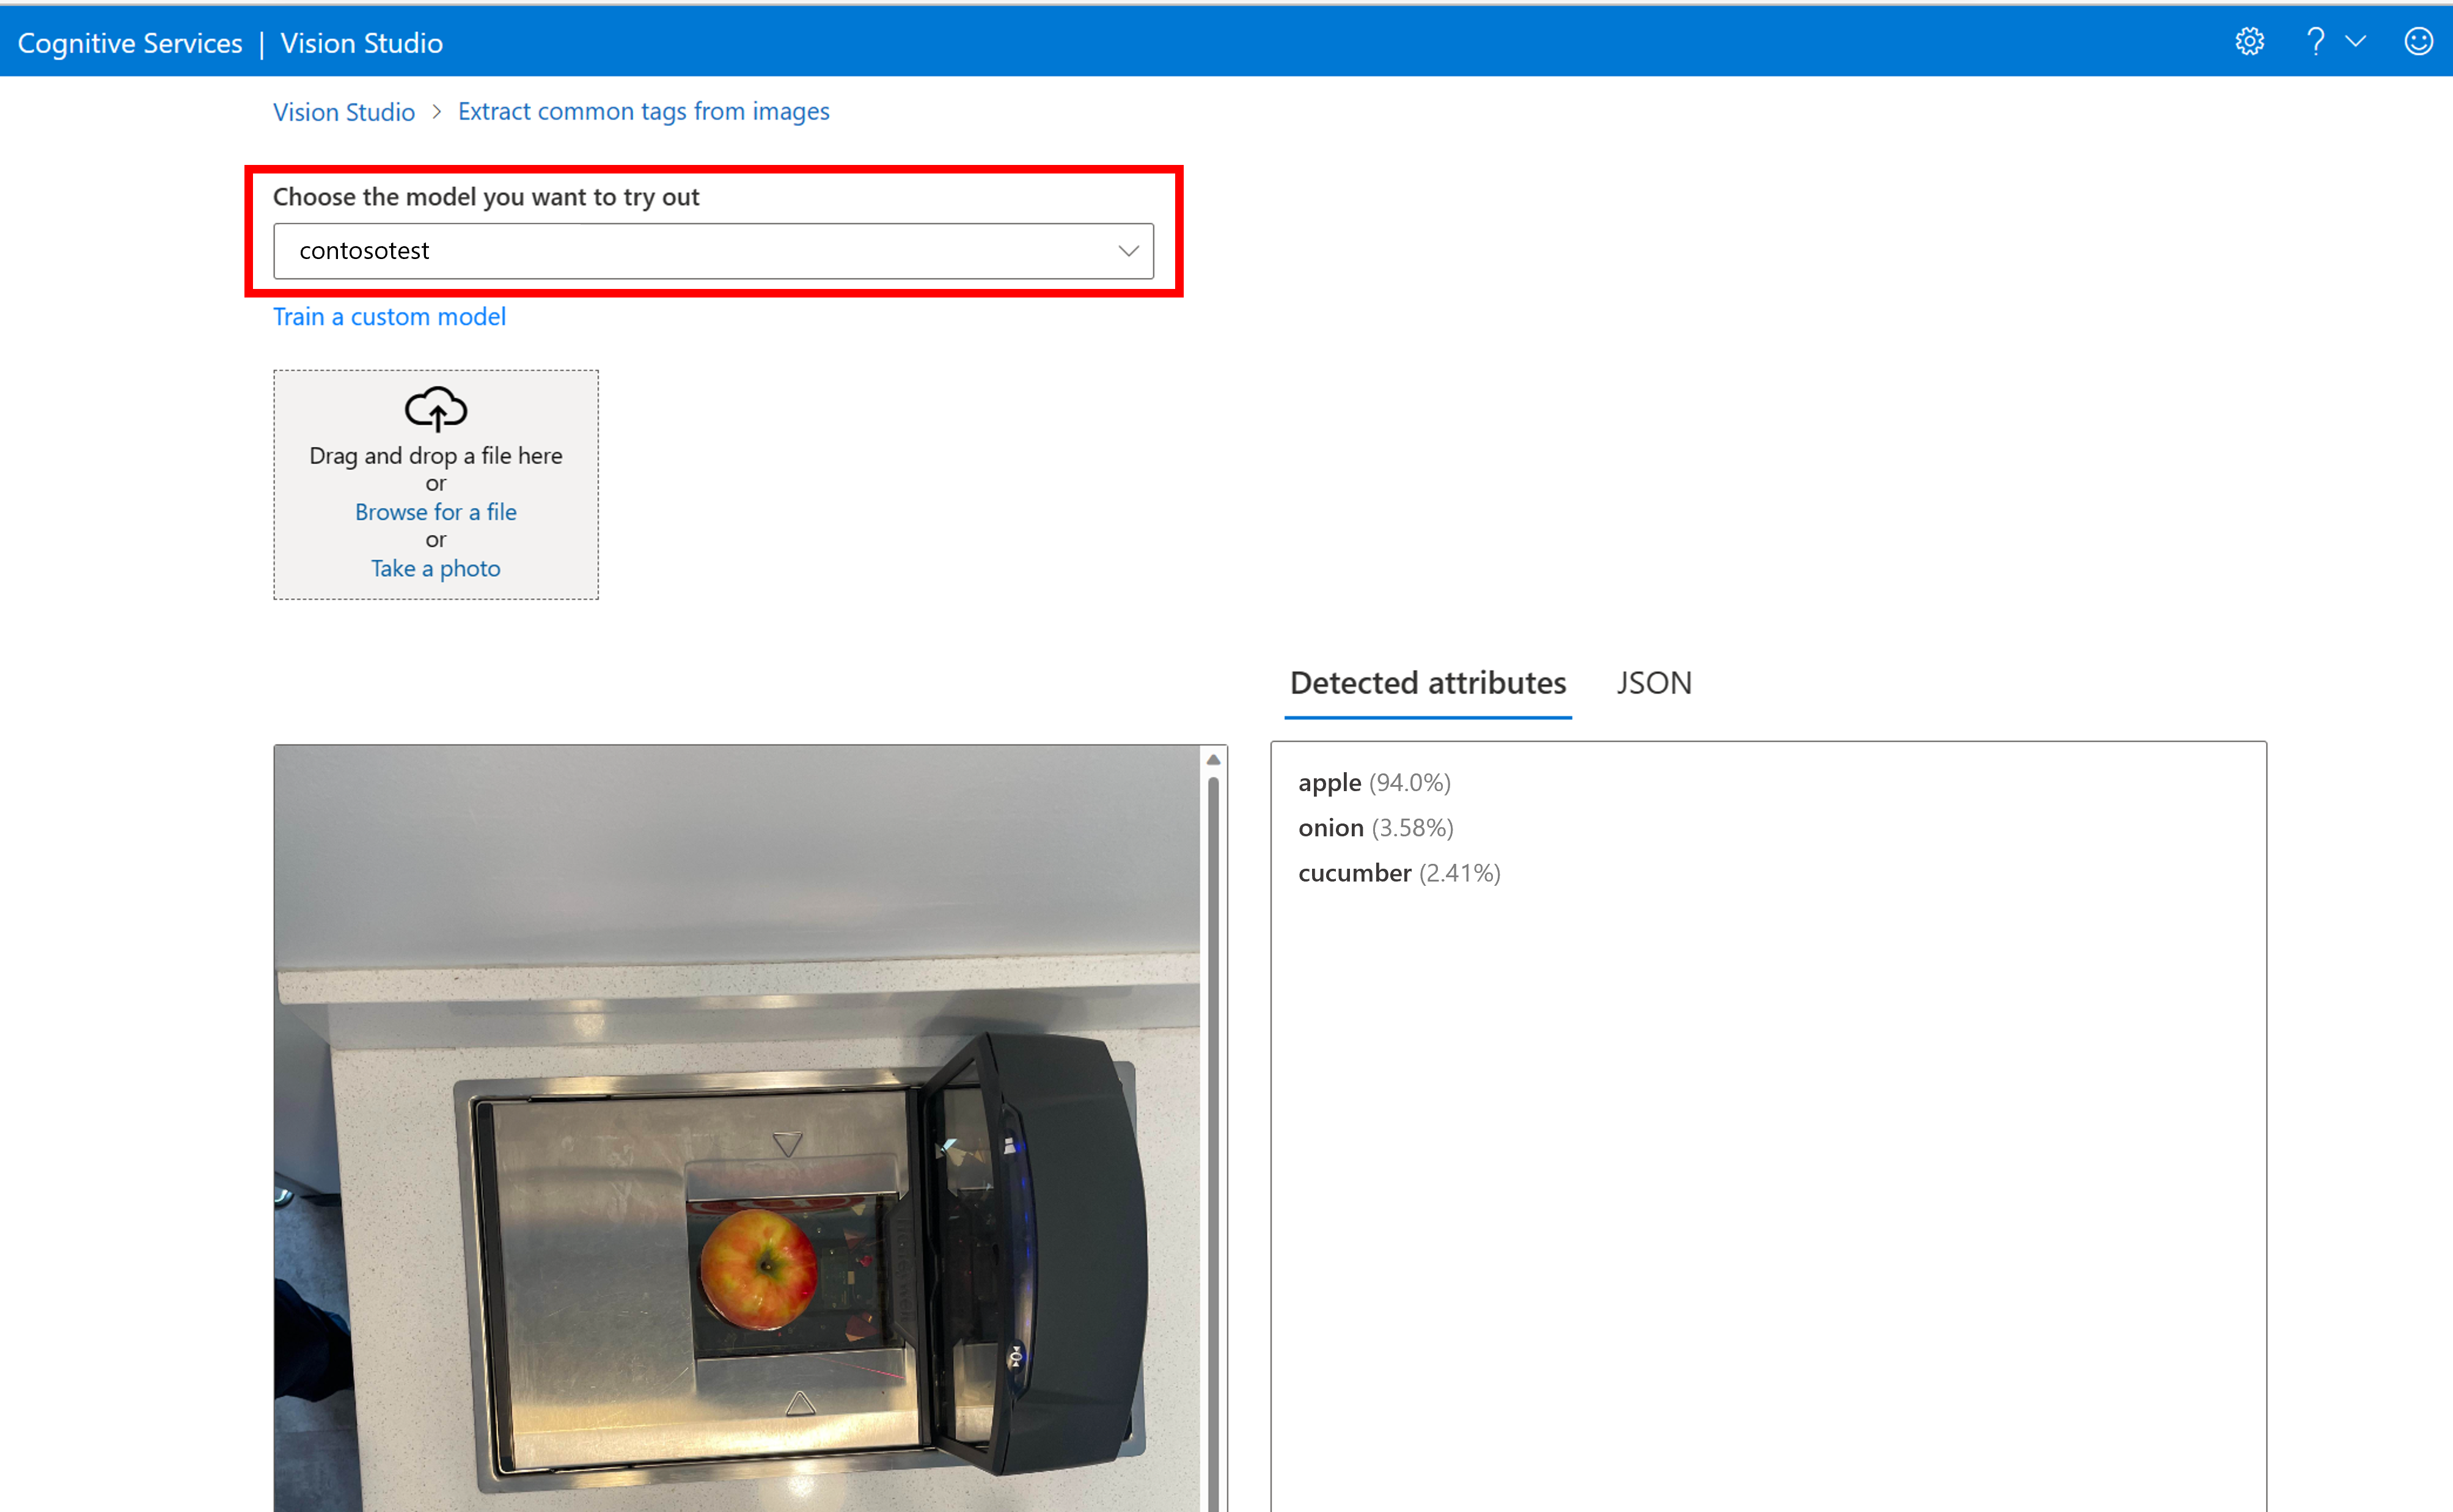
The prediction results appear in the right column.
Next steps
In this guide, you created and trained a custom image classification model using Image Analysis. Next, learn more about the Analyze Image 4.0 API, so you can call your custom model from an application using REST or library SDKs.
- See the Model customization concepts guide for a broad overview of this feature and a list of frequently asked questions.
- Call the Analyze Image API.
Feedback
Coming soon: Throughout 2024 we will be phasing out GitHub Issues as the feedback mechanism for content and replacing it with a new feedback system. For more information see: https://aka.ms/ContentUserFeedback.
Submit and view feedback for