Recommended settings for network isolation
Follow the steps below to restrict public access to QnA Maker resources. Protect an Azure AI services resource from public access by configuring the virtual network.
Note
The QnA Maker service is being retired on the 31st of March, 2025. A newer version of the question and answering capability is now available as part of Azure AI Language. For question answering capabilities within the Language Service, see question answering. Starting 1st October, 2022 you won’t be able to create new QnA Maker resources. For information on migrating existing QnA Maker knowledge bases to question answering, consult the migration guide.
Restrict access to App Service (QnA runtime)
You can use the ServiceTag CognitiveServicesMangement to restrict inbound access to App Service or ASE (App Service Environment) network security group in-bound rules. Check out more information about service tags in the virtual network service tags article.
Regular App Service
- Open the Cloud Shell (PowerShell) from the Azure portal.
- Run the following command in the PowerShell window at the bottom of the page:
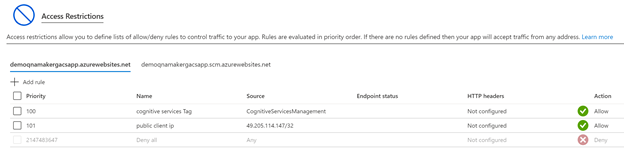
Add-AzWebAppAccessRestrictionRule -ResourceGroupName "<resource group name>" -WebAppName "<app service name>" -Name "Cognitive Services Tag" -Priority 100 -Action Allow -ServiceTag "CognitiveServicesManagement"
Verify the added access rule is present in the Access Restrictions section of the Networking tab:

To access the Test pane on the https://qnamaker.ai portal, add the Public IP address of the machine from where you want to access the portal. From the Access Restrictions page, select Add Rule, and allow access to your client IP.


Outbound access from App Service
The QnA Maker App Service requires outbound access to the below endpoint. Make sure it's added to the allowlist if there are any restrictions on the outbound traffic.
Configure App Service Environment to host QnA Maker App Service
The App Service Environment (ASE) can be used to host the QnA Maker App Service instance. Follow the steps below:
Create a new Azure AI Search Resource.
Create an external ASE with App Service.
- Follow this App Service quickstart for instructions. This process can take up to 1-2 hours.
- Finally, you'll have an App Service endpoint that will appear similar to:
https://<app service name>.<ASE name>.p.azurewebsite.net. - Example:
https:// mywebsite.myase.p.azurewebsite.net
Add the following App service configurations:
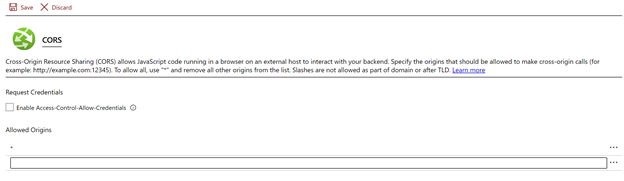
Name Value PrimaryEndpointKey <app service name>-PrimaryEndpointKeyAzureSearchName <Azure AI Search Resource Name from step #1>AzureSearchAdminKey <Azure AI Search Resource admin Key from step #1>QNAMAKER_EXTENSION_VERSION latestDefaultAnswer no answer foundAdd CORS origin "*" on the App Service to allow access to https://qnamaker.ai portal Test pane. CORS is located under the API header in the App Service pane.
Create a QnA Maker Azure AI services instance (Microsoft.CognitiveServices/accounts) using Azure Resource Manager. The QnA Maker endpoint should be set to the App Service Endpoint created above (
https:// mywebsite.myase.p.azurewebsite.net). Here's a sample Azure Resource Manager template you can use for reference.

Related questions
Can QnA Maker be deployed to an internal ASE?
The main reason for using an external ASE is so the QnAMaker service backend (authoring apis) can reach the App Service via the Internet. However, you can still protect it by adding inbound access restriction to allow only connections from addresses associated with the CognitiveServicesManagement service tag.
If you still want to use an internal ASE, you need to expose that specific QnA Maker app in the ASE on a public domain via the app gateway DNS TLS/SSL cert. For more information, see this article on Enterprise deployment of App Services.
Restrict access to Cognitive Search resource
The Cognitive Search instance can be isolated via a private endpoint after the QnA Maker resources have been created. Use the following steps to lock down access:
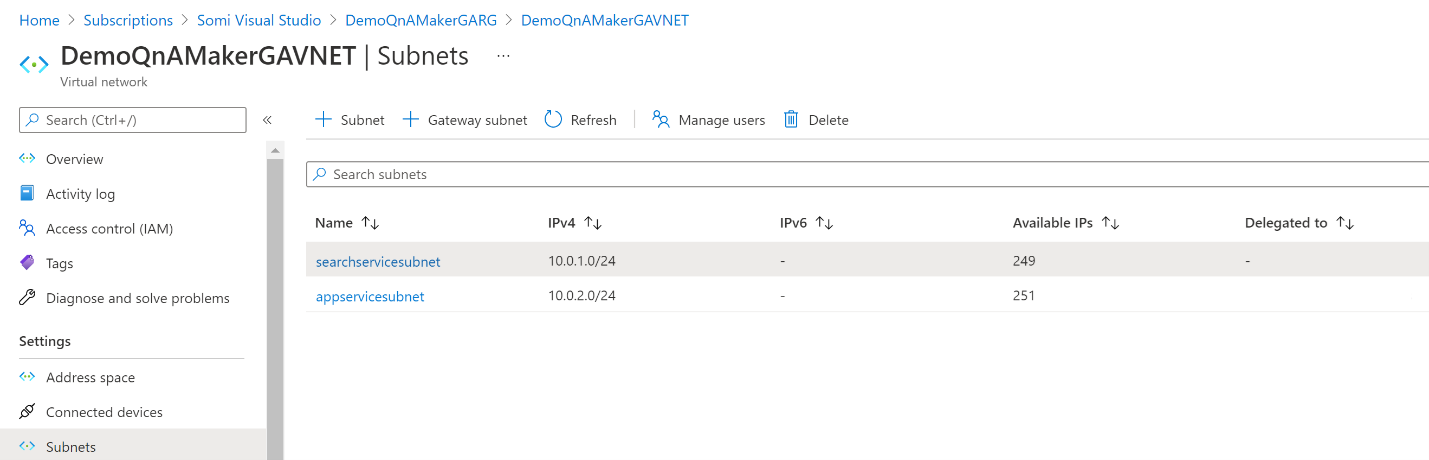
Create a new virtual network (VNet) or use existing VNet of ASE (App Service Environment).
Open the VNet resource, then under the Subnets tab create two subnets. One for the App Service (appservicesubnet) and another subnet (searchservicesubnet) for the Cognitive Search resource without delegation.
In the Networking tab in the Cognitive Search service instance switch endpoint connectivity data from public to private. This operation is a long running process and can take up to 30 minutes to complete.
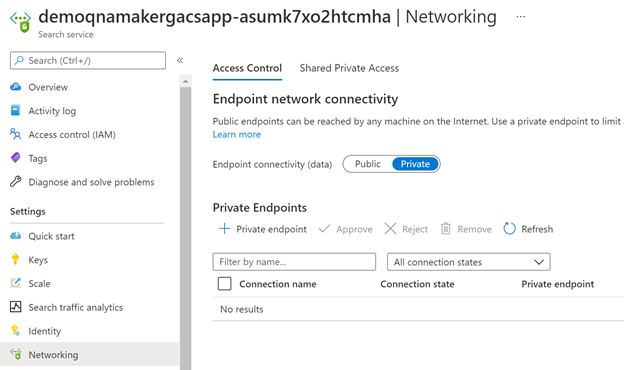
Once the Search resource is switched to private, select add private endpoint.
- Basics tab: make sure you're creating your endpoint in the same region as search resource.
- Resource tab: select the required search resource of type
Microsoft.Search/searchServices.

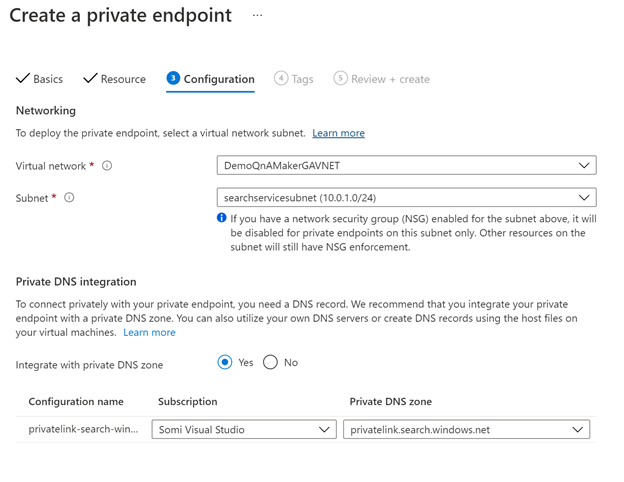
- Configuration tab: use the VNet, subnet (searchservicesubnet) created in step 2. After that, in section Private DNS integration select the corresponding subscription and create a new private DNS zone called privatelink.search.windows.net.
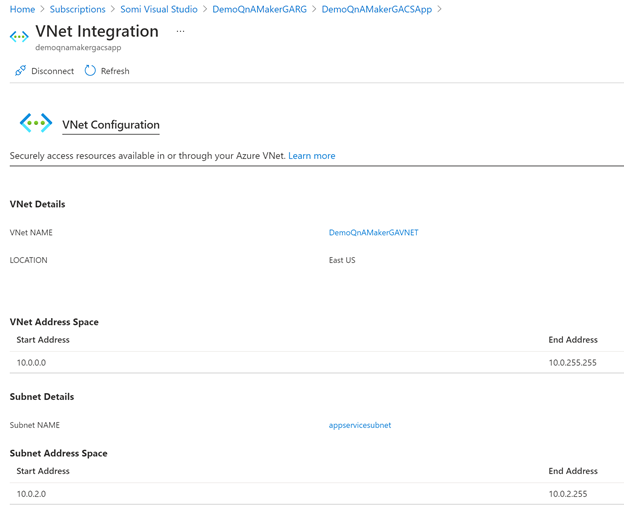
Enable VNET integration for the regular App Service. You can skip this step for ASE, as that already has access to the VNET.
- Go to App Service Networking section, and open VNet Integration.
- Link to the dedicated App Service VNet, Subnet (appservicevnet) created in step 2.


Create Private endpoints to the Azure Search resource.
Follow the steps below to restrict public access to QnA Maker resources. Protect an Azure AI services resource from public access by configuring the virtual network.
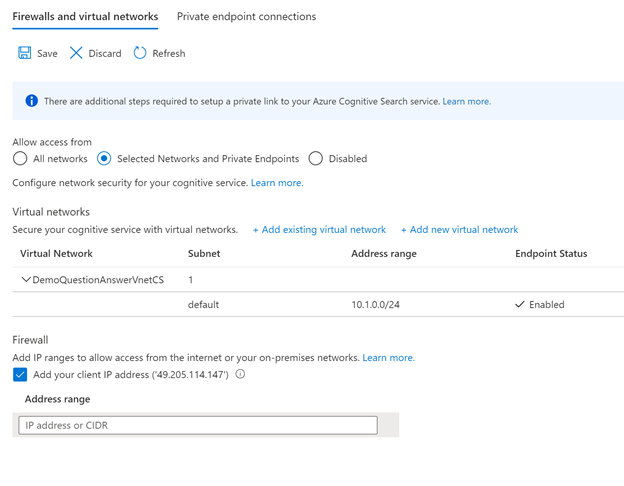
After restricting access to the Azure AI service resource based on VNet, To browse knowledgebases on the https://qnamaker.ai portal from your on-premises network or your local browser.
Grant access to on-premises network.
Grant access to your local browser/machine.
Add the public IP address of the machine under the Firewall section of the Networking tab. By default
portal.azure.comshows the current browsing machine's public IP (select this entry) and then select Save.