Quickstart: Create a voice assistant with custom commands
Important
Custom Commands will be retired on April 30th 2026. As of October 30th 2023 you can't create new Custom Commands applications in Speech Studio. Related to this change, LUIS will be retired on October 1st 2025. As of April 1st 2023 you can't create new LUIS resources.
In this quickstart, you create and test a basic custom commands application using Speech Studio. You can also access this application from a Windows client app.
Region Availability
At this time, custom commands support speech resources created in regions that have voice assistant capabilities.
Prerequisites
- Create a Speech resource in a region that supports custom commands. Refer to the Region Availability section above for list of supported regions.
- Download the sample Smart Room Lite json file.
- Download the latest version of Windows Voice Assistant Client.
Go to the Speech Studio for custom commands
In a web browser, go to Speech Studio.
Enter your credentials to sign in to the portal.
The default view is your list of Speech resources.
Note
If you don't see the select resource page, you can navigate there by choosing "Resource" from the settings menu on the top bar.
Select your Speech resource, and then select Go to Studio.
Select Custom commands.
The default view is a list of the custom commands applications you have under your selected resource.
Import an existing application as a new custom commands project
Select New project to create a project.
In the Name box, enter project name as
Smart-Room-Lite(or something else of your choice).In the Language list, select English (United States).
Select Browse files and in the browse window, select the SmartRoomLite.json file.
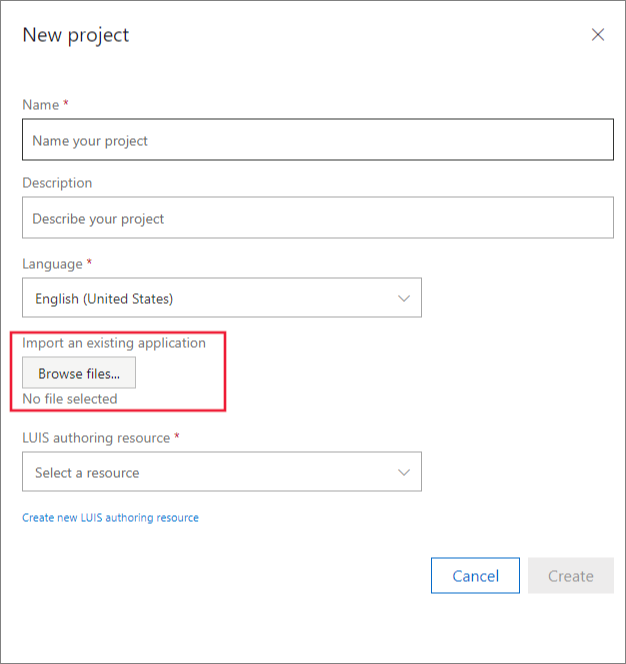
In the LUIS authoring resource list, select an authoring resource. If there are no valid authoring resources, create one by selecting Create new LUIS authoring resource.
- In the Resource Name box, enter the name of the resource.
- In the Resource Group list, select a resource group.
- In the Location list, select a location.
- In the Pricing Tier list, select a tier.
Note
You can create resource groups by entering the desired resource group name into the "Resource Group" field. The resource group will be created when Create is selected.
Next, select Create to create your project.
After the project is created, select your project. You should now see overview of your new custom commands application.
Try out some voice commands
- Select Train at the top of the right pane.
- Once training is completed, select Test and try out the following utterances:
- Turn on the tv
- Set the temperature to 80 degrees
- Turn it off
- The tv
- Set an alarm for 5 PM
Integrate custom commands application in an assistant
Before you can access this application from outside Speech Studio, you need to publish the application. For publishing an application, you need to configure prediction LUIS resource.
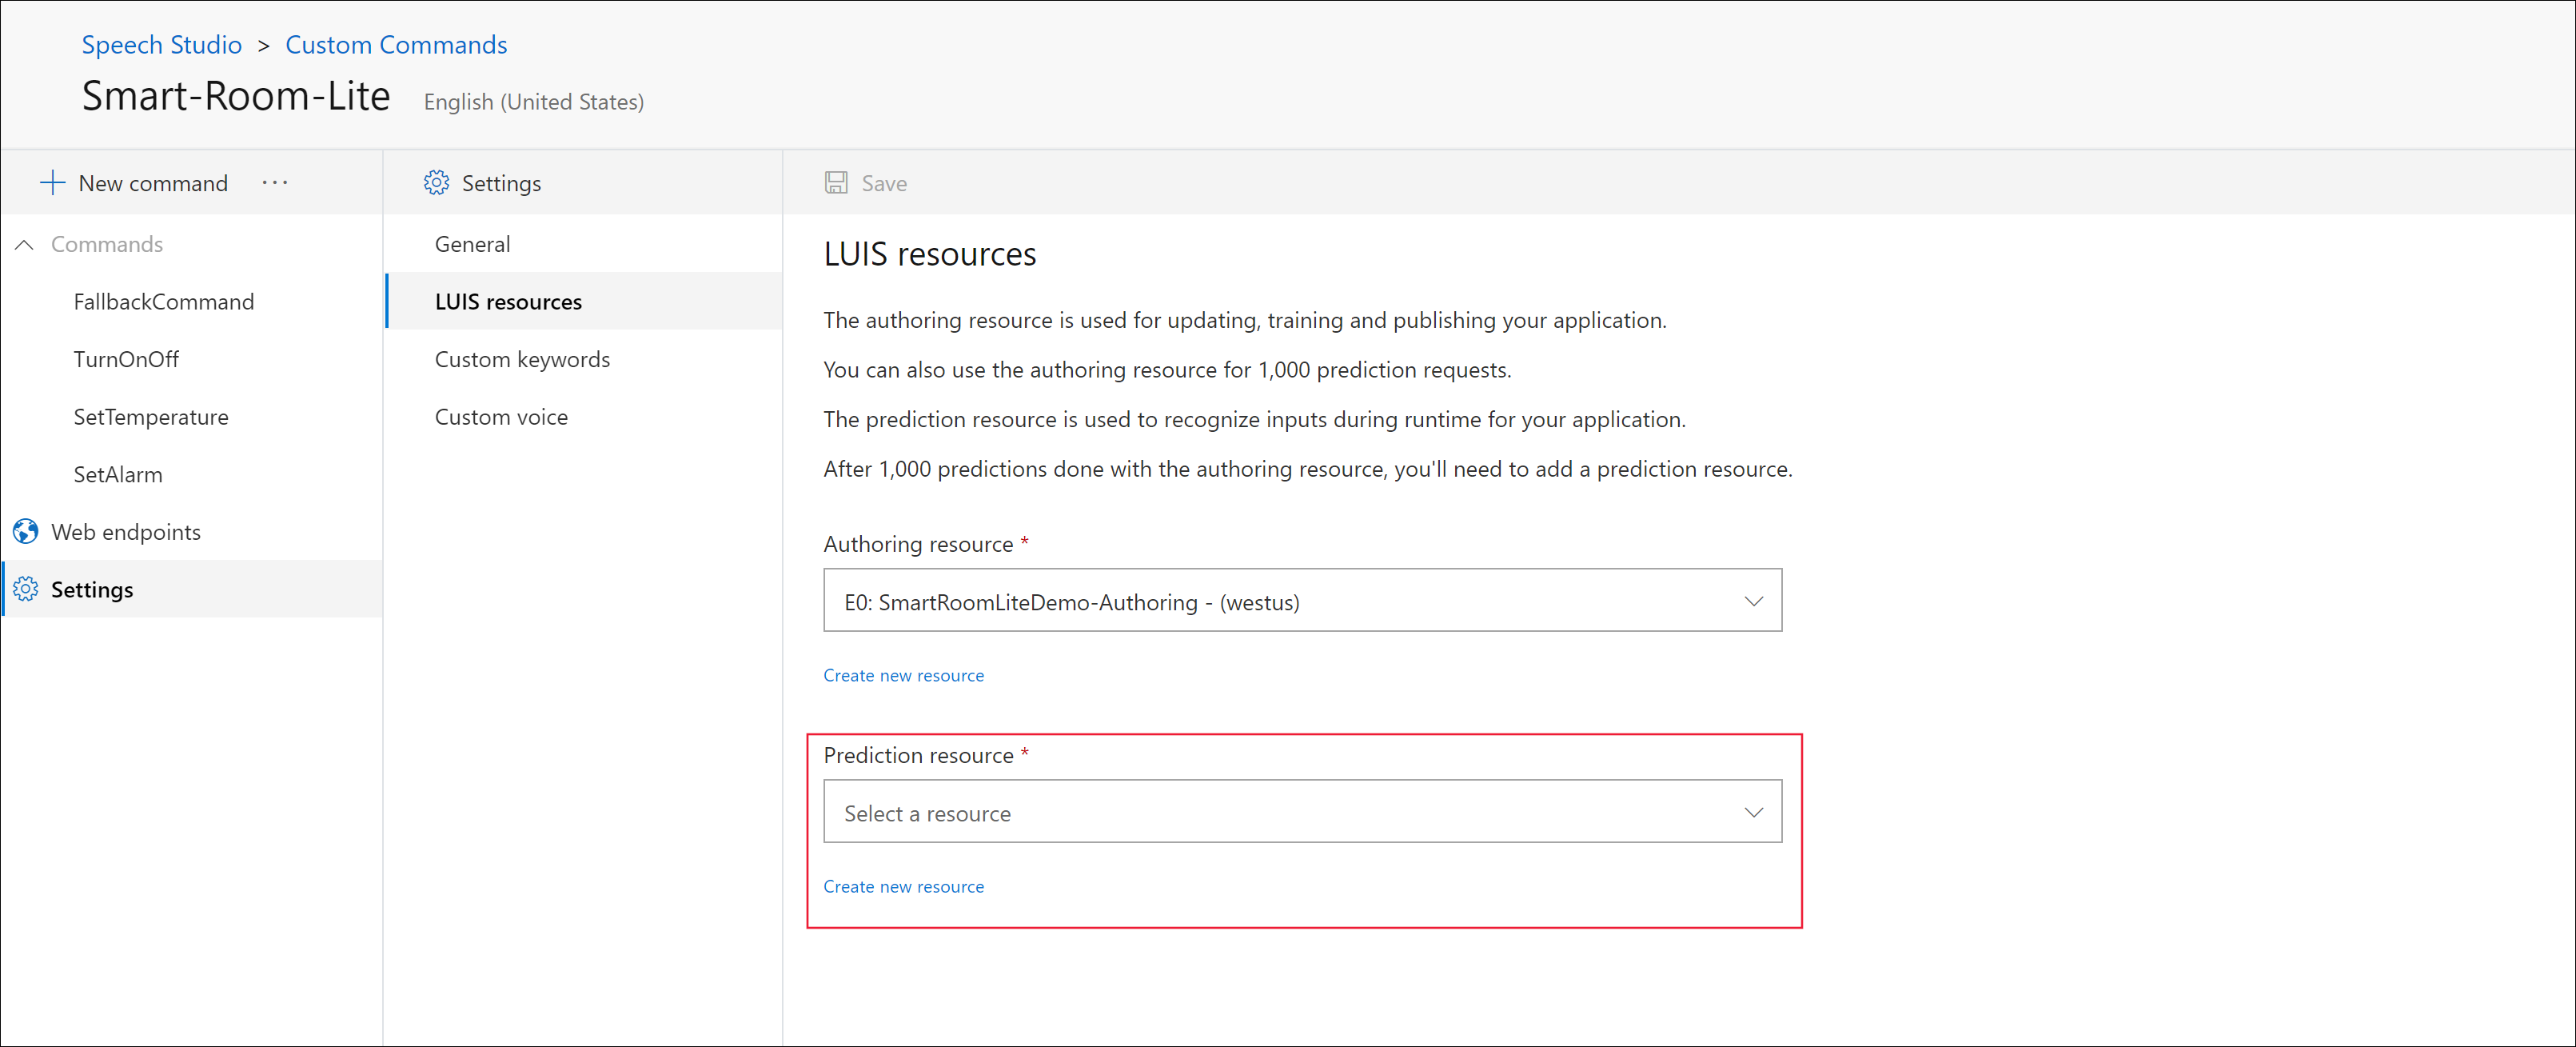
Update prediction LUIS resource
Select Settings in the left pane and select LUIS resources in the middle pane.
Select a prediction resource, or create one by selecting Create new resource.
Select Save.
Note
Because the authoring resource supports only 1,000 prediction endpoint requests per month, you will mandatorily need to set a LUIS prediction resource before publishing your custom commands application.
Publish the application
Select Publish on top of the right pane. Once publish completes, a new window appears. Note down the Application ID and Speech resource key value from it. You need these two values to be able to access the application from outside Speech Studio.
Alternatively, you can also get these values by selecting Settings > General section.
Access application from client
In the scope of this article, we're using the Windows Voice Assistant client you downloaded as part of the prerequisites. Unzip the folder.
- Launch VoiceAssistantClient.exe.
- Create a new publish profile and enter value for Connection Profile. In the General Settings section, enter values Subscription Key (this is same as the Speech resource key value you saved when publishing the application), Subscription key region and custom commands app ID.
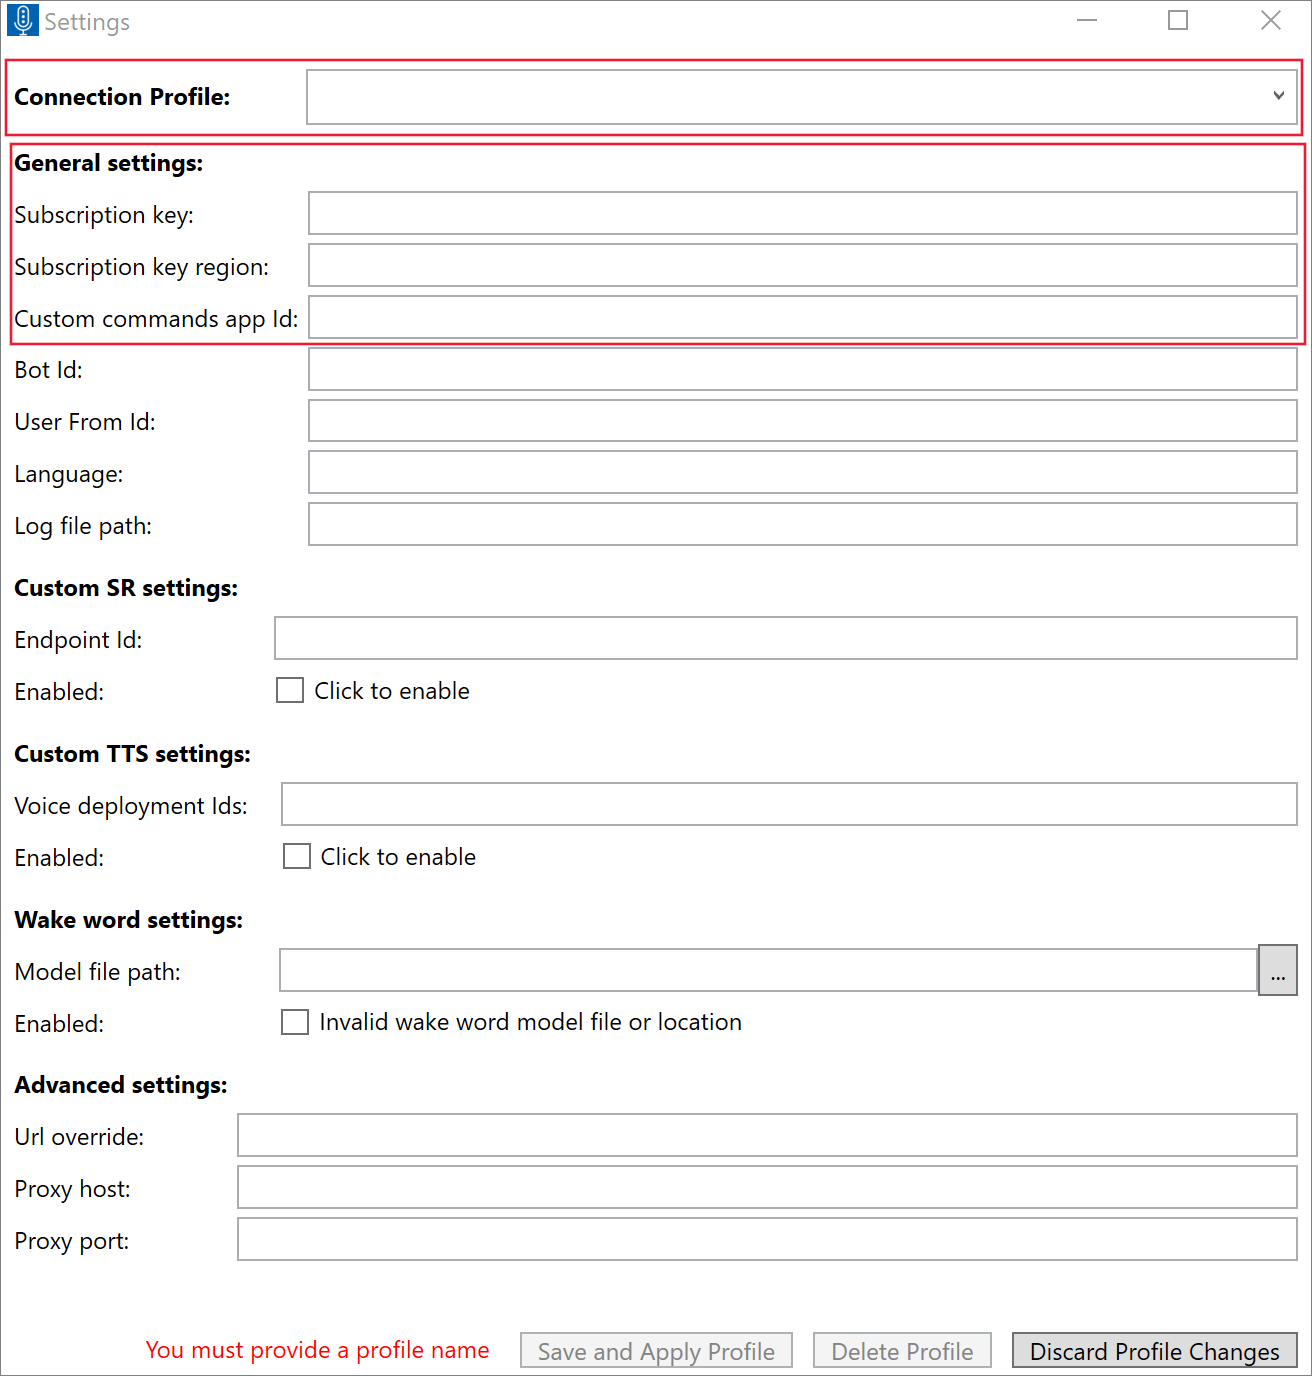
- Select Save and Apply Profile.
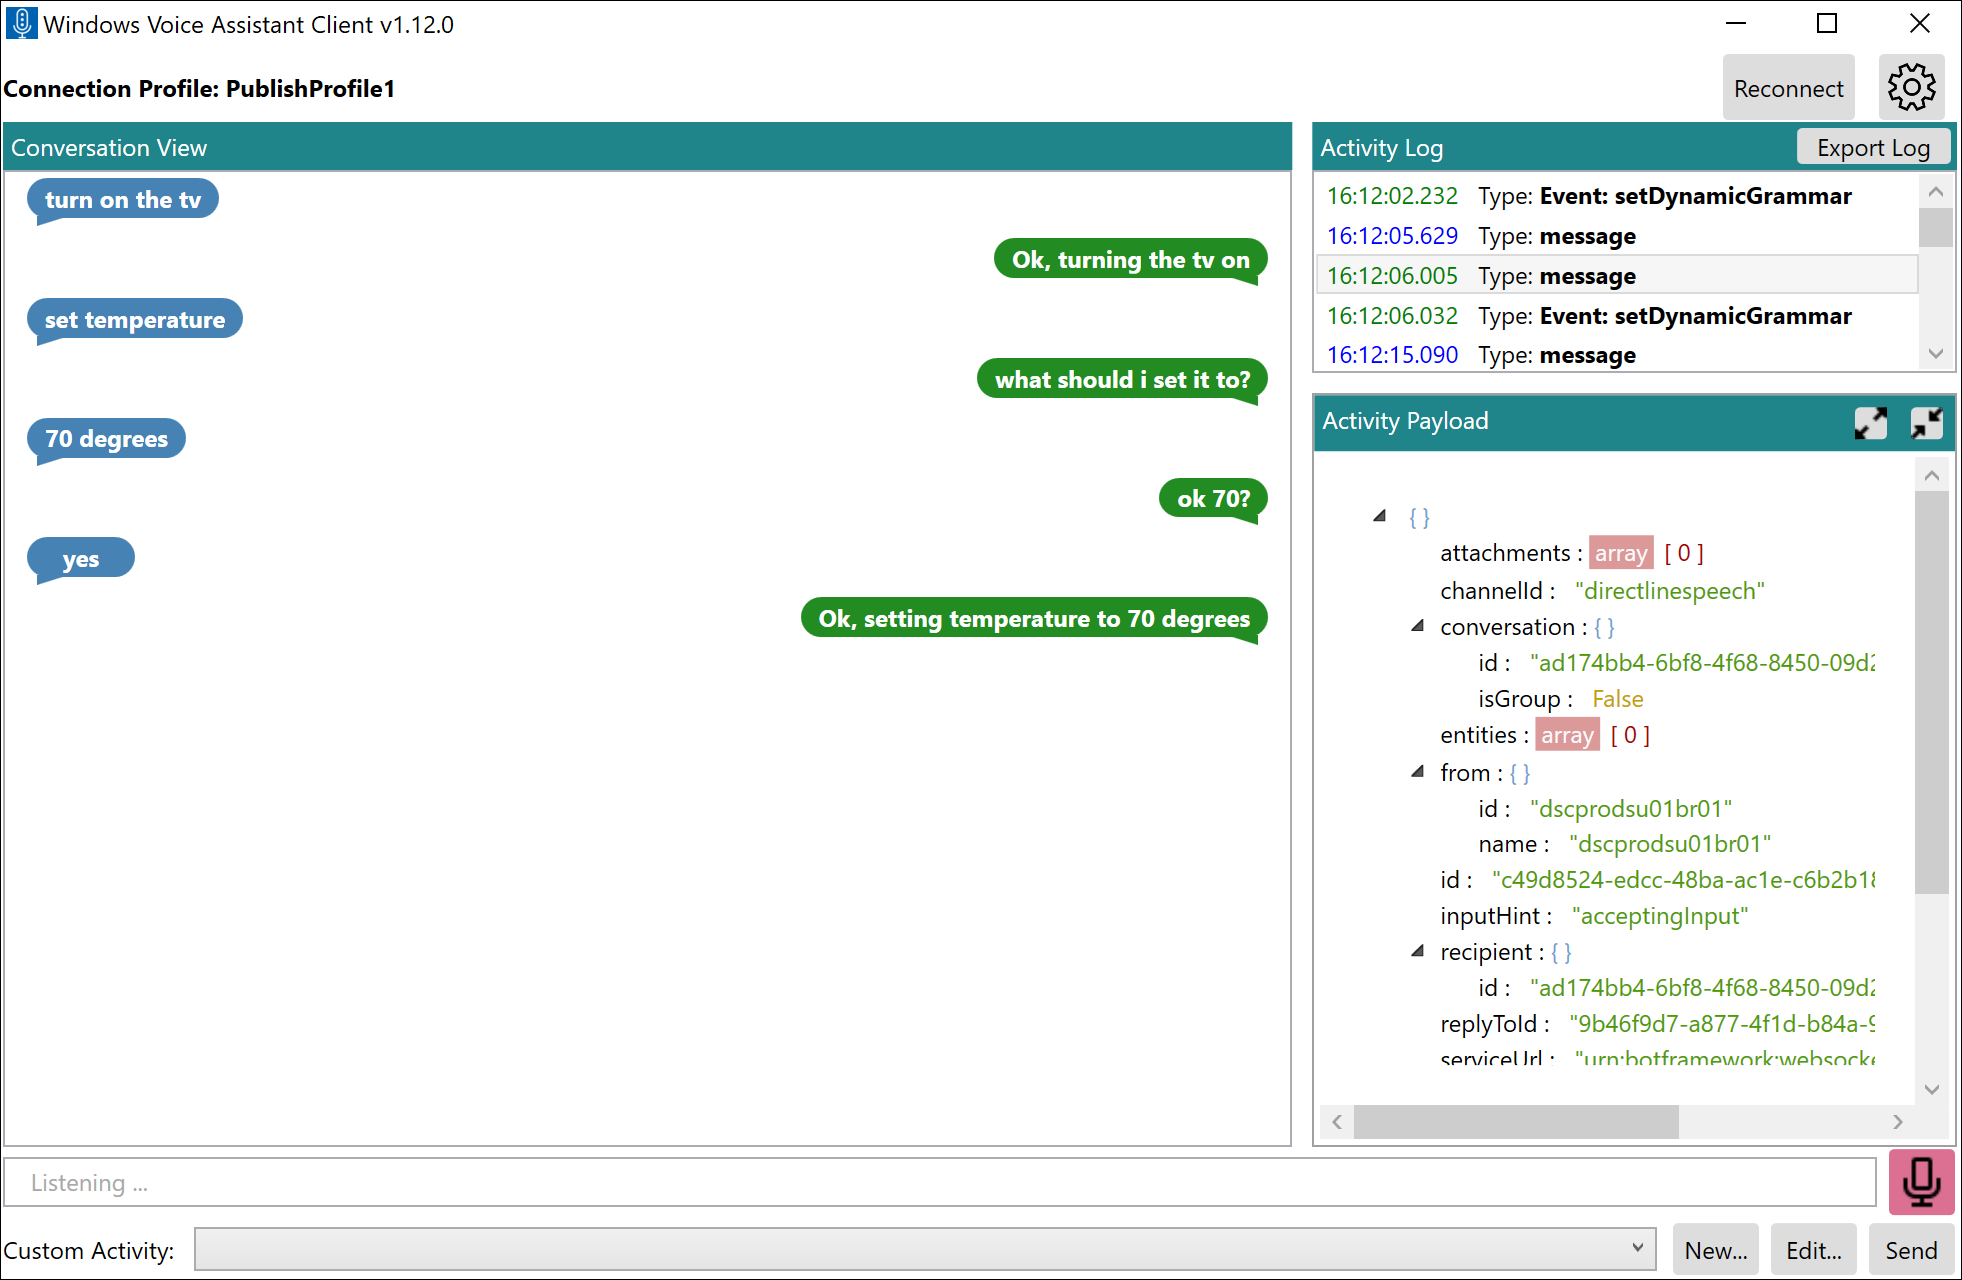
- Now try out the following inputs via speech/text
Tip
You can select entries in Activity Log to inspect the raw responses being sent from the custom commands service.
Next steps
In this article, you used an existing application. Next, in the how-to sections, you learn how to design, develop, debug, test and integrate a custom commands application from scratch.
Feedback
Coming soon: Throughout 2024 we will be phasing out GitHub Issues as the feedback mechanism for content and replacing it with a new feedback system. For more information see: https://aka.ms/ContentUserFeedback.
Submit and view feedback for