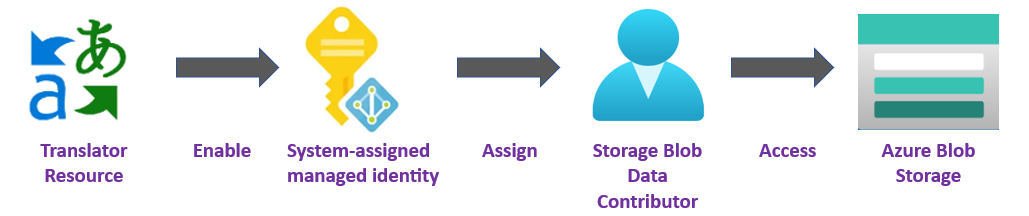
Managed identities for Document Translation
Managed identities for Azure resources are service principals that create a Microsoft Entra identity and specific permissions for Azure managed resources. Managed identities are a safer way to grant access to storage data and replace the requirement for you to include shared access signature tokens (SAS) with your source and target URLs.
You can use managed identities to grant access to any resource that supports Microsoft Entra authentication, including your own applications.
To grant access to an Azure resource, assign an Azure role to a managed identity using Azure role-based access control (
Azure RBAC).There's no added cost to use managed identities in Azure.
Important
When using managed identities, don't include a SAS token URL with your HTTP requests—your requests will fail. Using managed identities replaces the requirement for you to include shared access signature tokens (SAS) with your source and target URLs.
To use managed identities for Document Translation operations, you must create your Translator resource in a specific geographic Azure region such as East US. If your Translator resource region is set to Global, then you can't use managed identity for Document Translation. You can still use Shared Access Signature tokens (SAS) for Document Translation.
Document Translation is only available in the S1 Standard Service Plan (Pay-as-you-go) or in the D3 Volume Discount Plan. See Azure AI services pricing—Translator.
Prerequisites
To get started, you need:
An active Azure account—if you don't have one, you can create a free account.
A single-service Translator (not a multi-service Azure AI services) resource assigned to a geographical region such as West US. For detailed steps, see Create a multi-service resource.
A brief understanding of Azure role-based access control (
Azure RBAC) using the Azure portal.An Azure Blob Storage account in the same region as your Translator resource. You also need to create containers to store and organize your blob data within your storage account.
If your storage account is behind a firewall, you must enable the following configuration:
Go to the Azure portal and sign in to your Azure account.
Select the Storage account.
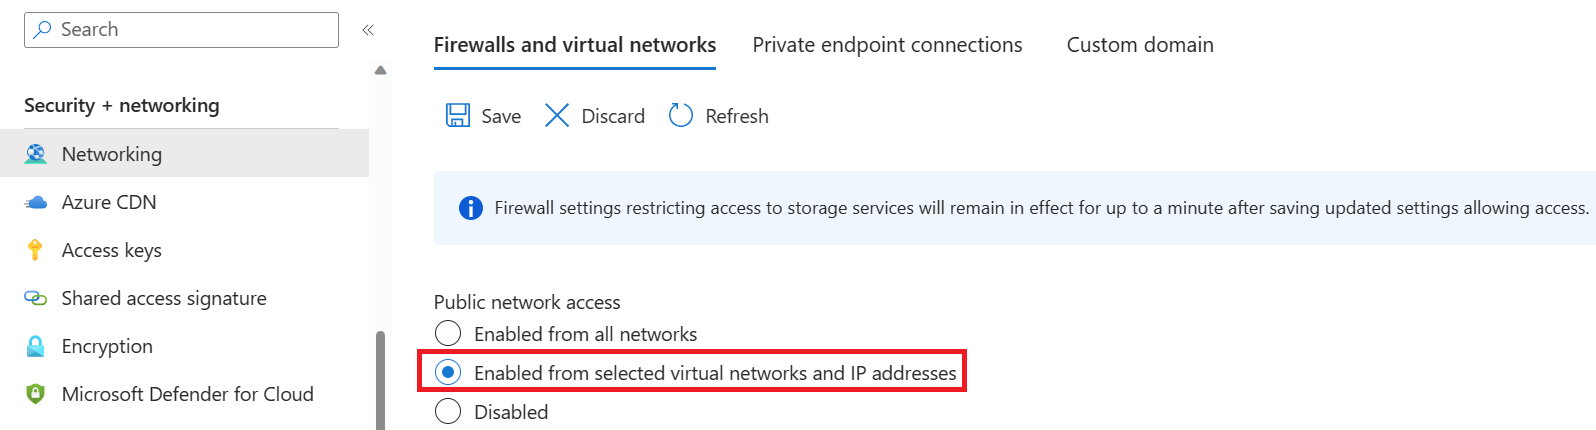
In the Security + networking group in the left pane, select Networking.
In the Firewalls and virtual networks tab, select Enabled from selected virtual networks and IP addresses.
Deselect all check boxes.
Make sure Microsoft network routing is selected.
Under the Resource instances section, select Microsoft.CognitiveServices/accounts as the resource type and select your Translator resource as the instance name.
Make certain that the Allow Azure services on the trusted services list to access this storage account box is checked. For more information about managing exceptions, see Configure Azure Storage firewalls and virtual networks.

Select Save.
Note
It may take up to 5 min for the network changes to propagate.
Although network access is now permitted, your Translator resource is still unable to access the data in your Storage account. You need to create a managed identity for and assign a specific access role to your Translator resource.
Managed identity assignments
There are two types of managed identities: system-assigned and user-assigned. Currently, Document Translation supports system-assigned managed identity:
A system-assigned managed identity is enabled directly on a service instance. It isn't enabled by default; you must go to your resource and update the identity setting.
The system-assigned managed identity is tied to your resource throughout its lifecycle. If you delete your resource, the managed identity is deleted as well.
In the following steps, we enable a system-assigned managed identity and grant your Translator resource limited access to your Azure Blob Storage account.
Enable a system-assigned managed identity
You must grant the Translator resource access to your storage account before it can create, read, or delete blobs. Once you enabled the Translator resource with a system-assigned managed identity, you can use Azure role-based access control (Azure RBAC), to give Translator access to your Azure storage containers.
Go to the Azure portal and sign in to your Azure account.
Select the Translator resource.
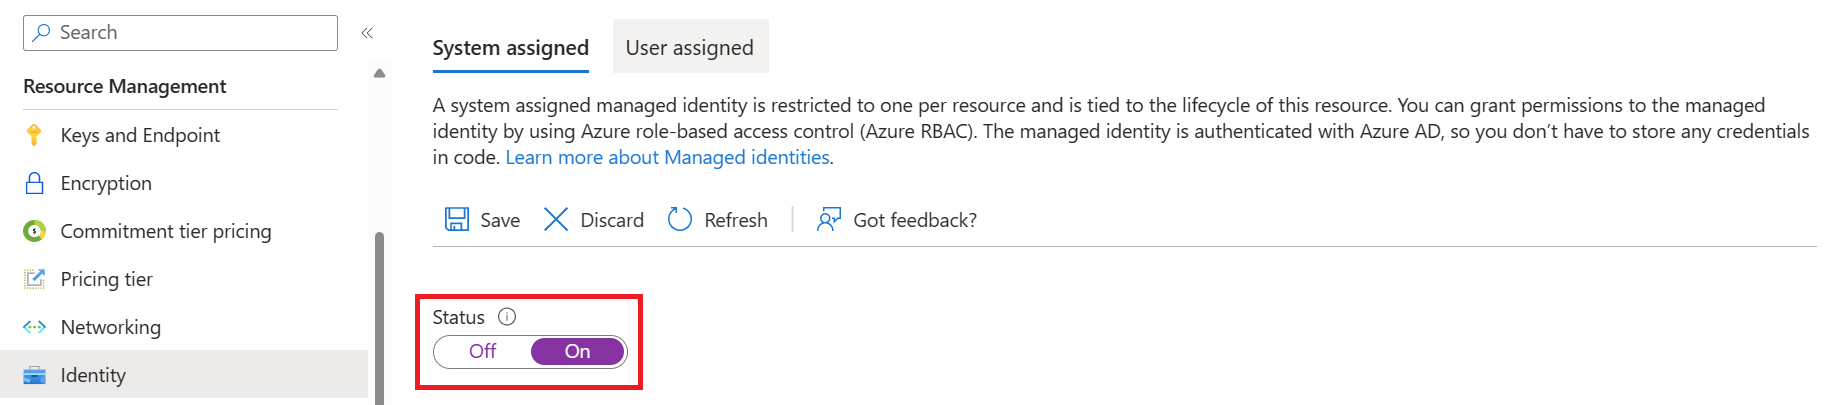
In the Resource Management group in the left pane, select Identity.
Within the System assigned tab, turn on the Status toggle.
Important
User assigned managed identity won't meet requirements for the batch transcription storage account scenario. Be sure to enable system assigned managed identity.
Select Save.
Grant storage account access for your Translator resource
Important
To assign a system-assigned managed identity role, you need Microsoft.Authorization/roleAssignments/write permissions, such as Owner or User Access Administrator at the storage scope for the storage resource.
Go to the Azure portal and sign in to your Azure account.
Select the Translator resource.
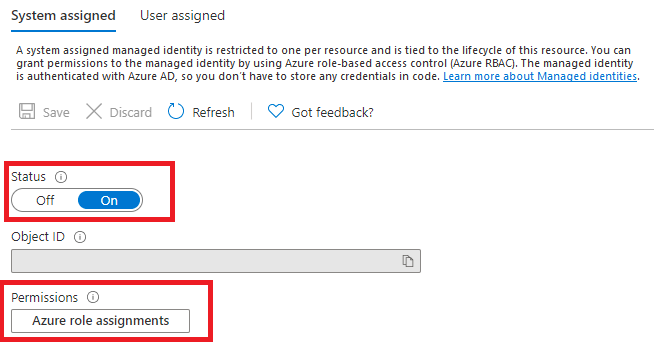
In the Resource Management group in the left pane, select Identity.
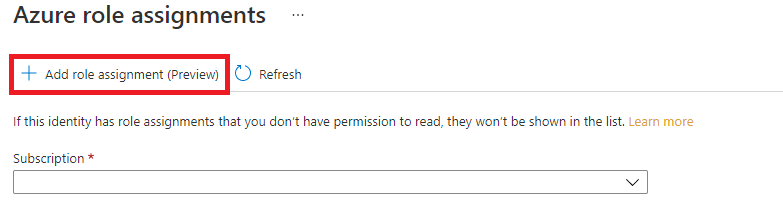
Under Permissions select Azure role assignments:
On the Azure role assignments page that opened, choose your subscription from the drop-down menu then select + Add role assignment.
Next, assign a Storage Blob Data Contributor role to your Translator service resource. The Storage Blob Data Contributor role gives Translator (represented by the system-assigned managed identity) read, write, and delete access to the blob container and data. In the Add role assignment pop-up window, complete the fields as follows and select Save:
Field Value Scope Storage. Subscription The subscription associated with your storage resource. Resource The name of your storage resource. Role Storage Blob Data Contributor. 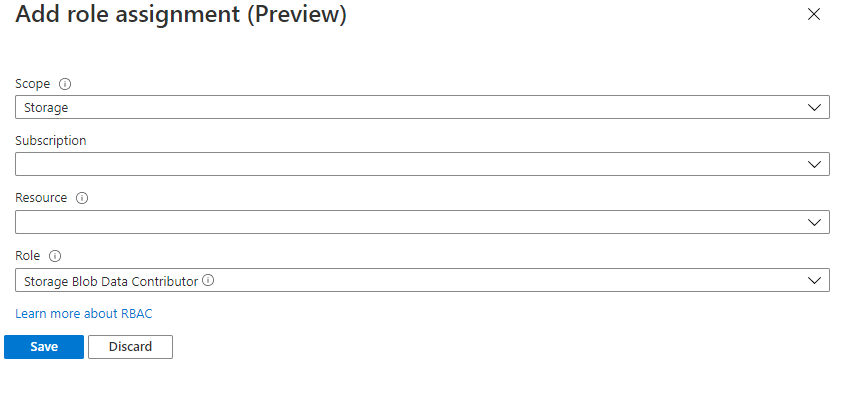
After the Added Role assignment confirmation message appears, refresh the page to see the added role assignment.

If you don't see the new role assignment right away, wait and try refreshing the page again. When you assign or remove role assignments, it can take up to 30 minutes for changes to take effect.

HTTP requests
An asynchronous batch translation request is submitted to your Translator service endpoint via a POST request.
With managed identity and
Azure RBAC, you no longer need to include SAS URLs.If successful, the POST method returns a
202 Acceptedresponse code and the service creates a batch request.The translated documents appear in your target container.
Headers
The following headers are included with each Document Translation API request:
| HTTP header | Description |
|---|---|
| Ocp-Apim-Subscription-Key | Required: The value is the Azure key for your Translator or Azure AI services resource. |
| Content-Type | Required: Specifies the content type of the payload. Accepted values are application/json or charset=UTF-8. |
POST request body
- The request URL is POST
https://<NAME-OF-YOUR-RESOURCE>.cognitiveservices.azure.com/translator/text/batch/v1.1/batches. - The request body is a JSON object named
inputs. - The
inputsobject contains bothsourceURLandtargetURLcontainer addresses for your source and target language pairs. With system assigned managed identity, you use a plain Storage Account URL (no SAS or other additions). The format ishttps://<storage_account_name>.blob.core.windows.net/<container_name>. - The
prefixandsuffixfields (optional) are used to filter documents in the container including folders. - A value for the
glossariesfield (optional) is applied when the document is being translated. - The
targetUrlfor each target language must be unique.
Important
If a file with the same name already exists in the destination, the job will fail. When using managed identities, don't include a SAS token URL with your HTTP requests. If you do so, your requests will fail.
Translate all documents in a container
This sample request body references a source container for all documents to be translated to a target language.
For more information, see request parameters.
{
    "inputs": [
        {
            "source": {
                "sourceUrl": "https://<storage_account_name>.blob.core.windows.net/<source_container_name>"
            },
            "targets": [
                {
                    "targetUrl": "https://<storage_account_name>.blob.core.windows.net/<target_container_name>"
                    "language": "fr"
                }
            ]
        }
    ]
}
Translate a specific document in a container
This sample request body references a single source document to be translated into two target languages.
Important
In addition to the request parameters noted previously, you must include "storageType": "File". Otherwise the source URL is assumed to be at the container level.
{
    "inputs": [
        {
            "storageType": "File",
            "source": {
                "sourceUrl": "https://<storage_account_name>.blob.core.windows.net/<source_container_name>/source-english.docx"
            },
            "targets": [
                {
                    "targetUrl": "https://<storage_account_name>.blob.core.windows.net/<target_container_name>/Target-Spanish.docx"
                    "language": "es"
                },
                {
                    "targetUrl": "https://<storage_account_name>.blob.core.windows.net/<target_container_name>/Target-German.docx",
                    "language": "de"
                }
            ]
        }
    ]
}
Translate all documents in a container using a custom glossary
This sample request body references a source container for all documents to be translated to a target language using a glossary.
For more information, see request parameters.
{
    "inputs": [
        {
            "source": {
                "sourceUrl": "https://<storage_account_name>.blob.core.windows.net/<source_container_name>",
                "filter": {
                    "prefix": "myfolder/"
                }
            },
            "targets": [
                {
                    "targetUrl": "https://<storage_account_name>.blob.core.windows.net/<target_container_name>",
                    "language": "es",
                    "glossaries": [
                        {
                            "glossaryUrl": "https://<storage_account_name>.blob.core.windows.net/<glossary_container_name>/en-es.xlf",
                            "format": "xliff"
                        }
                    ]
                }
            ]
        }
    ]
}
Great! You just learned how to enable and use a system-assigned managed identity. With managed identity for Azure Resources and Azure RBAC, you granted Translator specific access rights to your storage resource without including SAS tokens with your HTTP requests.
Next steps
Feedback
Coming soon: Throughout 2024 we will be phasing out GitHub Issues as the feedback mechanism for content and replacing it with a new feedback system. For more information see: https://aka.ms/ContentUserFeedback.
Submit and view feedback for