Events
Mar 17, 9 PM - Mar 21, 10 AM
Join the meetup series to build scalable AI solutions based on real-world use cases with fellow developers and experts.
Register nowThis browser is no longer supported.
Upgrade to Microsoft Edge to take advantage of the latest features, security updates, and technical support.
APPLIES TO:
![]() MongoDB vCore
MongoDB vCore
In this tutorial, you build a Node.js web application that connects to Azure Cosmos DB for MongoDB in vCore architecture. The MongoDB, Express, React.js, Node.js (MERN) stack is a popular collection of technologies used to build many modern web applications. With Azure Cosmos DB for MongoDB (vCore), you can build a new web application or migrate an existing application using MongoDB drivers that you're already familiar with. In this tutorial, you:
To complete this tutorial, you need the following resources:
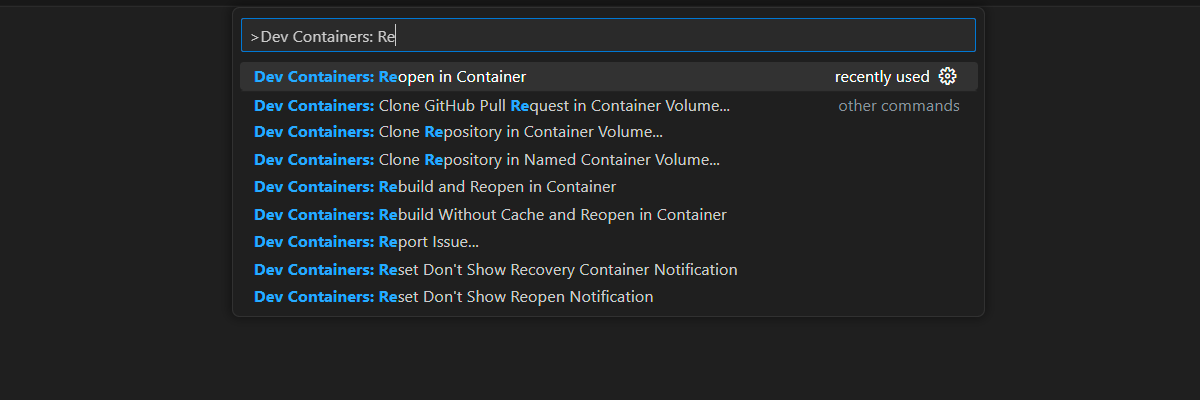
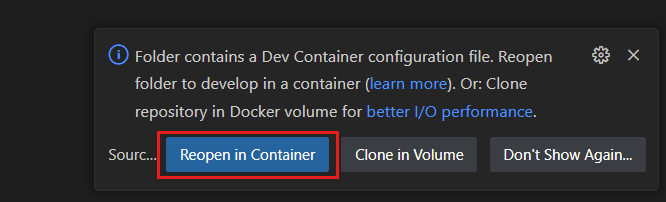
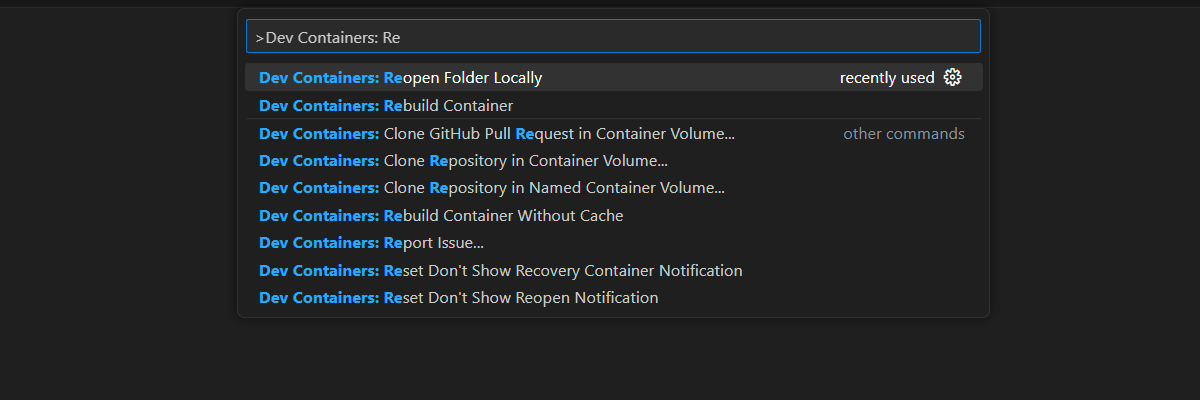
A development container environment is available with all dependencies required to complete every exercise in this project. You can run the development container in GitHub Codespaces or locally using Visual Studio Code.
GitHub Codespaces runs a development container managed by GitHub with Visual Studio Code for the Web as the user interface. For the most straightforward development environment, use GitHub Codespaces so that you have the correct developer tools and dependencies preinstalled to complete this training module.
Important
All GitHub accounts can use Codespaces for up to 60 hours free each month with 2 core instances.
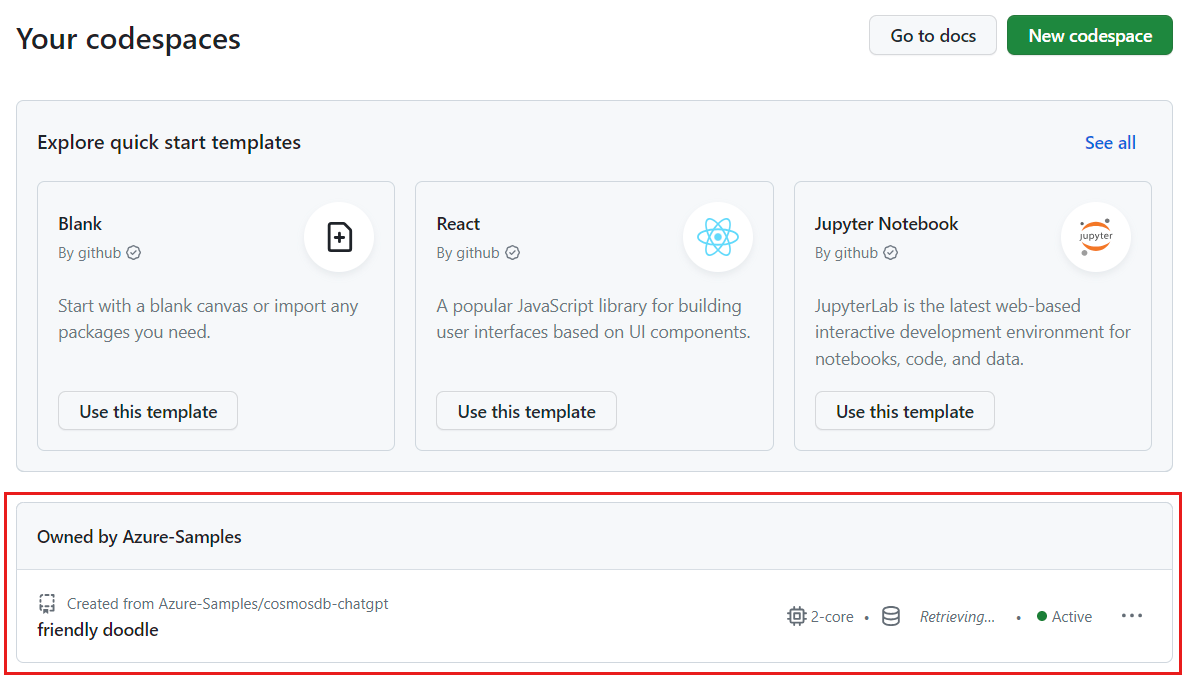
Start the process to create a new GitHub Codespace on the main branch of the azure-samples/msdocs-azure-cosmos-db-mongodb-mern-web-app GitHub repository.
![]()
On the Create codespace page, review the codespace configuration settings and then select Create new codespace
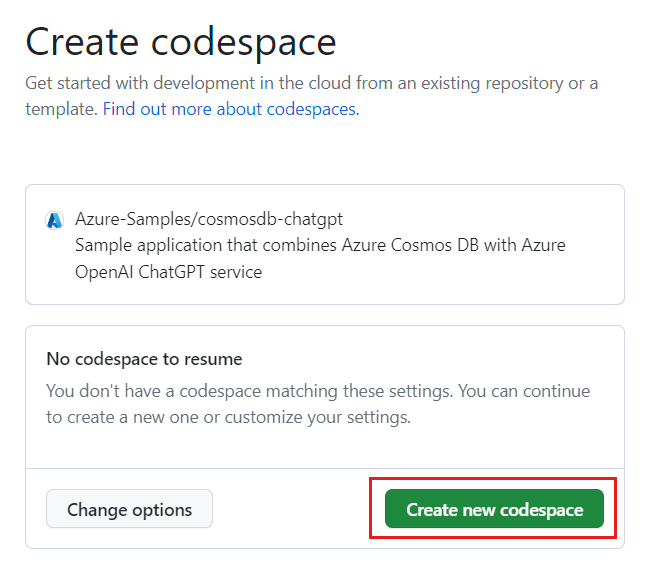
Wait for the codespace to start. This startup process can take a few minutes.
Open a new terminal in the codespace.
Tip
You can use the main menu to navigate to the Terminal menu option and then select the New Terminal option.

Check the versions of the tools you use in this tutorial.
docker --version

node --version

npm --version

az --version
Note
This tutorial requires the following versions of each tool which are preinstalled in your environment:
| Tool | Version |
|---|---|
| Docker | ≥ 20.10.0 |
| Node.js | ≥ 18.0150 |
| NPM | ≥ 9.5.0 |
| Azure CLI | ≥ 2.46.0 |
Close the terminal.
The remaining steps in this tutorial take place in the context of this development container.
Start by running the sample application's API with the local MongoDB container to validate that the application works.
Run a MongoDB container using Docker and publish the typical MongoDB port (27017).
docker pull mongo:6.0

docker run --detach --publish 27017:27017 mongo:6.0
In the side bar, select the MongoDB extension.
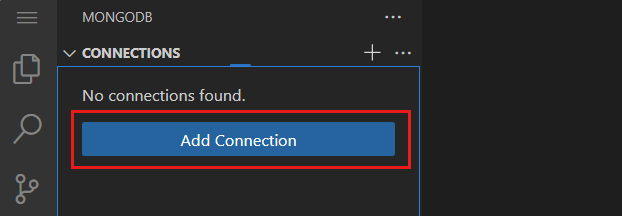
Add a new connection to the MongoDB extension using the connection string mongodb://localhost.
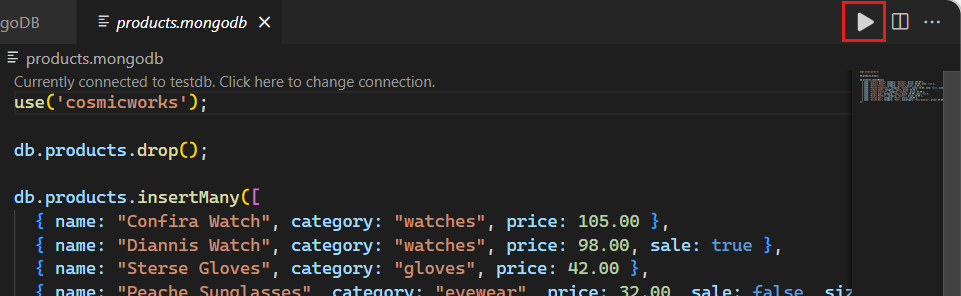
Once the connection is successful, open the data/products.mongodb playground file.
Select the Run all icon to execute the script.
The playground run should result in a list of documents in the local MongoDB collection. Here's a truncated example of the output.
[
  {
    "_id": { "$oid": "640a146e89286b79b6628eef" },
    "name": "Confira Watch",
    "category": "watches",
    "price": 105
  },
  {
    "_id": { "$oid": "640a146e89286b79b6628ef0" },
    "name": "Diannis Watch",
    "category": "watches",
    "price": 98,
    "sale": true
  },
  ...
]
Note
The object ids (_id) are randomnly generated and will differ from this truncated example output.
In the server/ directory, create a new .env file.
In the server/.env file, add an environment variable for this value:
| Environment Variable | Value |
|---|---|
CONNECTION_STRING |
The connection string to the Azure Cosmos DB for MongoDB (vCore) cluster. For now, use mongodb://localhost:27017?directConnection=true. |
CONNECTION_STRING=mongodb://localhost:27017?directConnection=true
Change the context of the terminal to the server/ folder.
cd server
Install the dependencies from Node Package Manager (npm).
npm install
Start the Node.js & Express application.
npm start
The API automatically opens a browser window to verify that it returns an array of product documents.
Close the extra browser tab/window.
Close the terminal.
Now, let's validate that the application works seamlessly with Azure Cosmos DB for MongoDB (vCore). For this task, populate the pre-existing cluster with seed data using the MongoDB shell and then update the API's connection string.
Sign in to the Azure portal (https://portal.azure.com).
Navigate to the existing Azure Cosmos DB for MongoDB (vCore) cluster page.
From the Azure Cosmos DB for MongoDB (vCore) cluster page, select the Connection strings navigation menu option.
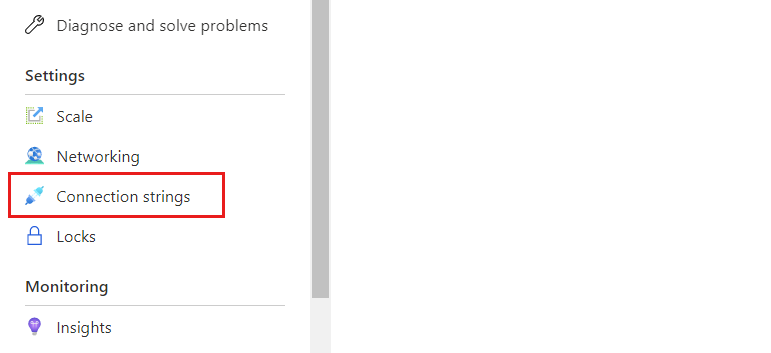
Record the value from the Connection string field.
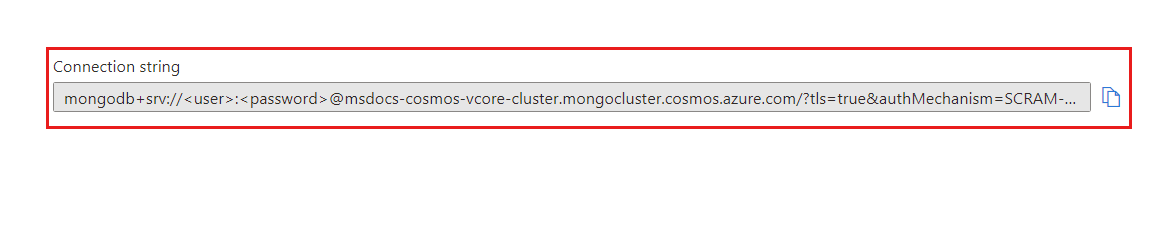
Important
The connection string in the portal does not include the username and password values. You must replace the <user> and <password> placeholders with the credentials you used when you originally created the cluster.
Back within your integrated development environment (IDE), open a new terminal.
Start the MongoDB Shell using the mongosh command and the connection string you recorded earlier. Make sure you replace the <user> and <password> placeholders with the credentials you used when you originally created the cluster.
mongosh "<mongodb-cluster-connection-string>"
Note
You may need to encode specific values for the connection string. In this example, the name of the cluster is msdocs-cosmos-tutorial, the username is clusteradmin, and the password is P@ssw.rd. In the password the @ character will need to be encoded using %40. An example connection string is provided here with the correct encoding of the password.
CONNECTION_STRING=mongodb+srv://clusteradmin:P%40ssw.rd@msdocs-cosmos-tutorial.mongocluster.cosmos.azure.com/?tls=true&authMechanism=SCRAM-SHA-256&retrywrites=false&maxIdleTimeMS=120000
Within the shell, run the following commands to create your database, create your collection, and seed with starter data.
use('cosmicworks');

db.products.drop();

db.products.insertMany([
  { name: "Confira Watch", category: "watches", price: 105.00 },
  { name: "Diannis Watch", category: "watches", price: 98.00, sale: true },
  { name: "Sterse Gloves", category: "gloves", price: 42.00 },
  { name: "Peache Sunglasses", category: "eyewear", price: 32.00, sale: false, sizes: [ "S", "M", "L" ] },
  { name: "Icento Pack", category: "bags", price: 58.00 },
  { name: "Iroowl Bracelet", category: "watches", price: 66.00 },
  { name: "Glaark Bag", category: "bags", price: 56.00, sale: true },
  { name: "Windry Mittens", category: "gloves", price: 35.00 },
  { name: "Tuvila Hat", category: "hats", price: 120.00 },
  { name: "Klinto Hat", category: "hats", subcategory: "hats-beanies", price: 65.00 }
]);

db.products.find({});
The commands should result in a list of documents in the local MongoDB collection. Here's a truncated example of the output.
[
  {
    "_id": { "$oid": "640a146e89286b79b6628eef" },
    "name": "Confira Watch",
    "category": "watches",
    "price": 105
  },
  {
    "_id": { "$oid": "640a146e89286b79b6628ef0" },
    "name": "Diannis Watch",
    "category": "watches",
    "price": 98,
    "sale": true
  },
  ...
]
Note
The object ids (_id) are randomnly generated and will differ from this truncated example output.
Exit the MongoDB shell.
exit
In the client/ directory, create a new .env file.
In the client/.env file, add an environment variable for this value:
| Environment Variable | Value |
|---|---|
CONNECTION_STRING |
The connection string to the Azure Cosmos DB for MongoDB (vCore) cluster. Use the same connection string you used with the mongo shell. |
CONNECTION_STRING=<your-connection-string>
Validate that the application is using the database service by changing the context of the terminal to the server/ folder, installing dependencies from Node Package Manager (npm), and then starting the application.
cd server

npm install

npm start
The API automatically opens a browser window to verify that it returns an array of product documents.
Close the extra browser tab/window. Then, close the terminal.
Deploy the service and client to Azure App Service to prove that the application works end-to-end. Use secrets in the web apps to store environment variables with credentials and API endpoints.
Within your integrated development environment (IDE), open a new terminal.
Create a shell variable for the name of the pre-existing resource group named resourceGroupName.
# Variable for resource group name
resourceGroupName="<existing-resource-group>"
Create shell variables for the two web app named serverAppName and clientAppName.
# Variable for randomnly generated suffix
let suffix=$RANDOM*$RANDOM

# Variable for web app names with a randomnly generated suffix
serverAppName="server-app-$suffix"
clientAppName="client-app-$suffix"
If you haven't already, sign in to the Azure CLI using the az login --use-device-code command.
Change the current working directory to the server/ path.
cd server
Create a new web app for the server component of the MERN application with az webapp up.
az webapp up \
    --resource-group $resourceGroupName \
    --name $serverAppName \
    --sku F1 \
    --runtime "NODE|18-lts"
Create a new connection string setting for the server web app named CONNECTION_STRING with az webapp config connection-string set. Use the same value for the connection string you used with the MongoDB shell and .env file earlier in this tutorial.
az webapp config connection-string set \
    --resource-group $resourceGroupName \
    --name $serverAppName \
    --connection-string-type custom \
    --settings "CONNECTION_STRING=<mongodb-connection-string>"
Get the URI for the server web app with az webapp show and store it in a shell variable name d serverUri.
serverUri=$(az webapp show \
    --resource-group $resourceGroupName \
    --name $serverAppName \
    --query hostNames[0] \
    --output tsv)
Use the open-cli package and command from NuGet with npx to open a browser window using the URI for the server web app. Validate that the server app is returning your JSON array data from the MongoDB (vCore) cluster.
npx open-cli "https://$serverUri/products" --yes
Tip
Sometimes deployments can finish asynchronously. If you are not seeing what you expect, wait another minute and refresh your browser window.
Change the working directory to the client/ path.
cd ../client
Create a new web app for the client component of the MERN application with az webapp up.
az webapp up \
    --resource-group $resourceGroupName \
    --name $clientAppName \
    --sku F1 \
    --runtime "NODE|18-lts"
Create a new app setting for the client web app named REACT_APP_API_ENDPOINT with az webapp config appsettings set. Use the server API endpoint stored in the serverUri shell variable.
az webapp config appsettings set \
    --resource-group $resourceGroupName \
    --name $clientAppName \
    --settings "REACT_APP_API_ENDPOINT=https://$serverUri"
Get the URI for the client web app with az webapp show and store it in a shell variable name d clientUri.
clientUri=$(az webapp show \
    --resource-group $resourceGroupName \
    --name $clientAppName \
    --query hostNames[0] \
    --output tsv)
Use the open-cli package and command from NuGet with npx to open a browser window using the URI for the client web app. Validate that the client app is rendering data from the server app's API.
npx open-cli "https://$clientUri" --yes
Tip
Sometimes deployments can finish asynchronously. If you are not seeing what you expect, wait another minute and refresh your browser window.
Close the terminal.
When you're working in your own subscription, at the end of a project, it's a good idea to remove the resources that you no longer need. Resources left running can cost you money. You can delete resources individually or delete the resource group to delete the entire set of resources.
To delete the entire resource group, use az group delete.
az group delete \
    --name $resourceGroupName \
    --yes
Validate that the resource group is deleted using az group list.
az group list
You may also wish to clean up your development environment or return it to its typical state.
Deleting the GitHub Codespaces environment ensures that you can maximize the amount of free per-core hours entitlement you get for your account.
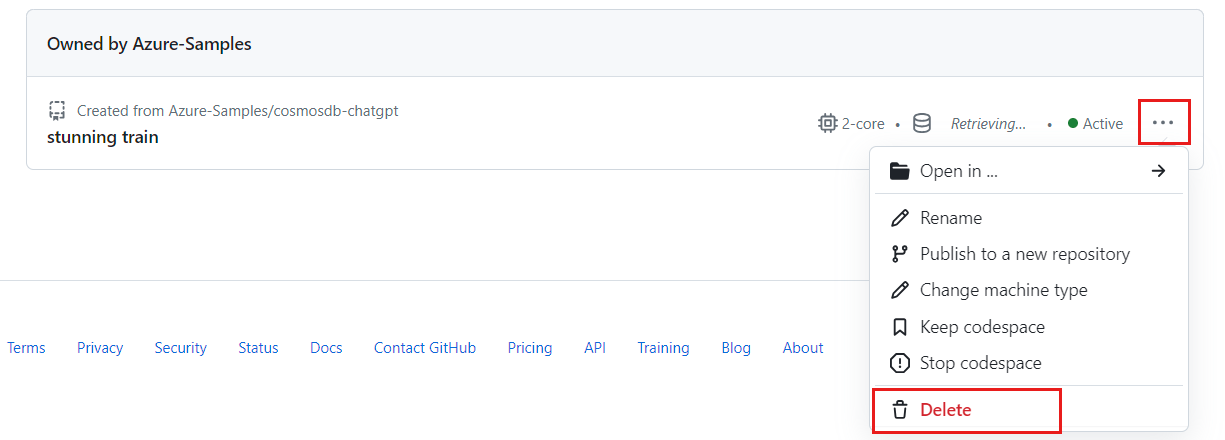
Sign into the GitHub Codespaces dashboard (https://github.com/codespaces).
Locate your currently running codespaces sourced from the azure-samples/msdocs-azure-cosmos-db-mongodb-mern-web-app GitHub repository.
Open the context menu for the codespace and then select Delete.
Now that you have built your first application for the MongoDB (vCore) cluster, learn how to migrate your data to Azure Cosmos DB.
Events
Mar 17, 9 PM - Mar 21, 10 AM
Join the meetup series to build scalable AI solutions based on real-world use cases with fellow developers and experts.
Register nowTraining
Module
Implement vCore-based Azure Cosmos DB for MongoDB - Training
Implement vCore-based Azure Cosmos DB for MongoDB.
Certification
Microsoft Certified: Azure Cosmos DB Developer Specialty - Certifications
Write efficient queries, create indexing policies, manage, and provision resources in the SQL API and SDK with Microsoft Azure Cosmos DB.
Documentation
Quickstart: Create a new cluster - Azure Cosmos DB for MongoDB vCore
In this quickstart, create a new Azure Cosmos DB for MongoDB vCore cluster to store databases, collections, and documents by using the Azure portal.
Introduction/Overview - Azure Cosmos DB for MongoDB (vCore)
Learn about vCore-based Azure Cosmos DB for MongoDB, a fully managed MongoDB-compatible database for building modern applications with a familiar architecture.
Options to migrate data from MongoDB - vCore-based Azure Cosmos DB for MongoDB
Review various options to migrate your data from other MongoDB sources to vCore-based Azure Cosmos DB for MongoDB.