Tutorial: Store and use Azure Cosmos DB credentials with Azure Key Vault
APPLIES TO:
![]() NoSQL
NoSQL
![]() MongoDB
MongoDB
![]() Cassandra
Cassandra
![]() Gremlin
Gremlin
![]() Table
Table
Important
It's recommended to access Azure Cosmos DB is to use a system-assigned managed identity. If both the managed identity solution and cert based solution do not meet your needs, please use the Azure Key vault solution in this article.
If you're using Azure Cosmos DB as your database, you connect to databases, container, and items by using an SDK, the API endpoint, and either the primary or secondary key.
It's not a good practice to store the endpoint URI and sensitive read-write keys directly within application code or configuration file. Ideally, this data is read from environment variables within the host. In Azure App Service, app settings allow you to inject runtime credentials for your Azure Cosmos DB account without the need for developers to store these credentials in an insecure clear text manner.
Azure Key Vault iterates on this best practice further by allowing you to store these credentials securely while giving services like Azure App Service managed access to the credentials. Azure App Service will securely read your credentials from Azure Key Vault and inject those credentials into your running application.
With this best practice, developers can store the credentials for tools like the Azure Cosmos DB emulator or Try Azure Cosmos DB free during development. Then, the operations team can ensure that the correct production settings are injected at runtime.
In this tutorial, you learn how to:
- Create an Azure Key Vault instance
- Add Azure Cosmos DB credentials as secrets to the key vault
- Create and register an Azure App Service resource and grant "read key" permissions
- Inject key vault secrets into the App Service resource
Note
This tutorial and the sample application uses an Azure Cosmos DB for NoSQL account. You can perform many of the same steps using other APIs.
Prerequisites
- An existing Azure Cosmos DB for NoSQL account.
- If you have an Azure subscription, create a new account.
- If you don't have an Azure subscription, create a free account before you begin.
- Alternatively, you can try Azure Cosmos DB free before you commit.
- GitHub account.
Before you begin: Get Azure Cosmos DB credentials
Before you start, you'll get the credentials for your existing account.
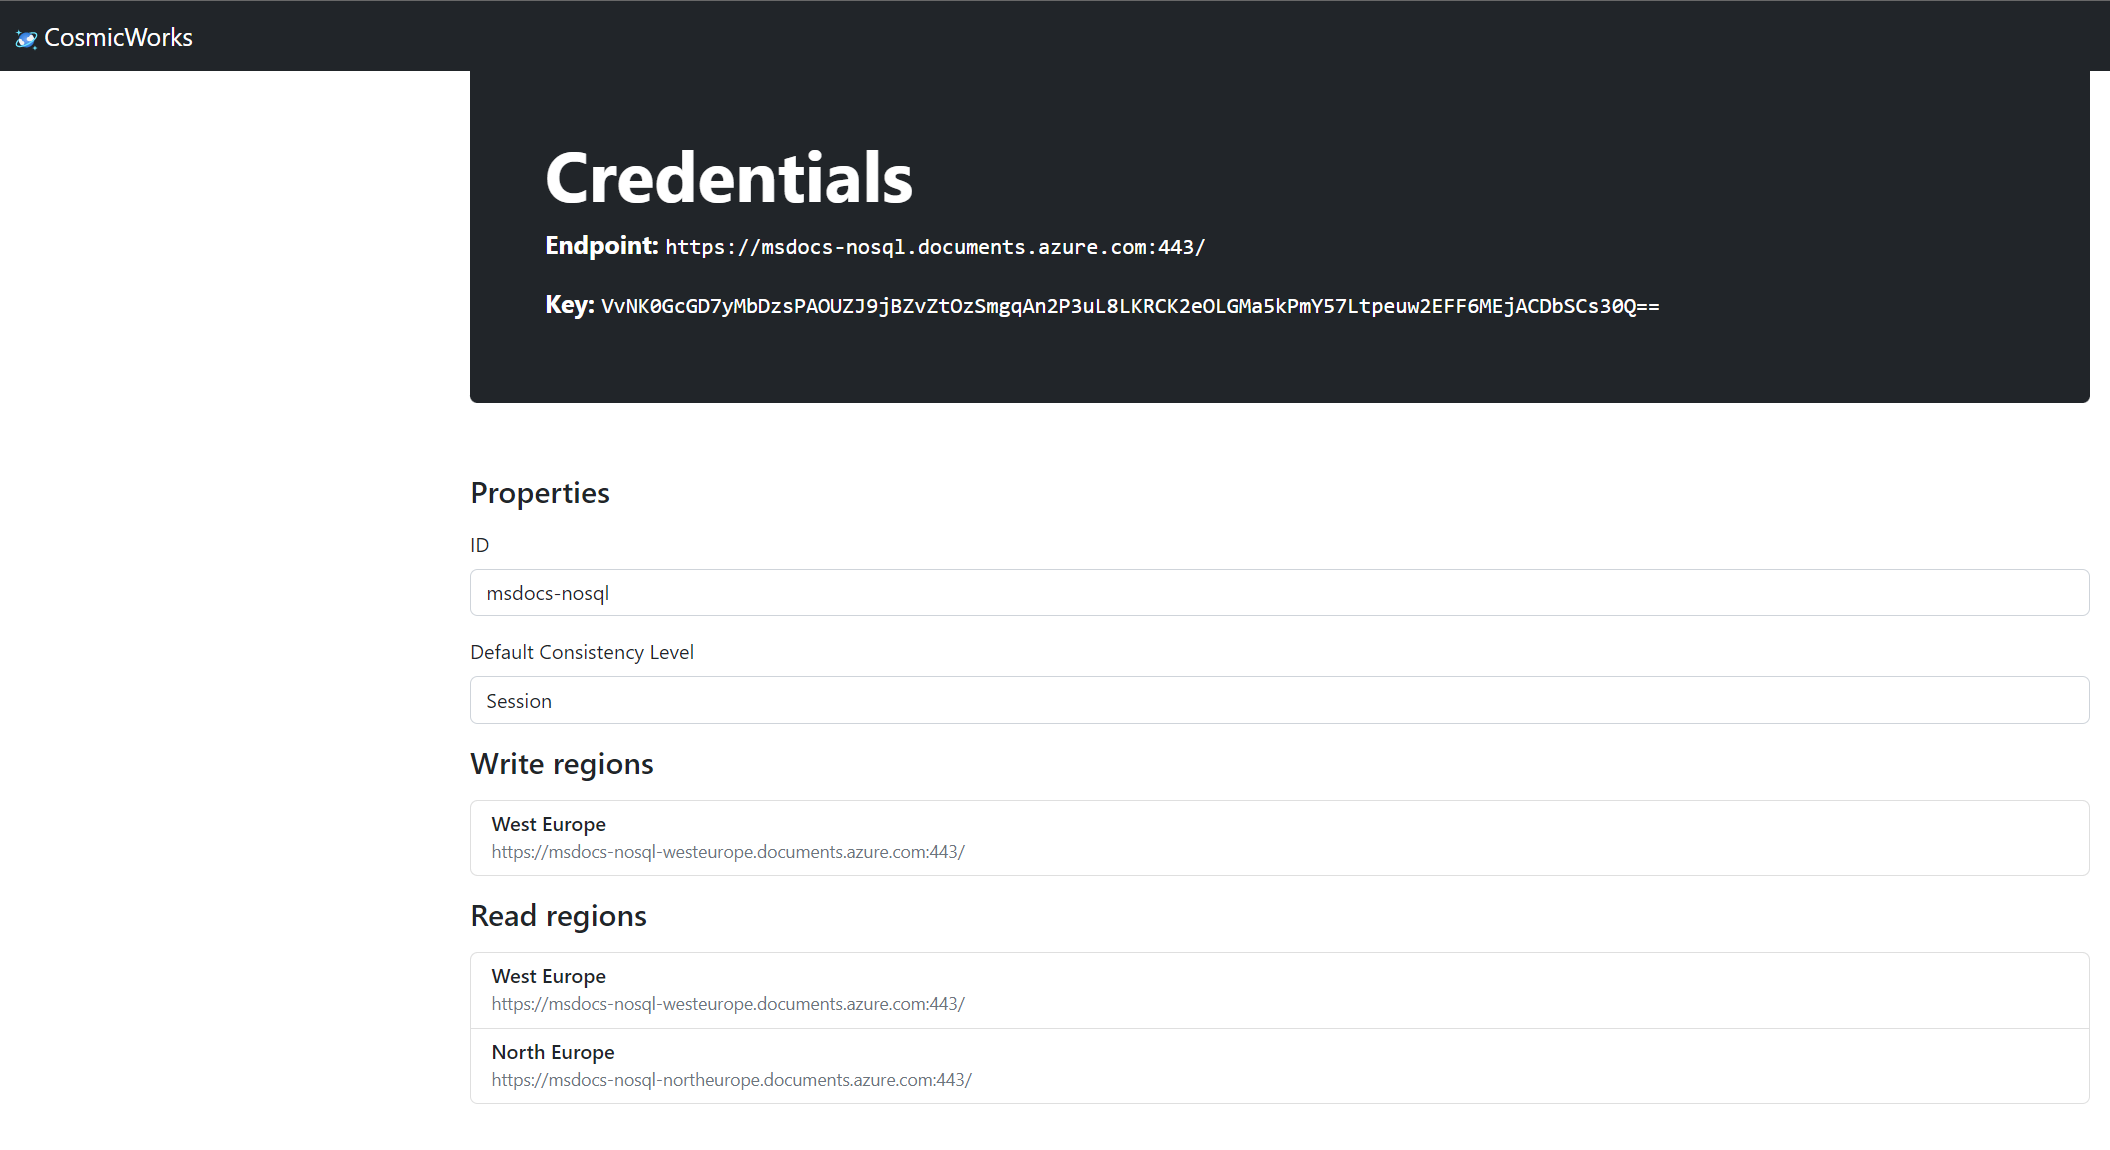
Navigate to the Azure portal page for the existing Azure Cosmos DB for NoSQL account.
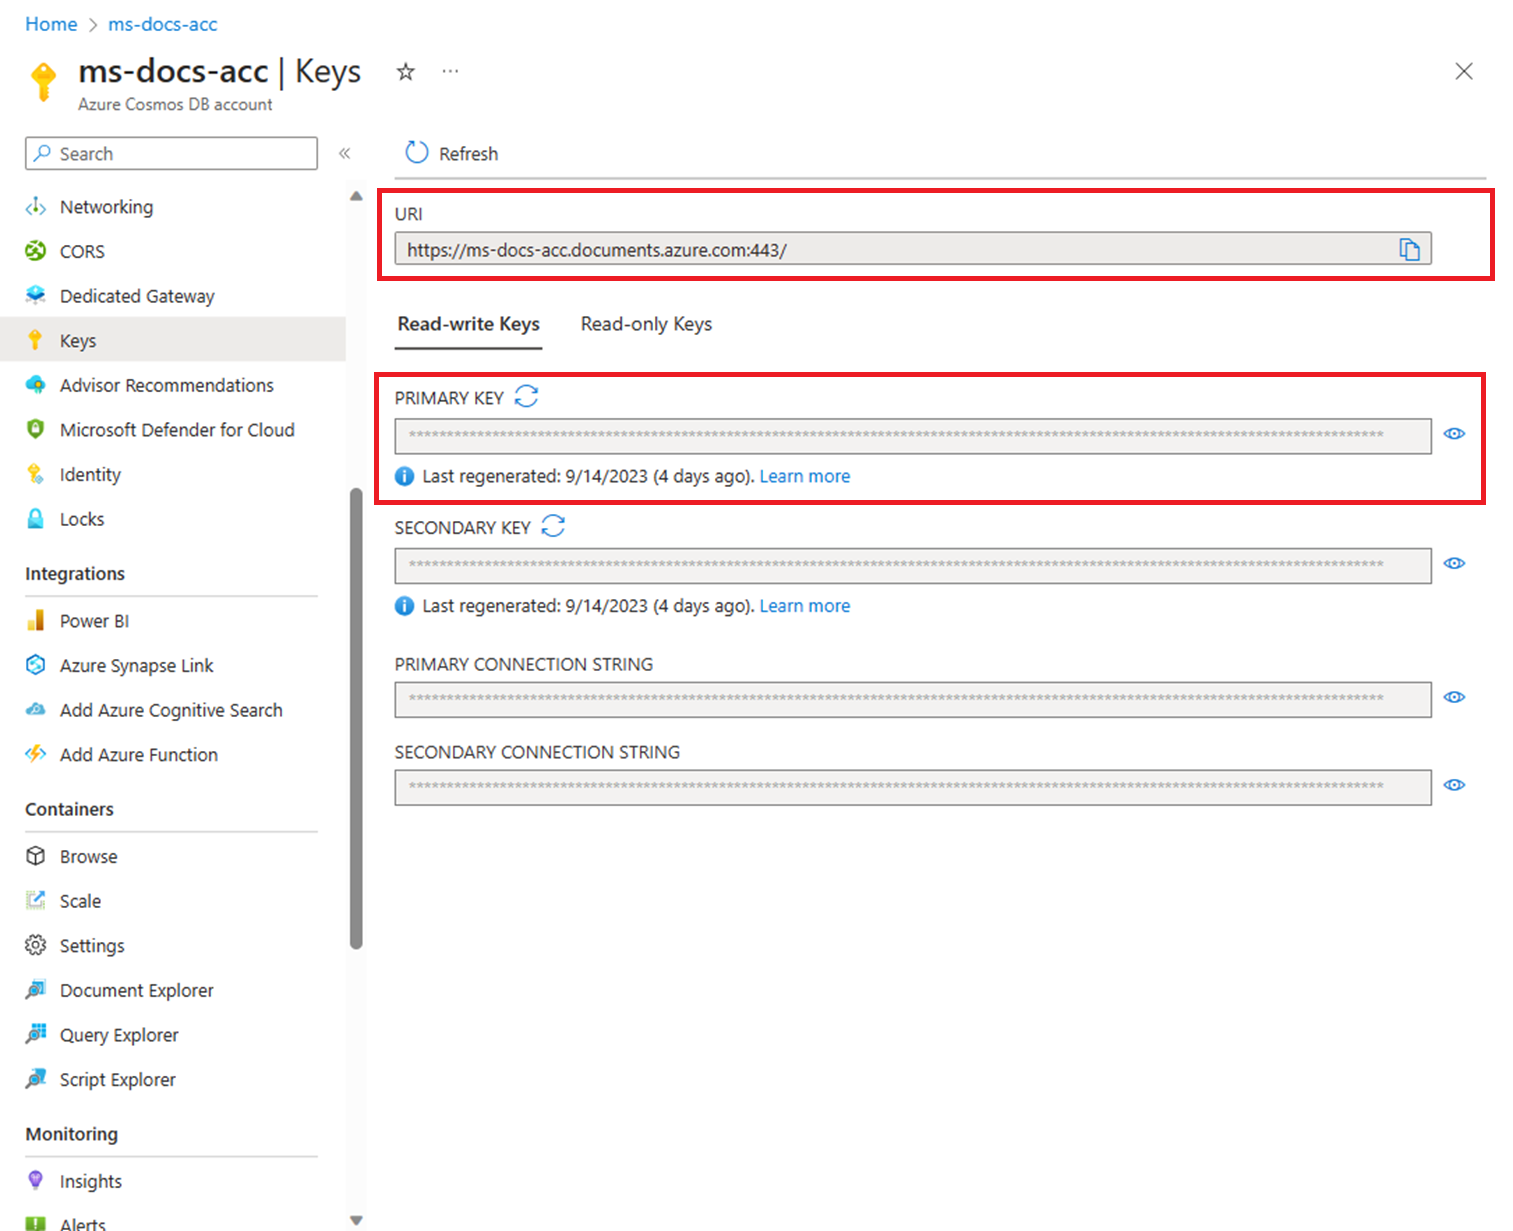
From the Azure Cosmos DB for NoSQL account page, select the Keys navigation menu option.
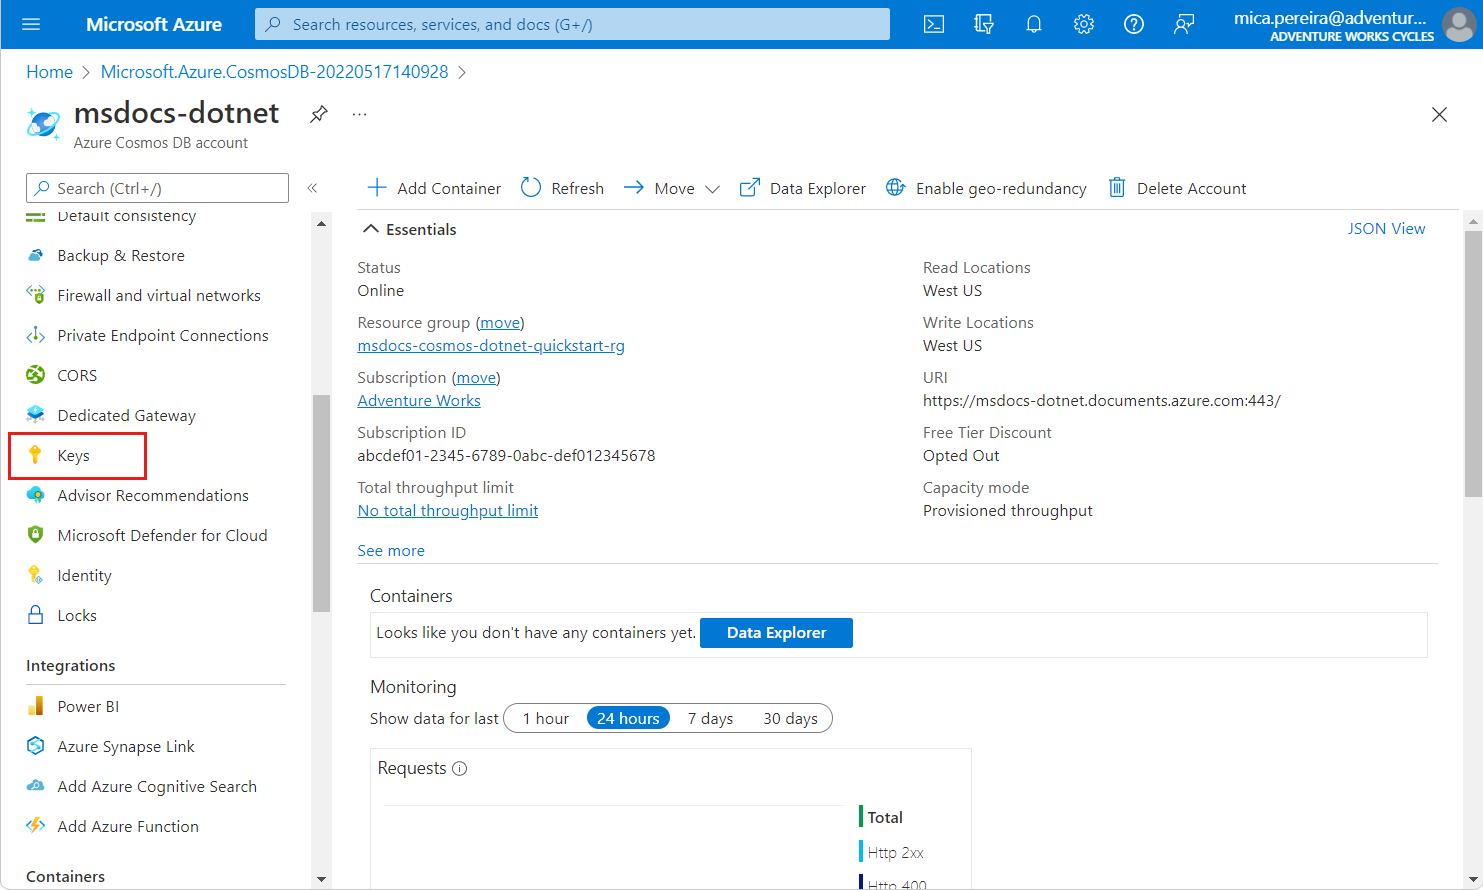
Record the values from the URI and PRIMARY KEY fields. You'll use these values later in this tutorial.


Create an Azure Key Vault resource
First, create a new key vault to store your API for NoSQL credentials.
Sign in to the Azure portal.
Select Create a resource > Security > Key Vault.
On the Create key vault page, enter the following information:
Setting Description Subscription Select the Azure subscription that you wish to use for this Azure Cosmos account. Resource group Select a resource group, or select Create new, then enter a unique name for the new resource group. Key vault name Enter a globally unique name for your key vault. Region Select a geographic location to host your Azure Cosmos DB account. Use the location that is closest to your users to give them the fastest access to the data. Pricing tier Select Standard. Leave the remaining settings to their default values.
Select Review + create.
Review the settings you provide, and then select Create. It takes a few minutes to create the account. Wait for the portal page to display Your deployment is complete before moving on.
Add Azure Cosmos DB access keys to the Key Vault
Now, store your Azure Cosmos DB credentials as secrets in the key vault.
Select Go to resource to go to the Azure Key Vault resource page.
From the Azure Key Vault resource page, select the Secrets navigation menu option.
Select Generate/Import from the menu.

On the Create a secret page, enter the following information:
Setting Description Upload options Manual Name cosmos-endpoint Secret value Enter the URI you copied earlier in this tutorial. 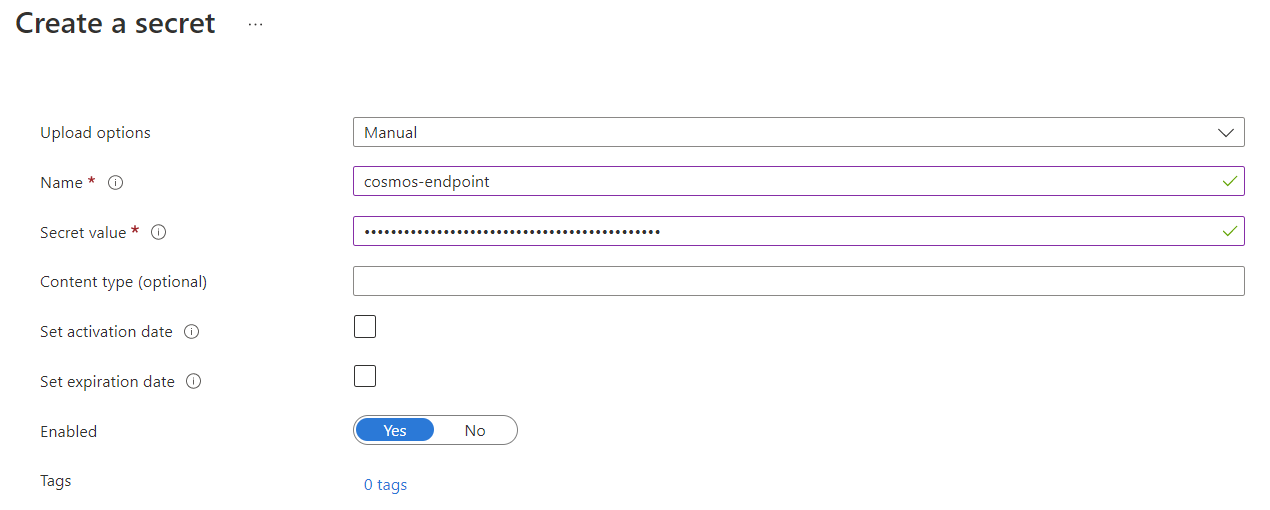
Select Create to create the new cosmos-endpoint secret.
Select Generate/Import from the menu again. On the Create a secret page, enter the following information:
Setting Description Upload options Manual Name cosmos-readwrite-key Secret value Enter the PRIMARY KEY you copied earlier in this tutorial. 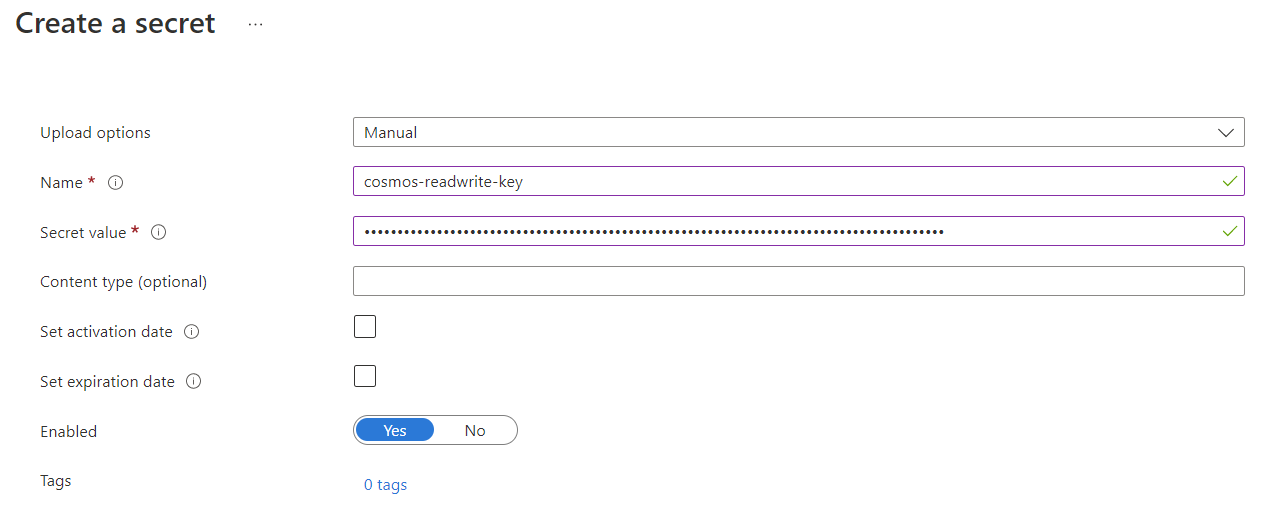
Select Create to create the new cosmos-readwrite-key secret.
After the secrets are created, view them in the list of secrets within the Secrets page.
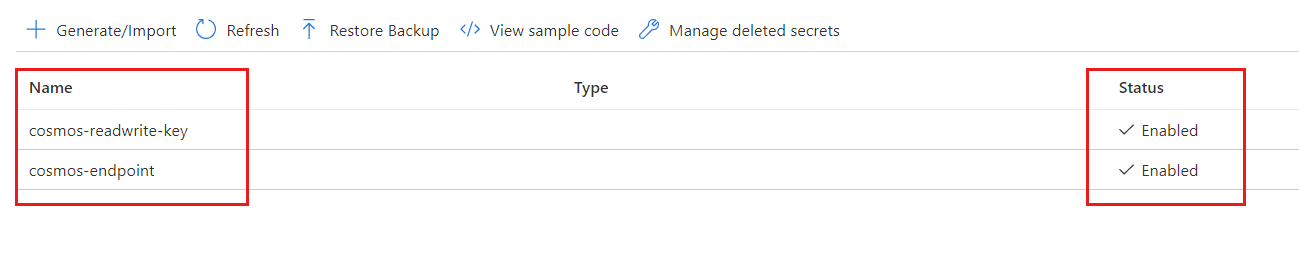
Select each key, select the latest version, and then copy the Secret Identifier. You'll use the identifier for the cosmos-endpoint and cosmos-readwrite-key secrets later in this tutorial.
Tip
The secret identifier will be in this format
https://<key-vault-name>.vault.azure.net/secrets/<secret-name>/<version-id>. For example, if the name of the key vault is msdocs-key-vault, the name of the key is cosmos-readwrite-key, and the version if 83b995e363d947999ac6cf487ae0e12e; then the secret identifier would behttps://msdocs-key-vault.vault.azure.net/secrets/cosmos-readwrite-key/83b995e363d947999ac6cf487ae0e12e.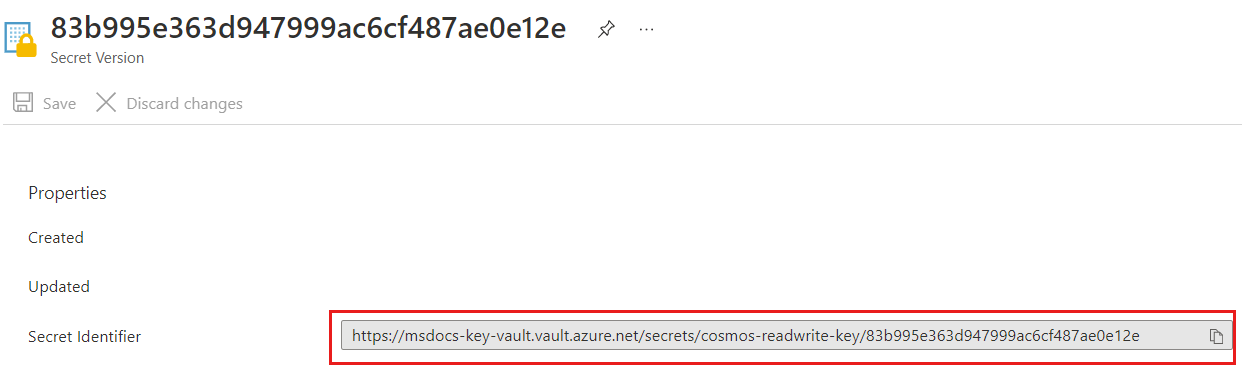
Create and register an Azure Web App with Azure Key Vault
In this section, create a new Azure Web App, deploy a sample application, and then register the Web App's managed identity with Azure Key Vault.
Create a new GitHub repository using the cosmos-db-nosql-dotnet-sample-web-environment-variables template.
In the Azure portal, select Create a resource > Web > Web App.
On the Create Web App page and Basics tab, enter the following information:
Setting Description Subscription Select the Azure subscription that you wish to use for this Azure Cosmos account. Resource group Select a resource group, or select Create new, then enter a unique name for the new resource group. Name Enter a globally unique name for your web app. Publish Select Code. Runtime stack Select .NET 6 (LTS). Operating System Select Windows. Region Select a geographic location to host your Azure Cosmos DB account. Use the location that is closest to your users to give them the fastest access to the data. Leave the remaining settings to their default values.
Select Next: Deployment.
On the Deployment tab, enter the following information:
Setting Description Continuous deployment Select Enable. GitHub account Select Authorize. Follow the GitHub account authorization prompts to grant Azure permission to read your newly created GitHub repository. Organization Select the organization for your new GitHub repository. Repository Select the name your new GitHub repository. Branch Select main. Select Review + create.
Review the settings you provide, and then select Create. It takes a few minutes to create the account. Wait for the portal page to display Your deployment is complete before moving on.
You may need to wait a few extra minutes for the web application to be initially deployed to the web app. From the Azure Web App resource page, select Browse to see the default state of the app.
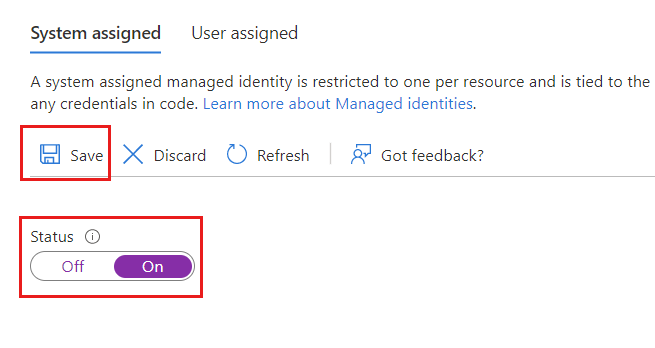
Select the Identity navigation menu option.
On the Identity page, select On for System-assigned managed identity, and then select Save.

Inject Azure Key Vault secrets as Azure Web App app settings
Finally, inject the secrets stored in your key vault as app settings within the web app. The app settings will, in turn, inject the credentials into the application at runtime without storing the credentials in clear text.
Return to the key vault page in the Azure portal. Select Access policies from the navigation menu.
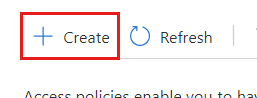
On the Access policies page, select Create from the menu.
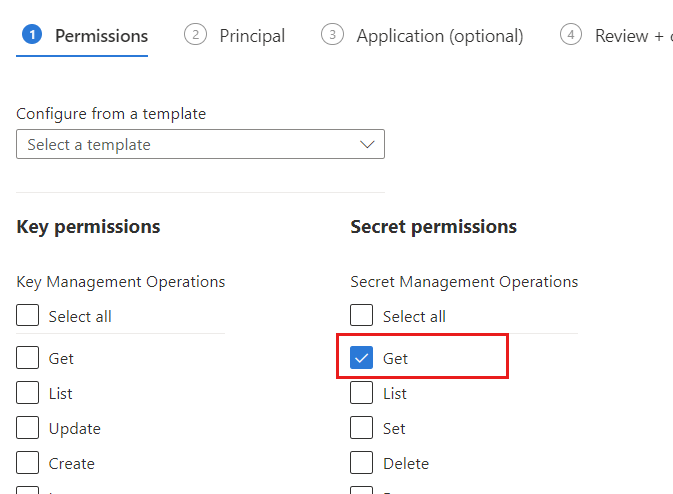
On the Permissions tab of the Create an access policy page, select the Get option in the Secret permissions section. Select Next.
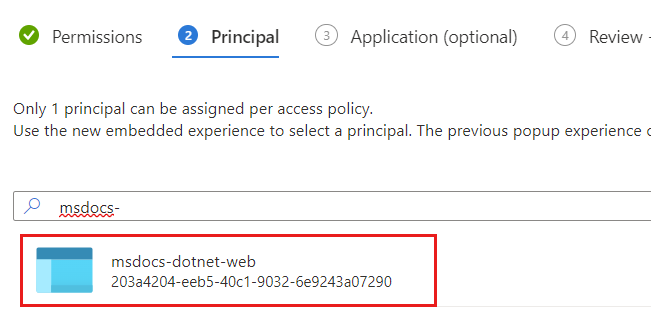
On the Principal tab, select the name of the web app you created earlier in this tutorial. Select Next.
Note
In this example screenshot, the web app is named msdocs-dotnet-web.
Select Next again to skip the Application tab. On the Review + create tab, review the settings you provide, and then select Create.
Return to the web app page in the Azure portal. Select Configuration from the navigation menu.
On the Configuration page, select New application setting. In the Add/Edit application setting dialog, enter the following information:
Setting Description Name CREDENTIALS__ENDPOINTKey Get the secret identifier for the cosmos-endpoint secret in your key vault that you created earlier in this tutorial. Enter the identifier in the following format: @Microsoft.KeyVault(SecretUri=<secret-identifier>).Tip
Ensure that the environment variable has a double underscore (
__) value instead of a single underscore. The double-underscore is a key delimeter supported by .NET on all platforms. For more information, see environment variables configuration.Note
For example, if the secret identifier is
https://msdocs-key-vault.vault.azure.net/secrets/cosmos-endpoint/69621c59ef5b4b7294b5def118921b07, then the reference would be@Microsoft.KeyVault(SecretUri=https://msdocs-key-vault.vault.azure.net/secrets/cosmos-endpoint/69621c59ef5b4b7294b5def118921b07).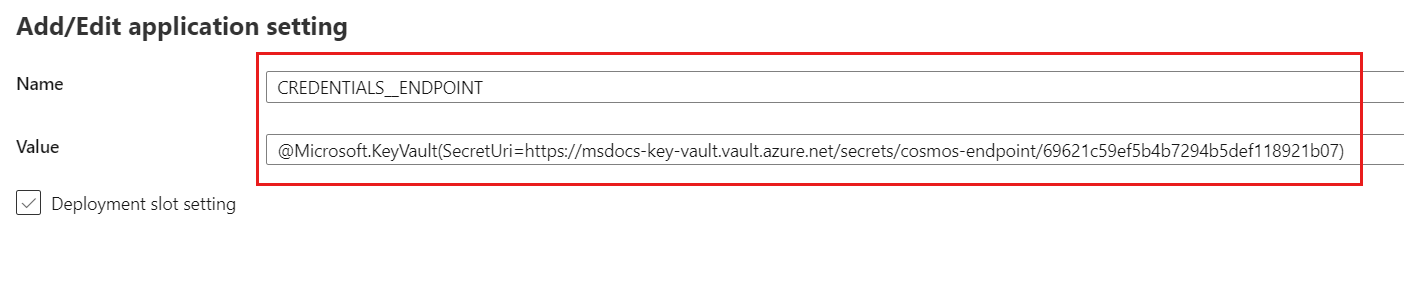
Select OK to persist the new app setting
Select New application setting again. In the Add/Edit application setting dialog, enter the following information and then select OK:
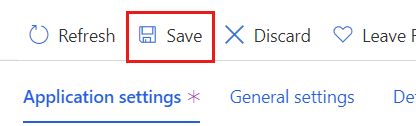
Setting Description Name CREDENTIALS__KEYKey Get the secret identifier for the cosmos-readwrite-key secret in your key vault that you created earlier in this tutorial. Enter the identifier in the following format: @Microsoft.KeyVault(SecretUri=<secret-identifier>).Back on the Configuration page, select Save to update the app settings for the web app.
Wait a few minutes for the web app to restart with the new app settings. At this point, the new app settings should indicate that they're a Key vault Reference.

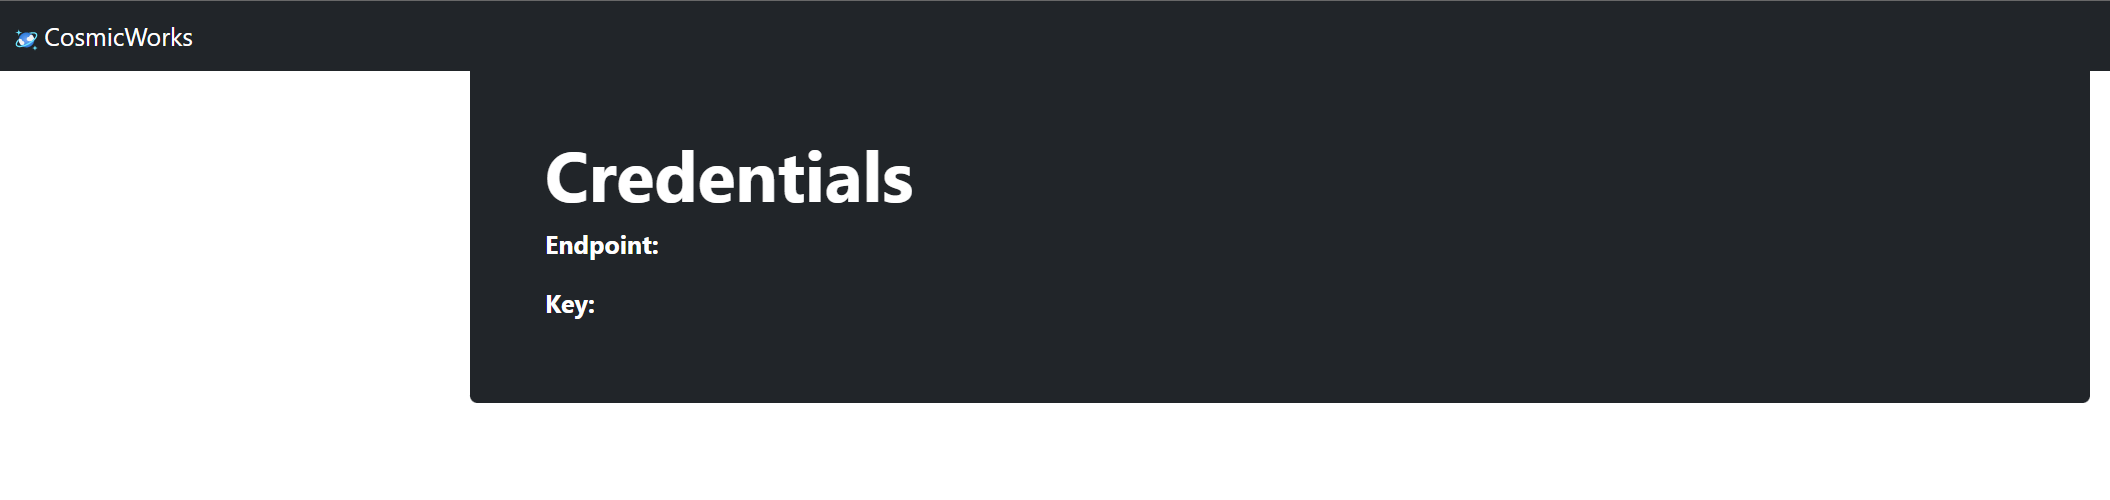
Select Overview from the navigation menu. Select Browse to see the app with populated credentials.


Next steps
- To configure a firewall for Azure Cosmos DB, see firewall support article.
- To configure virtual network service endpoint, see secure access by using VNet service endpoint article.
Feedback
Coming soon: Throughout 2024 we will be phasing out GitHub Issues as the feedback mechanism for content and replacing it with a new feedback system. For more information see: https://aka.ms/ContentUserFeedback.
Submit and view feedback for