Set up and configure AWS Cost and Usage report integration
Article
Note
The Connector for AWS in the Cost Management service retires on March 31, 2025. Users should consider alternative solutions for AWS cost management reporting. On March 31, 2024, Azure will disable the ability to add new Connectors for AWS for all customers. For more information, see Retire your Amazon Web Services (AWS) connector.
With Amazon Web Services (AWS) Cost and Usage report (CUR) integration, you monitor and control your AWS spending in Cost Management. The integration allows a single location in the Azure portal where you monitor and control spending for both Azure and AWS. This article explains how to set up the integration and configure it so that you can use Cost Management features to analyze costs and review budgets.
Cost Management processes the AWS Cost and Usage report stored in an S3 bucket by using your AWS access credentials to get report definitions and download report GZIP CSV files.
Create a Cost and Usage report in AWS
Using a Cost and Usage report is the AWS-recommended way to collect and process AWS costs. The Cost Management cross cloud connector supports cost and usage reports configured at the management (consolidated) account level. For more information, see the AWS Cost and Usage Report documentation.
Use the Cost & Usage Reports page of the Billing and Cost Management console in AWS to create a Cost and Usage report with the following steps:
In the navigation pane, select Cost & Usage Reports.
Select Create report.
For Report name, enter a name for your report.
Under Additional report details, select Include resource IDs.
For Data refresh settings, select whether you want the AWS Cost and Usage report to refresh if AWS applies refunds, credits, or support fees to your account after finalizing your bill. When a report refreshes, a new report is uploaded to Amazon S3. We recommend that you leave the setting selected.
Select Next.
For S3 bucket, choose Configure.
In the Configure S3 Bucket dialog box, enter a bucket name and the Region where you want to create a new bucket and choose Next.
Select I have confirmed that this policy is correct, then select Save.
(Optional) For Report path prefix, enter the report path prefix that you want prepended to the name of your report.
If skipped, the default prefix is the name that you specified for the report. The date range has the /report-name/date-range/ format.
For Time unit, choose Hourly.
For Report versioning, choose whether you want each version of the report to overwrite the previous version, or if you want more new reports.
For Enable data integration for, no selection is required.
For Compression, select GZIP.
Select Next.
After you review the settings for your report, select Review and Complete.
Note the report name. You use it in later steps.
It can take up to 24 hours for AWS to start delivering reports to your Amazon S3 bucket. After delivery starts, AWS updates the AWS Cost and Usage report files at least once a day. You can continue configuring your AWS environment without waiting for delivery to start.
Note
Cost and usage reports configured at the member (linked) account level aren't currently supported.
Create a policy and role in AWS
Cost Management accesses the S3 bucket where the Cost and Usage report is located several times a day. The service needs access to credentials to check for new data. You create a role and policy in AWS to allow Cost Management to access it.
To enable role-based access to an AWS account in Cost Management, the role is created in the AWS console. You need to have the role ARN and external ID from the AWS console. Later, you use them on the Create an AWS connector page in Cost Management.
Use the Create Policy wizard
Sign in into your AWS console and select Services.
In the list of services, select IAM.
Select Policies.
Select Create policy.
Select Choose a service.
Configure permission for the Cost and Usage report
Enter Cost and Usage Report.
Select Access level > Read > DescribeReportDefinitions. This step allows Cost Management to read what CUR reports are defined and determine if they match the report definition prerequisite.
Select Add more permissions.
Configure permission for your S3 bucket and objects
Select Choose a service.
Enter S3.
Select Access level > List > ListBucket. This action gets the list of objects in the S3 Bucket.
Select Access level > Read > GetObject. This action allows the download of billing files.
Select Resources > Specific.
In bucket, select the Add ARNs link to open another window.
In Resource Bucket name, enter the bucket used to store the CUR files.
Select Add ARNs.
In object, select Any.
Select Add more permissions.
Configure permission for Cost Explorer
Select Choose a service.
Enter Cost Explorer Service.
Select All Cost Explorer Service actions (ce:*). This action validates that the collection is correct.
Select Add more permissions.
Add permission for AWS Organizations
Enter Organizations.
Select Access level > List > ListAccounts. This action gets the names of the accounts.
Select Add more permissions.
Configure permissions for Policies
Enter IAM.
Select Access level > List > ListAttachedRolePolicies and ListPolicyVersions and ListRoles.
Select Access level > Read > GetPolicyVersion.
Select Resources > policy, and then select Any. These actions allow verification that only the minimal required set of permissions were granted to the connector.
Select Next.
Review and create
In Review Policy, enter a name for the new policy. Verify that you entered the correct information.
Add tags. You can enter tags you wish to use or skip this step. This step isn't required to create a connector in Cost Management.
Select Create policy to complete this procedure.
The policy JSON should resemble the following example. Replace bucketname with the name of your S3 bucket, accountname with your account number and rolename with the role name you created.
On the Select trusted entity page, select AWS account and then under An AWS account, select Another AWS account.
Under Account ID, enter 432263259397.
Under Options, select Require external ID (Best practice when a third party will assume this role).
Under External ID, enter the external ID, which is a shared passcode between the AWS role and Cost Management. Note the external ID, because you use it on the New Connector page in Cost Management. Microsoft recommends that you use a strong passcode policy when entering the external ID. The external ID should comply with AWS restrictions:
Type: String
Length constraints: Minimum length of 2. Maximum length of 1224.
Must satisfy regular expression pattern: [\w+=,.@: /-]*
Note
Don't change the selection for Require MFA. It should remain cleared.
Select Next.
On the search bar, search for your new policy and select it.
Select Next.
In Role details, enter a role name. Verify that you entered the correct information. Note the name entered because you use it later when you set up the Cost Management connector.
Optionally, add tags. You can enter any tags like or skip this step. This step isn't required to create a connector in Cost Management.
Select Create role.
Set up a new connector for AWS in Azure
Use the following information to create an AWS connector and start monitoring your AWS costs.
Note
The Connector for AWS remains active after the trial period ends if you set the auto-renew configuration to On during the initial setup. Otherwise, the connector is disabled following its trial. It may remain disabled for three months before it's permanently deleted. After the connector is deleted, the same connection can't be reactivated. For assistance with a disabled connector or to create a new connection after it's deleted, create a support request in the Azure portal.
Prerequisites
Ensure you have at least one management group enabled. A management group is required to link your subscription to the AWS service. For more information about creating a management group, see Create a management group in Azure.
Ensure that you're an administrator of the subscription.
Navigate to Cost Management + Billing and select a billing scope, if necessary.
Select Cost analysis and then select Settings.
Select Connectors for AWS.
Select Add connector.
On the Create connector page, in Display name, enter a name for your connector.
Optionally, select the default management group. It stores all discovered linked accounts. You can set it up later.
In the Billing section, select Auto-Renew to On if you want to ensure continuous operation. If you select the automatic option, you must select a billing subscription.
For Role ARN, enter the value that you used when you set up the role in AWS.
For External ID, enter the value that you used when you set up the role in AWS.
For Report Name, enter the name that you created in AWS.
Select Next and then select Create.
It might take a few hours for the new AWS scopes, AWS consolidated account, AWS linked accounts, and their cost data to appear.
After you create the connector, we recommend that you assign access control to it. Users are assigned permissions to the newly discovered scopes: AWS consolidated account and AWS linked accounts. The user who creates the connector is the owner of the connector, the consolidated account, and all linked accounts.
Assigning connector permissions to users after discovery occurs doesn't assign permissions to the existing AWS scopes. Instead, only new linked accounts are assigned permissions.
Check that new scopes are added to your scope picker. Select Refresh to view the latest data.
On the Cloud connectors page, select your connector and select Go to billing account to assign the linked account to management groups.
Note
Management groups aren't currently supported for Microsoft Customer Agreement (MCA) customers. MCA customers can create the connector and view their AWS data. However, MCA customers can't view their Azure costs and AWS costs together under a management group.
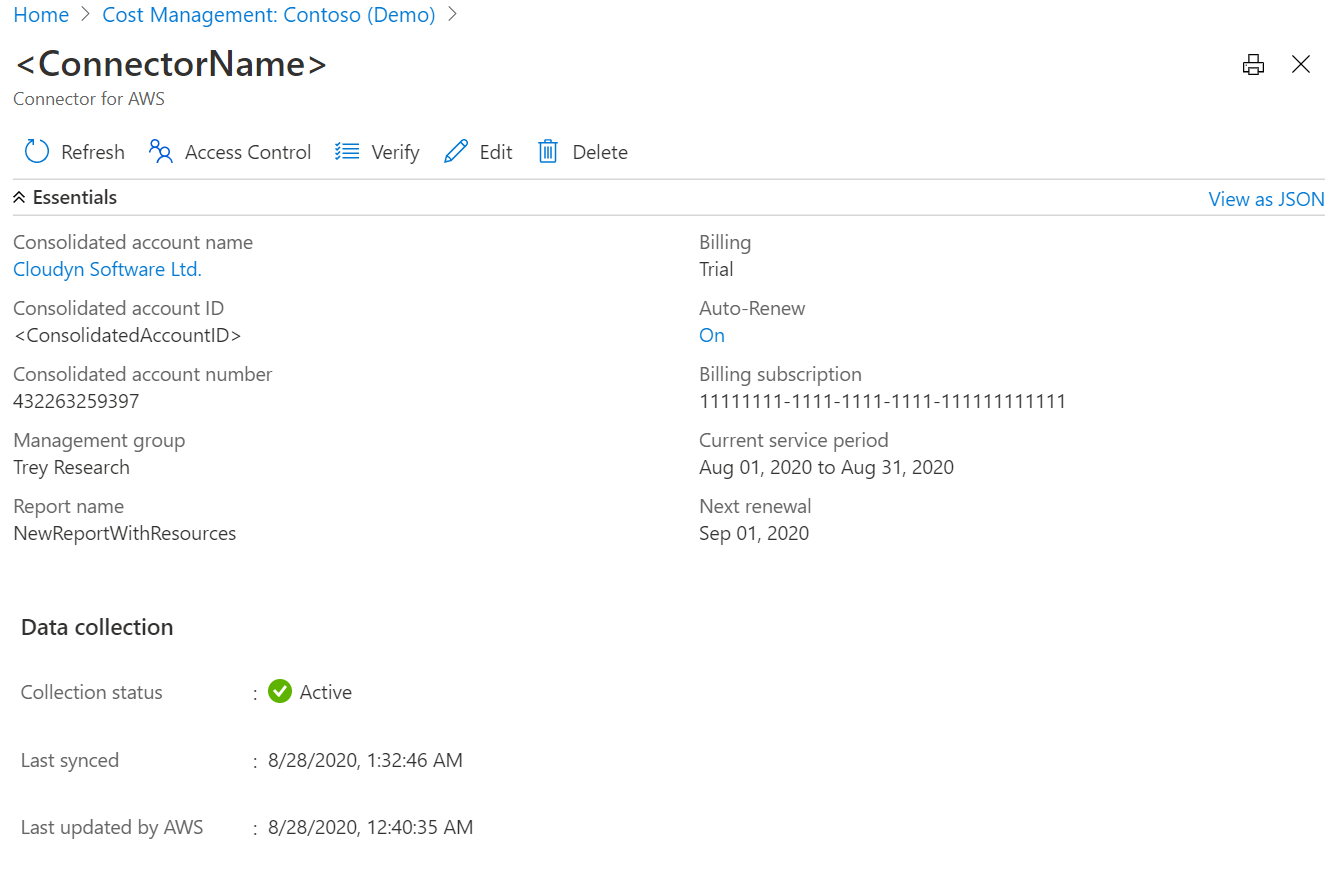
Manage AWS connectors
When you select a connector on the Connectors for AWS page, you can:
Select Go to Billing Account to view information for the AWS consolidated account.
Select Access Control to manage the role assignment for the connector.
Select Edit to update the connector. You can't change the AWS account number, because it appears in the role ARN. But you can create a new connector.
Select Verify to rerun the verification test to make sure that Cost Management can collect data by using the connector settings.
Set up Azure management groups
Place your Azure subscriptions and AWS linked accounts in the same management group to create a single location where you can see cross-cloud provider information. If you want to configure your Azure environment with management groups, see Initial setup of management groups.
If you want to separate costs, you can create a management group that holds just AWS linked accounts.
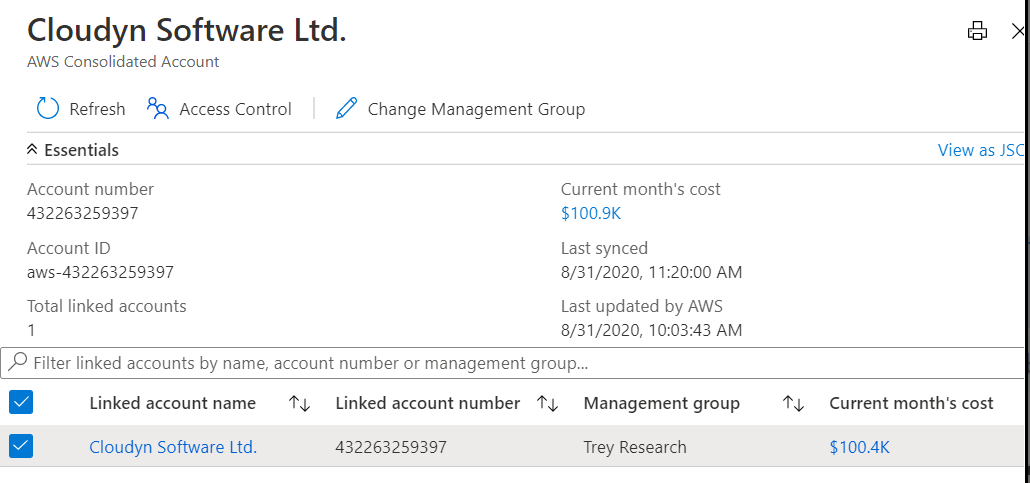
Set up an AWS consolidated account
The AWS consolidated account combines billing and payment for multiple AWS accounts. It also acts as an AWS linked account. You can view the details for your AWS consolidated account using the link on the AWS connector page.
From the page, you can:
Select Update to bulk update the association of AWS linked accounts with a management group.
Select Access Control to set the role assignment for the scope.
Permissions for an AWS consolidated account
By default, permissions for an AWS consolidated account are set upon the account's creation, based on the AWS connector permissions. The connector creator is the owner.
You manage the access level by using the Access Level page of the AWS consolidated account. However, AWS linked accounts don't inherit permissions to the AWS consolidated account.
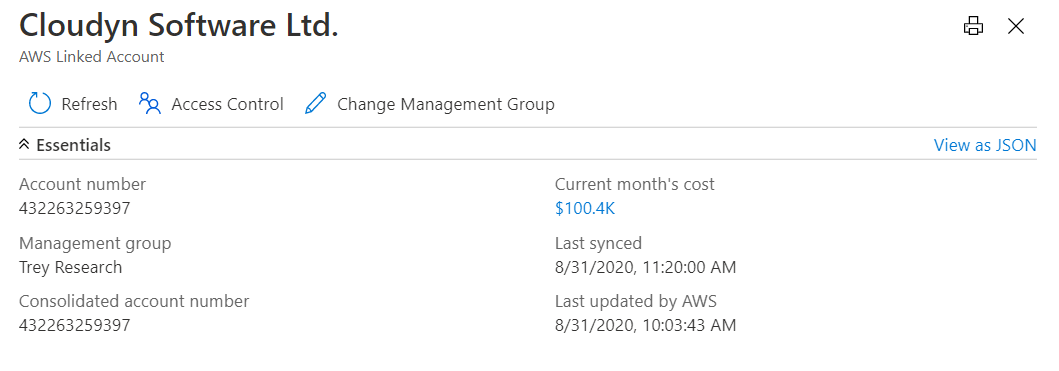
Set up an AWS linked account
The AWS linked account is where AWS resources are created and managed. A linked account also acts as a security boundary.
From this page, you can:
Select Update to update the association of an AWS linked account with a management group.
Select Access Control to set a role assignment for the scope.
Permissions for an AWS linked account
By default, permissions for an AWS linked account are set upon creation, based on the AWS connector permissions. The connector creator is the owner. You manage the access level by using the Access Level page of the AWS linked account. AWS linked accounts don't inherit permissions from an AWS consolidated account.
AWS linked accounts always inherit permissions from the management group that they belong to.
Next steps
Now that you set up and configured AWS Cost and Usage report integration, continue to Manage AWS costs and usage.
This learning path teaches you how to embed Power BI content in apps, develop programmatic solutions using the Power BI REST API and the Power BI Client APIs, enforce row-level security (RLS) for embedded content, automate common Power BI setup tasks, configure a development environment, and determine appropriate licensing.