Extract data from PDF
APPLIES TO:  Azure Data Factory
Azure Synapse Analytics
Azure Data Factory
Azure Synapse Analytics
Tip
Try out Data Factory in Microsoft Fabric, an all-in-one analytics solution for enterprises. Microsoft Fabric covers everything from data movement to data science, real-time analytics, business intelligence, and reporting. Learn how to start a new trial for free!
This article describes a solution template that you can use to extract data from a PDF source using Azure Data Factory and Azure AI Document Intelligence.
About this solution template
This template analyzes data from a PDF URL source using two Azure AI Document Intelligence calls. Then, it transforms the output to readable tables in a dataflow and outputs the data to a storage sink.
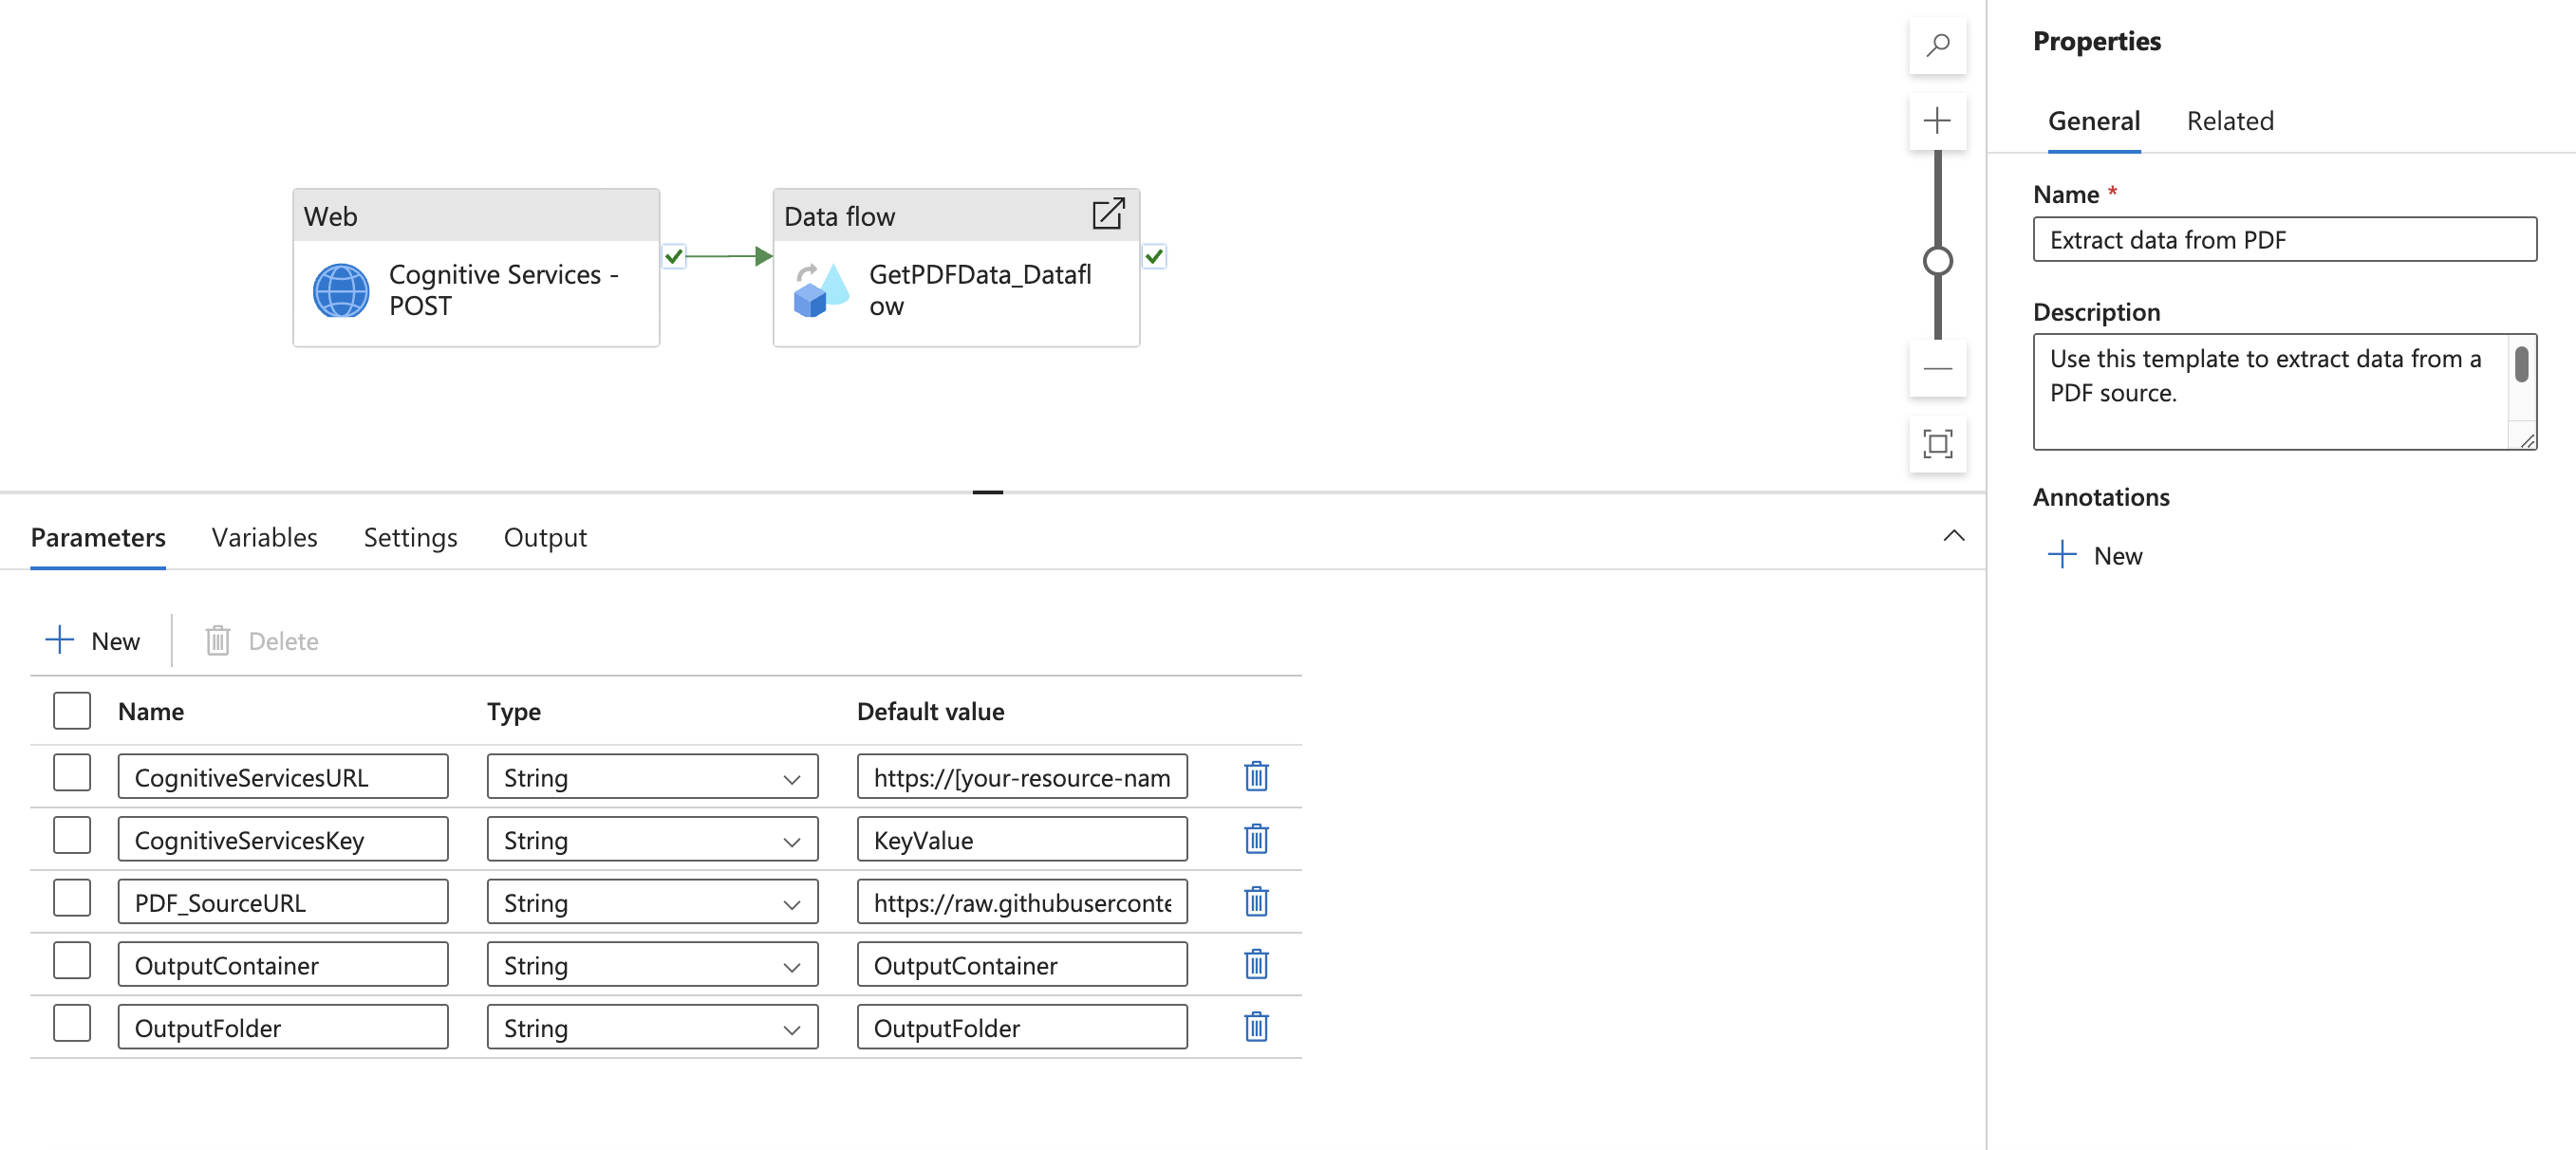
This template contains two activities:
- Web Activity to call Azure AI Document Intelligence's prebuilt read model API
- Data flow to transform extracted data from PDF
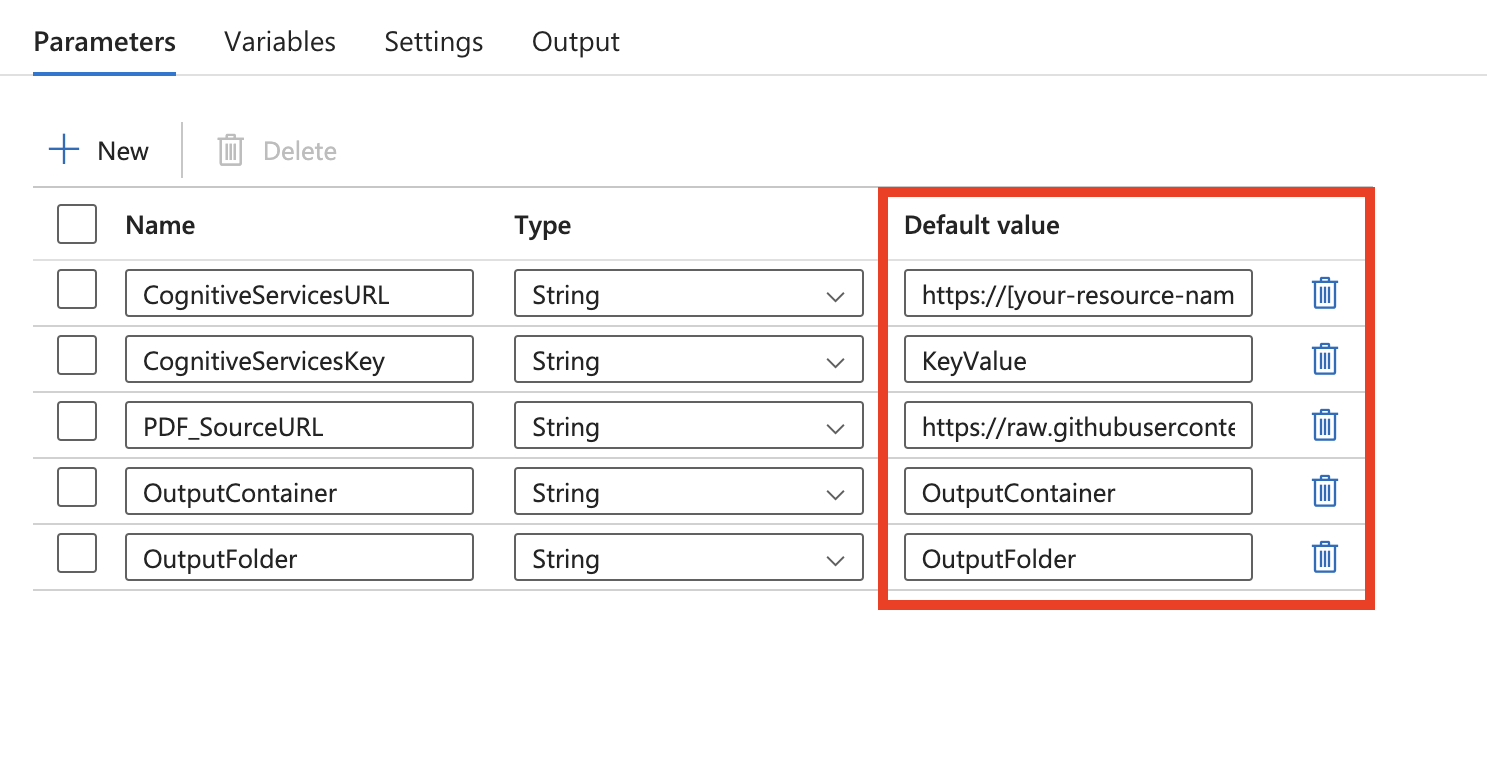
This template defines five parameters:
- CognitiveServicesURL is the Azure AI Document Intelligence URL ("https://{endpoint}/formrecognizer/v2.1/layout/analyze"). Replace {endpoint} with the endpoint that you obtained with your Azure AI Document Intelligence subscription. You need to replace the default value with your own URL.
- CognitiveServicesKey is the Azure AI Document Intelligence subscription key. You need to replace the default value with your own subscription key.
- PDF_SourceURL is the URL of your PDF source. You need to replace the default value with your own URL.
- OutputContainer is the name of the container path where you want your files to be in your destination store. You need to replace the default value with your own container.
- OutputFolder is the name of the folder path where you want your files to be in your destination store. You need to replace the default value with your own folder path.
Prerequisites
- Azure AI Document Intelligence Resource Endpoint URL and Key (create a new resource here)
How to use this solution template
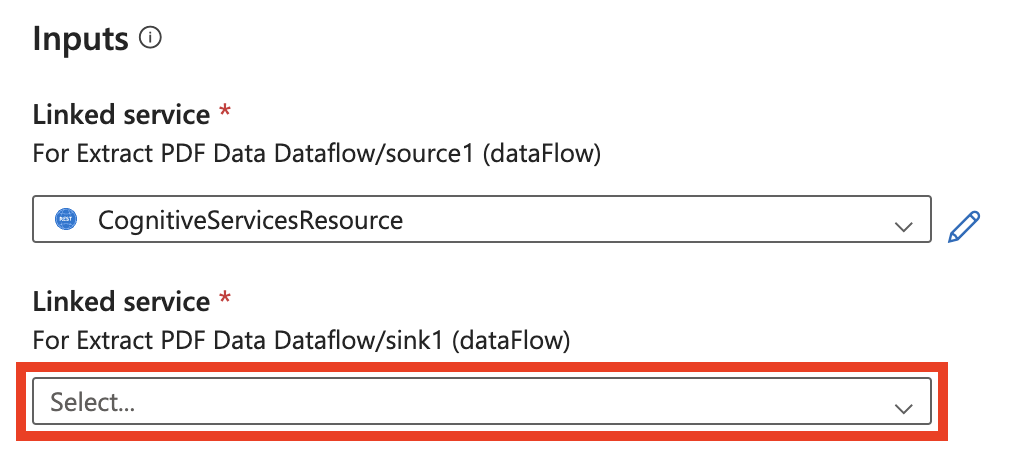
Go to template Extract data from PDF. Create a New connection to your Azure AI Document Intelligence resource or choose an existing connection.
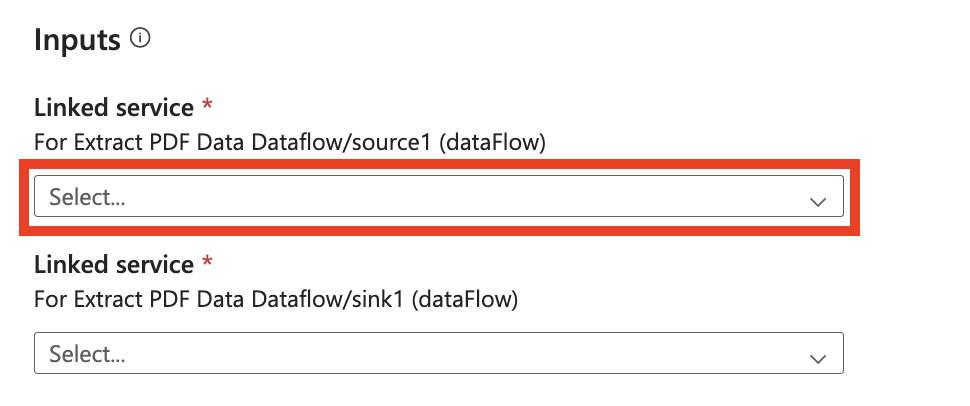
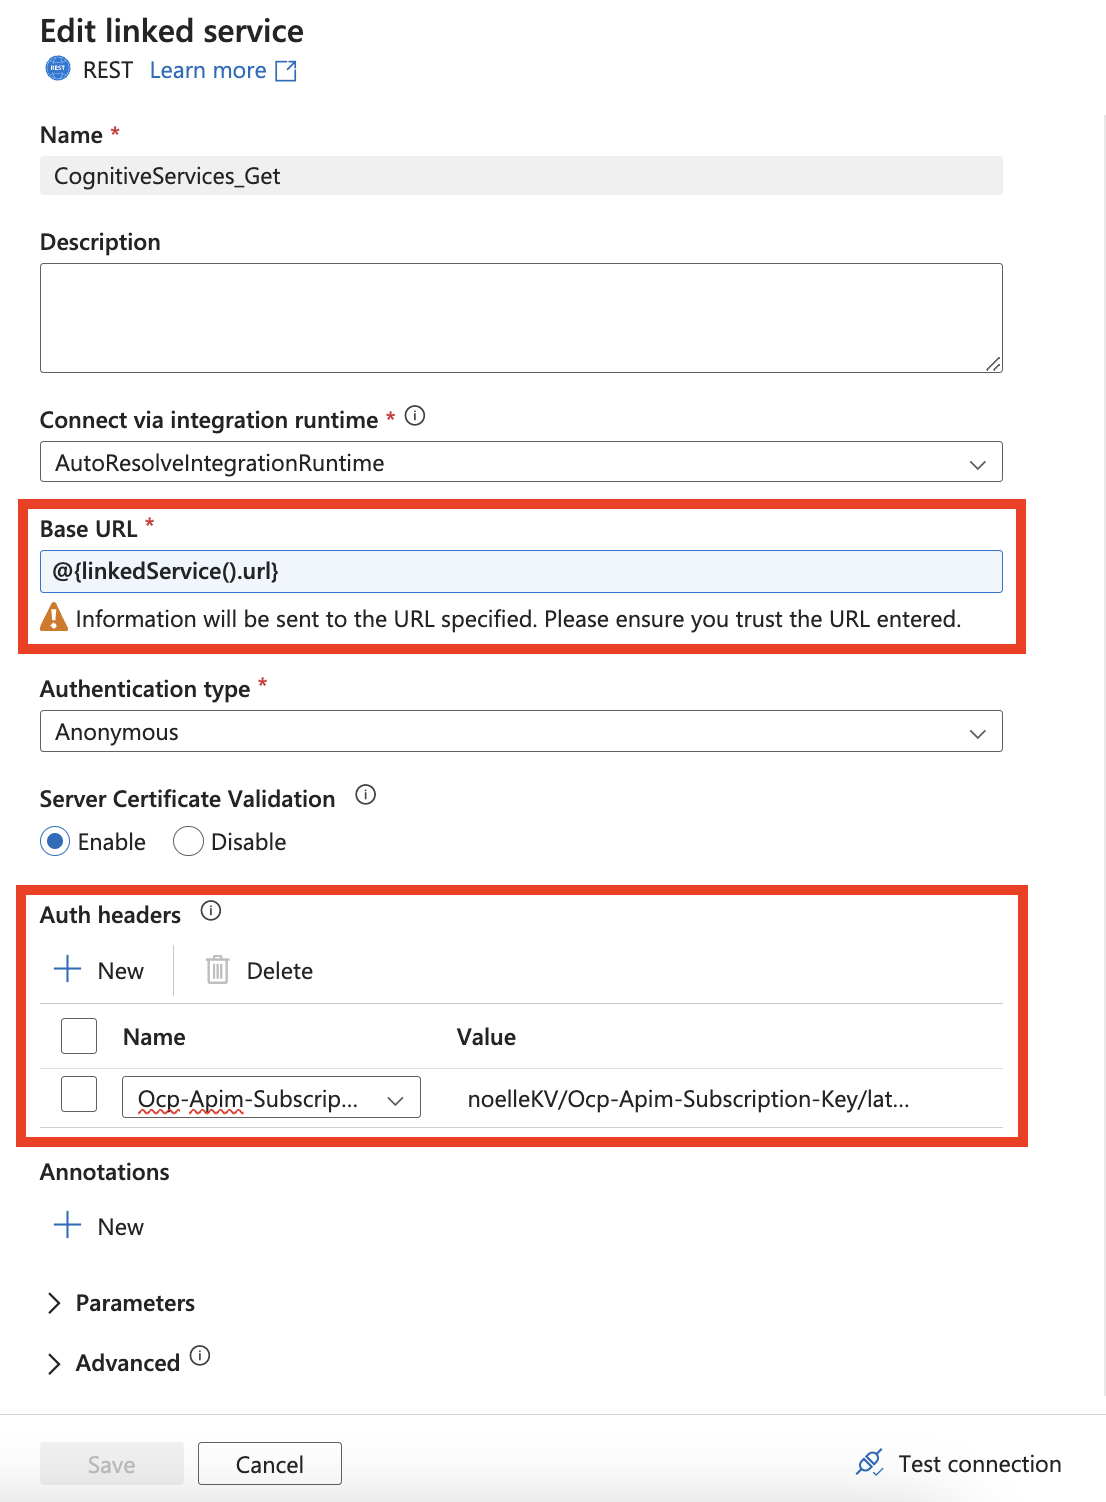
In your connection to Azure AI Document Intelligence, make sure to add a Linked service Parameter. You'll need to use this url parameter as your dynamic Base URL. You will also need to add a new Auth header under Auth headers. The name should be Ocp-Apim-Subscription-Key and the value should be the key value you find from your Azure Resource.
Create a New connection to your destination storage store or choose an existing connection. The chosen destination is where the extracted PDF data is stored.
Select Use this template.

You should see the following pipeline.
Navigate to the Data flow activity and find Settings. Here you need to add dynamic content for your linked service url parameter. After clicking Add dynamic content, the Pipeline expression builder will open. Select Cognitive Services - POST activity output. Then, type or copy and paste ".output.ADFWebActivityResponseHeaders['Operation-Location']." You should see the following expression in your expression builder.
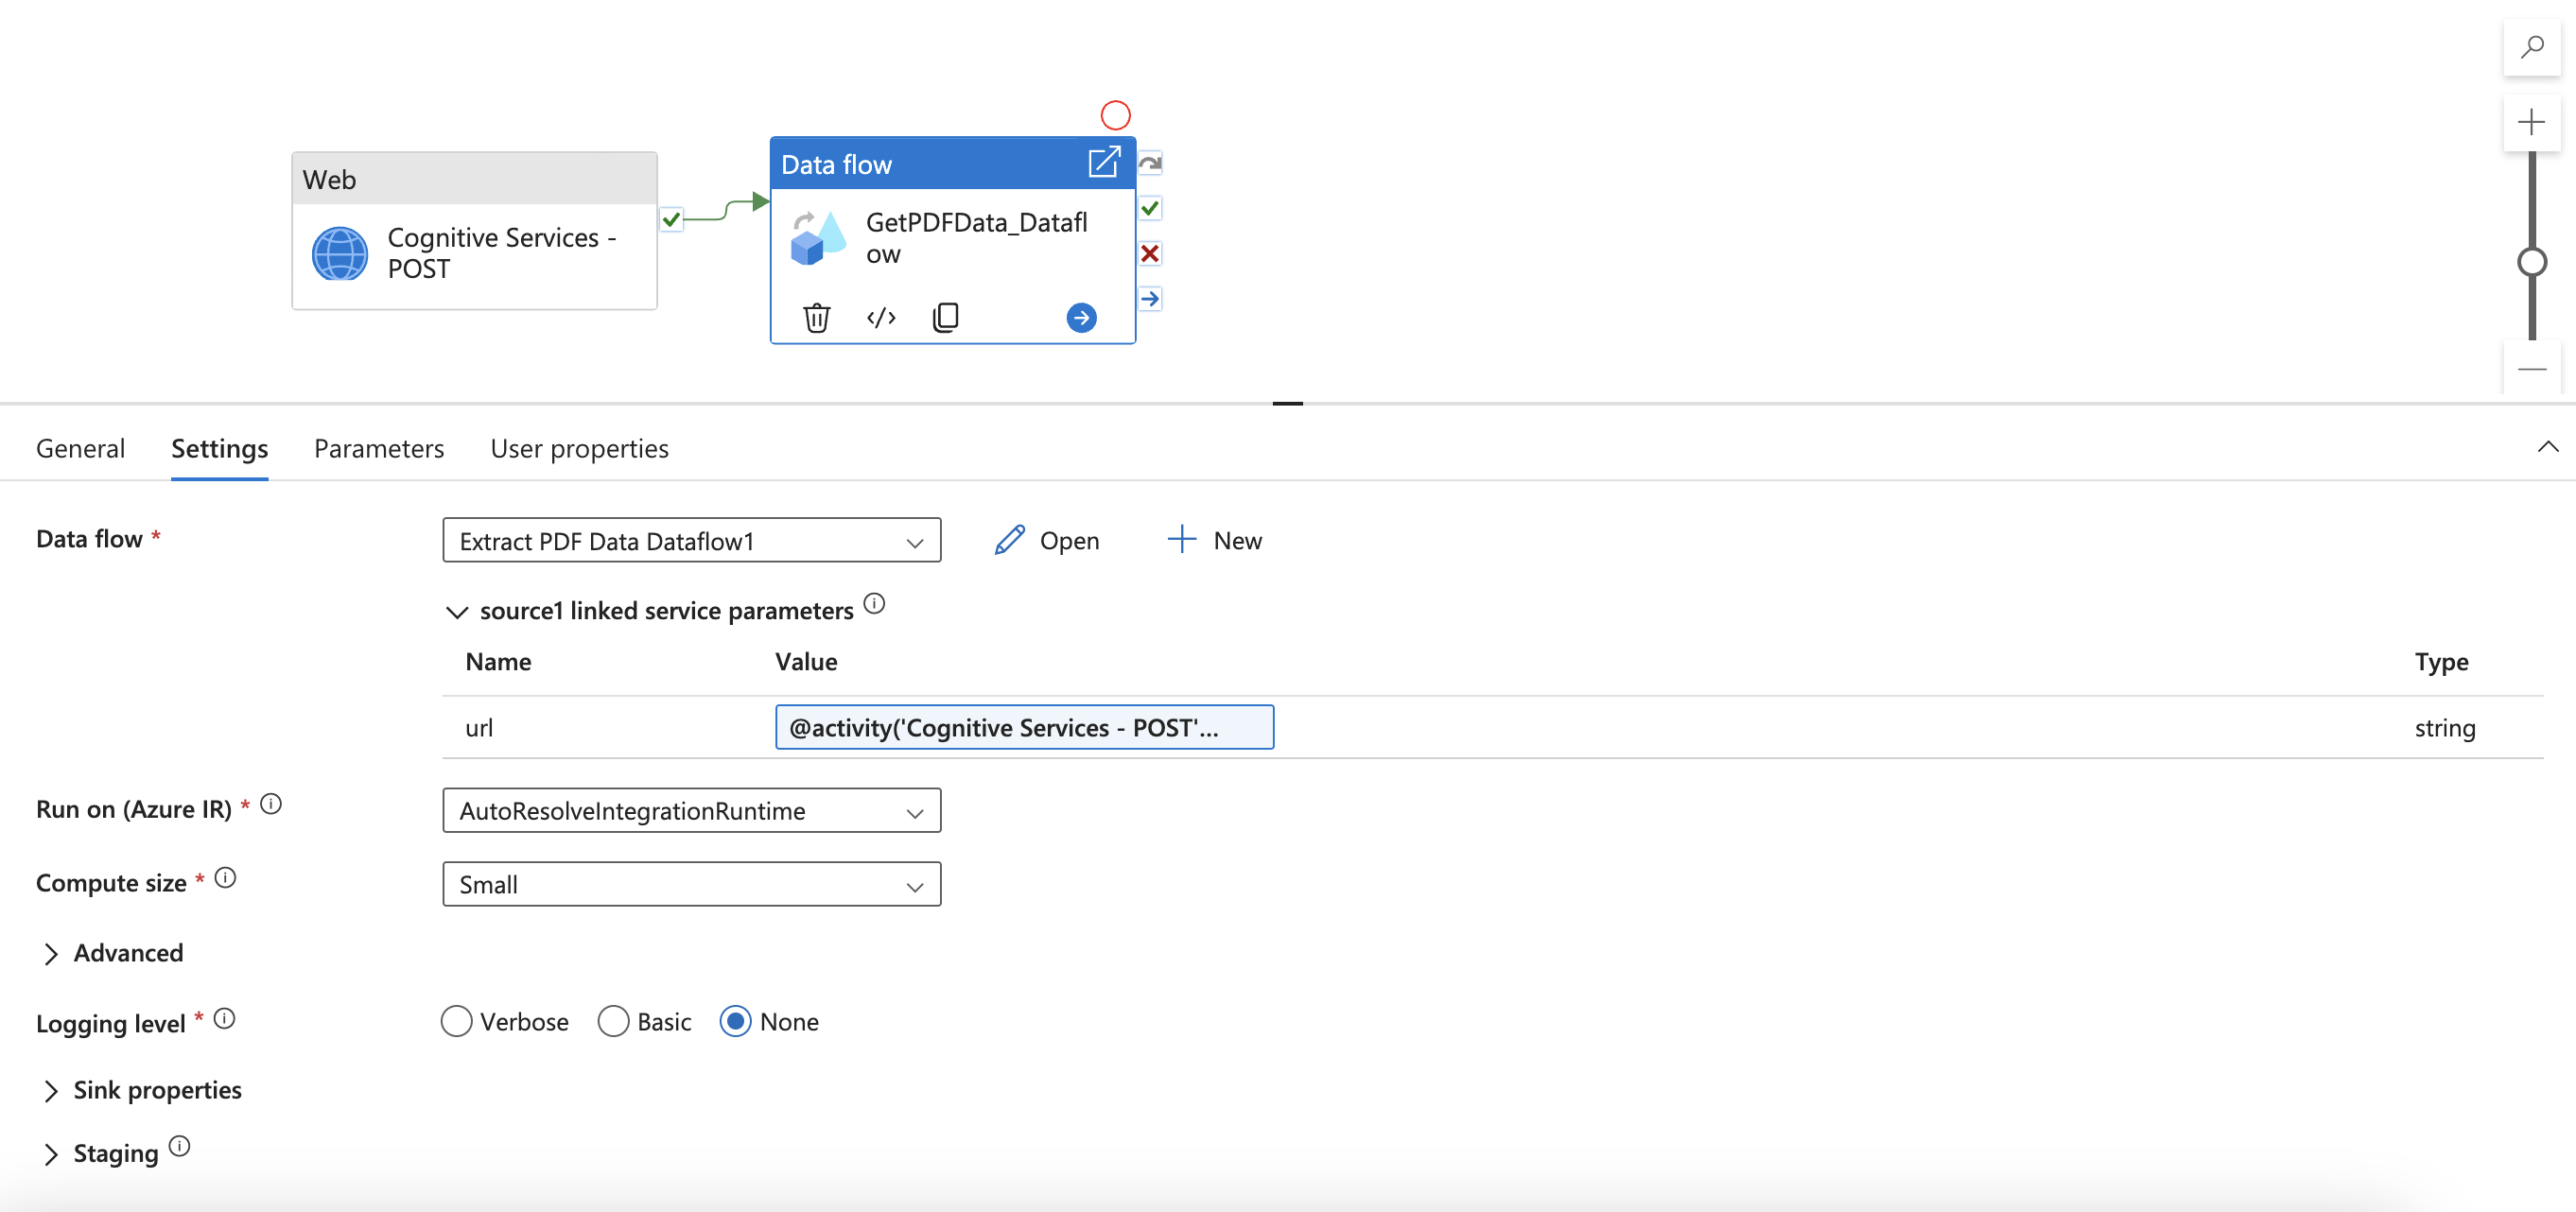
Click OK to return back to the pipeline.
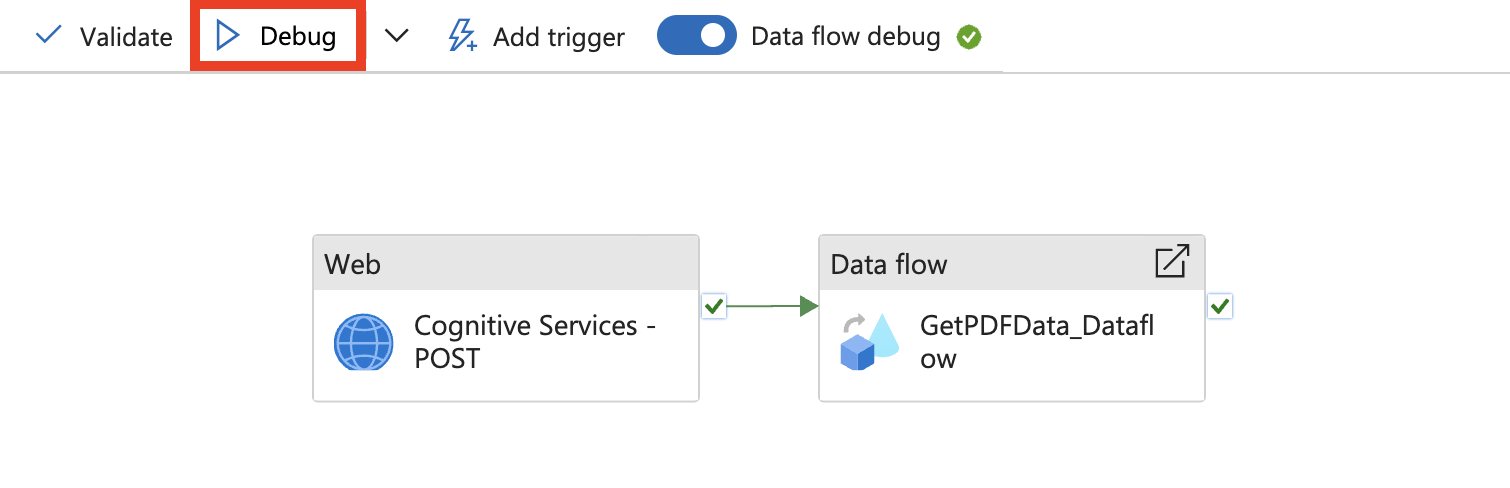
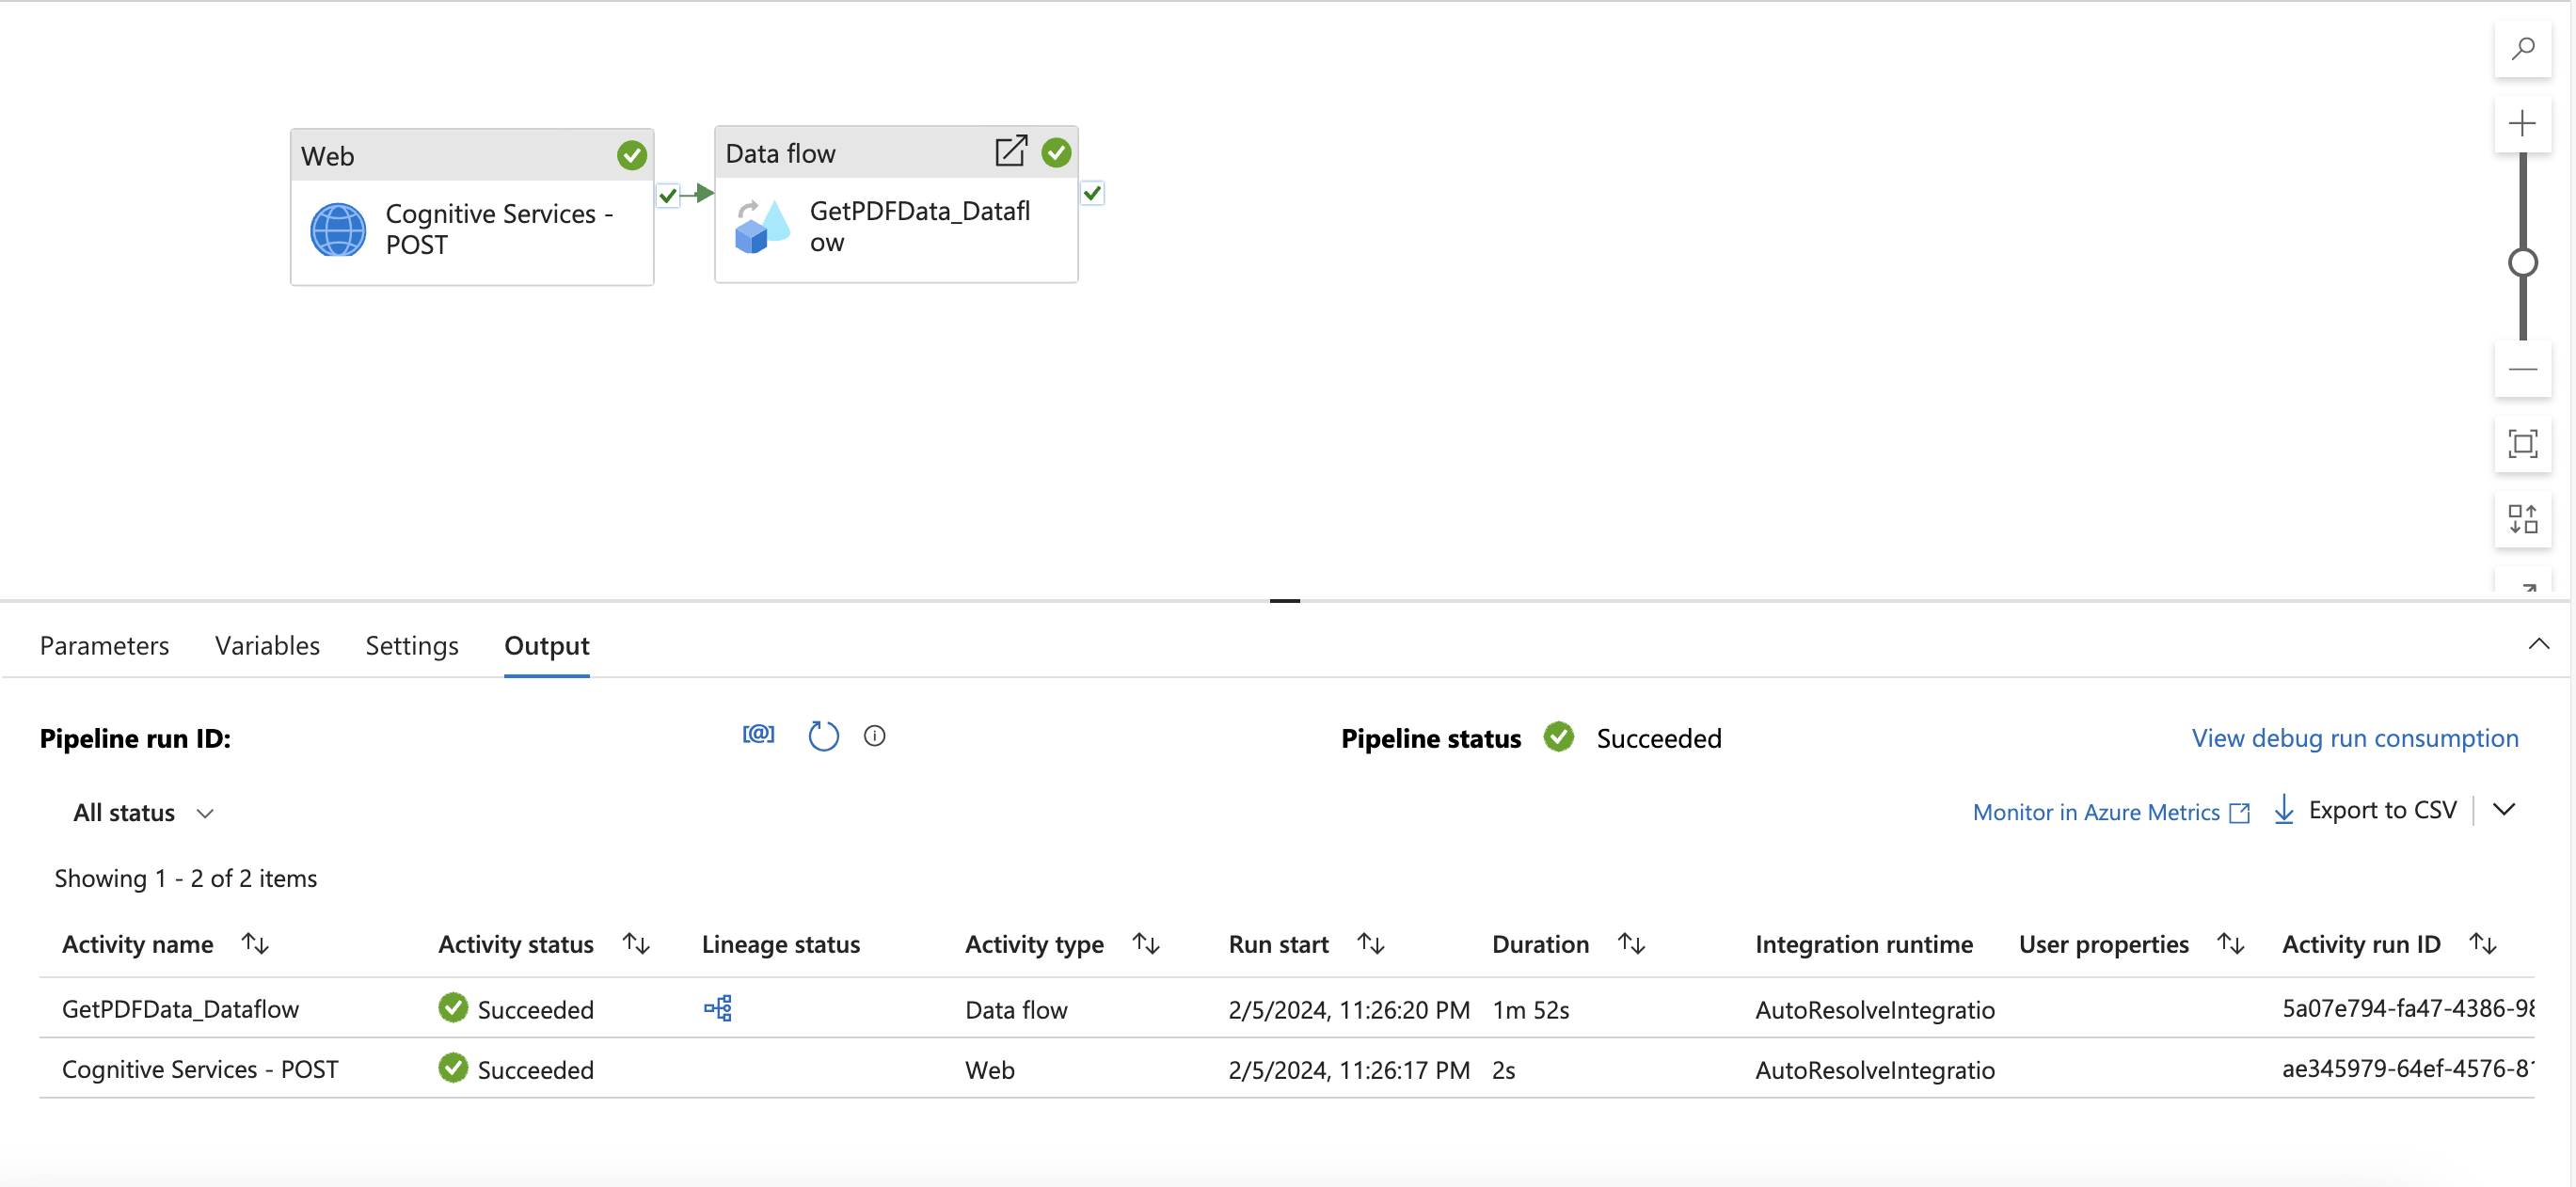
Next, select Debug.
Enter parameter values, review results, and publish.
Related content
Feedback
Coming soon: Throughout 2024 we will be phasing out GitHub Issues as the feedback mechanism for content and replacing it with a new feedback system. For more information see: https://aka.ms/ContentUserFeedback.
Submit and view feedback for