Prepare generalized image from Windows VHD to deploy VMs on Azure Stack Edge Pro GPU
APPLIES TO:  Azure Stack Edge Pro - GPUAzure Stack Edge Pro 2Azure Stack Edge Pro RAzure Stack Edge Mini R
To deploy VMs on your Azure Stack Edge Pro GPU device, you need to be able to create custom VM images that you can use to create VMs. This article describes how to prepare a generalized image from a Windows VHD or VHDX, which you can use to deploy virtual machines on Windows Stack Edge Pro GPU devices.
To prepare a generalized VM image using an ISO, see Prepare a generalized image from an ISO to deploy VMs on Azure Stack Edge Pro GPU.
About VM images
A Windows VHD or VHDX can be used to create a specialized image or a generalized image. The following table summarizes key differences between the specialized and the generalized images.
| Image type | Generalized | Specialized |
|---|---|---|
| Target | Deployed on any system. | Targeted to a specific system. |
| Setup after boot | Setup required at first boot of the VM. | No setup needed. Platform turns on the VM. |
| Configuration | Hostname, admin-user, and other VM-specific settings required. | Preconfigured. |
| Used when | Creating multiple new VMs from the same image. | Migrating a specific machine or restoring a VM from previous backup. |
Workflow
The high-level workflow to prepare a Windows VHD to use as a generalized image, starting from the VHD or VHDX of an existing virtual machine, has the following steps:
- Prepare the source VM from a Windows VHD:
- Convert the source VHD or VHDX to a fixed-size VHD.
- Use that VHD to create a new virtual machine.
- Start the VM, and install the Windows operating system.
- Generalize the VHD using the sysprep utility.
- Copy the generalized image to Blob storage.
Prerequisites
Before you prepare a Windows VHD for use as a generalized image on an Azure Stack Edge Pro GPU device, make sure that:
- You have a VHD or a VHDX containing a supported version of Windows.
- You have access to a Windows client with Hyper-V Manager installed.
- You have access to an Azure Blob storage account to store your VHD after it is prepared.
Prepare source VM from Windows VHD
When your VM source is a Windows VHD or VHDX, you first need to convert the Windows VHD to a fixed-size VHD. You will use the fixed-size VHD to create a new virtual machine.
Important
These procedures do not cover cases where the source VHD is configured with custom configurations and settings. For example, additional actions may be required to generalize a VHD containing custom firewall rules or proxy settings. For more information on these additional actions, see Prepare a Windows VHD to upload to Azure - Azure Virtual Machines.
Convert source VHD to a fixed-size VHD
For your device, you'll need fixed-size VHDs to create VM images. You'll need to convert your source Windows VHD or VHDX to a fixed VHD.
Follow these steps:
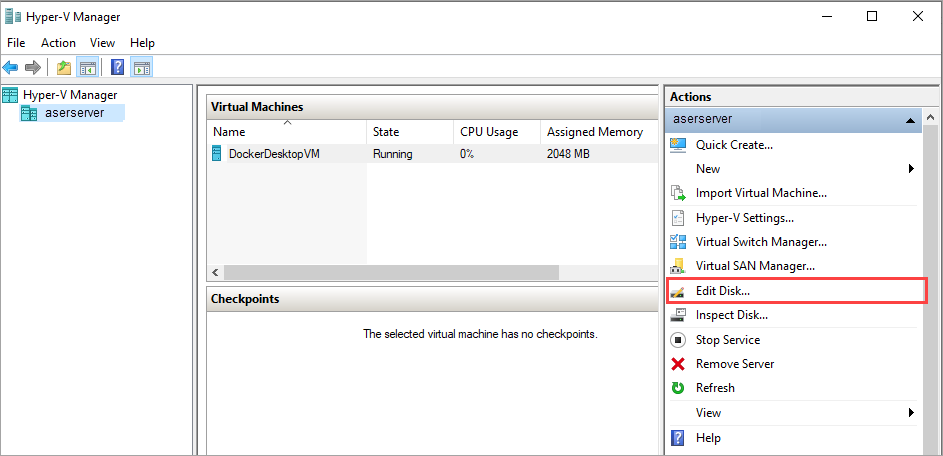
Open Hyper-V Manager on your client system. Go to Edit Disk.
On the Before you begin page, select Next>.
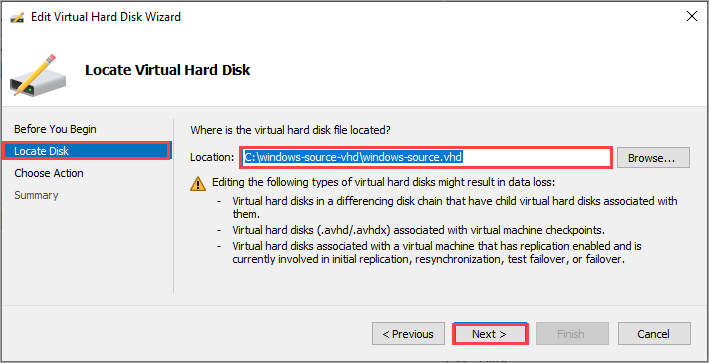
On the Locate virtual hard disk page, browse to the location of the source Windows VHD or VHDX that you wish to convert. Select Next>.
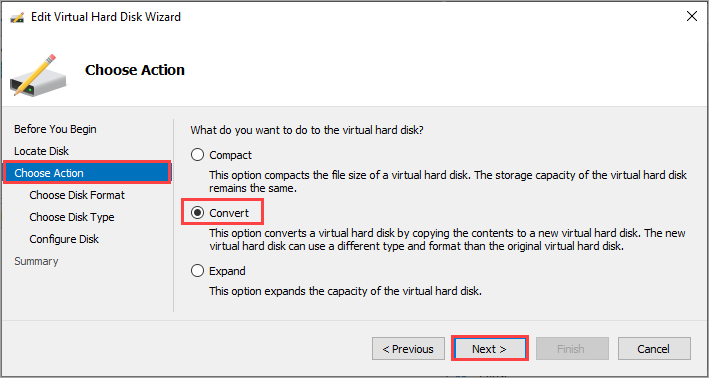
On the Choose action page, select Convert and select Next>.
On the Choose disk format page, select VHD format and then select Next>.

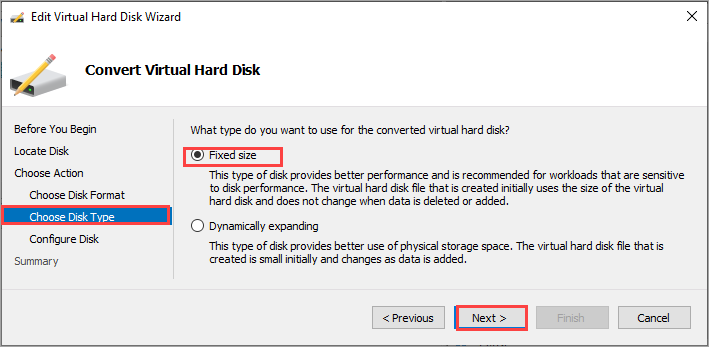
On the Choose disk type page, choose Fixed size and select Next>.
On the Configure disk page, browse to the location and specify a name for the fixed size VHD disk. Select Next>.
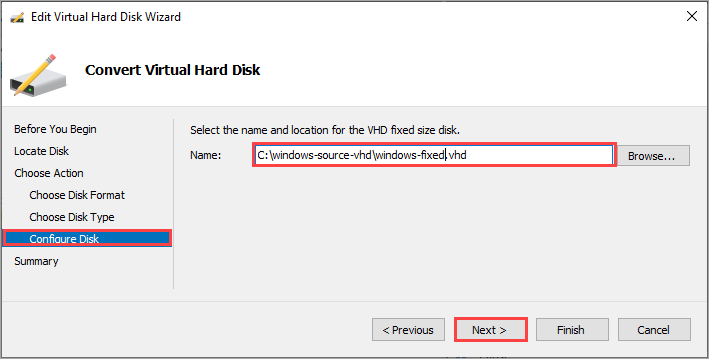
Review the summary and select Finish. The VHD or VHDX conversion takes a few minutes. The time for conversion depends on the size of the source disk.
You'll use this fixed-size VHD for all the subsequent steps in this article.
Create Hyper-V VM from the fixed-size VHD
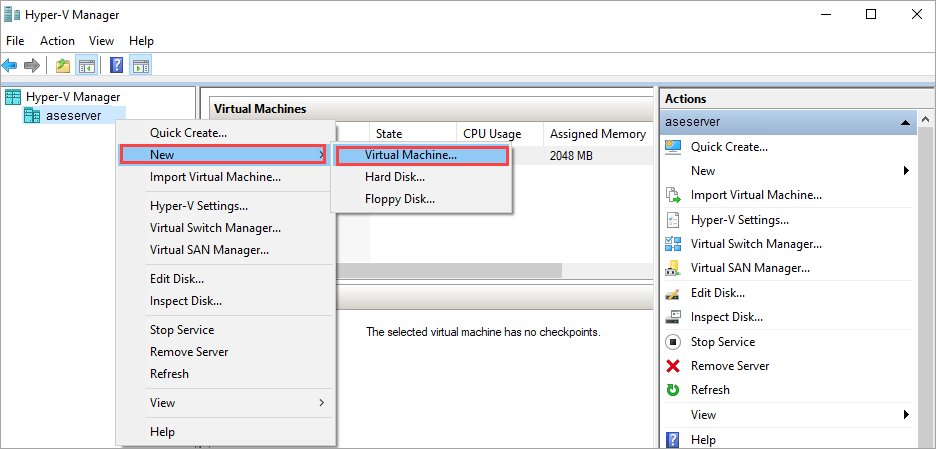
In Hyper-V Manager, in the scope pane, right-click your system node to open the context menu, and then select New > Virtual Machine.
On the Before you begin page of the New Virtual Machine Wizard, select Next.
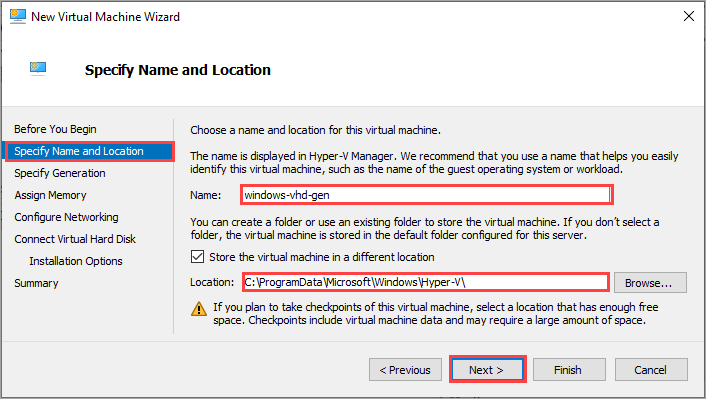
On the Specify name and location page, provide a Name and location for your virtual machine. Select Next.
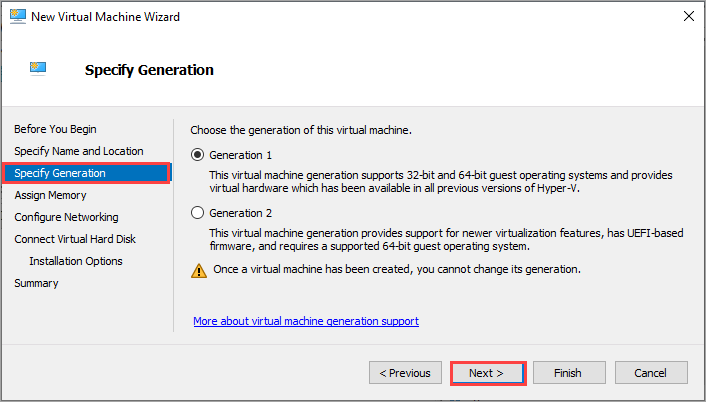
On the Specify generation page, choose Generation 1 or Generation 2 for the .vhd device image type, and then select Next.
Assign your desired memory and networking configurations.
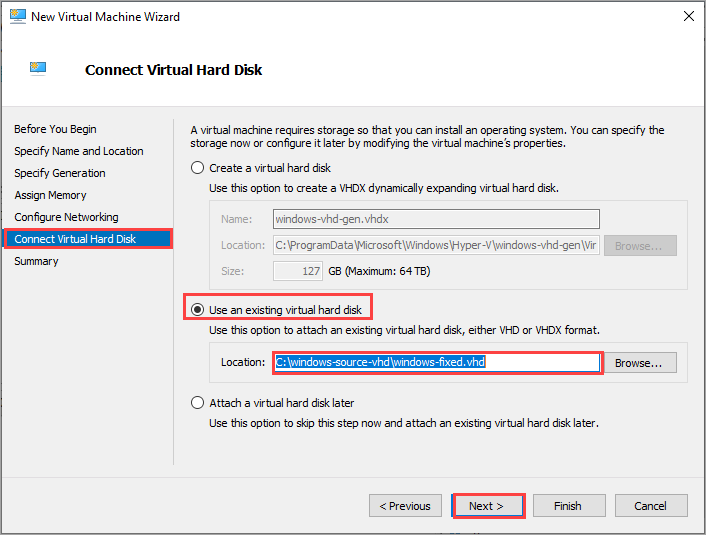
On the Connect virtual hard disk page, choose Use an existing virtual hard disk, specify the location of the Windows fixed VHD that we created earlier, and then select Next.
Review the Summary and then select Finish to create the virtual machine.
Creation of the virtual machine takes several minutes.
The VM shows in the list of the virtual machines on your client system.
Start VM, and install operating system
To finish building your virtual machine, you need to start the virtual machine and walk through the operating system installation.
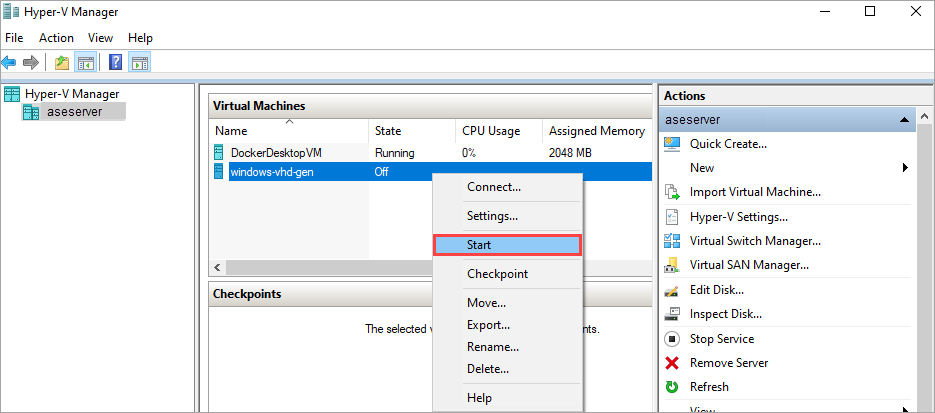
In Hyper-V Manager, in the scope pane, right-click the VM to open the context menu, and then select Start.
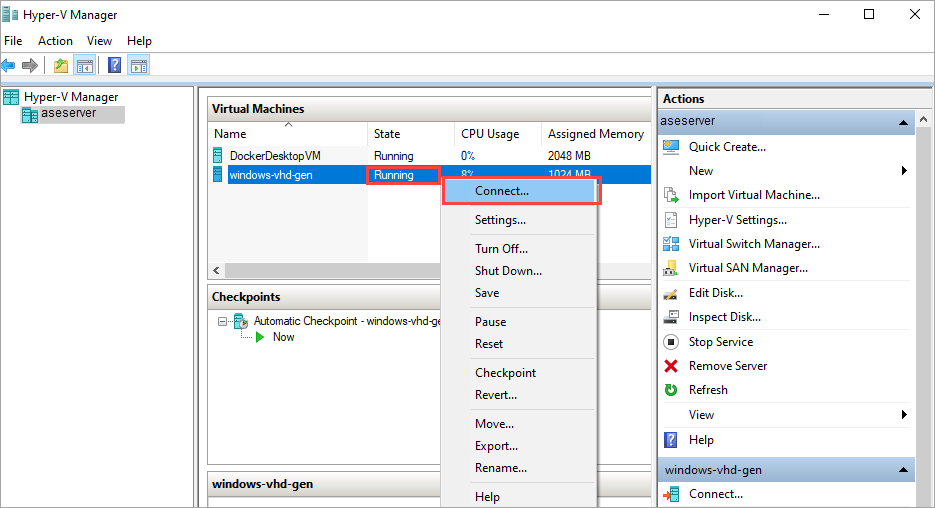
When the VM state is Running, select the VM, and then right-click and select Connect.
The virtual machine boots into setup, and you can walk through the installation like you would on a physical computer.
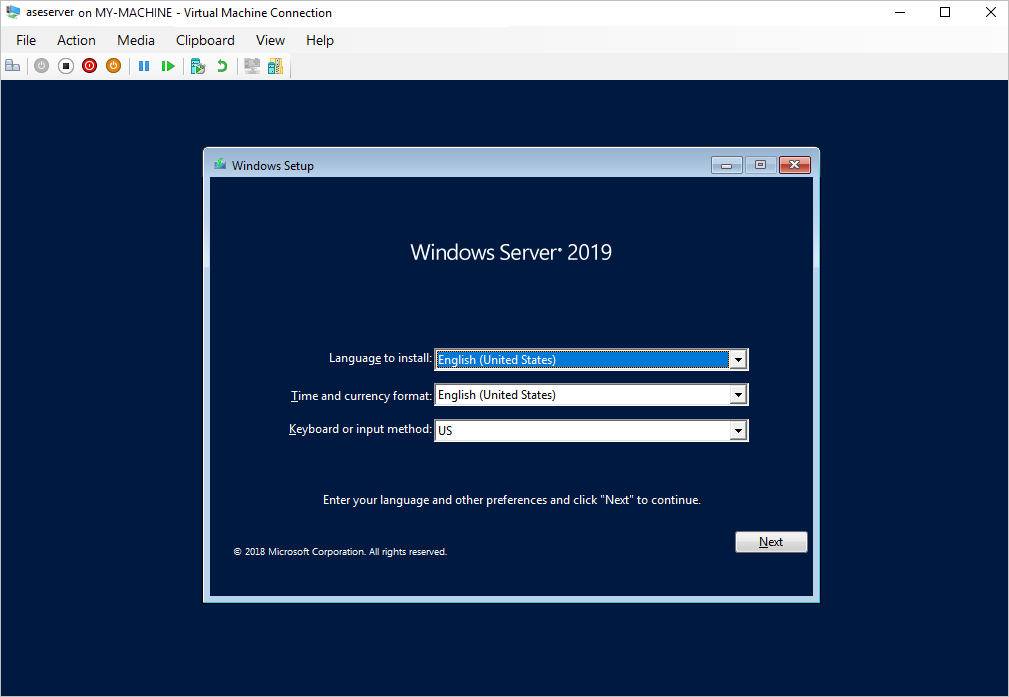
After you're connected to the VM, complete the Machine setup wizard, and then sign into the VM.
Generalize the VHD
Use the sysprep utility to generalize the VHD.
Inside the VM, open a command prompt.
Run the following command to generalize the VHD.
c:\windows\system32\sysprep\sysprep.exe /oobe /generalize /shutdown /mode:vmFor details, see Sysprep (system preparation) overview.
After the command is complete, the VM will shut down. Do not restart the VM.
Your VHD can now be used to create a generalized image to use on Azure Stack Edge Pro GPU.
Upload generalized VHD to Azure Blob storage
Upload the VHD to Azure blob storage. See the detailed instructions in Upload a VHD using Azure Storage Explorer.
After the upload is complete, you can use the uploaded image to create VM images and VMs.
Next steps
Depending on the nature of deployment, you can choose one of the following procedures.
Feedback
Coming soon: Throughout 2024 we will be phasing out GitHub Issues as the feedback mechanism for content and replacing it with a new feedback system. For more information see: https://aka.ms/ContentUserFeedback.
Submit and view feedback for