Configure pipelines to support work tracking
Azure DevOps Services | Azure DevOps Server 2022 - Azure DevOps Server 2019
To support integration and traceability across Azure DevOps Services with pipelines, you can configure several options. You can report pipeline status, copy the syntax for status badges, and set up automatic linking of work items to builds and releases.
Supported pipeline and work tracking integration features
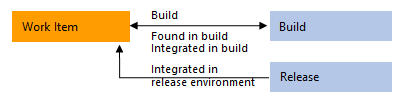
Several features provide support for end-to-end traceability as user stories and features move through the development cycle. As with Azure Repos, you can link work items to pipeline objects with the following link types: Build, Integrated in build, and Integrated in release. Note, that the Integrated in release environment link can only be created by enabling the Report release status to Boards option in Classic release pipelines.
The following table summarizes the integration points between Azure Boards and Azure Pipelines. Options and configuration steps differ depending on whether you are configuring a YAML or Classic pipeline, and your Azure DevOps version. Most options are supported for pipelines run against an Azure Repos Git repository unless otherwise noted.
Feature
Description
Supported versions
Manually link work items to builds
You can link from a work item to builds within the same project or other projects within the organization. For details, see Link to work items from other objects.
All versions
View builds linked to from a work item
You can view all builds linked to from a work item, whether manual or automatically linked, from the Links tab. For details, see Link to work items from other objects, View list of linked objects.
All versions
Automatically link work items to builds
Required to populate the Development control with Integrated in build links. The work items or commits that are part of a release are computed from the versions of artifacts. For example, each build in Azure Pipelines is associated with a set of work items and commits. For details, see Automatically link work items later in this article.
YAML, Azure DevOps Server 2020 and later
Classic, TFS 2017.2 and later
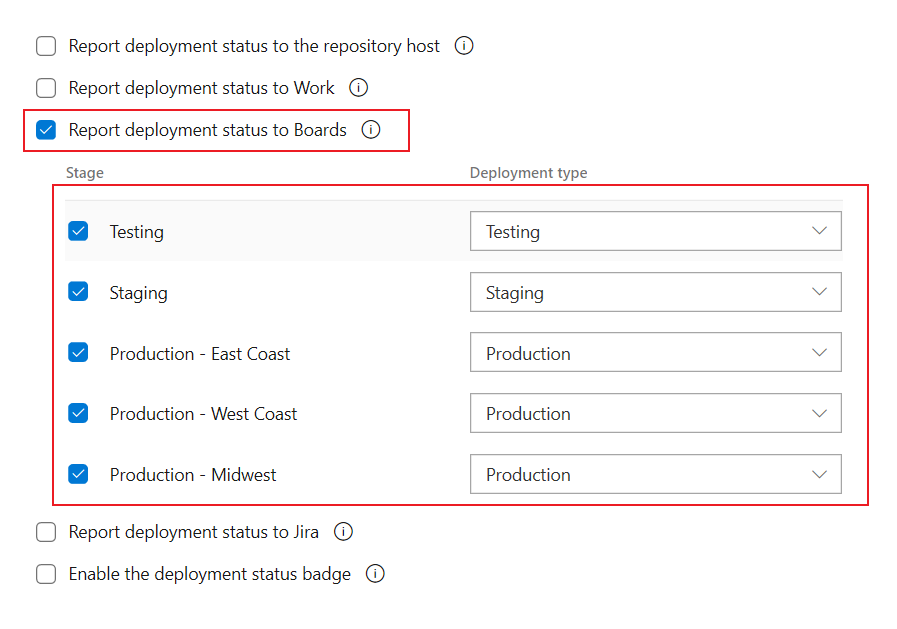
Automatically link work items to releases and report deployment status to a work item (Classic only)
Required to populate Deployment control in work item form with Integrated in release stage links. For details, see Report deployment status to Boards later in this article.
Azure DevOps Server 2020 and later
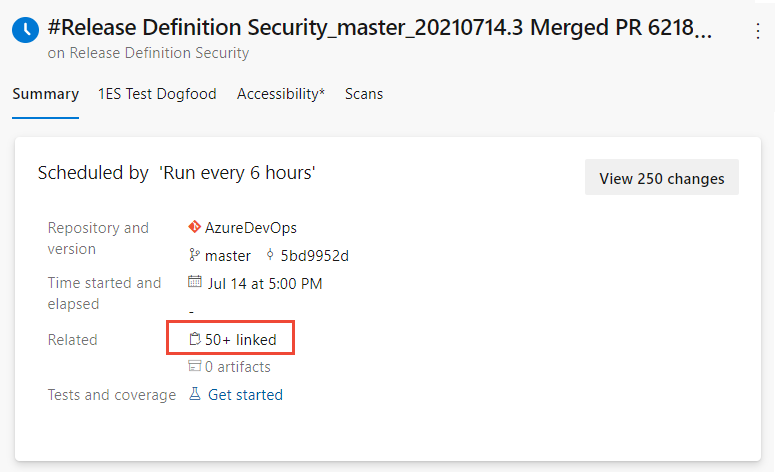
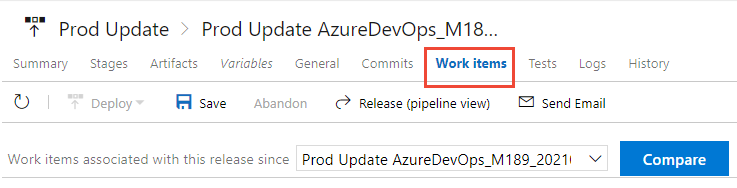
View list of work items linked to a build or release
Review and open the work items included in a build or release.
YAML, Azure DevOps Server 2020 and later
Classic, TFS 2017.2 and later
Create work item on failure (Classic)
Automatically create a work item when a build fails, and optionally set values for work item fields. For details, see Create work item on failure later in this article.
TFS 2018 and later versions
Query Work Items task, ensure the number of matching work items returned from a query is within a threshold.
Use this task to ensure the number of matching items returned by a work item query is within the configured thresholds. For details, see Query Work Items task, Control deployments with gates and approvals.
Azure DevOps Server 2020 and later versions
Prerequisites
- To configure the integration options for a Classic release pipeline, you must have permissions to edit the release.
- To link work items to commits and pull requests, you must have your Edit work items in this node permissions set to Allow for the Area Path assigned to the work item. By default, the Contributors group has this permission set.
- To view work items, you must have your View work items in this node permissions set to Allow for the Area Path assigned to the work item.
Open pipeline settings, build options, or integration options
Open Pipeline settings
For YAML-defined release pipelines, you configure the integration through the Pipeline settings dialog.
Open the pipeline, choose
 More actions, and then choose Settings.
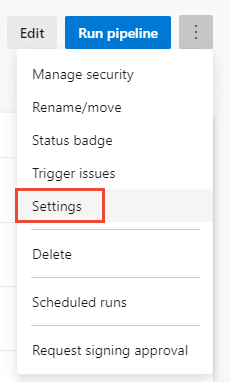
The Pipeline Settings dialog appears. For details on automatic linking, see Automatically link work items later in this article.
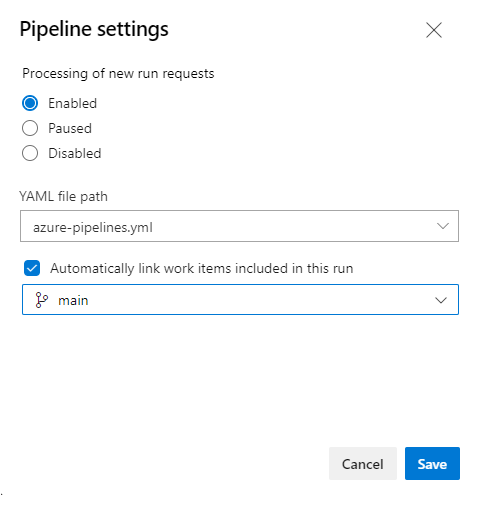
This setting isn't available for Azure DevOps Server 2019 or earlier versions.

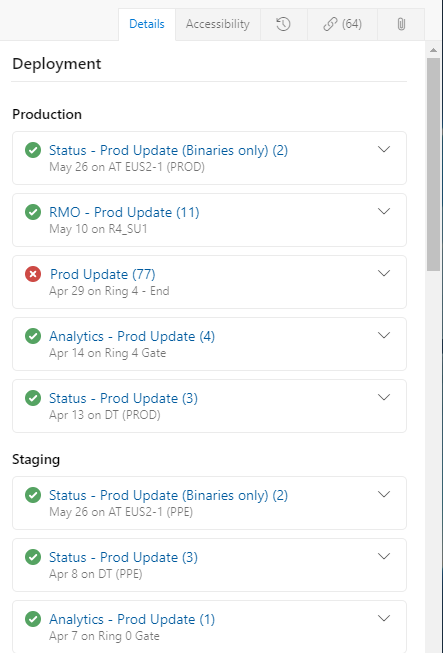
Automatically link work items to builds or releases
By enabling automatic linking, you can track the builds or releases that have incorporated work without having to manually search through a large set of builds or releases. Each successful build associated with the work item automatically appears in the Development control of the work item form. Each release stage associated with the work item automatically appears in the Deployment control of the work item form.
Automatically link work items to builds
By enabling automatic linking, you can track the builds that have incorporated work without having to manually search through a large set of builds. Each successful build associated with the work item automatically appears in the Development control of the work item form.
Open Pipeline settings as described in Open Pipeline settings.
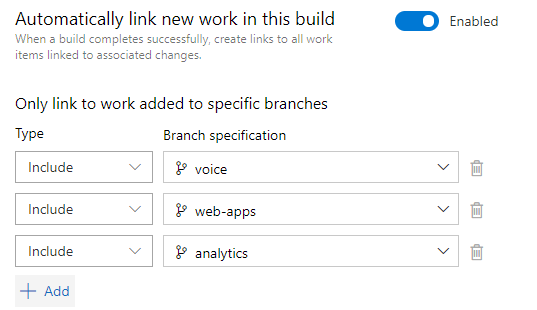
Enable Automatically link new work in this build.
Once enabled, Integrated in build links are generated for all work items linked to the selected pull request with each release run.
This feature isn't supported for YAML pipelines in Azure DevOps Server 2019.
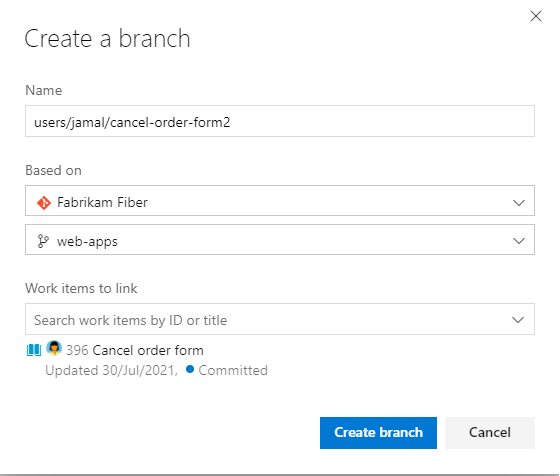
What work items are included in automatic linking?
When developing your software, you can link work items when you create a branch, commit, or pull request. Or, you can initiate a branch, commit, or pull request from a work item, automatically linking these objects as described in Drive Git development from a work item. For example, here we create a new branch from the Cancel order form user story.
When automatically linking work items to builds, the following computations are made:
For a first-time build:
- Identify all work items linked to the branch, commits, and pull requests associated with the build.
For subsequent builds:
- Identify all work items associated with the current commit (C1) being built.
- Identify all work items associated with the commit (C2) of the last successful build of the same source branch.
- Identify all work items associated with the commits between C1 and C2 in the commit tree.
Create work item on build failure (Classic)
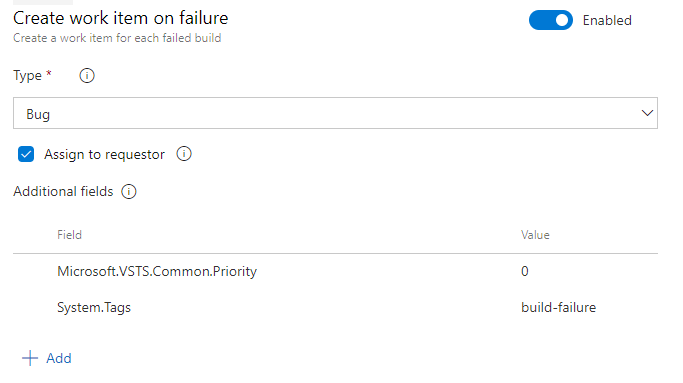
If a build pipeline fails, you can automatically create a work item to track getting the problem fixed. You can specify the work item type and set options to automatically assign it to the requestor or other fields. The requestor corresponds to the person that triggered the build.
Tip
The option to Create work item on failure is only supported for Classic pipelines. To accomplish this with a YAML pipeline, you can use a marketplace extension like Create Bug on Release failure or you can implement it yourself using Azure CLI or REST API calls.
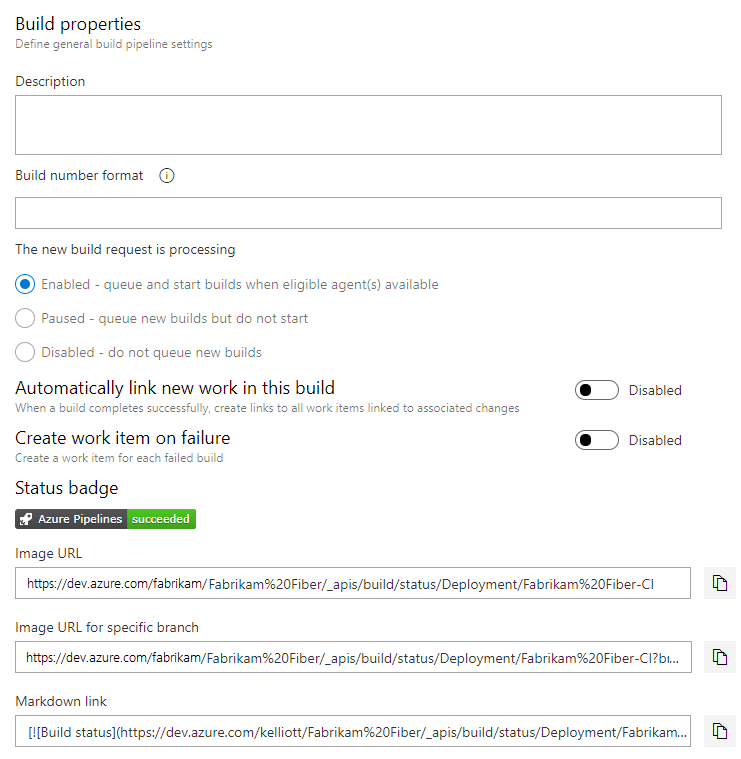
Open pipeline build options as described in Build properties.
Enable Create work item on failure and choose the type of work item to create. Optionally check the Assign to requestor checkbox to set the Assign To field and add fields to set within the work item to create.
For example, here we choose the Bug work item type and specify the Priority and Tags fields and their values.
Save your pipeline.
To learn the reference name for a field, look it up from the Work item field index. For custom fields you add through an inherited process, Azure DevOps assigns a reference name based on friendly field name prefixed with Custom. For example, you add a field named DevOps Triage, the reference name is Custom.DevOpsTriage. No spaces are allowed within the reference name.
Get or enable a status badge
Open pipeline
More Actions and choose Status badge.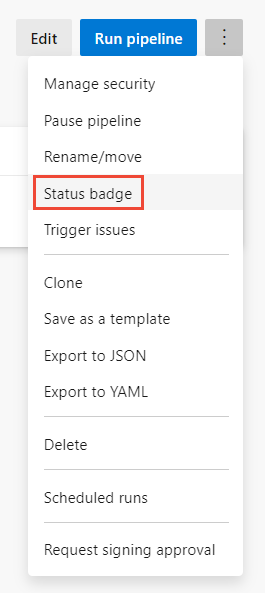
Choose the branch and scope of interest, and then choose
 Copy to clipboard to copy the image or Markdown syntax.
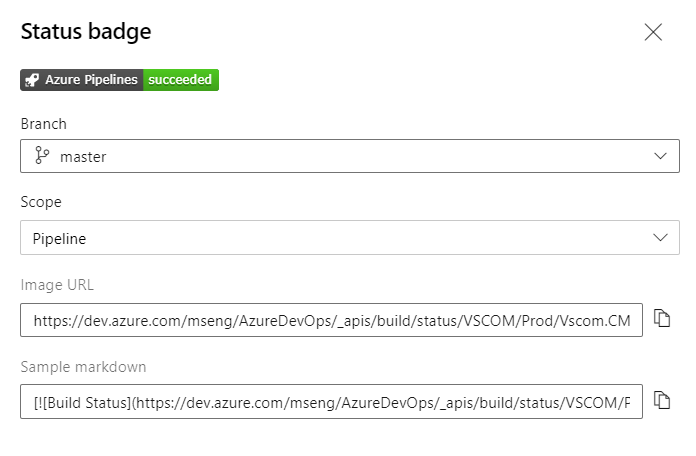
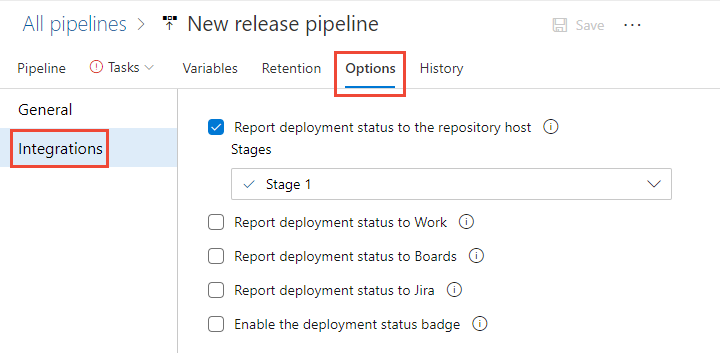
Report deployment status to the repository host (Classic)
When you code is stored in an Azure Repos Git repository, you can configure your release pipeline to display a badge on the Azure Repos pages. The badge indicates where the specific commit got deployed and whether the deployment is passing or failing. This option improves the traceability from code commit to deployment.
The deployment status is displayed in the following sections of Azure Repos:
- Files: Indicates the status of the latest deployment for the selected branch.
- Commits: Indicates the deployment status for each commit (requires the continuous integration (CD) trigger to be enabled for your release).
- Branches: Indicates the status of the latest deployment for each branch.
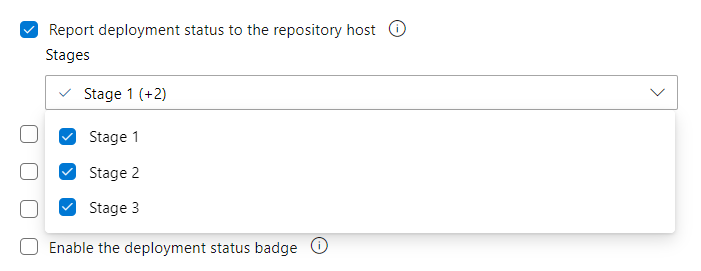
If a commit gets deployed to multiple release pipelines, with multiple stages, each has an entry in the badge with status that's shown for each stage. By default, when you create a release pipeline, deployment status is posted for all stages. However, you can selectively choose the stages for which deployment status should be displayed in the status badge (for example, show only the production stage). Your team members can select the status badge to view the latest deployment status for each of the selected stages of the release pipelines.
Report deployment status to Jira (Classic)
Include Jira issues in work items and create links to all issues on stage completion. Install Azure Pipelines for Jira app in JIRA Software cloud and add organization to create a connection.
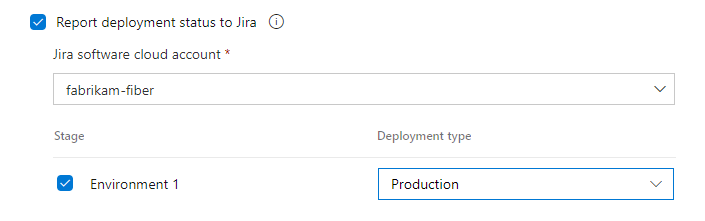
To support integration with Jira issue tracking, install Azure Pipelines integration with Jira and connect your Azure DevOps organizations with your Jira Software instance. You can connect multiple organizations with one instance and get data for all your teams and related projects. Learn more about setting up the integration in our documentation.To learn more about installation and setup, see Integrate with Jira Issue tracking.
Related articles
- Define your multi-stage continuous deployment (CD) pipeline
- Link work items to other objects
- Release pipelines (Classic) overview
- How to retrieve all work items associated with a release pipeline using Azure DevOps API
- Drive Git development from a work item
- Link to work items to other objects
- End-to-end traceability
- Link type reference
Feedback
Coming soon: Throughout 2024 we will be phasing out GitHub Issues as the feedback mechanism for content and replacing it with a new feedback system. For more information see: https://aka.ms/ContentUserFeedback.
Submit and view feedback for