Use Azure Repos with Microsoft Teams
Azure DevOps Services
If you use Microsoft Teams and Azure Repos, you can use the Azure Repos app for Teams to monitor your repos. The app supports monitoring both Git and Team Foundation Version Control (TFVC) repos, but it doesn't support integration with GitHub repos.
In this article, learn how to do the following tasks:
- Add the Azure Repos app to your team in Microsoft Teams
- Connect the Azure Repos app to your repos
- Manage subscriptions to repo related events in your channel
- Search and share PR info using compose extension
- Preview PR URLs
- Remove subscriptions and repos from a channel
Prerequisites
- Manage your subscription, so you receive notifications in your channel whenever code gets pushed or checked in, or when a pull request (PR) gets created, updated, or merged. To create subscriptions for repo-related events, you must be a member of the Project Administrators group, or a team administrator. To get added, see Change project-level permissions or Add a team administrator.
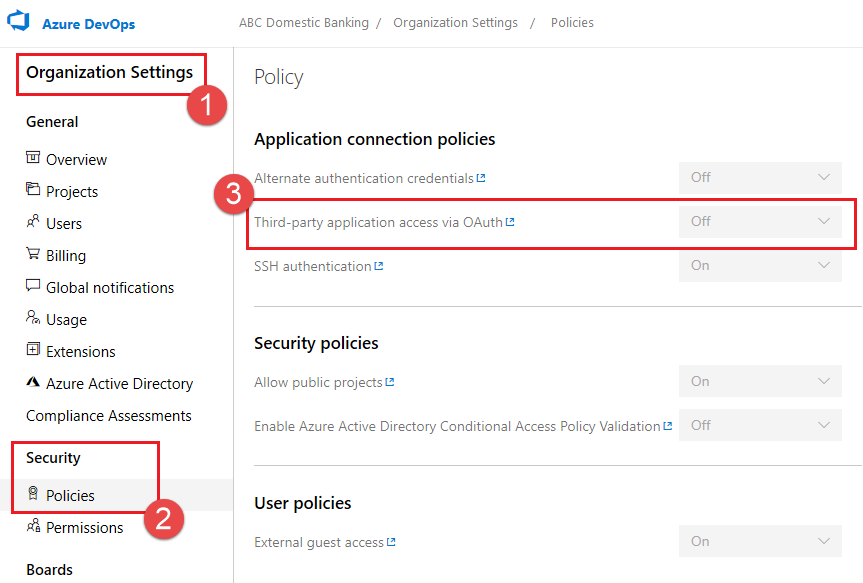
- To receive notifications, enable the Third-party application access via OAuth setting for the Azure DevOps organization. See Change application access policies for your organization.
Note
- Notifications are currently not supported inside direct messages.
- You can only link the Azure Repos app for Microsoft Teams to a project hosted on Azure DevOps Services.
Add the Azure Repos app to a team in Microsoft Teams
Go to the Azure Repos app in Microsoft Teams, Microsoft Teams > Azure Repos.
Select Add or if you already downloaded the app, select the dropdown menu next to Open, and then select Add to a team.
Enter a team or channel name, and then select Set up a bot.
Connect the Azure Repos app to your repos
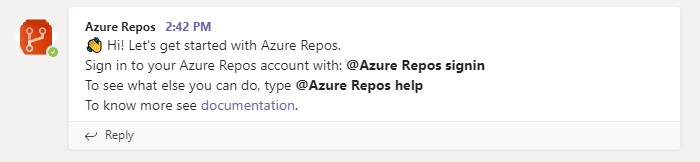
Once the app is installed in your team, enter the following text into the reply field:
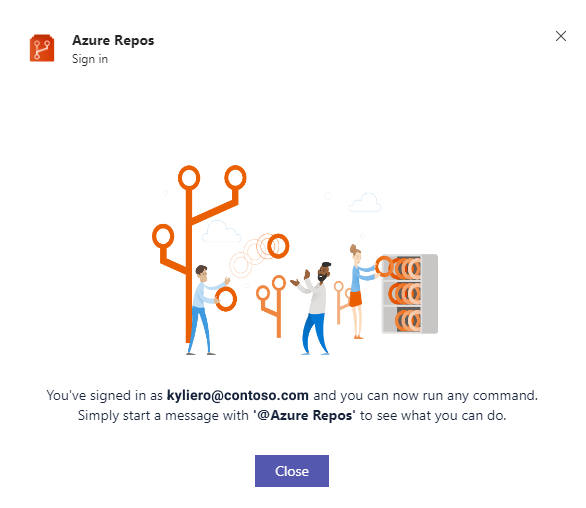
@azure repos signinIf your Microsoft Teams and Azure Boards are in different tenants, select Sign in with different email.

To monitor all Git repos in a project, enter
@azure repos subscribe [project url]into the channel. Be sure to add your project URL. The project URL can be to any page within your project (except URLs to repos).You can also monitor a specific repo using:
@azure repos subscribe [repo url].The repo URL can be to any page within your repo that has your repo name, for example,
@azure repos subscribe https://dev.azure.com/myorg/myproject/_git/myrepo, or for TFVC repos:@azure repos subscribe https://dev.azure.com/myorg/myproject/_versionControl.The
subscribecommand gets you started with a default subscription. For Git repos, the channel gets subscribed to the Pull request created event (with target branch = main). For TFVC repos, the channel is subscribed to the Code checked in event.
Manage subscriptions
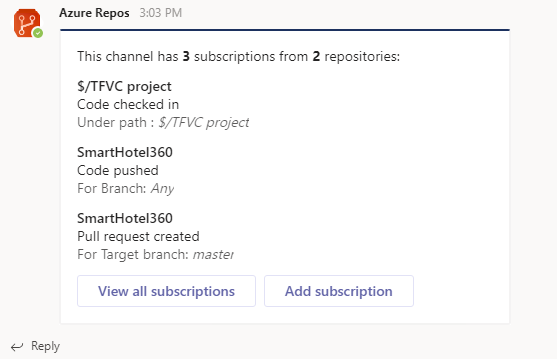
To view, add, and remove subscriptions for a channel, enter the following text: @azure repos subscriptions.
You see a list of all the current subscriptions for the channel and you can add new subscriptions or remove existing ones. Customize your notifications with various filters, as described in the following section.
Note
Team administrators can't remove or modify subscriptions created by Project administrators.
Use filters to get only notifications that you want
When you subscribe to a repo with @azure repos subscribe, a default subscription gets created with no filters applied.
Often, users need to customize these subscriptions to be notified only when certain conditions are met.
The following screenshots show an example of setting up notifications only when our team is in the reviewer list for a PR.
Enter the following text into your channel:
@azure repos subscriptions.In the list of subscriptions, if there's a subscription that you don't want or must be modified, select Remove to delete it.
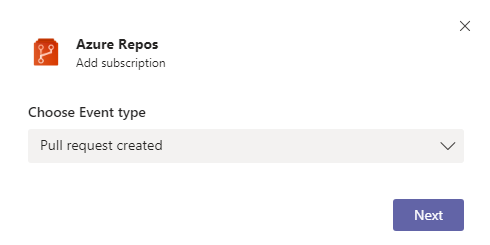
Select the Add subscription button.
Choose an event type, and then select Next.
Choose a repo, and then select Next.
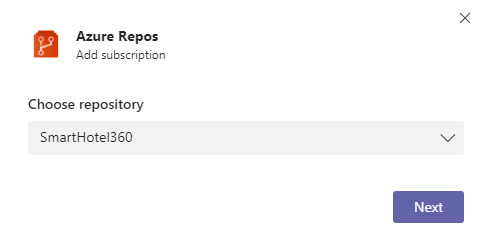
Select the appropriate filters to customize your subscription, and then select Submit.

Note
- All the filters are typically drop-downs. However, if the drop-down has greater than 100 items, you must manually enter the values.
- For the TFVC Code Checked in event, the filter Under path must be of the format
$/myproject/path.
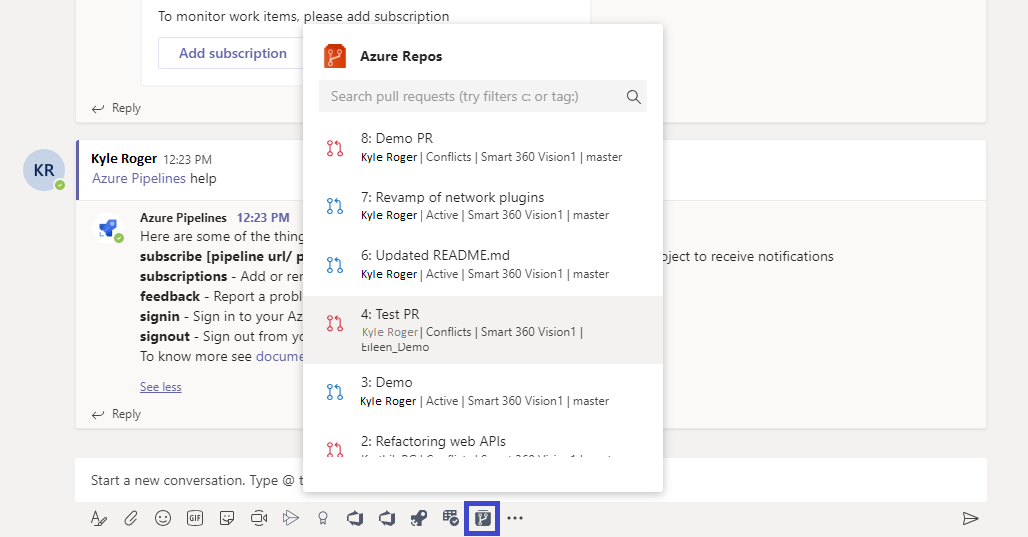
Search and share pull request information using compose extension
To help users search and share information about pull requests, Azure Repos app for Microsoft Teams supports a compose extension. You can search for pull requests by ID or name. For the extension to work, sign in to the Azure Repos project by entering @azure repos signin or by signing into the compose extension directly.
Preview pull request URLs
When you paste the URL of a PR, a preview shows like the one in the following image, which helps to keep PR-related conversations contextual and accurate. You must be signed in, and then you can preview PRs for URLs in all channels in a Team.

Remove subscriptions and repos from a channel
To delete all the subscriptions related to any repo in the project and remove the repos from the channel, enter the following text into Teams: @azure repos unsubscribe all [project url]. Make sure to enter the project URL. Only project admins can do this task.
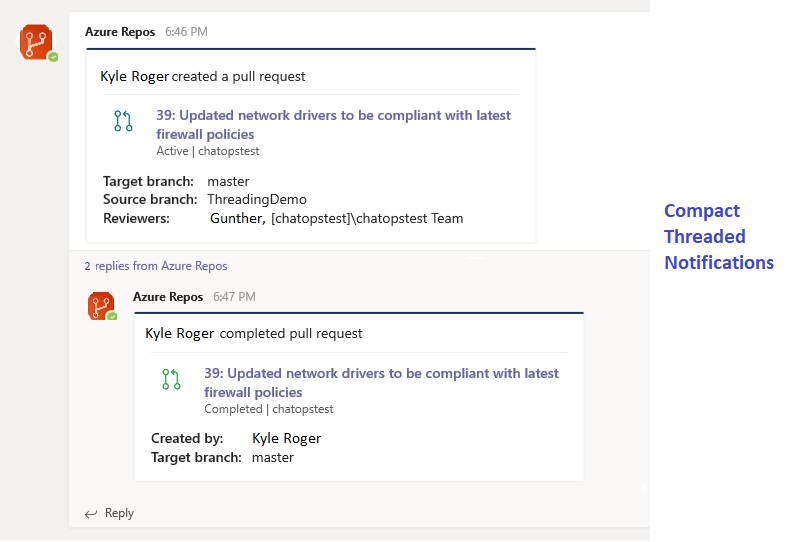
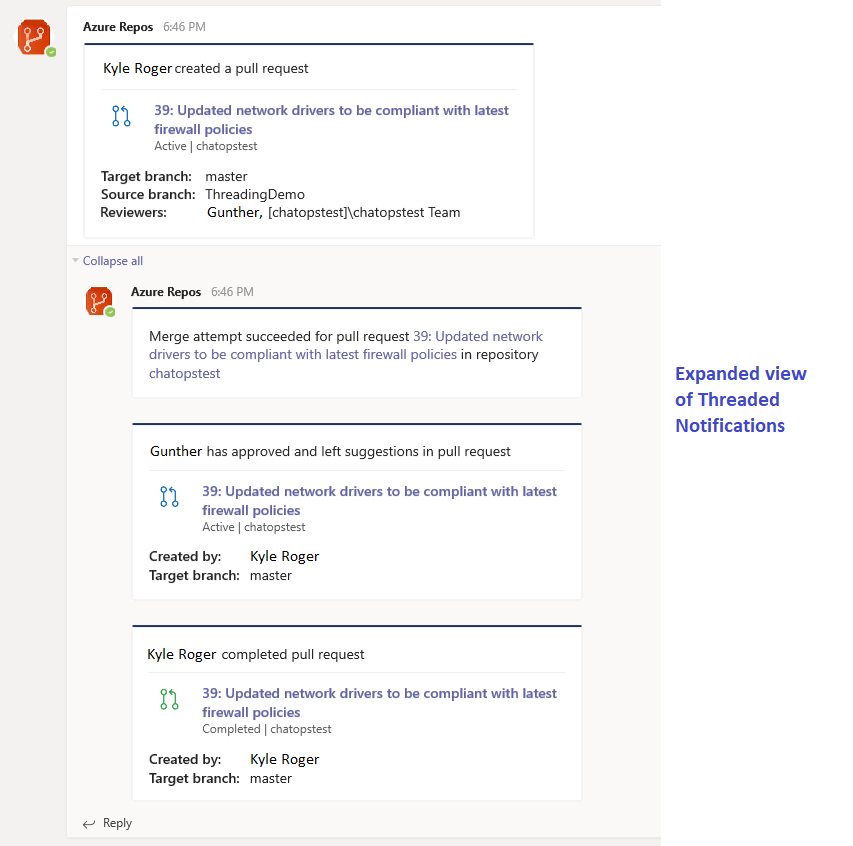
Threaded notifications
To link a set of related notifications and also to reduce the space occupied by notifications in a channel, notifications get threaded. All notifications linked to a particular pull request are linked together.
Compact view of threaded notifications
Expanded view of threaded notifications
Command reference
The following table lists all the azure repos commands you can use in your Teams channel.
| Command | Functionality |
|---|---|
@azure repos subscribe [repo url/ project url] |
Subscribe to a repo or all repos in a project to receive notifications |
@azure repos subscriptions |
Add or remove subscriptions for this channel |
@azure repos signin |
Sign in to your Azure Repos organization |
@azure repos signout |
Sign out from your Azure Repos organization |
@azure repos feedback |
Report a problem or suggest a feature |
@azure repos unsubscribe all [project url] |
Remove all repos (belonging to a project) and their associated subscriptions from a channel |
Multi-tenant support
If you're using a different email or tenant for Microsoft Teams and Azure DevOps, do the following steps to sign in, based on your use case.
| Use case | Email ID + Microsoft Teams tenant | Email ID + Azure DevOps tenant | Steps |
|---|---|---|---|
| 1 | email1@abc.com (tenant 1) | email1@abc.com (tenant 1) | Select Sign in. |
| 2 | email1@abc.com (tenant 1) | email1@abc.com (tenant 2) | Sign in to Azure DevOps. In the same browser, start a new tab and go to https://teams.microsoft.com/. Run the signin command and select Sign in. |
| 3 | email1@abc.com (tenant 1) | email2@pqr.com (tenant 2) | Select Sign in with different email address, and then in the email ID picker use the email2 to sign in to Azure DevOps. |
| 4 | email1@abc.com (tenant 1) | email2@pqr.com (non default tenant 3) | This scenario isn't supported. |
Troubleshoot
If you're experiencing the following errors when using the Azure Repos App, follow the procedures in this section.
- Sorry, something went wrong. Please try again.
- Configuration failed. Please make sure that the organization '{organization name}' exists and that you have sufficient permissions.
Sorry, something went wrong. Please try again.
The Azure Repos app uses the OAuth authentication protocol, and requires Third-party application access via OAuth for the organization to be enabled. To enable this setting, navigate to Organization Settings > Security > Policies, and set the Third-party application access via OAuth for the organization setting to On.
Configuration failed. Please make sure that the organization '{organization name}' exists and that you have sufficient permissions.
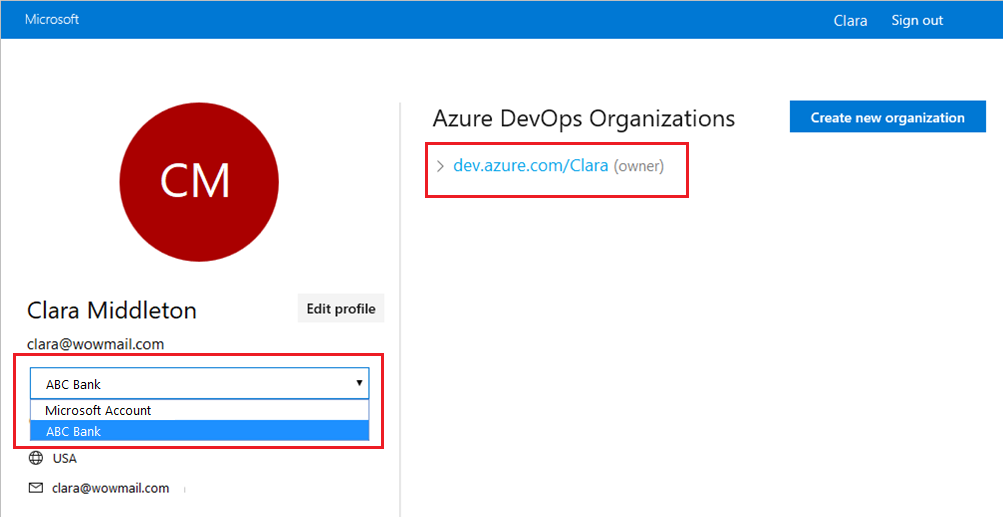
Sign out of Azure DevOps by navigating to https://aka.ms/VsSignout using your browser.
Open an In private or incognito browser window and navigate to https://aex.dev.azure.com/me and sign in. In the dropdown under the profile
icon to the left, select the directory that contains the organization containing the repository to which you wish to subscribe.
In the same browser, start a new tab and sign in to https://teams.microsoft.com/. Run the @Azure Repos signout command and then run the @Azure Repos signin command in the channel where the Azure Repos app for Microsoft Teams is installed.
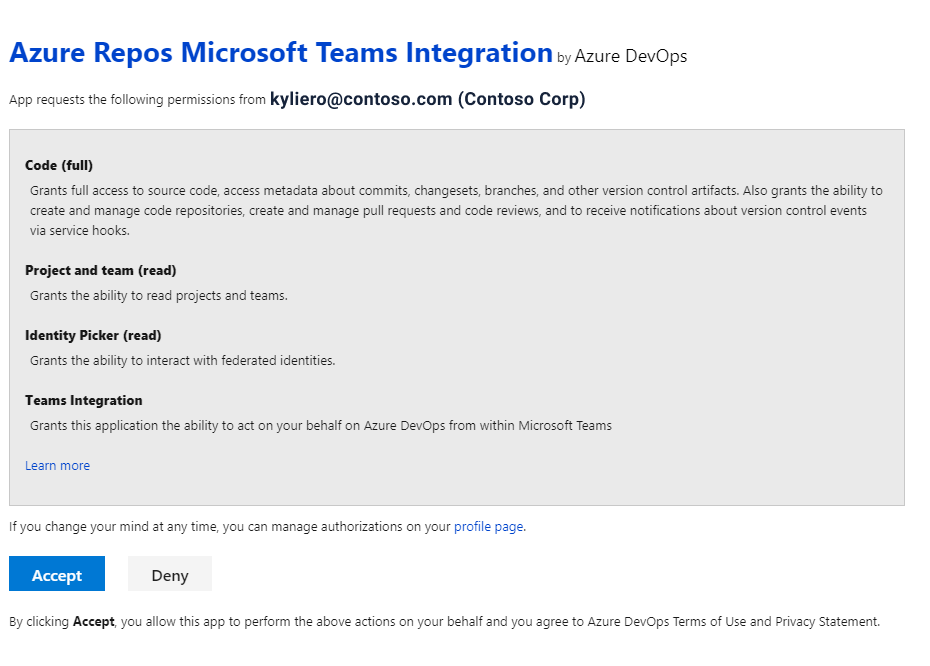
Select the Sign in button and you're redirected to a consent page like the one in the following example. Ensure that the directory shown beside the email is same as what was chosen in the previous step. Accept and complete the sign-in process.
If these steps don't resolve your authentication issue, reach out to us at Developer Community.
Related articles
Feedback
Coming soon: Throughout 2024 we will be phasing out GitHub Issues as the feedback mechanism for content and replacing it with a new feedback system. For more information see: https://aka.ms/ContentUserFeedback.
Submit and view feedback for