Perform an unattended installation
Azure DevOps Server 2022 | Azure DevOps Server 2020 | Azure DevOps Server 2019
With an unattended install you can preset all configuration parameters for your Azure DevOps Server instance in advance. The tfsconfig unattend command is especially useful when you're familiar with the Azure DevOps Server configuration process and are deploying Azure DevOps into a multiple machine environment.
For example, many large-scale enterprise systems have several servers that are designated to builds. Unattended install allows an administrator to quickly kick off the Team Build installation process on these machines without having to supervise each one independently. Furthermore, since the configuration for each build server will likely be almost or completely identical, it should be easy to set each machine’s configuration parameters quickly.
Important
This article describes usage of the tfsconfig unattend command to perform an unattended install on Azure DevOps Server 2019. While the steps are similar for previous versions of Team Foundation Server, the syntax for the tfsconfig unattend command has changed. For details, select the article version you want from TFSConfig, Unattend.
Use the unattend command to perform the following types of installations:
- New single server or multi-server install
- Upgrade
- Pre-production upgrade
- Configure a new application tier
- Clone an existing deployment
- Configure a version control proxy server
For information on the syntax usage of the tfsconfig unattend command, see Use TFSConfig to manage Azure DevOps on-premises, Unattend.
Prerequisites
Prepare a single computer that satisfies the system requirements.
If you don't plan to use SQL Server Express, set up a supported version of SQL Server. When you set up SQL Server for Azure DevOps on-premises, at a minimum install the Database Engine and Full-Text and Semantic Extractions for Search features.
We recommend that you use SQL Server Express only for personal or evaluation deployments. Paid copies of Azure DevOps on-premises include a SQL Server Standard license. For more information, see Azure DevOps Server pricing. If you use the included license, you can use it only for databases created with those products.
The account you use to configure the installation must be a member of the sysadmin server role in SQL Server.
Note
Installing Azure DevOps on-premises involves a set of operations that require a high degree of privilege. These operations include creating databases, provisioning logins for service accounts, and more. Technically, all that's required is:
- Membership in the serveradmin role.
- ALTER ANY LOGIN, CREATE ANY DATABASE, and VIEW ANY DEFINITION server-scoped permissions.
- CONTROL permission on the master database.
Membership in the sysadmin server role confers all these memberships and permissions. It's the easiest way to ensure that configuration succeeds. If necessary, you can revoke these memberships and permissions after installation.
To support installation and configuration of the Search extension, you need to provide a user name and password. Installing and configuring Search supports Code, Work Item and Wiki search features. For more information, see Configure search.
Note
Search also requires Oracle Server JRE 8 (Update 60 or higher). You can download and install or update to the latest version by accepting the Oracle Binary Code License Agreement for Server JRE and selecting Configure. Note that this will set the JAVA_HOME environment variable to point to the Java installation directory, and that Server JRE does not provide automatic updates.
When configuring the application-tier you have a choice of web site settings. Review Web site settings to understand the choices and requirements.
Supported installations
The unattended install feature supports all the same installation types that the Configuration Wizard supports and contains fields for the same set of configuration parameters. For the most part, the name of each configuration type for unattended install mirrors the name in the Wizard.
Here is a list of names and descriptions of the types of unattended configurations:
| InstallType | Description |
|---|---|
| NewServerBasic | Configures the essential development services for Azure DevOps Server. This includes Azure Boards (work tracking) Azure Repos (source control), Azure Pipelines (build and release), and optionally Search. |
| NewServerAdvanced | Configures the essential development services and allows optional configuration of integration with Reporting Services. |
| Upgrade | Upgrades Azure DevOps Server to the current version from a supported previous release. |
| PreProductionUpgrade | Test the upgrade on an existing Azure DevOps Server deployment in a pre-production environment. This is typically done using databases restored from production backups. This scenario includes additional steps to ensure that the new deployment will not interfere with the production deployment. |
| ApplicationTierOnlyBasic | Configure a new application tier using existing settings from the supplied configuration database. This option allows you to get a new application tier up and running quickly using existing settings. If you want the ability to change existing settings, use the Advanced ApplicationTierOnlyAdvanced type instead. |
| ApplicationTierOnlyAdvanced | Configure a new application tier with full control over all settings. Settings will default to existing values from the supplied configuration database. If you want to preserve all of your existing settings, use the ApplicationTierOnlyBasic type instead. |
| Clone | Configure a new Azure DevOps Server deployment which is a clone of an existing deployment. This is typically done, using databases restored from production backups, to create an environment where configuration changes, extensions, and other modifications can be tested. This scenario includes additional steps to ensure that the new deployment will not interfere with the production deployment. |
| Proxy | Configures a version control proxy service. |
Important
Before running the configuration, you need to ensure you have a current backup of your databases and then override ‘ConfirmBackup’ so that ‘ConfirmBackup=True.’ Otherwise, the configuration won't run.
Unsupported scenarios
Unattended install is only intended for use in on-premises scenarios. Unattended installation doesn't support the following scenarios:
- Although the Configuration Wizard can install Build and Proxy instances that point to Azure databases, this functionality isn't implemented for the command line (there is no place to supply the Azure Cloud Storage account information).
- Unattended install is available for Azure DevOps Server Express; however, only the 'build' and 'basic' (where 'SqlInstance=SqlExpress') configuration types will succeed. Unattended install will block on configuration types that can't be installed on the Express SKU, such as 'spinstall,' 'spextensions,' and 'proxy,' and will raise errors for the ‘atonly’ and 'Standard' configuration types, since Azure DevOps Server Express is only compatible with SQL Express.
- Reusing unattended configuration files across machines is not currently supported because configuration files use the machine name in certain default parameter values. We have plans to improve this functionality in the future. In the meantime, users can write their own scripts to dynamically switch out the machine names in their configuration file to suit their needs.
Download and install
-
Download Azure DevOps Server through one of the following channels:
- Visual Studio Downloads, which is the simplest method (scroll down to All downloads, Azure DevOps Server 2019)
- Visual Studio Dev Essentials
- Volume Licensing Service Center
Perform a silent installation.
azuredevopsserver2019.1_rc1.exe /SilentOr, silently install the express version.
devopsexpress2019_rc1.exe /SilentThe installer copies files onto your machine.
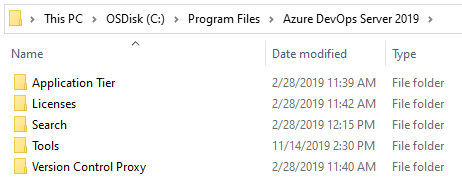
Verify the installation by looking at C:\Program Files\Azure DevOps Server 2019 folder.
You can configure your installation by choosing Start Wizard, or exit and configure using unattended install.
At this point, you have the bits installed on your machine, but Azure DevOps Server isn't configured. To perform an unattended configuration, you need to create an ini file and then configure the machine(s) using that ini file.
Create the ini file
The /create command option generates a configuration file that you can then modify or run to configure a server instance.
To start, open a command prompt to run as an administrator and change to the /Tools directory
Here, we run the /create command, specifying the type of installation and name of the file to create.
C:\Program Files\Azure DevOps Server 2019\Tools>
tfsconfig unattend /create /type:NewServerBasic /unattendfile:basic.ini
Upon completion, open the .ini file in a text editor. It appears similar to the one listed next. The auto-generated, fully-commented basic.ini file specifies to perform the following tasks:
- Scenario=NewServerBasic
- InstallSqlExpress=False
- SqlInstance=MININT-O0VPFCK\SqlExpress
- UseExistingEmptyDatabase=False
- CreateConfigurationDatabase=True
- StartTrial=False
- DatabaseLabel=
- ServiceAccountName=NT AUTHORITY\NETWORK SERVICE
- LCID=1033
- WebSiteVDirName=
- SiteBindings=http:*:80:
- PublicUrl=http://minint-o0vpfck/
- FileCacheFolder=C:\AzureDevOpsData\ApplicationTier_fileCache
- SmtpEmailEnabled=False
- EnableSshService=True
- SshPort=22
- ConfigureSearch=False
- InstallSearchService=True
- CreateInitialCollection=True
- CollectionName=DefaultCollection
- CollectionDescription=
- UseExistingEmptyCollectionDatabase=False
[Configuration]
Activity=Microsoft.TeamFoundation.Admin.ServerConfigurationActivity
Assembly=Microsoft.TeamFoundation.Admin, Version=17.0.0.0, Culture=neutral, PublicKeyToken=b03f5f7f11d50a3a
; You can submit information about your Azure DevOps Server configuration and administration experience to Microsoft.
SendFeedback=True
; One of the following configuration Scenarios:
;
; NewServerBasic: Configure a new server with only the essential services.
; NewServerAdvanced: Configure a new server with essential and other optional features.
; NewServerAzure: Configure a new server with Azure SQL integration.
; ProductionUpgrade: Upgrade an existing production server.
; PreProductionUpgrade: Perform a pre-production upgrade using backed up production databases.
; ApplicationTierOnlyBasic: Basic application tier-only configuration using existing settings.
; ApplicationTierOnlyAdvanced: Application tier-only configuration that allows full setting customization.
; Clone: Create a new deployment from an existing deployment.
;
Scenario=NewServerBasic
; Whether SQL Express will be installed as part of configuration
InstallSqlExpress=False
; Provide the configured SQL instance in the form of Server, ServerName\InstanceName or Server,Port
SqlInstance=MININT-O0VPFCK\SqlExpress
; You can elect to create an existing set of empty databases (Tfs_<label>Configuration, Tfs_<label>Warehouse and Tfs_<label>Analysis)
UseExistingEmptyDatabase=False
; Determines whether a configuration database will get created
CreateConfigurationDatabase=True
; Database label controls the names of the configuration databases. Database name will be Tfs_<label>Configuration, Tfs_<label>Warehouse and Tfs_<label>Analysis
DatabaseLabel=
StartTrial=False
; Boolean to determine whether the account is a built-in account
IsServiceAccountBuiltIn=True
; Account that the Azure DevOps web site will run as. On a domain joined machine, this can be a domain account or NT Authority\Network Service. On a workgroup machine, it can be a local account or NT Authority\Local Service
ServiceAccountName=NT AUTHORITY\NETWORK SERVICE
; The LCID to use for this Azure DevOps Server installation.
LCID=1033
; The host name portion of the web site URL. This is typically the machine name but can be customized for more advanced scenarios such as HTTPS or NLB
UrlHostNameAlias=MININT-O0VPFCK
; The web site virtual directory name can be either empty or up to 8 alphanumeric characters.
WebSiteVDirName=
;
; SiteBindings is a semi-colon separated list of bindings, each of which consists
; of 4 or 6 parts (4 for http, 6 for https):
;
; [http|https]:[ipaddress]:[port]:[host]:[certificateStore]:[certificateThumprint|"generate"]
;
; Examples:
; http:*:80:
;
; A single http binding on port 80, for all unassigned IP addresses, with no host header
;
; https:*:443:contoso.com:My:generate
;
; A single https binding on port 443, for all unassigned IP addresses, having a host header 'contoso.com',
; including a generated self-signed certificate that will be stored in the Personal store
; on the local machine.
;
; http:*:80:;http:*:8082:
;
; Two bindings separated by a semi-colon
;
; https:*:443:contoso.com:My:169CE0BCCECBD854321A61670413F8000A798F31
;
; A single https binding on port 443 with a certificate thumbprint.
; Azure DevOps will look for the thumbprint in the Personal store for the local
; machine.
;
SiteBindings=http:*:80:
; The Public URL is the primary URL that users specify to connect to the system and is the URL used in the text of e-mail alerts.
PublicUrl=http://minint-o0vpfck/
; The Windows file system folder used by Azure DevOps Server to cache data.
FileCacheFolder=C:\AzureDevOpsData\ApplicationTier\_fileCache
; Determines if Email notifications will be enabled.
SmtpEmailEnabled=False
; Determines if SSH service will be enabled.
EnableSshService=True
; The port used by the SSH service.
SshPort=22
; Configure Search in Azure DevOps deployment.
ConfigureSearch=False
; You can select to install new search service or use an existing search service
InstallSearchService=True
; Determines whether an initial collection will be created. This can be disabled for advanced scenarios such as different SQL instances by using the create collection wizard in the administration console after configuring the server.
CreateInitialCollection=True
; The name of the collection
CollectionName=DefaultCollection
; The description for the collection
CollectionDescription=
UseExistingEmptyCollectionDatabase=False
Run the configuration
When you run an unattended installation, the process performs the same validation checks as the Configuration Wizard and then configures the specified Azure DevOps Server instance on the machine.
You can run the /configure command in one of two ways. The first and recommended option uses the ini file you created in the previous step. The second option specifies a type of installation to run and then specify inputs to override the smart defaults. Each option is mutually exclusive. You can't specify both a file and a type.
The two basic forms of the /configure command are:
Option 1
tfsconfig unattend /configure /unattendfile:<file> [/inputs:<inputs>] [/verify] [/continue]
Option 2
tfsconfig unattend /configure /type:<type> [/inputs:<inputs>] [/verify] [/continue]
For information on the syntax usage of the tfsconfig unattend command, see Use TFSConfig to manage Azure DevOps on-premises, Unattend.
Note
If you choose to run the /configure command without first creating an ini configuration file to manage the inputs, we recommended you run /verify prior to proceeding with the full configuration.
Once the install is complete, you can access the Azure DevOps Server at:
http://<localhostname>:8080/tfs
Or, for the express server at:
http://<localhostname>