Create endpoints in Azure Digital Twins
This article explains how to create an endpoint for Azure Digital Twin events using the Azure portal or the Azure CLI. You can also manage endpoints with the DigitalTwinsEndpoint control plane APIs.
Routing event notifications from Azure Digital Twins to downstream services or connected compute resources is a two-step process: create endpoints, then create event routes to send data to those endpoints. This article covers the first step, setting up endpoints that can receive the events. Later, you can create event routes that specify which events generated by Azure Digital Twins are delivered to which endpoints.
Prerequisites
You'll need an Azure account, which can be set up for free
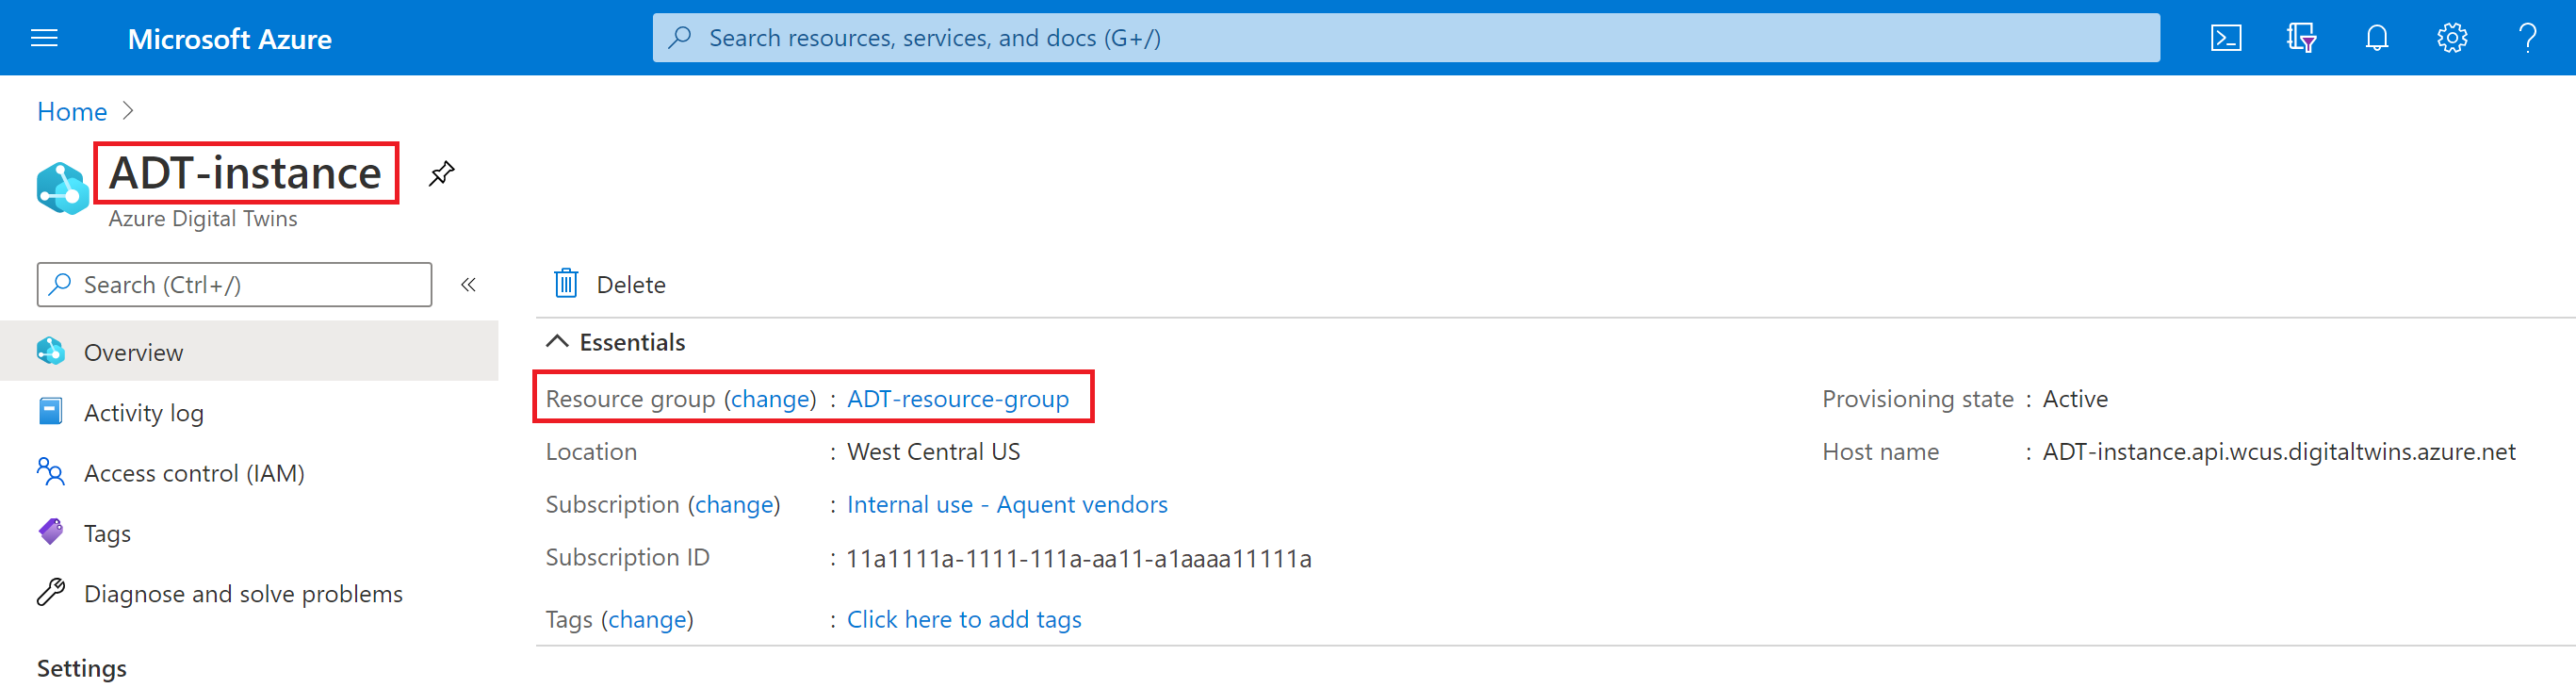
You'll need an Azure Digital Twins instance in your Azure subscription. If you don't have an instance already, you can create one using the steps in Set up an instance and authentication. Have the following values from setup handy to use later in this article:
- Instance name
- Resource group
You can find these details in the Azure portal after setting up your instance.

Next, follow the instructions below if you intend to use the Azure CLI while following this guide.
Prepare your environment for the Azure CLI
Use the Bash environment in Azure Cloud Shell. For more information, see Quickstart for Bash in Azure Cloud Shell.

If you prefer to run CLI reference commands locally, install the Azure CLI. If you're running on Windows or macOS, consider running Azure CLI in a Docker container. For more information, see How to run the Azure CLI in a Docker container.
If you're using a local installation, sign in to the Azure CLI by using the az login command. To finish the authentication process, follow the steps displayed in your terminal. For other sign-in options, see Sign in with the Azure CLI.
When you're prompted, install the Azure CLI extension on first use. For more information about extensions, see Use extensions with the Azure CLI.
Run az version to find the version and dependent libraries that are installed. To upgrade to the latest version, run az upgrade.
Create required resources
These services are the supported types of endpoints that you can create for your instance:
- Event Grid topic
- For Event Grid endpoints, only Event Grid topics are supported. Event Grid domains are not supported as endpoints.
- Event Hubs hub
- Service Bus topic
To link an endpoint to Azure Digital Twins, the Event Grid topic, event hub, or Service Bus topic that you're using for the endpoint needs to exist already.
Use the following chart to see what resources should be set up before creating your endpoint.
| Endpoint type | Required resources (linked to creation instructions) |
|---|---|
| Event Grid endpoint | Event Grid topic *event schema must be Event Grid Schema or Cloud Event Schema v1.0 |
| Event Hubs endpoint | Event Hubs namespace event hub (Optional) authorization rule for key-based authentication |
| Service Bus endpoint | Service Bus namespace Service Bus topic (Optional) authorization rule for key-based authentication |
Create the endpoint
Once you've created the endpoint resources, you can use them for an Azure Digital Twins endpoint.
To create a new endpoint, go to your instance's page in the Azure portal (you can find the instance by entering its name into the portal search bar).
From the instance menu, select Endpoints. Then from the Endpoints page that follows, select + Create an endpoint. Doing so will open the Create an endpoint page, where you'll fill in the fields in the following steps.

Enter a Name for your endpoint and choose the Endpoint type.
Complete the other details that are required for your endpoint type, including your subscription and the endpoint resources described earlier.
- For Event Hubs and Service Bus endpoints only, you must select an Authentication type. You can use key-based authentication with a pre-created authorization rule, or a system-assigned or user-assigned managed identity. For more information about using the identity authentication options, see Endpoint options: Identity-based authentication.
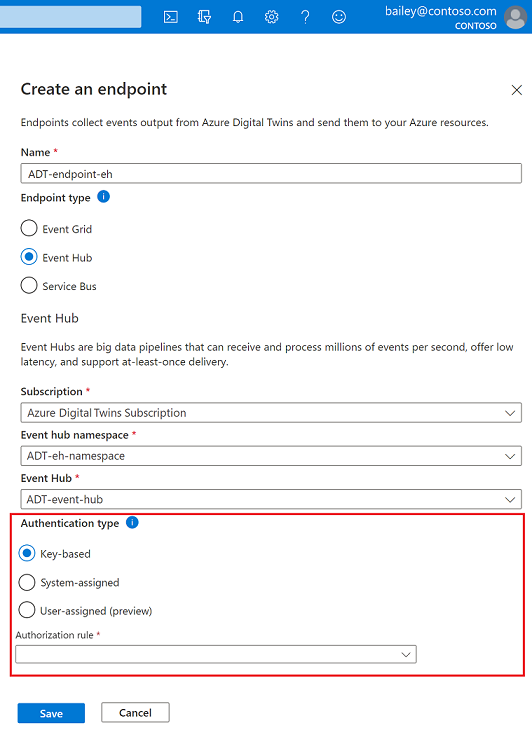
Finish creating your endpoint by selecting Save.

After creating your endpoint, you can verify that the endpoint was successfully created by checking the notification icon in the top Azure portal bar:
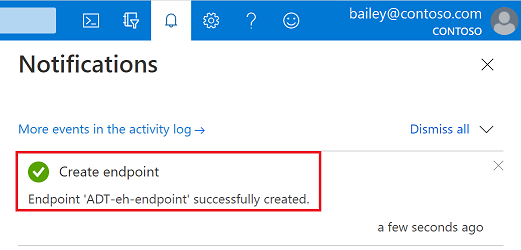
If the endpoint creation fails, observe the error message and retry after a few minutes.
You can also view the endpoint that was created back on the Endpoints page for your Azure Digital Twins instance.
Now the Event Grid topic, event hub, or Service Bus topic is available as an endpoint in Azure Digital Twins, under the name you chose for the endpoint. You'll typically use that name as the target of an event route, which you can create in Create routes and filters.
Endpoint options: Identity-based authentication
This section describes how to use a managed identity for an Azure Digital Twins instance when forwarding events to supported routing destinations. Setting up a managed identity isn't required for routing, but it can help the instance to easily access other Microsoft Entra protected resources, such as Event Hubs, Service Bus destinations, and Azure Storage Container. Managed identities can be system-assigned or user-assigned.
The rest of this section walks through three steps for setting up an endpoint with a managed identity.
1. Enable managed identity for the instance
Use the tabs below for instructions that match your preferred experience.
First, make sure that you've enabled a managed identity for your Azure Digital Twins instance.
Also, make sure you have Azure Digital Twins Data Owner role on the instance. You can find instructions in Set up user access permissions.
2. Assign Azure roles to the identity
Once a managed identity is created for your Azure Digital Twins instance, you'll need to assign it appropriate roles to authenticate with different types of endpoints for routing events to supported destinations. This section describes the role options and how to assign them to the managed identity.
Important
Make sure to complete this step. Without it, the identity won't be able to access your endpoints and events won't be delivered.
Here are the minimum roles that your Azure Digital Twins identity needs to access an endpoint, depending on the type of destination. Roles with higher permissions (like Data Owner roles) will also work.
| Destination | Azure role |
|---|---|
| Azure Event Hubs | Azure Event Hubs Data Sender |
| Azure Service Bus | Azure Service Bus Data Sender |
| Azure storage container | Storage Blob Data Contributor |
Use the tabs below to assign the role using your preferred experience.
To assign a role to the identity, start by opening the Azure portal in a browser.
Navigate to your endpoint resource (your event hub, Service Bus topic, or storage container) by searching for its name in the portal search bar.
Select Access control (IAM).
Select Add > Add role assignment to open the Add role assignment page.
Assign the desired role to the managed identity of your Azure Digital Twins instance, using the information below. For detailed steps, see Assign Azure roles using the Azure portal.
Setting Value Role Select the desired role from the options. Assign access to Managed identity Members Select the user-assigned or system-assigned managed identity of your Azure Digital Twins instance that's being assigned the role. A user-assigned identity will have the name you chose when you created the identity, and a system-assigned identity will have a name that matches the name of your Azure Digital Twins instance. 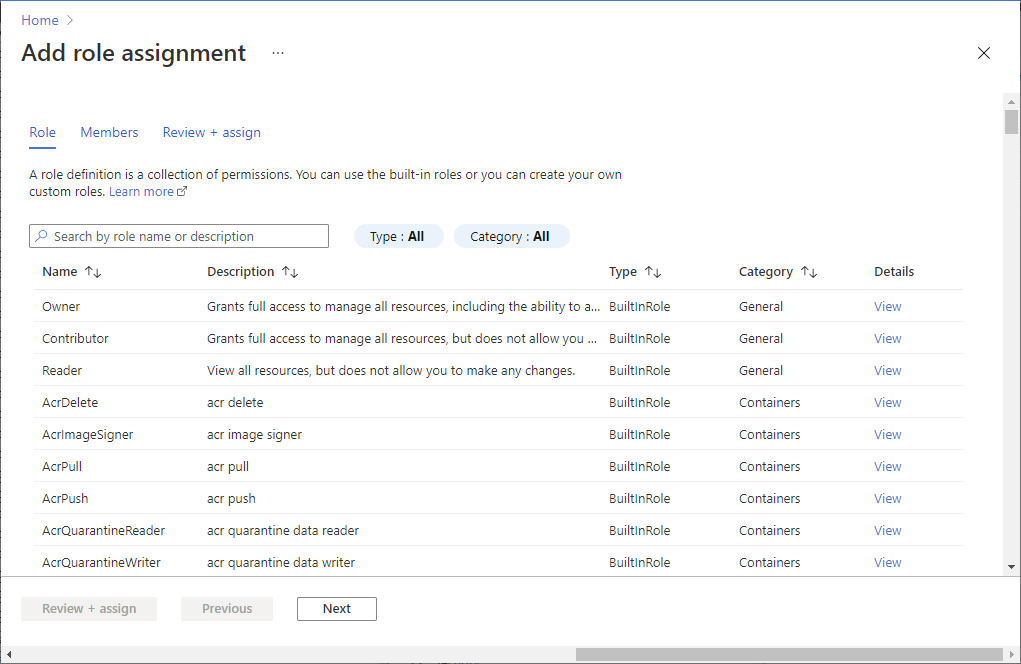

3. Create the endpoint with identity-based authentication
After setting up a managed identity for your Azure Digital Twins instance and assigning it the appropriate role(s), you can create the endpoints that use the identity for authentication. This option is only available for Event Hubs and Service Bus-type endpoints (it's not supported for Event Grid).
Note
You cannot edit an endpoint that has already been created with key-based identity to change to identity-based authentication. You must choose the authentication type when the endpoint is first created.
Use the tabs below to create the endpoint using your preferred experience.
Start following the general instructions to create an Azure Digital Twins endpoint.
When you get to the step of completing the details required for your endpoint type, select either System-assigned or User-assigned (preview) for the Authentication type.

Finish setting up your endpoint and select Save.
Considerations for disabling managed identities
Because an identity is managed separately from the endpoints that use it, it's important to consider the effects that any changes to the identity or its roles can have on the endpoints in your Azure Digital Twins instance. If the identity is disabled, or a necessary role for an endpoint is removed from it, the endpoint can become inaccessible and the flow of events will be disrupted.
To continue using an endpoint that was set up with a managed identity that's now been disabled, you'll need to delete the endpoint and re-create it with a different authentication type. It may take up to an hour for events to resume delivery to the endpoint after this change.
Endpoint options: Dead-lettering
When an endpoint can't deliver an event within a certain time period or after trying to deliver the event a certain number of times, it can send the undelivered event to a storage account. This process is known as dead-lettering.
You can set up the necessary storage resources using the Azure portal or the Azure Digital Twins CLI. However, to create an endpoint with dead-lettering enabled, you'll need to use the Azure Digital Twins CLI or control plane APIs.
To learn more about dead-lettering, see Endpoints and event routes. For instructions on how to set up an endpoint with dead-lettering, continue through the rest of this section.
Set up storage resources
Before setting the dead-letter location, you must have a storage account with a container set up in your Azure account.
You'll provide the URI for this container when creating the endpoint later. The dead-letter location will be provided to the endpoint as a container URI with a SAS token. That token needs write permission for the destination container within the storage account. The fully formed dead letter SAS URI will be in the format of: https://<storage-account-name>.blob.core.windows.net/<container-name>?<SAS-token>.
Follow the steps below to set up these storage resources in your Azure account, to prepare to set up the endpoint connection in the next section.
- Follow the steps in Create a storage account to create a storage account in your Azure subscription. Make a note of the storage account name to use it later.
- Follow the steps in Create a container to create a container within the new storage account. Make a note of the container name to use it later.
Create a SAS token
Next, create a SAS token for your storage account that the endpoint can use to access it.
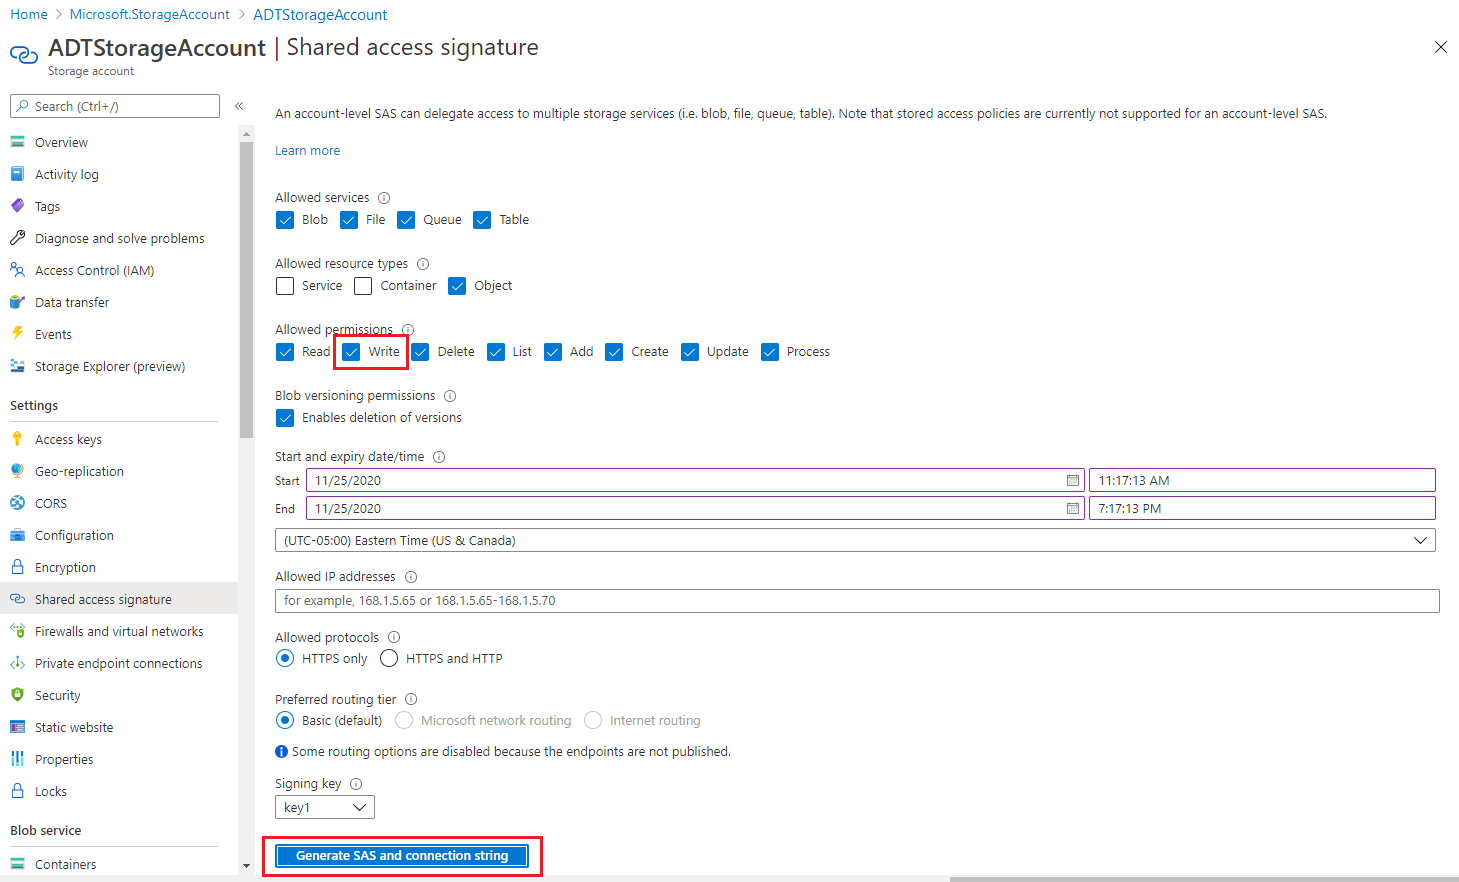
Start by navigating to your storage account in the Azure portal (you can find it by name with the portal search bar).
In the storage account page, choose the Shared access signature link in the left navigation bar to start setting up the SAS token.
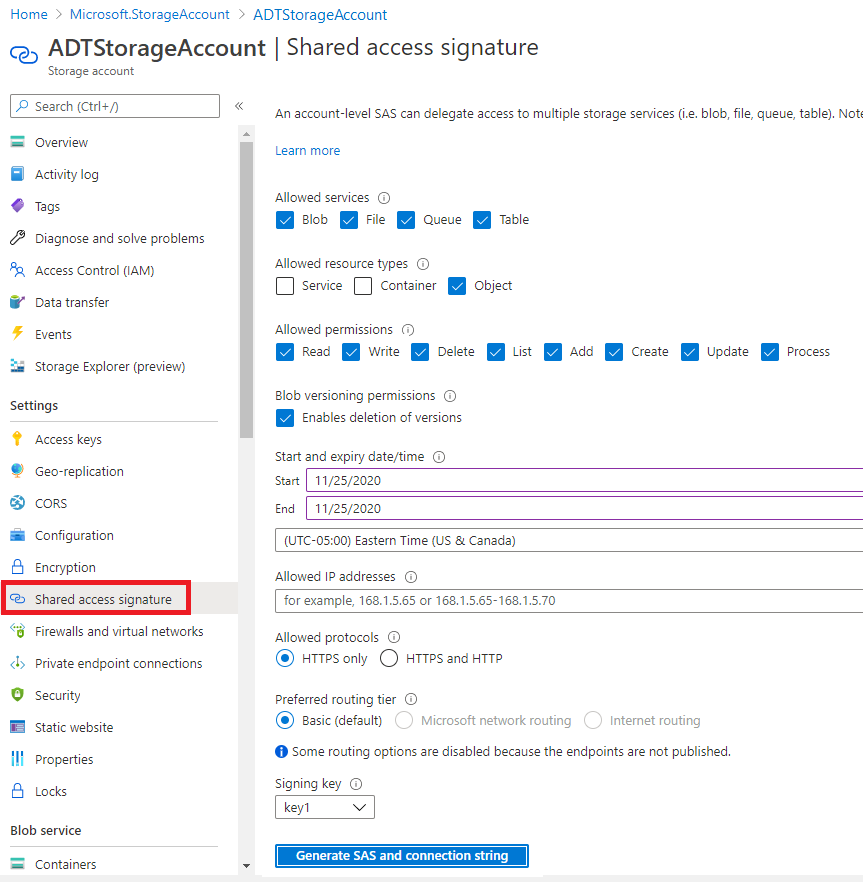
On the Shared access signature page, under Allowed services and Allowed resource types, select whatever settings you want. You'll need to select at least one box in each category. Under Allowed permissions, choose Write (you can also select other permissions if you want).
Set whatever values you want for the remaining settings.
When you're finished, select the Generate SAS and connection string button to generate the SAS token.
Doing so will generate several SAS and connection string values at the bottom of the same page, underneath the setting selections. Scroll down to view the values, and use the Copy to clipboard icon to copy the SAS token value. Save it to use later.


Create the dead-letter endpoint
To create an endpoint with dead-lettering enabled, you must use the CLI commands or control plane APIs to create your endpoint, rather than the Azure portal.
For instructions on how to create this type of endpoint with the Azure CLI, switch to the CLI tab for this section.
Message storage schema
Once the endpoint with dead-lettering is set up, dead-lettered messages will be stored in the following format in your storage account:
<container>/<endpoint-name>/<year>/<month>/<day>/<hour>/<event-ID>.json
Dead-lettered messages will match the schema of the original event that was intended to be delivered to your original endpoint.
Here's an example of a dead-letter message for a twin create notification:
{
  "specversion": "1.0",
  "id": "xxxxxxxx-xxxxx-xxxx-xxxx-xxxxxxxxxxxx",
  "type": "Microsoft.DigitalTwins.Twin.Create",
  "source": "<your-instance>.api.<your-region>.da.azuredigitaltwins-test.net",
  "data": {
    "$dtId": "<your-instance>xxxxxxxx-xxxxx-xxxx-xxxx-xxxxxxxxxxxx",
    "$etag": "W/\"xxxxxxxx-xxxxx-xxxx-xxxx-xxxxxxxxxxxx\"",
    "TwinData": "some sample",
    "$metadata": {
      "$model": "dtmi:test:deadlettermodel;1",
      "room": {
        "lastUpdateTime": "2020-10-14T01:11:49.3576659Z"
      }
    }
  },
  "subject": "<your-instance>xxxxxxxx-xxxxx-xxxx-xxxx-xxxxxxxxxxxx",
  "time": "2020-10-14T01:11:49.3667224Z",
  "datacontenttype": "application/json",
  "traceparent": "00-889a9094ba22b9419dd9d8b3bfe1a301-f6564945cb20e94a-01"
}
Next steps
To actually send data from Azure Digital Twins to an endpoint, you'll need to define an event route. These routes let developers wire up event flow, throughout the system and to downstream services. A single route can allow multiple notifications and event types to be selected. Continue on to create an event route to your endpoint in Create routes and filters.
Feedback
Coming soon: Throughout 2024 we will be phasing out GitHub Issues as the feedback mechanism for content and replacing it with a new feedback system. For more information see: https://aka.ms/ContentUserFeedback.
Submit and view feedback for