Add a new endpoint with Front Door manager
This article shows you how to add a new endpoint to an existing Azure Front Door profile in the Front Door manager.
Prerequisites
Before you can create a new endpoint with Front Door manager, you must have an Azure Front Door profile created. To create an Azure Front Door profile, see create an Azure Front Door. The profile must have at least one endpoint.
Create a new Front Door endpoint
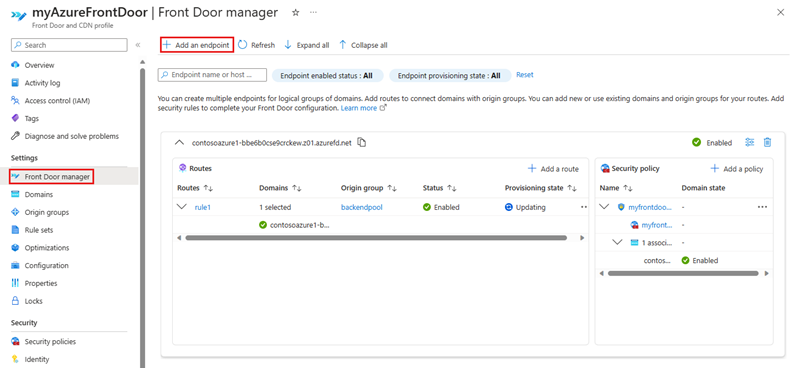
Sign in to the Azure portal and navigate to your Azure Front Door profile.
Select Front Door manager from under Settings from the left side menu pane. Then select + Add an endpoint to create a new endpoint.
On the Add an endpoint page, enter a unique name for the endpoint.
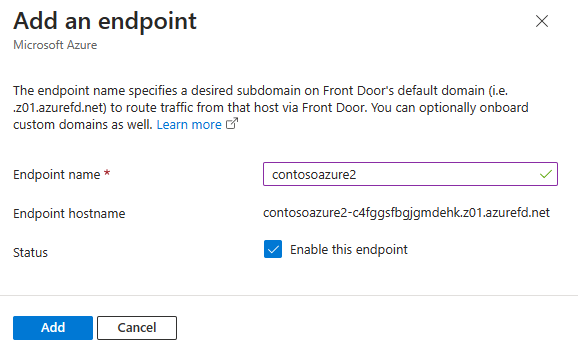
- Name - Enter a unique name for the new Front Door endpoint. Azure Front Door generates a unique endpoint hostname based on the endpoint name in the form of
<endpointname>-hash.z01.azurefd.net. - Endpoint hostname - A deterministic DNS name that helps prevent subdomain takeover. This name is used to access your resources through your Azure Front Door at the domain
<endpointname>-hash.z01.azurefd.net. - Status - Set as checked to enable this endpoint.
- Name - Enter a unique name for the new Front Door endpoint. Azure Front Door generates a unique endpoint hostname based on the endpoint name in the form of

Add a route
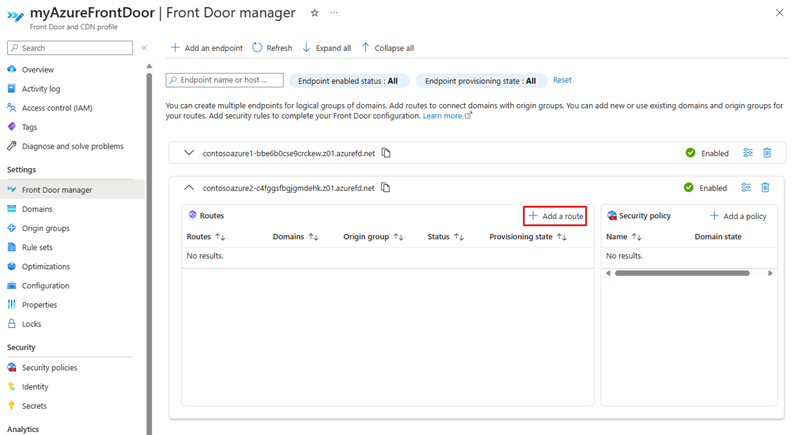
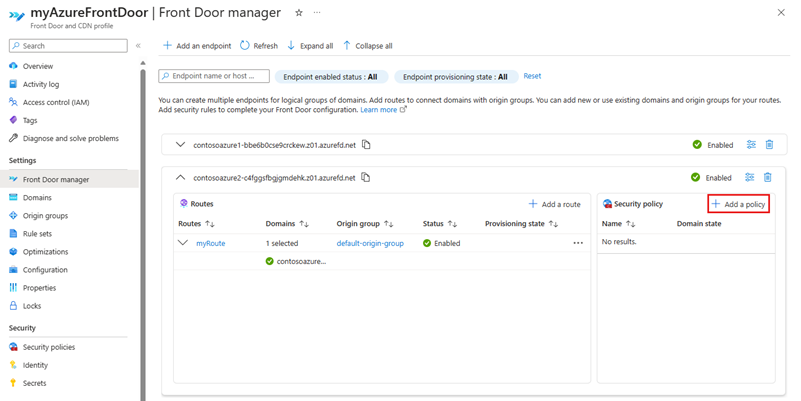
To add a new route, first expand an endpoint from the list of endpoints in the Front Door manager.
In the endpoint configuration pane, select + Add a route to configure the mapping of your domains and routing configuration to your origin group.
On the Add a route page, enter, or select the following information:
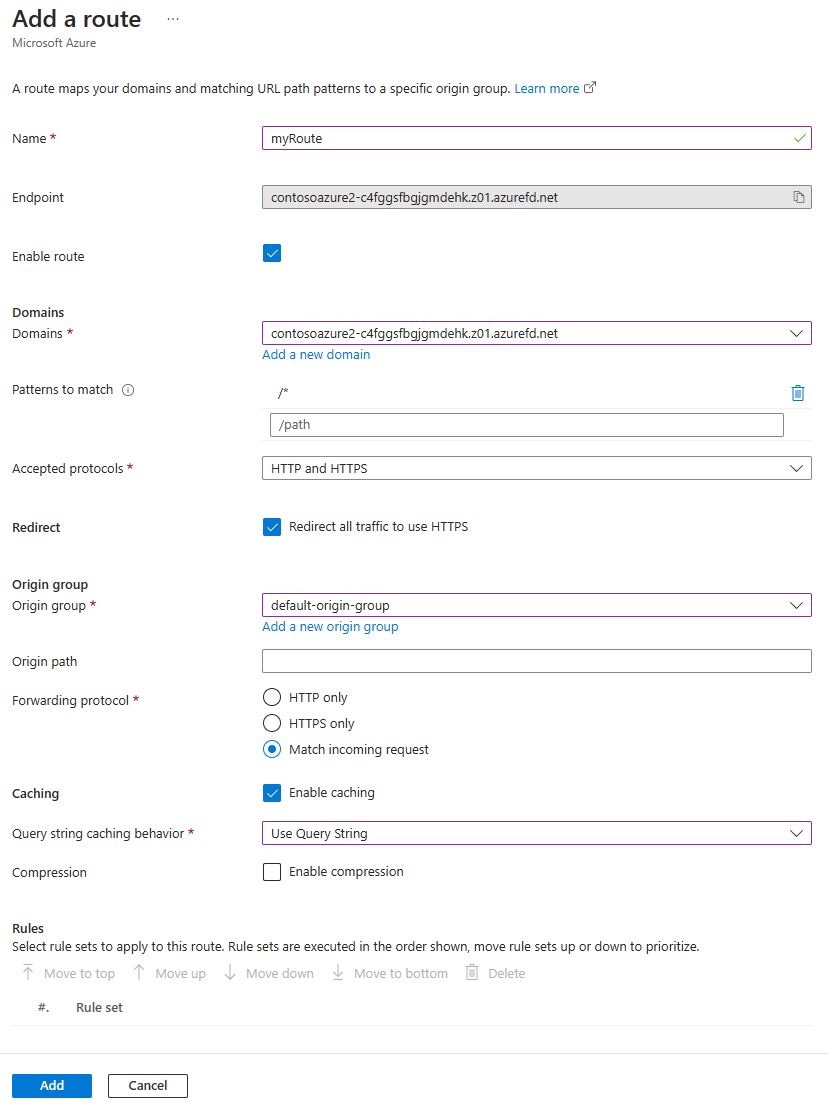
Name - Enter a unique name for the new route
Enable route - Set as checked to enable this route.
Domains - Select one or more domains that have been validated and isn't associated to another route. For more information, see add a custom domain.
Patterns to match - Configure all URL path patterns that this route accepts. For example, you can set the pattern to match to
/images/*to accept all requests on the URLwww.contoso.com/images/*. Azure Front Door determines the traffic based on exact match first. If no paths match exactly, then Front Door looks for a wildcard path that matches. If no routing rules are found with a matching path, then the request get rejected and returns a 400: Bad Request error HTTP response. Patterns to match paths are not case sensitive, meaning paths with different casing are treated as duplicates. For example, you have a host using the same protocol with paths/FOOand/foo. These paths are considered duplicates, and aren't allowed in the Patterns to match field.Accepted protocols - Specify the protocols you want Azure Front Door to accept when the client is making the request. You can specify HTTP, HTTPS, or both.
Redirect - Specify whether HTTPS is enforced for the incoming HTTP requests.
Origin group - Select the origin group to forward traffic to when requests are made to the origin. For more information, see configure an origin group.
Origin path - This path is used to rewrite the URL that Front Door uses when constructing the request forwarded to the origin. By default, this path isn't provided. Therefore, Front Door uses the incoming URL path in the request to the origin. You can also specify a wildcard path, which copies any matching part of the incoming path to the request path to the origin. The origin path is case sensitive.
Pattern to match:
/foo/*Origin path:/fwd/Incoming URL path:
/foo/a/b/c/URL from Front Door to origin:fwd/a/b/cForwarding protocol - Select the protocol used for forwarding request. You can specify HTTP only, HTTPS only, or match incoming request.
Caching - Select this option to enable caching of static content with Azure Front Door. For more information, see caching with Front Door.
Rules - Select rule sets that get applied to this route. For more information, see rule sets for Front Door.
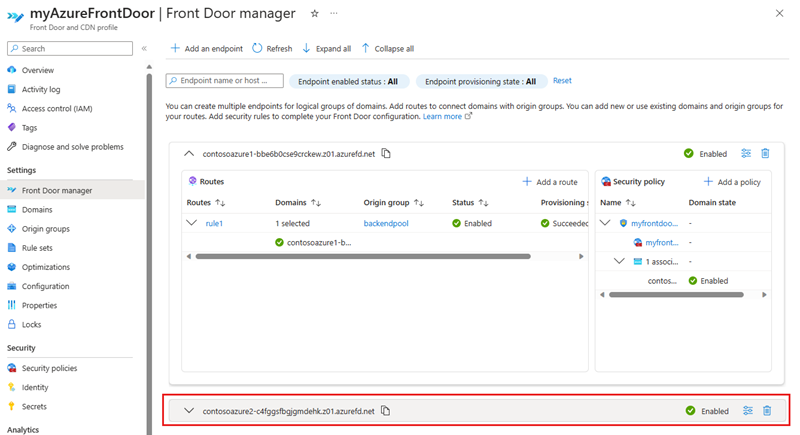
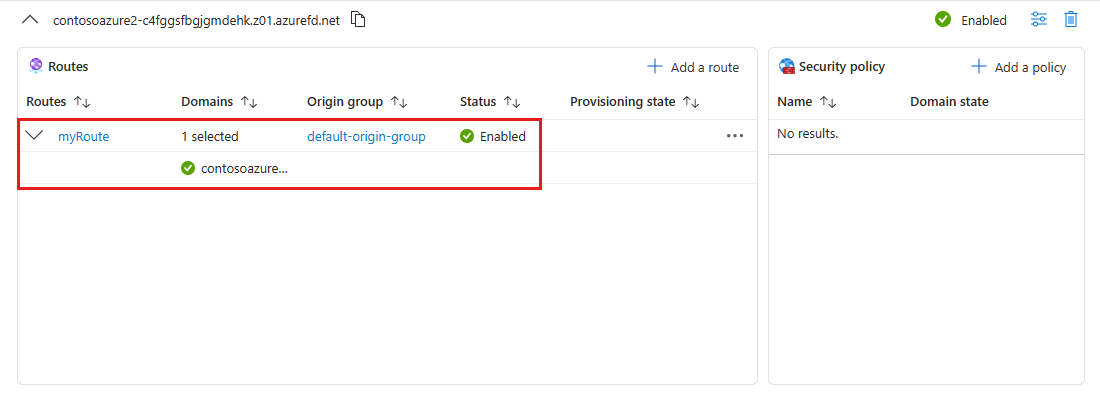
Select Add to create the new route. The route appears in the list of routes for the endpoints.


Add security policy
Select + Add a policy, in the Security policy pane to apply or create a new web application firewall policy to associate to your domains.
On the Add security policy page, enter, or select the following information:
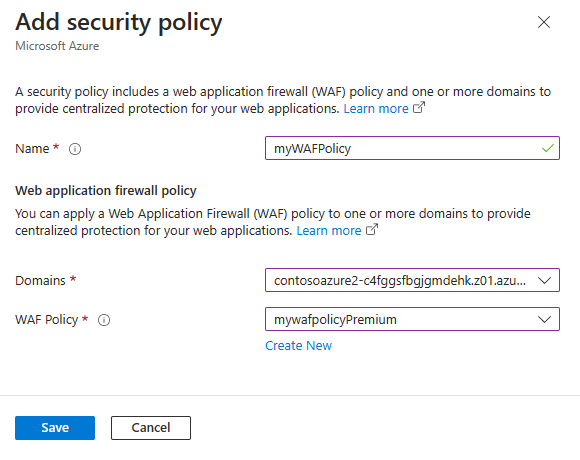
- Name - Enter a unique name within this Front Door profile for the security policy.
- Domains - Select one or more domains you want to apply this security policy to.
- WAF Policy - Select an existing or create a new WAF policy. When you select an existing WAF policy, it must be the same tier as the Front Door profile. For more information, see configure WAF policy for Front Door.
Select Save to create the security policy and associate it with the endpoint.


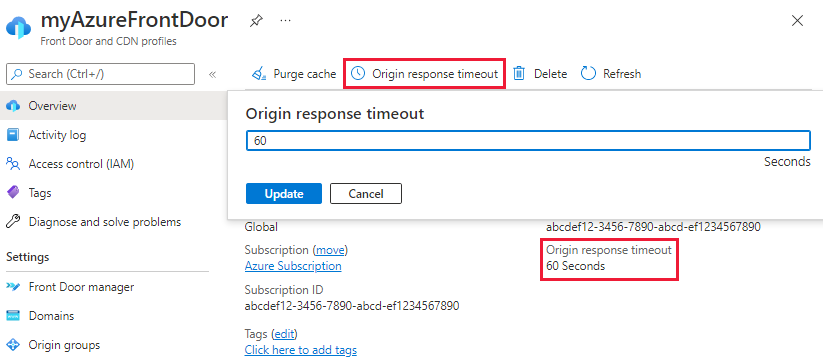
Configure origin timeout
Origin timeout is the amount of time Azure Front Door waits until it considers the connection to origin has timed out. You can set this value on the overview page of the Azure Front Door profile. This value is applied to all endpoints in the profile.
Clean up resources
In order to remove an endpoint, you first have to remove any security policies associated with the endpoint. Then select Delete endpoint to remove the endpoint from the Azure Front Door profile.

Next steps
- Learn about the use of origins and origin groups in an Azure Front Door configuration.
- Learn about rules match conditions in an Azure Front Door rule set.
- Learn more about policy settings for WAF with Azure Front Door.
- Learn how to create custom rules to protect your Azure Front Door profile.
Feedback
Coming soon: Throughout 2024 we will be phasing out GitHub Issues as the feedback mechanism for content and replacing it with a new feedback system. For more information see: https://aka.ms/ContentUserFeedback.
Submit and view feedback for