Tutorial: Consume FHIR events with Logic Apps
Note
Fast Healthcare Interoperability Resources (FHIR®) is an open healthcare specification.
This tutorial shows how to use Azure Logic Apps to process Azure Health Data Services FHIR events. Logic Apps creates and runs automated workflows to process event data from other applications. Learn how to register a FHIR event with your Logic App, meet a specified event criteria, and perform a service operation.
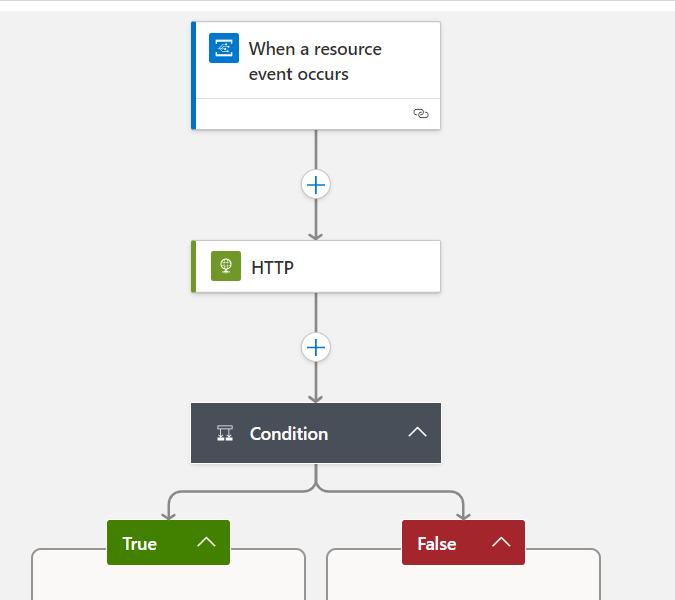
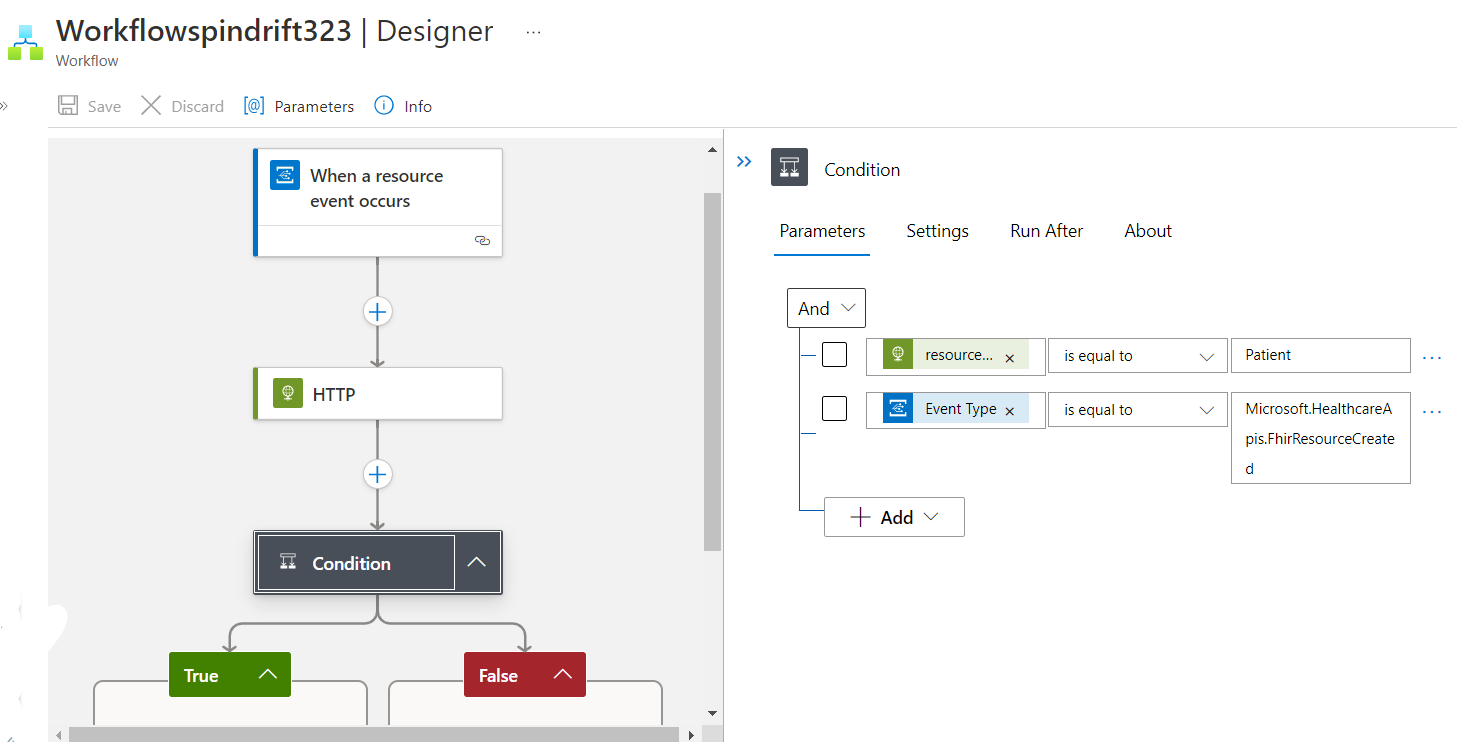
Here's an example of a Logic App workflow:
The workflow is on the left and the trigger condition is on the right.
Overview
Follow these steps to create a Logic App workflow to consume FHIR events:
- Set up prerequisites
- Create a Logic App
- Create a Logic App workflow
Prerequisites
Before you begin this tutorial, you need to have deployed a FHIR service and enabled events. For more information about deploying events, see Deploy events using the Azure portal.
Creating a Logic App
To set up an automated workflow, you must first create a Logic App. For more information about Logic Apps, see What is Azure Logic Apps?
Specify your Logic App details
Follow these steps:
- Go to the Azure portal.
- Search for Logic App.
- Select Add.
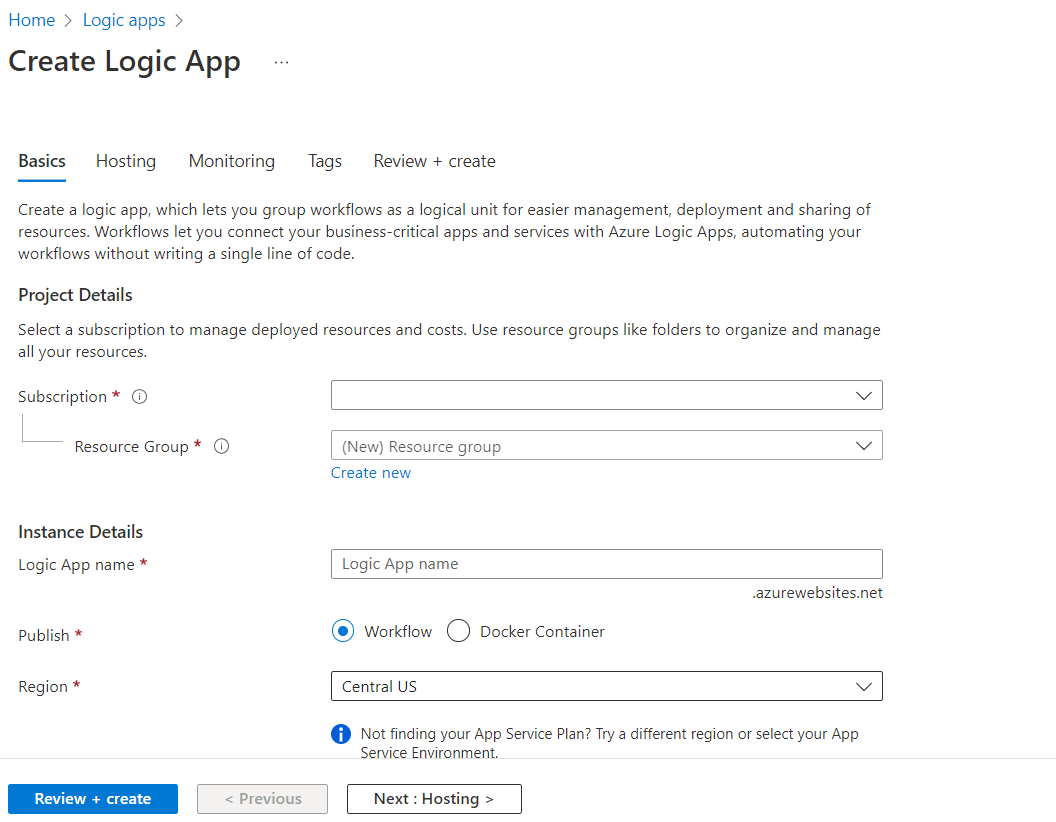
- Specify Basic details.
- Specify Hosting.
- Specify Monitoring.
- Specify Tags.
- Review and create your Logic App.
You now need to fill out the details of your Logic App. Specify information for these five categories. They are in separate tabs:
- Tab 1 - Basics
- Tab 2 - Hosting
- Tab 3 - Monitoring
- Tab 4 - Tags
- Tab 5 - Review + Create
Basics - Tab 1
Start by specifying the following basics:
Project details
- Subscription
- Resource Group
Select a current subscription and specify an existing or new resource group.
Instance details
- Logic App name
- Publish type
- Region
Create a name for your Logic App. You must choose Workflow or Docker Container as your publishing type. Select a region that is compatible with your plan.
Plan
- Plan type
- App Service Plan
- Sku and size
Choose a plan type (Standard or Consumption). Create a new Windows Plan name and specify the Sku and size.
Zone redundancy
- Zone redundancy deployment
Enabling your plan makes it zone redundant.
Hosting - Tab 2
Continue specifying your Logic App by selecting Next: Hosting.
Storage
- Storage type
- Storage account
Choose the type of storage you want to use and the storage account. You can use Azure Storage or add SQL functionality. You must also create a new storage account or use an existing one.
Monitoring - Tab 3
Continue specifying your Logic App by selecting Next: Monitoring.
Monitoring with Application Insights
- Enable Application Insights
- Application Insights
- Region
Enable Azure Monitor Application Insights to automatically monitor your application. If you enable insights, you must create a new insight and specify the region.
Tags - Tab 4
Continue specifying your Logic App by selecting Next: Tags.
Use tags to categorize resources
Tags are name/value pairs that enable you to categorize resources and view consolidated billing by applying the same tag to multiple resources and resource groups.
This example doesn't use tagging.
Review + create - Tab 5
Finish specifying your Logic App by selecting Next: Review + create.
Review your Logic App
Your proposed Logic app displays the following details:
- Subscription
- Resource Group
- Logic App Name
- Runtime stack
- Hosting
- Storage
- Plan
- Monitoring
If you're satisfied with the proposed configuration, select Create. If not, select Previous to go back and specify new details.
First you'll see an alert telling you that deployment is initializing. Next you'll see a new page telling you that the deployment is in progress.
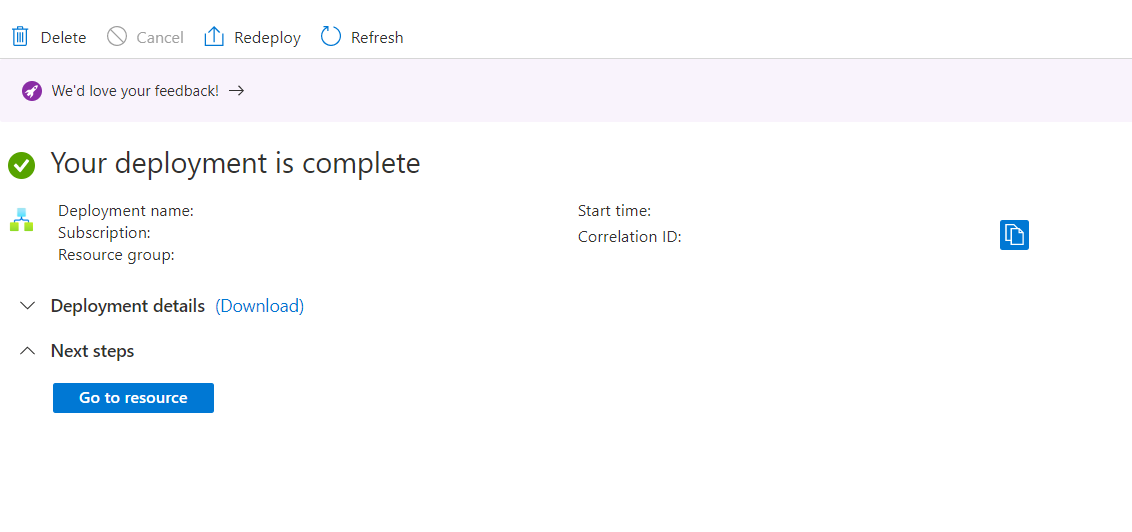
If there are no errors, you'll finally see a notification telling you that your deployment is complete.
Your Logic App dashboard
Azure creates a dashboard when your Logic App is complete. The dashboard shows you the status of your app. You can return to your dashboard by selecting Overview in the Logic App menu. Here's a Logic App dashboard:
You can do the following activities from your dashboard.
- Browse
- Refresh
- Stop
- Restart
- Swap
- Get Publish Profile
- Reset Publish Profile
- Delete
Creating a Logic App workflow
When your Logic App is running, follow these steps to create a Logic App workflow:
- Initialize a workflow
- Configuring a workflow
- Designing a workflow
- Adding an action
- Giving FHIR Reader access
- Adding a condition
- Choosing a condition criteria
- Testing your condition
Initializing your workflow
Before you begin, you'll need to have a Logic App configured and running correctly.
Once your Logic App is running, you can create and configure a workflow. To initialize a workflow, follow these steps:
- Start at the Azure portal.
- Select Logic Apps in Azure services.
- Select the Logic App you created.
- Select Workflows in the Workflow menu on the left.
- Select Add to add a workflow.
Configuring a new workflow
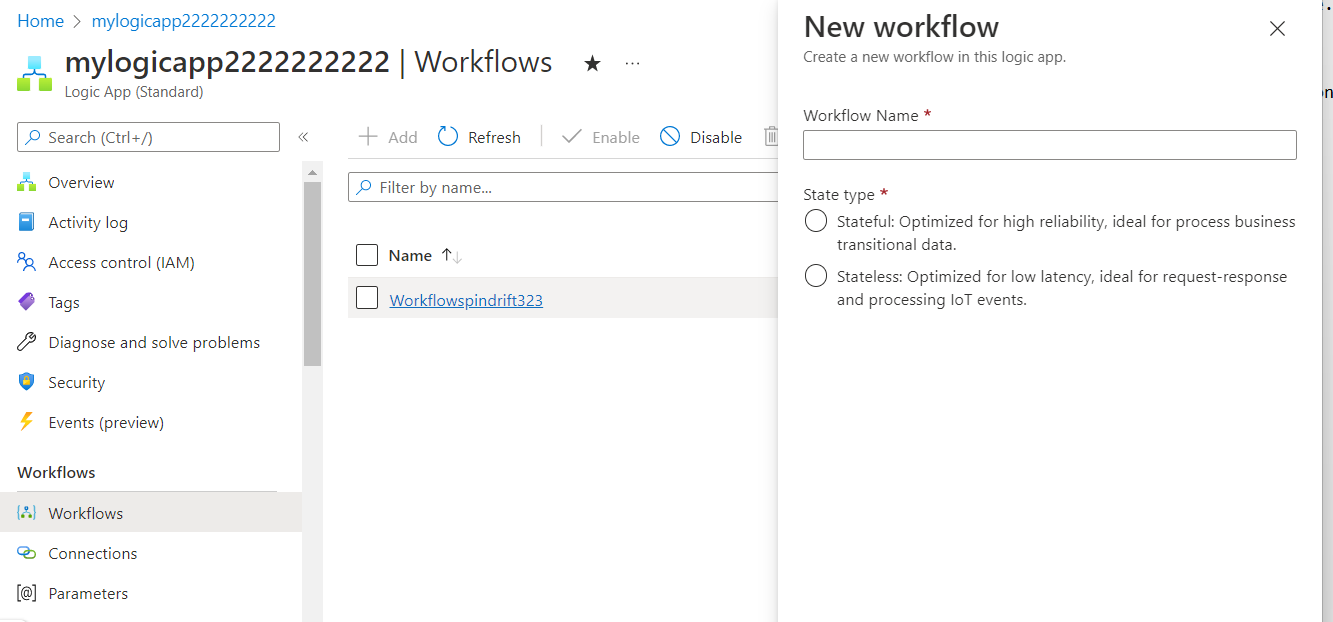
You'll see a new panel on the right for creating a workflow.
You can specify the details of the new workflow in the panel on the right.
Creating a new workflow for the Logic App
To set up a new workflow, fill in these details:
- Workflow Name
- State type
Specify a new name for your workflow. Indicate whether you want the workflow to be stateful or stateless. Stateful is for business processes and stateless is for processing IoT events.
When you've specified the details, select Create to begin designing your workflow.
Designing the workflow
In your new workflow, select the name of the enabled workflow.
You can write code to design a workflow for your application, but for this tutorial, choose the Designer option on the Developer menu.
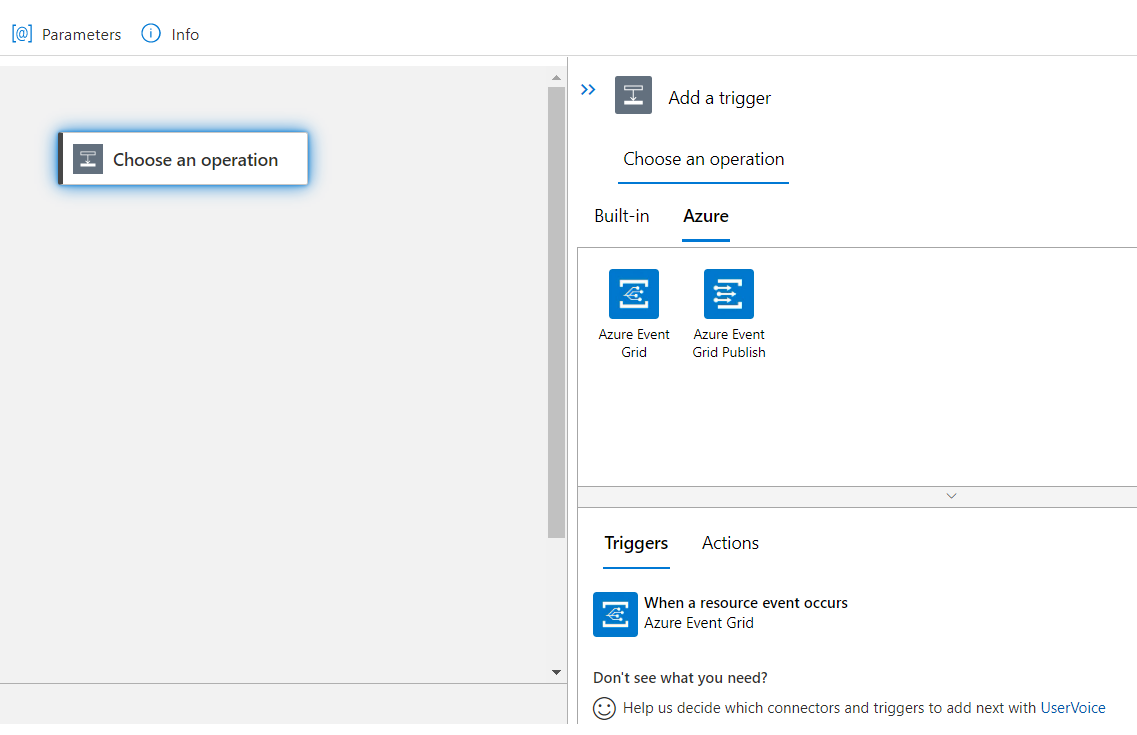
Next, select Choose an operation to display the Add a Trigger blade on the right. Then search for "Azure Event Grid" and select the Azure tab below. The Event Grid isn't a Logic App Built-in.
When you see the "Azure Event Grid" icon, select on it to display the Triggers and Actions available from Event Grid. For more information about Event Grid, see What is Azure Event Grid?.
Select When a resource event occurs to set up a trigger for the Azure Event Grid.
To tell Event Grid how to respond to the trigger, you must specify parameters and add actions.
Parameter settings
You need to specify the parameters for the trigger:
- Subscription
- Resource Type
- Resource Name
- Event type item(s)
Fill in the details for subscription, resource type, and resource name. Then you must specify the event types you want to respond to. The event types used in this article are:
- Resource created
- Resource deleted
- Resource updated
For more information about supported event types, see Frequently asked questions about events.
Adding an HTTP action
Once you've specified the trigger events, you must add more details. Select the + below the When a resource event occurs button.
You need to add a specific action. Select Choose an operation to continue. Then, for the operation, search for "HTTP" and select on Built-in to select an HTTP operation. The HTTP action will allow you to query the FHIR service.
The options in this example are:
- Method is "Get"
- URL is
"concat('https://', triggerBody()?['subject'], '/_history/', triggerBody()?['dataVersion'])". - Authentication type is Managed Identity.
- Audience is
"concat('https://', triggerBody()?['data']['resourceFhirAccount'])".
Allow FHIR Reader access to your Logic App
At this point, you need to give the FHIR Reader access to your app, so it can verify that the event details are correct. Follow these steps to give it access:
The first step is to go back to your Logic App and select the Identity menu item.
In the System assigned tab, make sure the Status is "On".
Select on Azure role assignments. Select Add role assignment.
Specify the following options:
- Scope = Subscription
- Subscription = your subscription
- Role = FHIR Data Reader.
When you've specified the first four steps, add the role assignment by Managed identity, using Subscription, Managed identity (Logic App Standard), and select your Logic App by selecting the name and then selecting the Select button. Finally, select Review + assign to assign the role.
Add a condition
After you have given FHIR Reader access to your app, go back to the Logic App workflow Designer. Then add a condition to determine whether the event is one you want to process. Select the + below HTTP to "Choose an operation". On the right, search for the word Condition. Select on Built-in to display the Control icon. Next select Actions and choose Condition.
When the condition is ready, you can specify what actions happen if the condition is true or false.
Choosing a condition criteria
In order to specify whether you want to take action for the specific event, begin specifying the criteria by selecting on Condition in the workflow. A set of condition choices are then displayed.
Under the And box, add these two conditions:
- resourceType
- Event Type
resourceType
The expression for getting the resourceType is body('HTTP')?['resourceType'].
Event Type
You can select Event Type from the Dynamic Content.
Here's an example of the Condition criteria:
Save your workflow
When you've entered the condition criteria, save your workflow.
Workflow dashboard
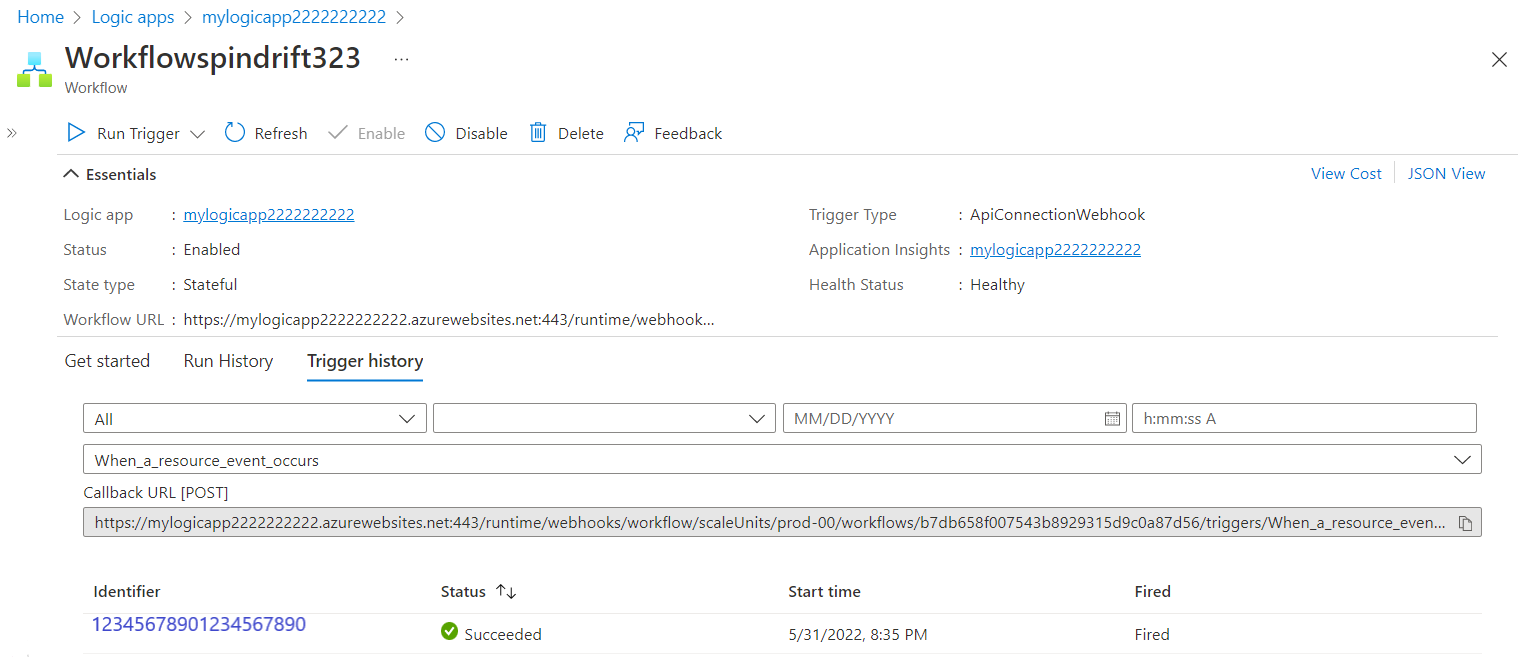
To check the status of your workflow, select Overview in the workflow menu. Here's a dashboard for a workflow:
You can do the following operations from your workflow dashboard:
- Run trigger
- Refresh
- Enable
- Disable
- Delete
Condition testing
Save your workflow by selecting the Save button.
To test your new workflow, do the following steps:
- Add a new Patient FHIR Resource to your FHIR Service.
- Wait a moment or two and then check the Overview webpage of your Logic App workflow.
- The event should be shaded in green if the action was successful.
- If it failed, the event is shaded in red.
Here's an example of a workflow trigger success operation:
Next steps
In this tutorial, you learned how to use Logic Apps to process FHIR events.
To learn about Events, see
To learn about the Events frequently asked questions (FAQs), see
FHIR® is a registered trademark of Health Level Seven International, registered in the U.S. Trademark Office and is used with their permission.
Feedback
Coming soon: Throughout 2024 we will be phasing out GitHub Issues as the feedback mechanism for content and replacing it with a new feedback system. For more information see: https://aka.ms/ContentUserFeedback.
Submit and view feedback for
