Manage your cache
The cache overview page in the Azure portal shows project details, cache status, and basic statistics for your cache. It also has controls to stop or start the cache, delete the cache, flush data to long-term storage, and update software.
This article also explains how to do these basic tasks with the Azure CLI.
To open the overview page, select your cache resource in the Azure portal. For example, load the All resources page and click the cache name.
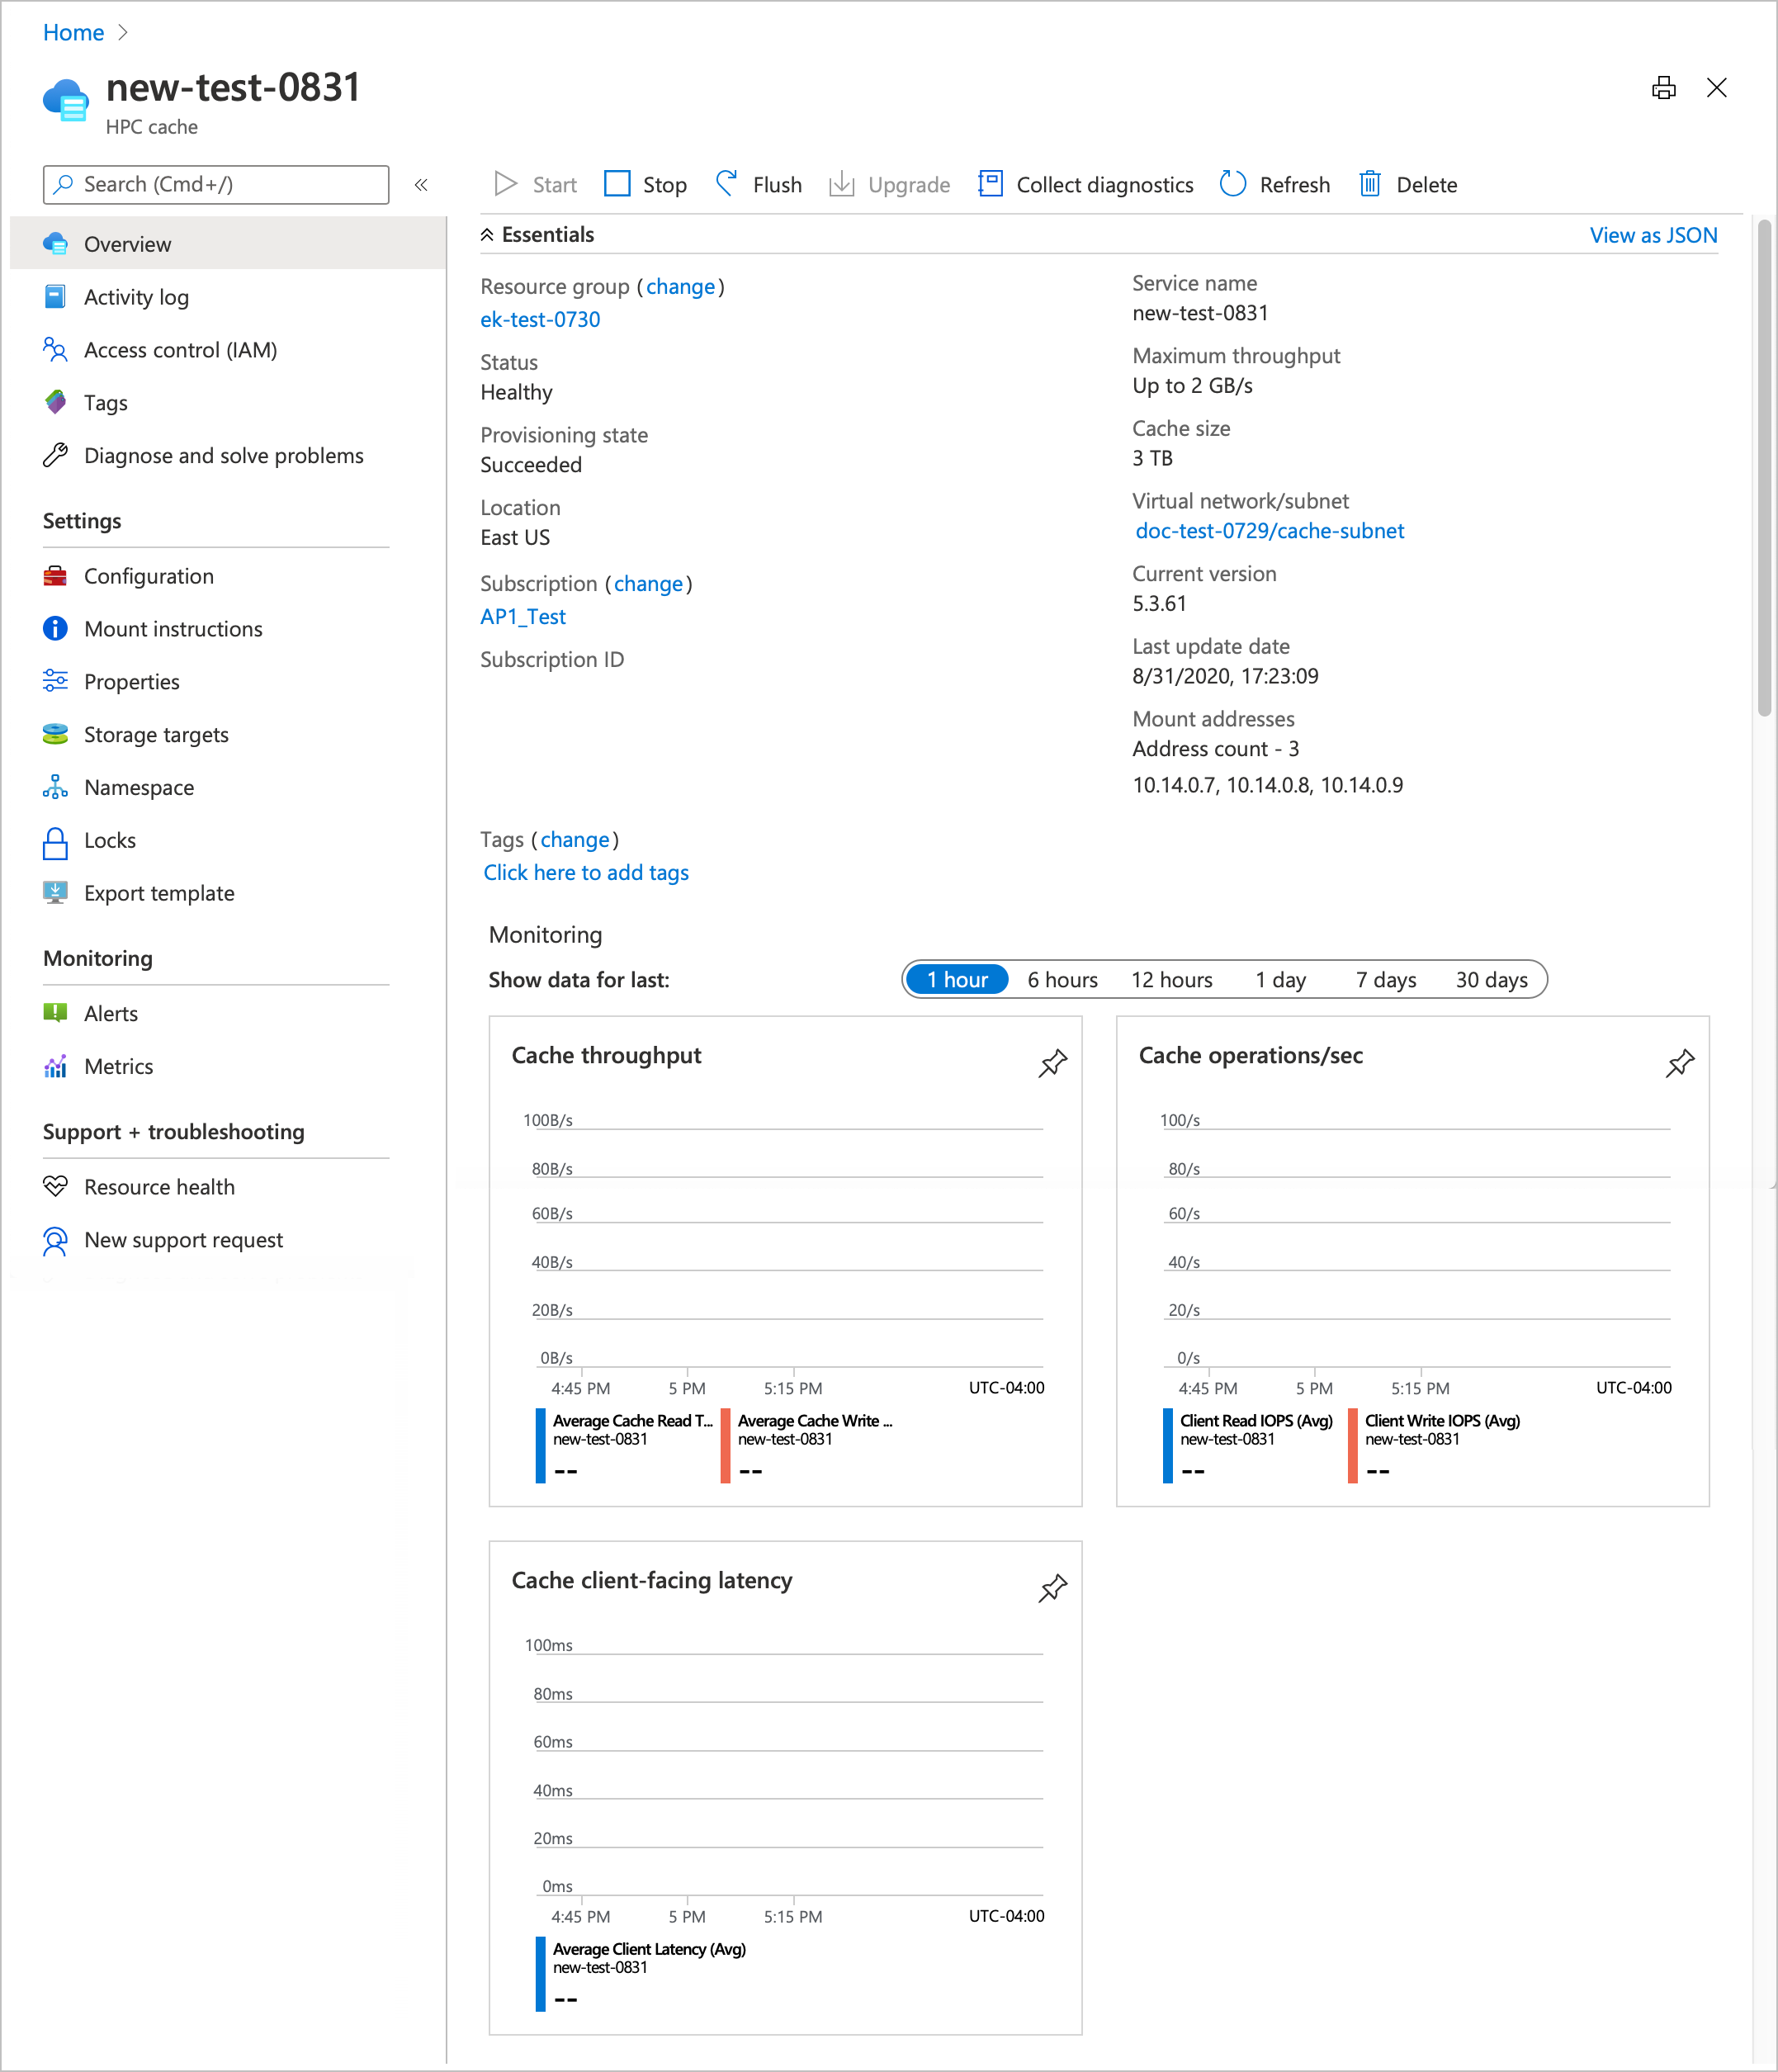
The buttons at the top of the page can help you manage the cache:
- Start and Stop - Resumes or suspends cache operation
- Flush - Writes changed data to storage targets
- Upgrade - Updates the cache software
- Collect diagnostics - Uploads debugging information
- Refresh - Reloads the overview page
- Delete - Permanently destroys the cache
Read more about these options below.
Tip
You can also manage individual storage targets - read View and manage storage targets for details.
Stop the cache
You can stop the cache to reduce costs during an inactive period. You are not charged for uptime while the cache is stopped, but you are charged for the cache's allocated disk storage. (See the pricing page for details.)
A stopped cache does not respond to client requests. You should unmount clients before stopping the cache.
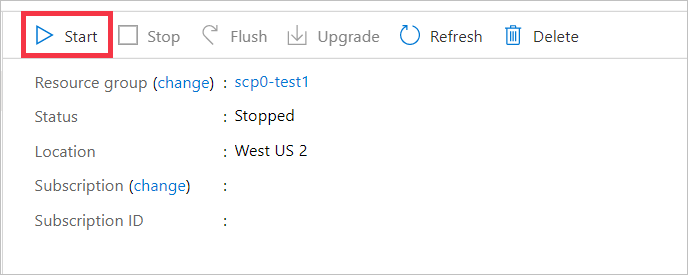
The Stop button suspends an active cache. The Stop button is available when a cache's status is Healthy or Degraded.
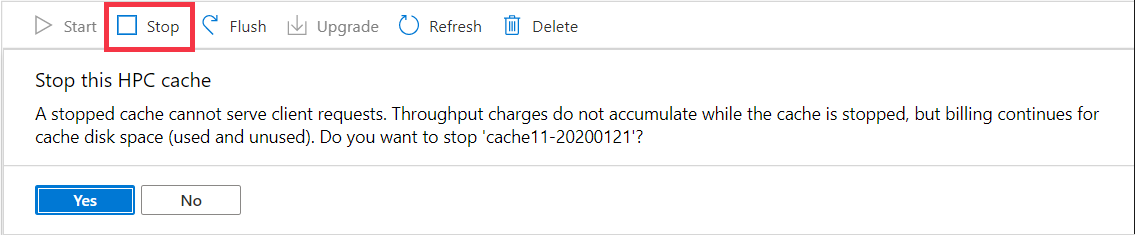
After you click Yes to confirm stopping the cache, the cache automatically flushes its contents to the storage targets. This process might take some time, but it ensures data consistency. Finally, the cache status changes to Stopped.
To reactivate a stopped cache, click the Start button. No confirmation is needed.
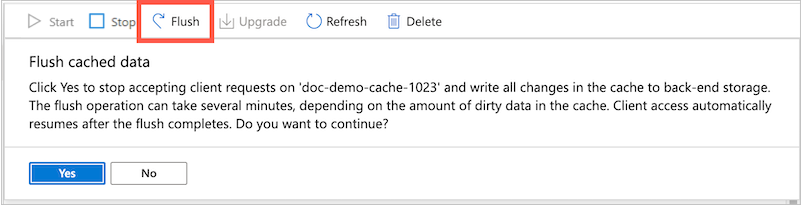
Flush cached data
The Flush button on the overview page tells the cache to immediately write all changed data that is stored in the cache to the back-end storage targets. The cache routinely saves data to the storage targets, so it's not necessary to do this manually unless you want to make sure the back-end storage system is up to date. For example, you might use Flush before taking a storage snapshot or checking the data set size.
Note
During the flush process, the cache can't serve client requests. Cache access is suspended and resumes after the operation finishes.
When you start the cache flush operation, the cache stops accepting client requests, and the cache status on the overview page changes to Flushing.
Data in the cache is saved to the appropriate storage targets. Depending on how much data needs to be flushed, the process can take a few minutes or over an hour.
After all the data is saved to storage targets, the cache automatically starts taking client requests again. The cache status returns to Healthy.
To flush the cache, click the Flush button and then click Yes to confirm the action.
Tip
If you need to write specific individual files back to a storage target without writing the entire cache contents, consider using the flush_file.py script contained in the PC Cache NFSv3 client library distribution. Learn more in Customize file write-back in Azure HPC Cache.
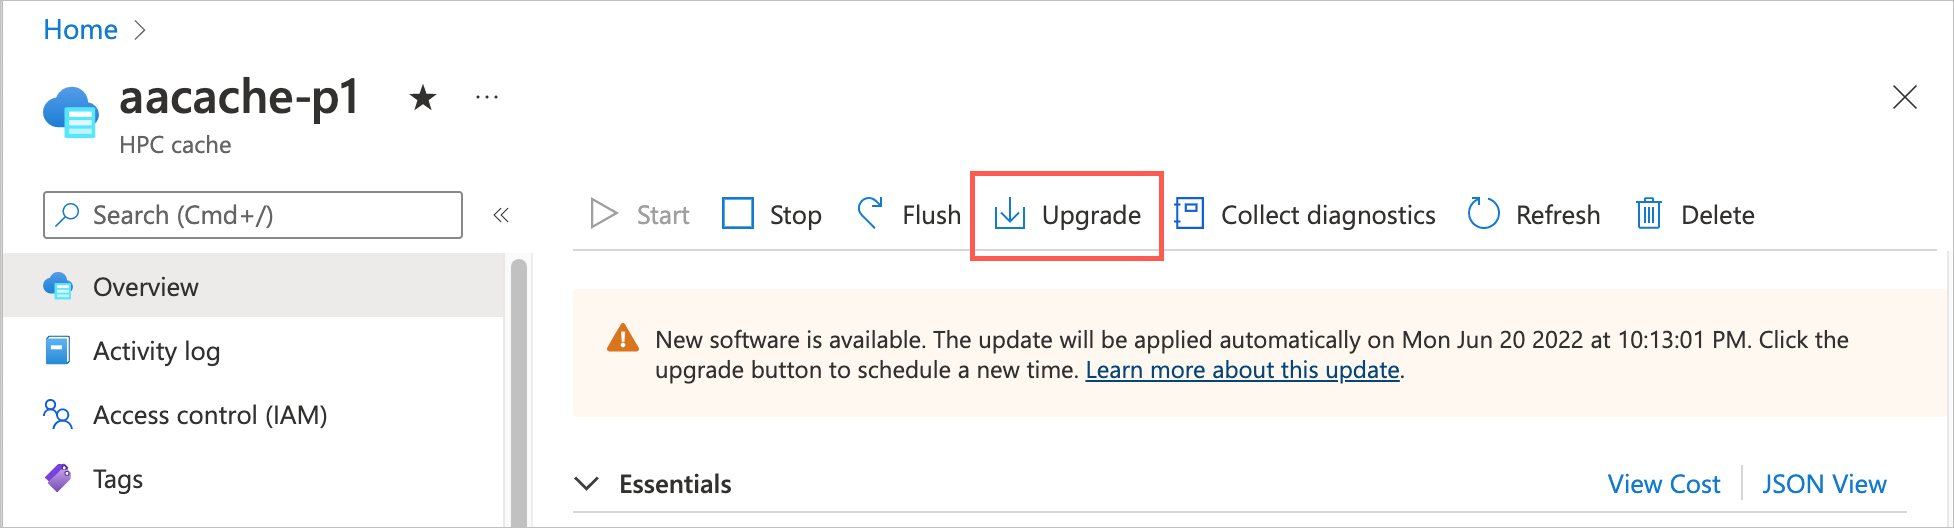
Upgrade cache software
If a new software version is available, the Upgrade button becomes active. You also should see a message at the top of the page about updating software.
Client access is not interrupted during a software upgrade, but cache performance slows. Plan to upgrade software during non-peak usage hours or in a planned maintenance period.
The software update can take several hours. Caches configured with higher throughput take longer to upgrade than caches with smaller peak throughput values. The cache status changes to Upgrading until the operation completes.
When a software upgrade is available, you will have a week or so to apply it manually. The end date is listed in the upgrade message. If you don't upgrade during that time, Azure automatically applies the new software to your cache.
You can use the Azure portal to schedule a more convenient time for the upgrade. Follow the instructions in the Portal tab below.
If your cache is stopped when the end date passes, the cache will automatically upgrade software the next time it is started. (The update might not start immediately, but it will start in the first hour.)
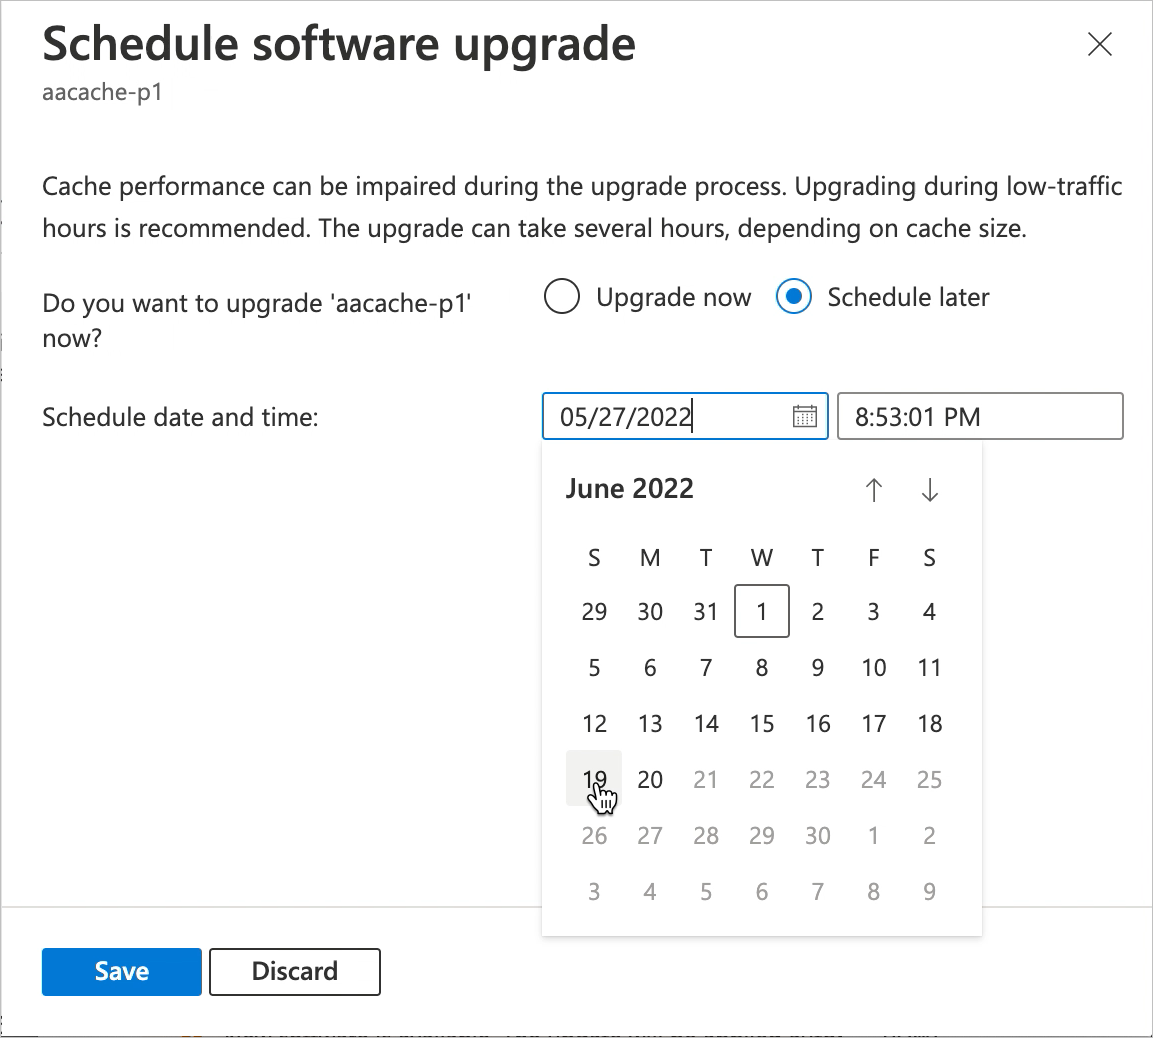
Click the Upgrade button to configure your software update. You have the option to upgrade the software immediately, or to schedule the upgrade for a specific date and time.
To upgrade immediately, select Upgrade now and click the Save button.
To schedule a different upgrade time, select Schedule later and select a new date and time.
- The date and time are shown in the browser's local time zone.
- You can't choose a later time than the deadline in the original message.
When you save the custom date, the banner message will change to show the date you chose.
If you want to revise your scheduled upgrade date, click the Upgrade button again. Click the Reset date link. This immediately removes your scheduled date.
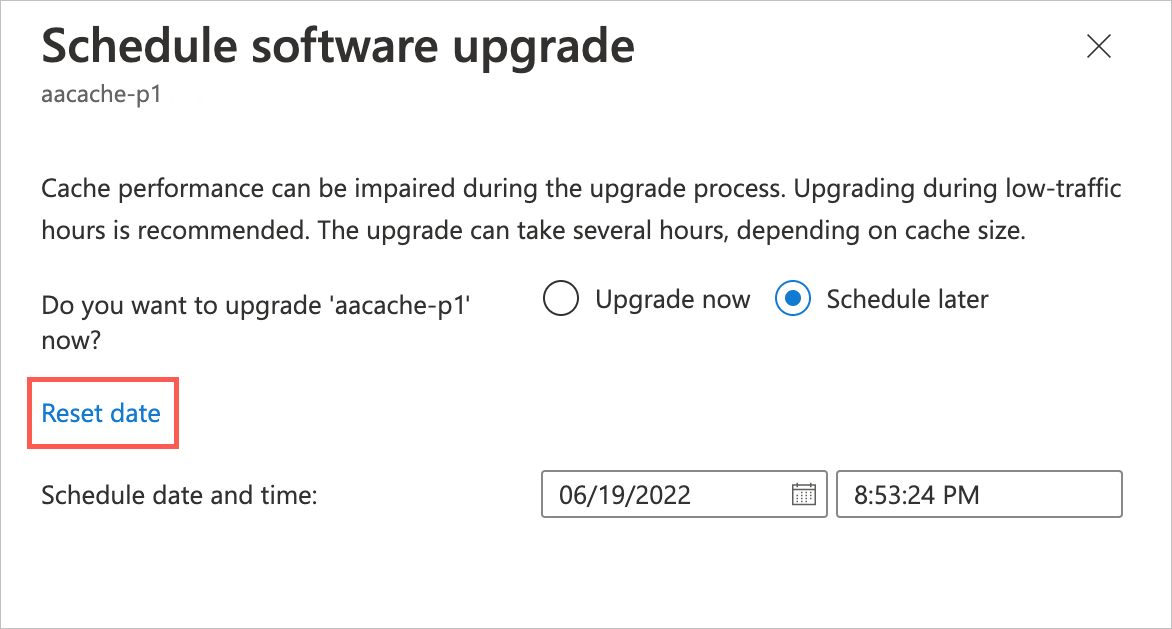
After you reset the previously scheduled value, the date selector resets to the latest available date and time. You can choose a new date and save it, or click Discard to keep the latest date.
You can't change the schedule if there are fewer than 15 minutes remaining before the upgrade.
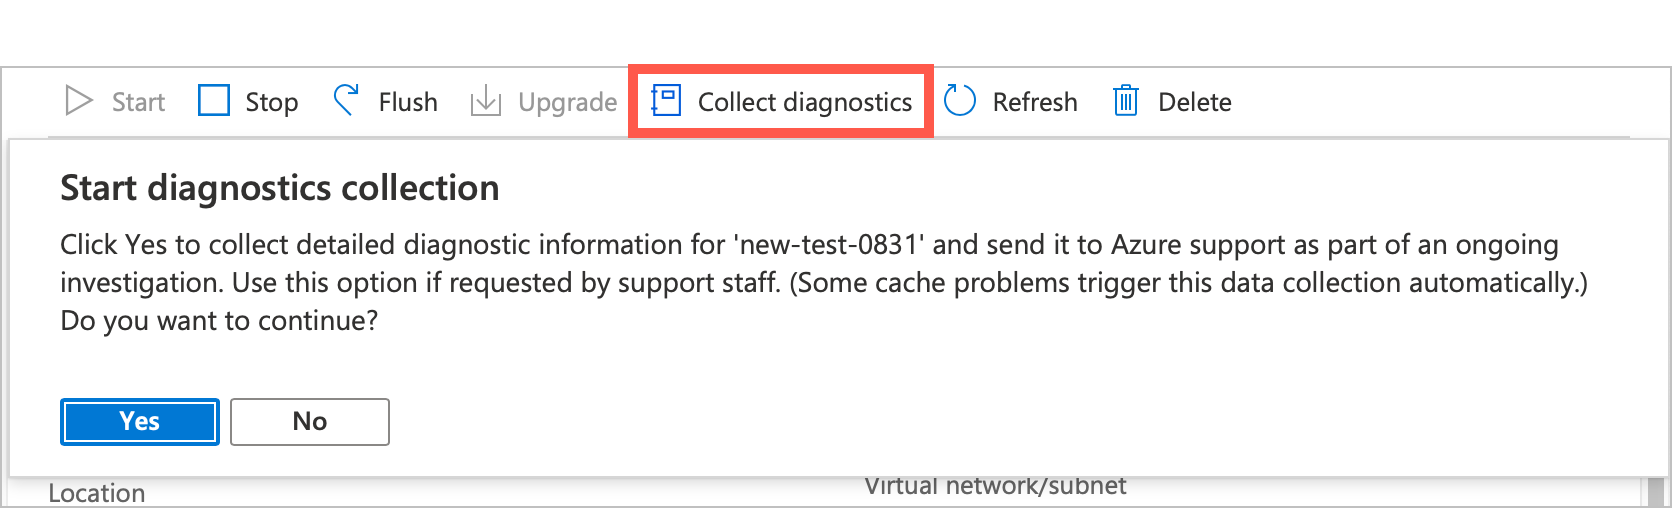
Collect diagnostics
The Collect diagnostics button manually starts the process to collect system information and upload it to Microsoft Service and Support for troubleshooting. Your cache automatically collects and uploads the same diagnostic information if a serious cache problem occurs.
Use this control if Microsoft Service and Support requests it.
After clicking the button, click Yes to confirm the upload.
Delete the cache
The Delete button destroys the cache. When you delete a cache, all of its resources are destroyed and no longer incur account charges.
The back-end storage volumes used as storage targets are unaffected when you delete the cache. You can add them to a future cache later, or decommission them separately.
Note
Azure HPC Cache does not automatically write changed data from the cache to the back-end storage systems before deleting the cache.
To make sure that all data in the cache has been written to long-term storage, stop the cache before you delete it. Make sure that it shows the status Stopped before deleting.
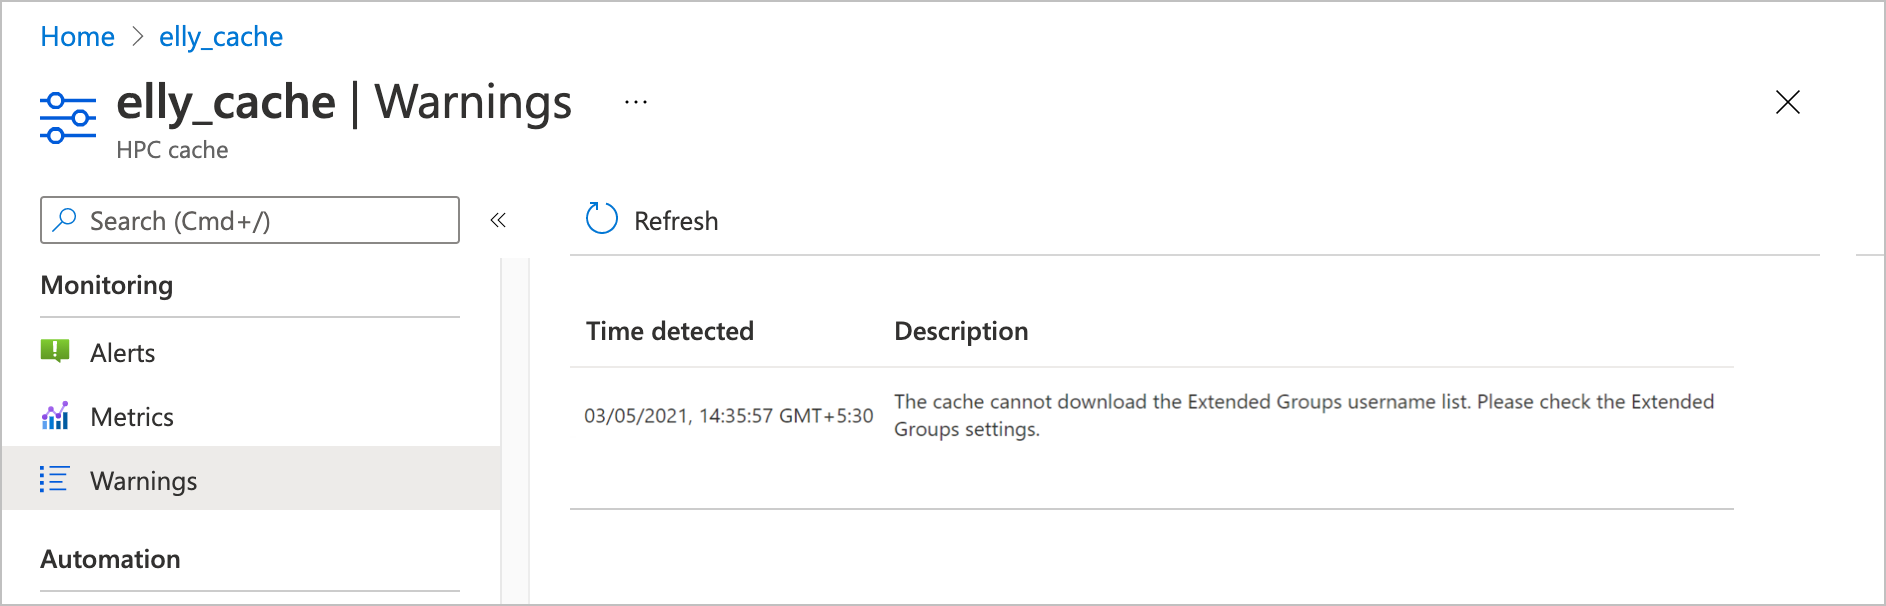
View warnings
If the cache goes into an unhealthy state, check the Warnings page. This page shows notifications from the cache software that might help you understand its state.
These notifications do not appear in the activity log because they are not controlled by Azure portal. They are often associated with custom settings you might have made.
Kinds of warnings you might see here include:
- The cache can't reach its NTP server
- The cache failed to download Extended Groups username information
- Custom DNS settings have changed on a storage target
Next steps
Feedback
Coming soon: Throughout 2024 we will be phasing out GitHub Issues as the feedback mechanism for content and replacing it with a new feedback system. For more information see: https://aka.ms/ContentUserFeedback.
Submit and view feedback for